- Plumber labor runs $45–$200 per hour in 2026, with most fixture installations taking 1–4 hours; knowing this range lets you evaluate any quote with confidence.
- A single unpermitted installation can void homeowner's insurance and cost more to remediate than the original permitted job would have.
- Toilet installation averages $224–$533 installed [3]; water heater installation ranges from $700–$4,050 depending on type and location [1].
- 10 fixture types covered in this guide each have a distinct process, permit requirement, and skill threshold.
- Low-flow WaterSense fixtures can reduce household water usage by up to 60%, cutting utility bills while meeting current code.
- The U.S. faces a forecast shortage of 550,000 plumbers by 2026 [10], making it increasingly important to book qualified contractors early for project timelines.
Every functional room in your home depends on plumbing that was installed correctly the first time. A bathroom remodel, a water heater swap, a new dishwasher: each one involves connections that carry water at pressure and must hold for decades without leaking. Done right, a plumbing installation goes unnoticed. Done wrong, it shows up as water damage in your walls, a mold problem behind the vanity, or a denied insurance claim after a flood.
This guide covers the 10 most common residential plumbing installations, from straightforward toilet swaps to complex shower rough-ins. For each fixture type, you'll find what the job actually involves, current cost ranges, permit requirements, and an honest assessment of whether it's a DIY job or one that needs a licensed plumber. For a complete picture of your home's plumbing system before starting any installation, see our guide on how home plumbing works.

Get quotes from top-rated pros.
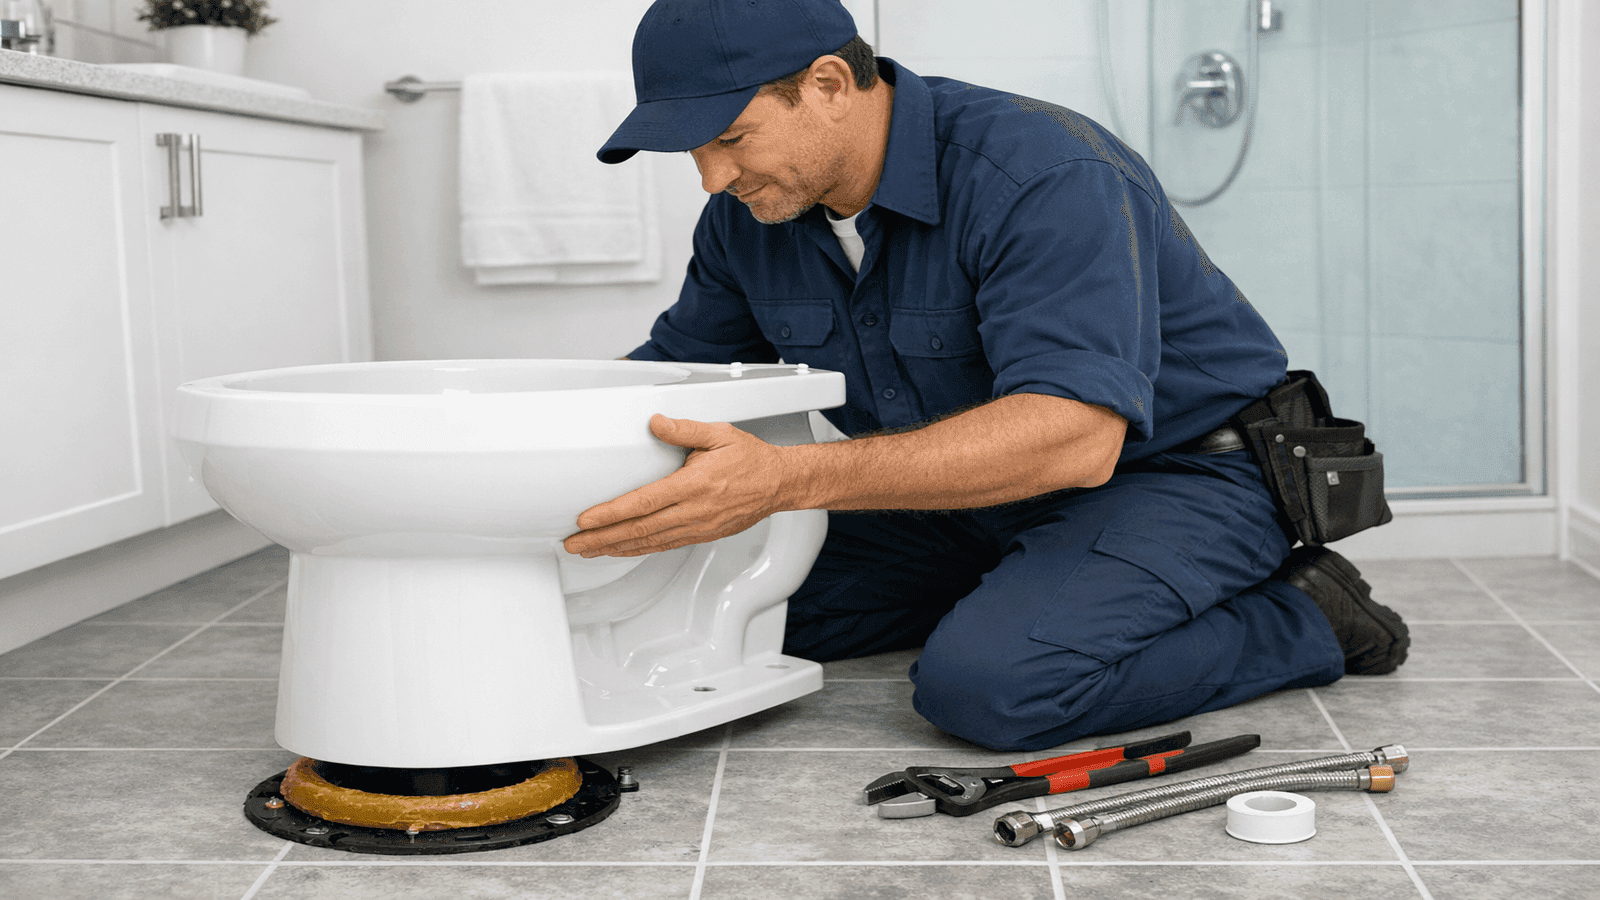
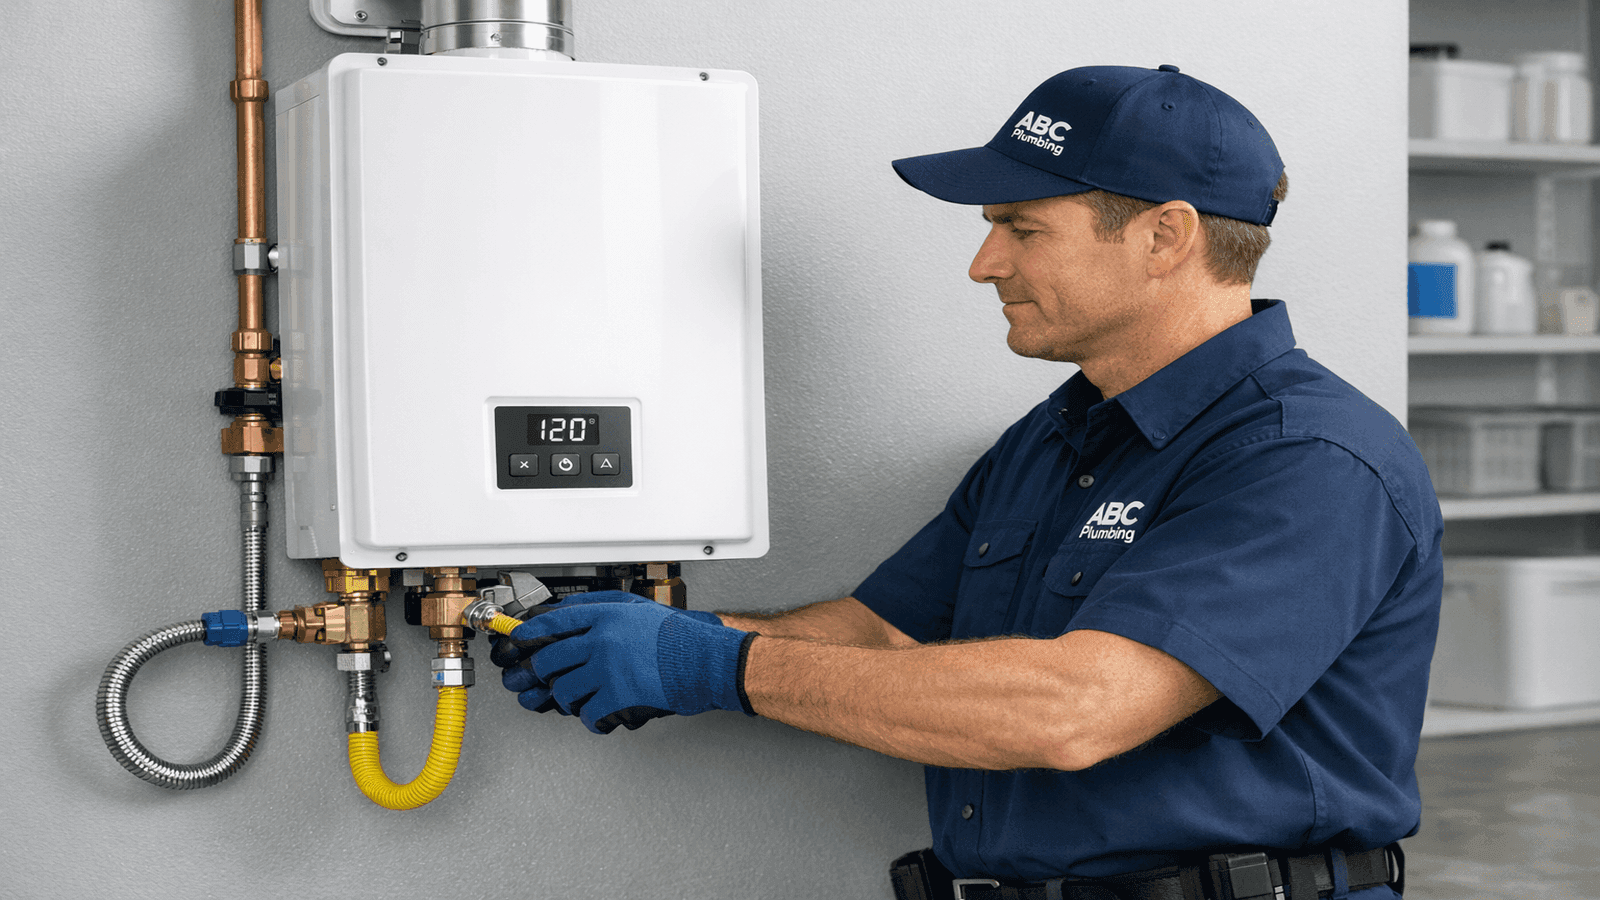
Photo: Licensed plumber installing a toilet in a modern bathroom, wax ring visible on floor flange, professional tools laid out
Before You Install Anything: Permits, Codes, and Planning
Why Permits Matter
Permits exist because plumbing failures cause serious property damage and health hazards. A water heater installed without a permit has no inspection record, which means your insurance company has grounds to deny a claim when it leaks. Municipalities that discover unpermitted work at resale require demolition and licensed re-installation, often at three times the original cost.
Work that typically requires a permit in most jurisdictions:
- Water heater replacement (all types, all states)
- New fixture rough-in (adding a toilet, sink, or shower where one didn't exist)
- Relocating supply or drain lines
- Shower and bathtub installations
- Sump pump installation
- Any work that opens walls to access pipes
Work that typically does NOT require a permit:
- Like-for-like toilet replacement (same drain location, no drain work)
- Faucet and showerhead replacement
- Supply line replacement under a sink
- Toilet fill valve and flapper replacement
Permit costs range from $50 in rural counties to $450+ in major metro areas, with most homeowners paying $75–$200 for a standard residential permit. The permit fee includes the required inspection, which is the actual value: a licensed inspector verifying connections before walls close.
IPC vs. UPC: Which Plumbing Code Applies to Your Home?
The United States uses two primary plumbing codes. The International Plumbing Code (IPC) governs 37 states, primarily in the East and Midwest. The Uniform Plumbing Code (UPC) covers Western states including California, Oregon, Washington, and Hawaii. Both codes are updated every three years; the current editions are IPC 2024 and UPC 2024, with most states implementing through 2026.
Local amendments can add requirements beyond either code. A pressure-balance valve is required nationwide (IPC 424.3), but some California counties require thermostatic valves in all new shower installations. Always verify local amendments with your building department before specifying fixtures. For a full state-by-state breakdown, see our plumbing code requirements guide.
Know Your Shutoff Before You Start
Before any installation, locate your main water shutoff valve and confirm it operates freely. A valve that hasn't been turned in years can seize mid-project and leave you with no way to stop water flow. Also identify individual fixture shutoff valves under sinks and behind toilets; these let you isolate work areas without cutting water to the whole house. Our guide on how to shut off your water supply walks through every shutoff type and location.
In 18 years and 2,400-plus residential projects across Dallas-Fort Worth and California, the biggest installation mistakes I see aren't technical; they're process failures. A homeowner skips the permit, installs their own water heater, the unit fails 14 months later, and their insurance denies the claim because there's no inspection record. A $75 permit and a two-hour inspection protects a $2,000 appliance and provides legal documentation that the work was done to code. I've watched homeowners spend $4,000 to remediate unpermitted water heater installs at resale. The permit was $90.
Toilet Installation
What the Job Involves
A standard toilet replacement is one of the few plumbing installations that confident DIYers can reasonably tackle. The job involves shutting off the supply valve, disconnecting the supply line, removing the old unit, replacing the wax ring, setting the new toilet on the floor flange, and connecting the supply line. Total time for an experienced DIYer: 1–2 hours.
The critical component is the floor flange condition. A flange that sits too low, is cracked, or has corroded bolts creates a seal problem that no wax ring will fix permanently. If the flange is damaged, the entire job becomes a professional job (repairing or replacing a flange typically requires cutting into the floor or accessing drain pipe, which is licensed plumber territory).
| Component | DIY Cost | Professional Installed |
| Basic round toilet | $100–$250 | $100–$250 |
| Comfort-height elongated | $200–$600 | $200–$600 |
| Labor (professional) | - | $100–$230 |
| Wax ring and hardware | $15–$30 | Included |
| Total | $115–$280 | $224–$533 |
DIY or Professional?
Replace it yourself if: the drain location doesn't change, the flange is in good condition, and you're comfortable with basic plumbing connections. Call a plumber if: the flange needs repair, the rough-in distance doesn't match the new toilet, you're installing a wall-hung toilet, or the toilet is on a second floor with a finished ceiling below.
Permits are rarely required for a same-location toilet replacement, but always verify with your local building department before assuming. Some jurisdictions require a permit for any toilet replacement that involves flange work.
For the complete step-by-step process, see our toilet installation guide.
Kitchen and Bathroom Sink Installation
Kitchen Sink Installation
Kitchen sink installations vary significantly in complexity based on sink type. A drop-in (self-rimming) sink is a legitimate DIY project: the sink drops into a pre-cut hole, clips secure it from below, and you connect the P-trap and supply lines. Total time: 2–3 hours with basic tools.
An undermount sink is a different challenge. The sink attaches to the underside of the countertop, requiring epoxy and mechanical clips that must support a full sink of water plus dishware. The weight load on a granite or quartz top requires careful installation. If the clips fail or the silicone perimeter seal fails, the sink drops, often quietly, over months, until the mounting fails entirely. Professional undermount installation ($250–$450 labor) is worth the cost.
A farmhouse (apron-front) sink almost always requires cabinet modification to accommodate the larger front face. This is a cabinetry and plumbing job combined; plan on professional installation ($400–$700 labor) unless you have both carpentry and plumbing experience.
Key data: Kitchen sink professional installation ranges from $250–$700 total, including basic P-trap connection [4]. Garbage disposal add-on runs $150–$350 additional.
Bathroom Sink Installation
Bathroom sinks come in four main types, each with different installation requirements:
- Vanity sinks (drop-in or undermount into a cabinet top): similar logic to kitchen drop-ins; drop-ins are DIY-friendly, undermounts less so
- Pedestal sinks: relatively simple installation but require securing the pedestal base to the floor and the basin to the wall for stability
- Vessel sinks: sit on top of the counter; require a taller faucet with minimum 8-inch rise to clear the basin rim
- Wall-mount sinks: require wood blocking or a steel support plate inside the wall before installation; if the wall doesn't have backing, the sink must wait until blocking is added
Professional bathroom sink installation runs $100–$500 depending on type, with wall-mount installations at the high end due to wall preparation requirements.
Full guides: kitchen sink installation and bathroom sink installation.
Undermount sinks are the number one kitchen upgrade I get called back to fix. Homeowners watch an online tutorial, glue it up, skip the silicone behind the clips, and the sink drops six months later onto their dishes. If you're spending $500 or more on an undermount sink, spend another $150 to have a plumber set it. The countertop alone costs more than the installation labor. I've replaced three undermount sinks in one year in the same neighborhood (all DIY installs that failed at the clip points).
Get quotes from top-rated pros.

Photo: Plumber connecting P-trap and supply lines under kitchen sink, showing proper drain alignment with tools in foreground
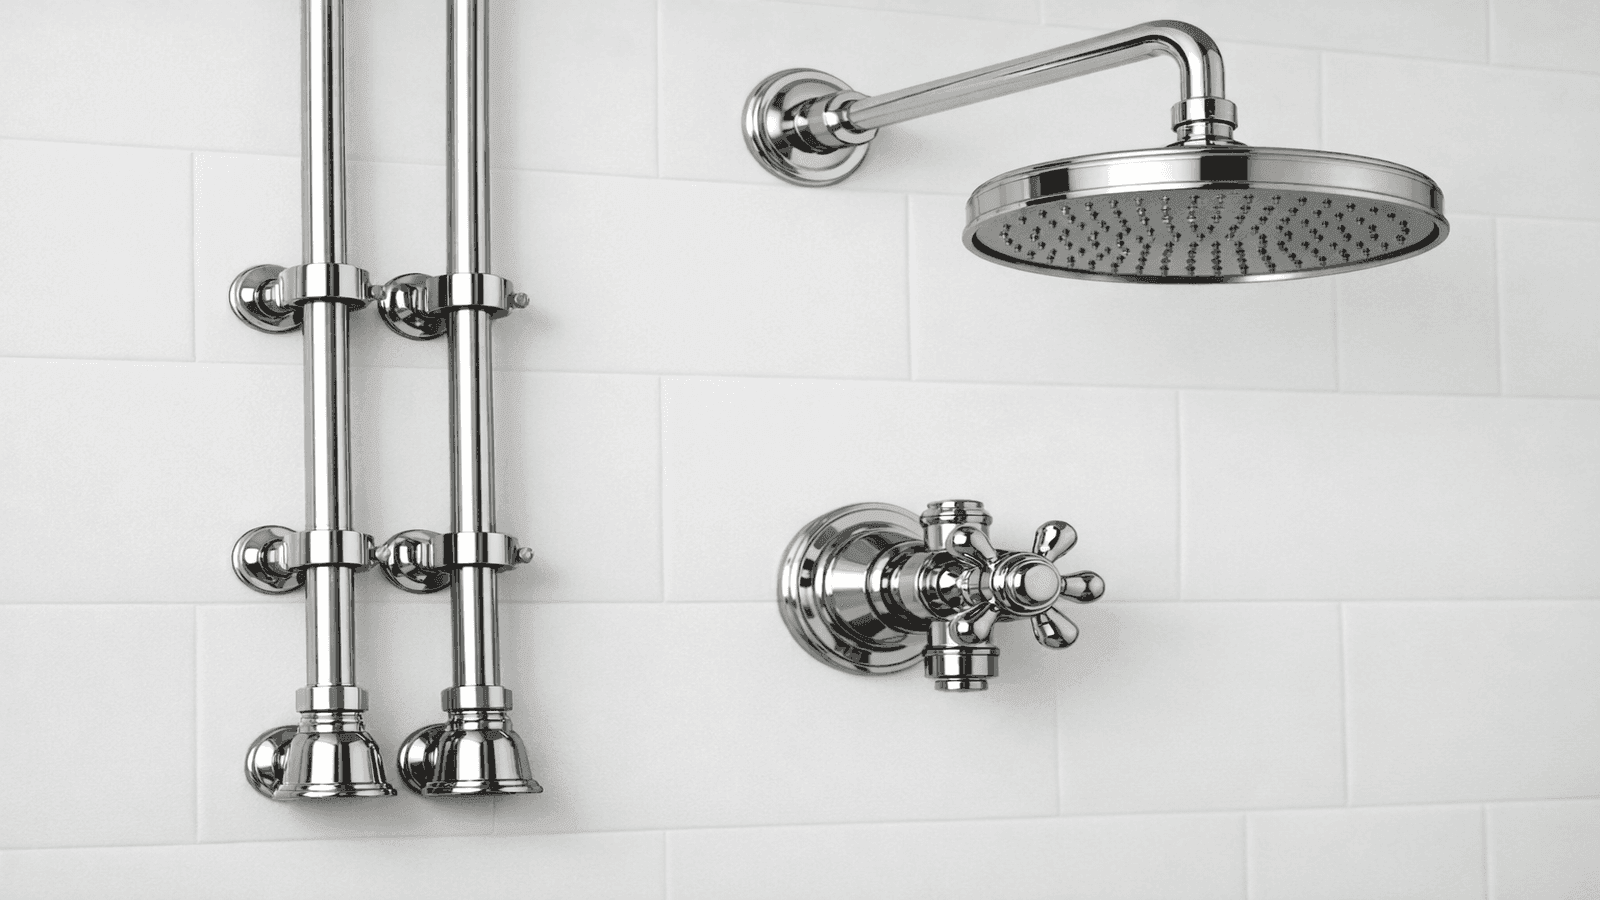
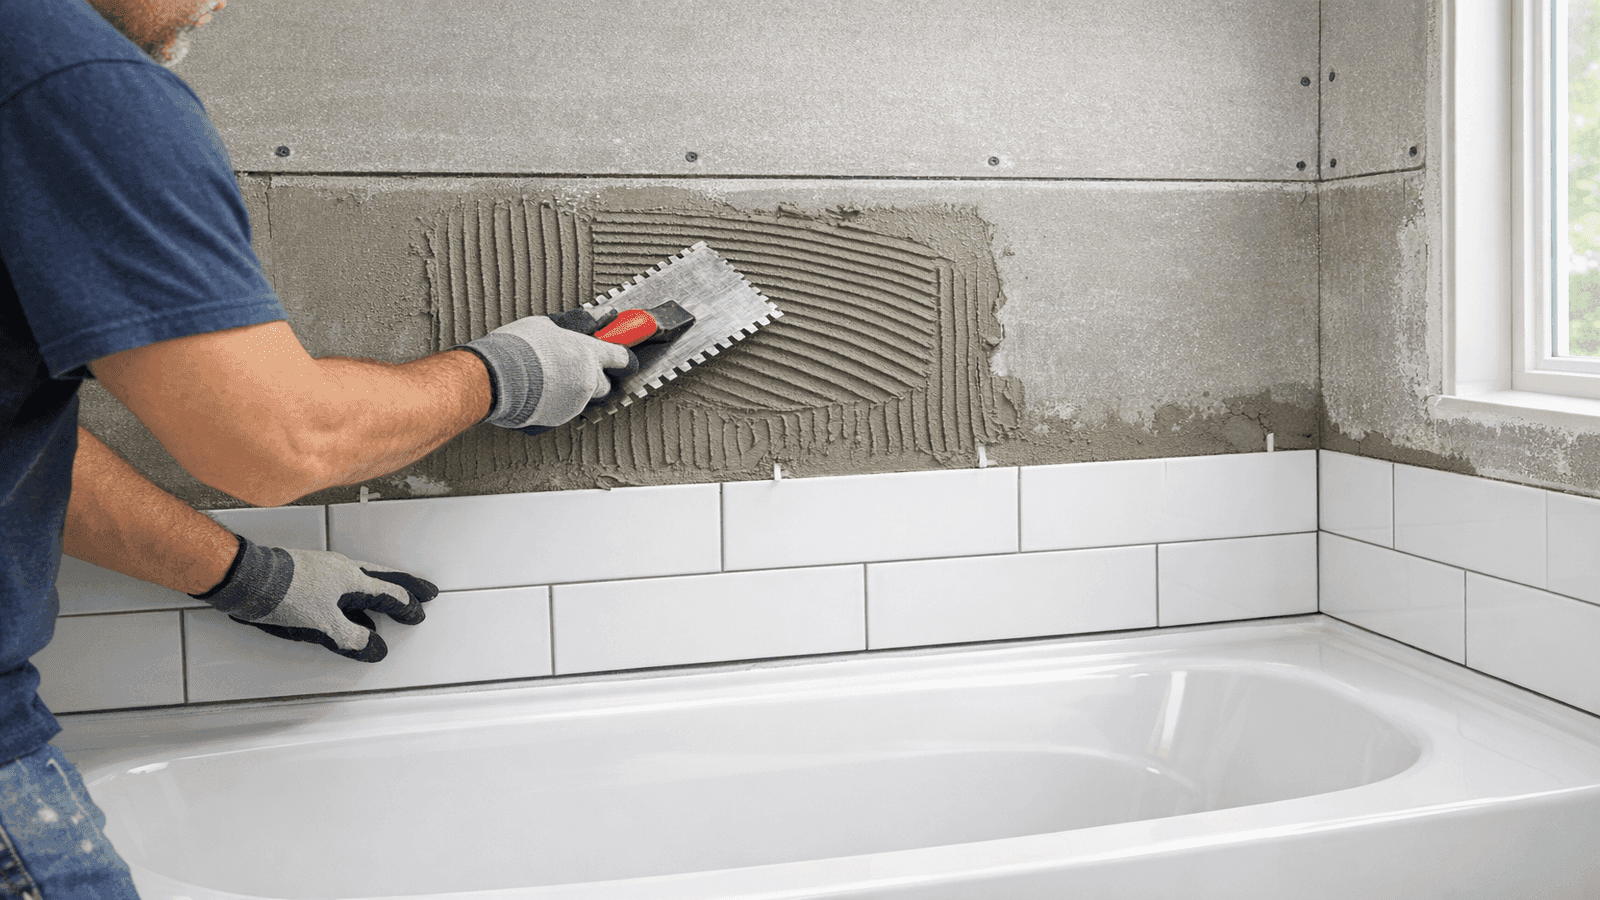
Shower and Bathtub Installation
Shower Installation: Rough-In to Finish
Shower installation is intermediate-to-advanced plumbing work. The rough-in phase (running supply lines and the drain to the correct locations before the floor and walls close) requires a permit in virtually every U.S. jurisdiction and must be inspected before walls are closed. Homeowners who skip the inspection face a requirement to open the walls for inspection after the fact, at their own expense.
Supply rough-in positions the hot and cold inlets at the valve body location. The drain rough-in positions the shower drain at the center (or specified offset) of the shower base. Getting these measurements wrong means either a visible deviation in the fixture placement or a do-over.
The valve body selection is also code-driven. IPC Section 424.3 requires pressure-balance or thermostatic valves on all showers [7], a requirement that has been in the code since 2000. A pressure-balance valve ensures that a toilet flush elsewhere in the home doesn't create a scalding surge in the shower. Non-code valves (still found in older homes) should be replaced during any shower remodel.
Shower installation total costs:
- Prefab shower kit (one-piece or base + walls): $1,000–$3,000 professional installed
- Custom tile shower (materials + labor): $5,000–$15,000+
- Shower replacement (existing space, no rough-in change): $1,500–$4,000
Bathtub Installation
Bathtub installation scope depends heavily on tub type:
Alcove tubs (three-sided wall surround, most common): Installation involves setting the tub on a mortar bed or pre-leveled subfloor, attaching the drain and overflow assembly, and installing the surrounding tile or prefab surround. Professional installation: $1,500–$3,500 for tub and basic tile surround.
Freestanding tubs: The supply lines are floor-mounted or wall-mounted at specific rough-in distances. Because freestanding tubs have no surrounding wall for adjustments, the rough-in locations must be precise before the subfloor closes. Professional installation: $2,500–$6,000 depending on complexity.
Drop-in tubs: Similar to undermount kitchen sinks, installed into a deck frame, requiring structural support built into the platform. Professional installation: $2,000–$5,000.
Full guides: shower installation and bathtub installation.
Shower valves have to be pressure-balanced by code everywhere in the U.S. This is not optional. The code exists because scalding injuries happen when toilet flushes drop cold water pressure mid-shower. I pull out non-code valves in remodels regularly; they were installed by homeowners who didn't know about the requirement. If your shower doesn't have a pressure-balance valve and you're remodeling, budget for a valve replacement. It's a $150–$300 part and one to two hours of labor. Not replacing it and getting caught during inspection means the whole shower wall comes back out.
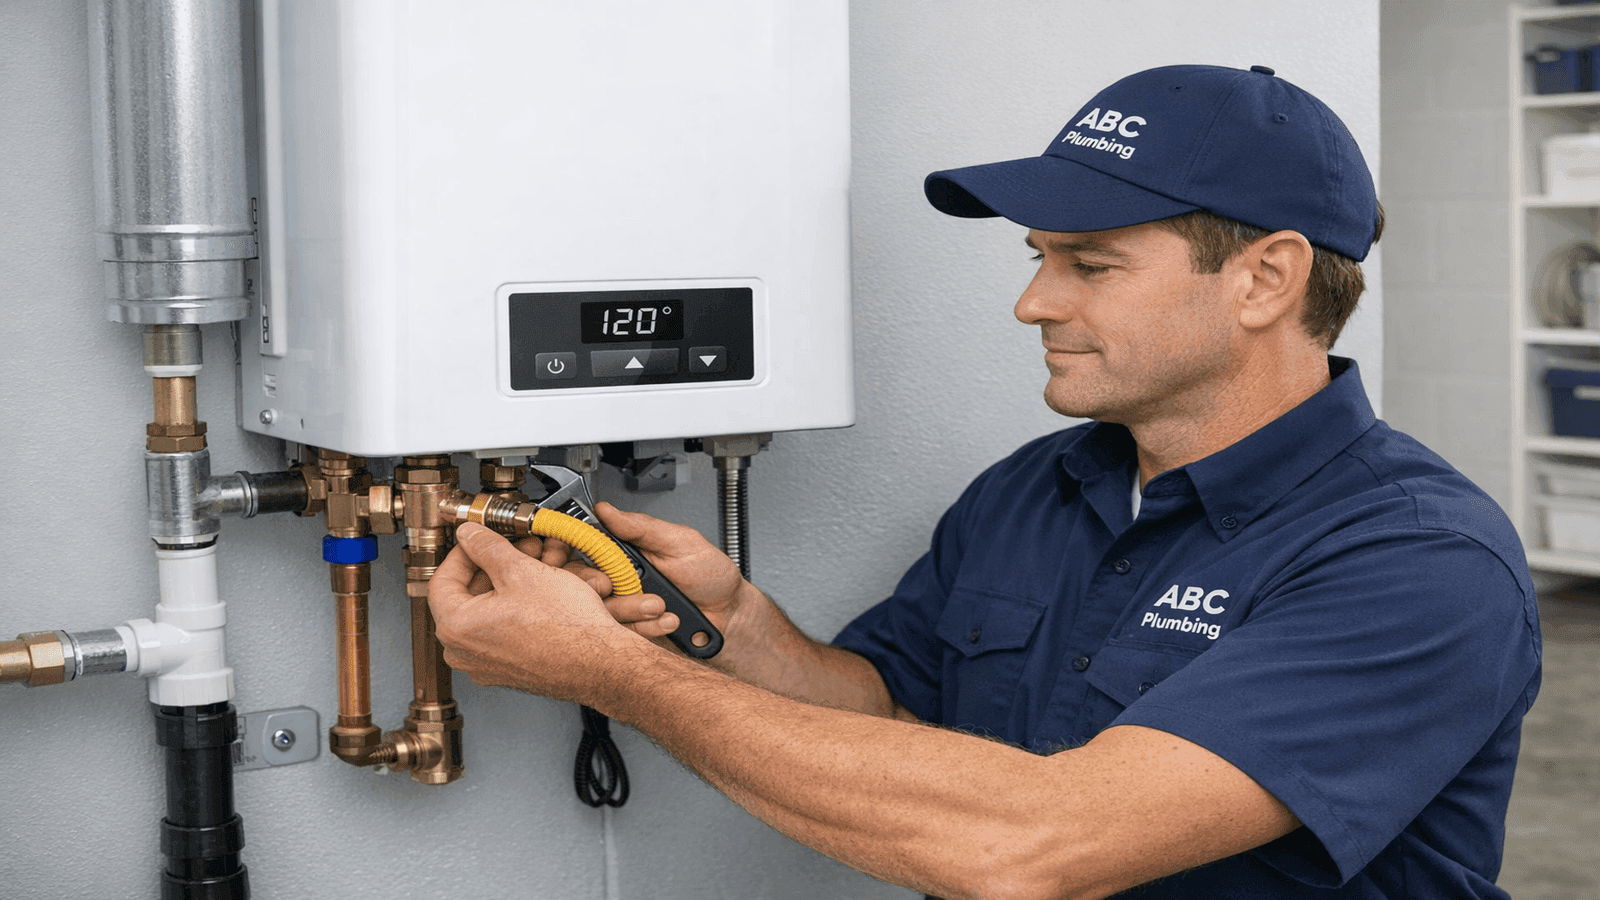
Photo: Professional plumber installing a tankless water heater on a utility room wall, showing gas line flex connector and temperature control panel
Water Heater Installation
Tank vs. Tankless: Cost and Complexity Differences
Water heater installation is permit-required in all 50 states. In most jurisdictions, only a licensed contractor can pull the permit. This is non-negotiable, and for good reason. The licensed plumbers in our NearbyHunt network report that water heater installations account for the highest share of permit-related callbacks they handle, most of which stem from DIY installations that were never inspected. A gas water heater with an improperly connected flue can cause carbon monoxide poisoning, and a poorly installed T&P relief valve can fail during an overpressure event with catastrophic results.
The cost difference between tank and tankless installations is significant, and it extends beyond the unit cost:
| Type | Unit Cost | Labor | Permit | Total Installed |
| Tank (40-gal gas) | $500–$900 | $150–$450 | $50–$150 | $700–$1,500 |
| Tank (40-gal electric) | $400–$700 | $150–$400 | $50–$150 | $600–$1,250 |
| Tankless (gas) | $800–$2,000 | $600–$1,900 | $50–$150 | $1,450–$4,050 |
| Tankless (electric) | $500–$1,500 | $300–$800 | $50–$150 | $850–$2,450 |
Tankless installations take 8–10 hours compared to 2–3 hours for a tank swap [2], primarily because gas tankless units often require upsizing the gas line from 1/2 inch to 3/4 inch or larger to supply the higher BTU demand. That gas line work adds permit scope and labor.
Code Requirements Every Homeowner Should Know
Several code requirements apply to water heater installation regardless of type:
- Temperature setting: Maximum 120°F at the outlet (IPC 501.1 for scalding prevention)
- T&P relief valve: Required on all tank heaters; discharge pipe must terminate within 6 inches of the floor or to an approved drain
- Seismic strapping: Required in earthquake-prone states (CA, OR, WA, NV, AK, HI): two metal straps anchored to studs
- Expansion tank: Required in closed plumbing systems (most homes with a backflow preventer on the supply line) to absorb thermal expansion pressure
- Clearances: Gas water heaters require minimum 18-inch clearance from ignition sources in garage installations
After installation, annual maintenance protects your investment. See our water heater maintenance guide for the full service schedule.
Full guide: water heater installation.
Dishwasher Installation
The Three Connections
A dishwasher requires three connections: a water supply (hot water line, typically from the sink supply valve), a drain line (to the garbage disposal or an air gap fitting), and an electrical connection (dedicated 120V/20-amp circuit). The electrical side is where most homeowners hit their limit: a new dedicated circuit requires an electrician, and if one doesn't exist, that work must be done before the dishwasher goes in.
Professional dishwasher installation into an existing space (replacing an old unit with power and supply already present) runs $150–$350. Installing a dishwasher where none previously existed, with new electrical and plumbing rough-in, runs $400–$900.
The Most Common Installation Mistakes
No high-loop or air gap on the drain line: Most jurisdictions require either a high-loop (drain hose routed up to the underside of the countertop before connecting to the disposal) or an air gap fitting mounted on the sink deck. Without one, the drain can siphon dirty water back into the dishwasher. This is a code violation in California and several other states.
Supply water pressure too high: Dishwasher inlet valves are rated for 20–120 PSI. Homes with pressure above 80 PSI see accelerated inlet valve wear. If your home runs high pressure, address the PRV before installing new appliances. See our guide on water pressure maintenance.
Dishwasher not leveled: A dishwasher that isn't level doesn't seal properly at the door, allowing water to track under the flooring over time.
Full guide: dishwasher installation.
Sump Pump Installation
Get quotes from top-rated pros.
When Your Home Needs One
A sump pump is needed when groundwater accumulates in or under the basement floor. Signs that suggest you need one: water appears on the basement floor after heavy rain, the home sits in a flood zone, the basement is finished or has HVAC equipment at risk from water intrusion, or the home previously had a sump pump that was removed.
Installation costs:
- Pedestal sump pump (above-pit motor): $60–$170 for the pump, $300–$700 total installed
- Submersible sump pump (motor sits in pit): $100–$400 for the pump, $500–$1,500 total installed
- Battery backup system add-on: $150–$500 additional
Pit, Pump, and Discharge Line
The sump pit must sit at the lowest point of the basement floor. If no pit exists, the installation requires cutting through the concrete slab, which is a full permit job in most municipalities. The pit depth is typically 24–36 inches, sized to the pump manufacturer's specification.
The discharge line routes water away from the foundation through a wall penetration and must terminate at least 10 feet from the house, sloping away. A check valve on the discharge line prevents water from running back into the pit when the pump shuts off, which would cause continuous cycling. A missing check valve is the leading cause of premature sump pump motor burnout.
Full guide: sump pump installation.
Homeowners in flood-prone areas often call me after the first major rain event, not before. Installing a sump pump is a permit-required job in most municipalities: concrete cutting, discharge line routing, and electrical all need inspection. I've also replaced a lot of pumps installed without a check valve. The water runs back down after the pump shuts off, the pump starts immediately, runs continuously until the motor burns out, usually between two and six months after installation. The check valve is a $15 part.
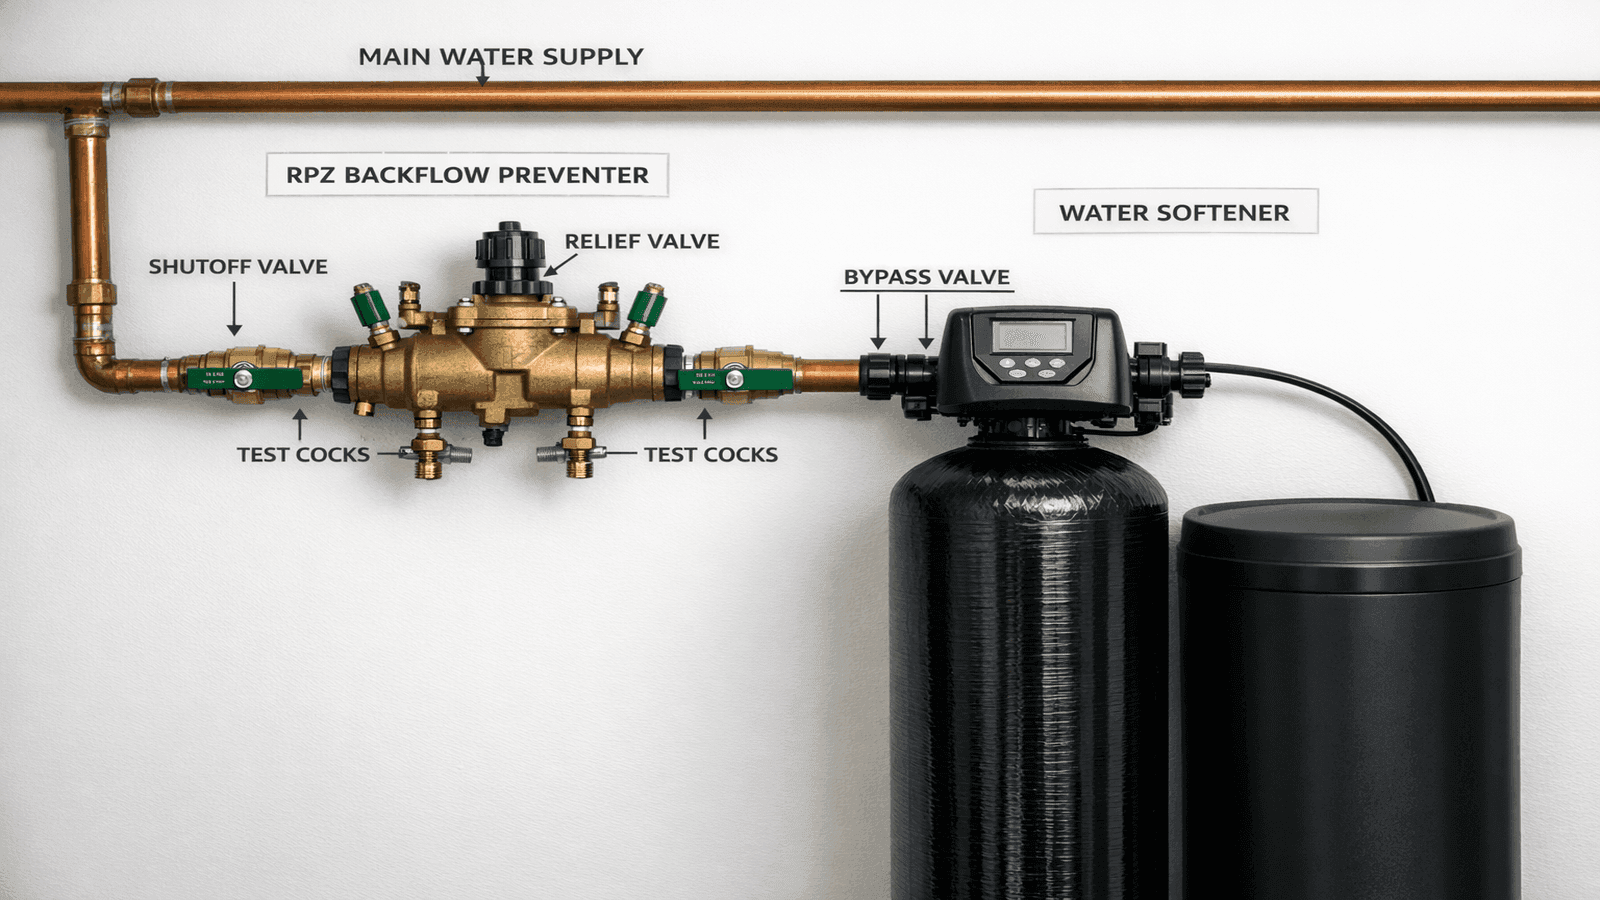
Photo: Backflow preventer assembly and water softener bypass valve installed side-by-side on main supply line in utility room
Water Softener and Backflow Preventer Installation
Water Softener Installation
A water softener installs on the main supply line after the pressure reducing valve and before the water heater. The location matters: putting the softener after the water heater means only cold water gets treated. The three connections are the inlet and outlet to the main line (with a bypass valve that allows service without cutting water to the house), a drain line for regeneration cycle discharge, and a power outlet for the control valve timer.
Installation cost ranges:
- Water softener unit: $400–$2,500 depending on grain capacity
- Professional installation labor: $300–$1,000
- Total installed: $700–$3,500
Water softeners are technically DIY-feasible if you're comfortable with soldered or push-fit copper connections, but professional installation is worth the cost for most homeowners; an incorrectly bypassed valve leaves the whole house without water, and the regeneration cycle drain routing has code requirements in some jurisdictions.
Before installing a water softener, test your water to confirm hardness level and identify any other contaminants. A softener removes hardness minerals but does nothing for lead, bacteria, or nitrates. See our water quality testing guide to determine what your water actually needs.
Full guide: water softener installation.
Backflow Preventer Installation
A backflow preventer stops contaminated water from flowing backward into the potable water supply under negative pressure conditions. This is required by code on all irrigation systems connected to municipal water, hose bibs with chemical injection potential (for fertilizer injectors and similar), boiler fill valves, and fire suppression systems.
The three common types in residential applications:
- Atmospheric vacuum breaker (AVB): simplest; installed at each individual hose bib or irrigation zone valve
- Pressure vacuum breaker (PVB): installed on the main irrigation supply line; must be at least 12 inches above the highest irrigation head
- Reduced pressure zone (RPZ) assembly: highest protection level; required for applications with chemical injection or high contamination risk; must be tested annually by a certified backflow tester
RPZ installation cost: $300–$700 installed; annual testing: $75–$150.
This is always a licensed plumber job: backflow preventer installation is permit-required in virtually all jurisdictions, and RPZ assemblies must be registered with the local water authority.
Full guide: backflow preventer installation.
DIY vs. Professional: A Clear Decision Framework
The right answer depends on three factors: whether the rough-in location changes, whether a permit is required, and whether a licensed contractor is legally required to pull that permit.
| Fixture | DIY Feasible? | Permit Required? | Licensed Plumber Required? |
| Toilet (standard swap) | Yes | Rarely | No |
| Kitchen sink (drop-in) | Yes | No | No |
| Kitchen sink (undermount) | Not recommended | No | Recommended |
| Bathroom sink (vanity) | Yes | No | No |
| Bathroom sink (wall-mount) | No (wall backing needed) | No | Recommended |
| Dishwasher (replacement) | Yes (plumbing only) | Varies | No (plumbing); electrician for new circuit |
| Shower (prefab, no rough-in change) | Intermediate | Yes | Recommended |
| Shower (custom tile) | No | Yes | Yes |
| Bathtub | No | Yes | Yes |
| Water heater (any type) | No (code) | Yes, all states | Yes |
| Sump pump | No (permit/concrete) | Yes, most areas | Yes |
| Water softener | Intermediate | Usually no | Recommended |
| Backflow preventer | No | Yes | Yes (certified) |
When DIY Works
DIY is appropriate when: the fixture is a like-for-like swap with no rough-in change, no permit is required, you have the correct tools, and the consequence of a slow leak is manageable (you'll be nearby to notice it quickly). Toilet replacements, drop-in sink swaps, and supply line replacements fall into this category. Michael has completed 2,400-plus residential plumbing projects across Dallas-Fort Worth and California, and reports that the vast majority of DIY callback jobs involve one of three issues: skipped permits, incorrect rough-in measurements, or supply lines tightened by hand rather than wrench.
When to Call a Licensed Plumber
Call a licensed plumber when: a permit is required (especially since most permit applications require a licensed contractor's credentials) [8], supply or drain lines are moving, gas lines are involved, work connects to structural elements, or the fixture has consequences if installation fails (water heaters, backflow preventers, sump pumps).
The DIY threshold I give homeowners is simple: if the rough-in doesn't move and no permit is required, a competent homeowner with quality guidance can usually handle it. The moment you're touching a gas line, cutting a concrete slab, or opening a wall for rough-in work, you need a license (not because I want the work, but because the risk of doing it wrong is measured in flooding, gas leaks, and voided manufacturer warranties). I've seen a homeowner save $300 on a DIY water heater install and spend $8,000 fixing the water damage two years later when a connection failed because it wasn't inspected.

Photo: Homeowner reviewing a written plumbing installation estimate with a licensed plumber at a kitchen table, tablet showing itemized costs
Plumbing Installation Costs: 2026 Complete Reference
What Drives Price Variation
Four factors account for most of the range in installation quotes:
- Labor rate by region: $45–$75 per hour in rural Southern states; $120–$200 per hour in metro California, New York, and the Pacific Northwest [9]
- Permit and inspection fees: $50–$450 depending on municipality
- Fixture grade: Builder-grade vs. mid-range vs. premium fixtures can triple material costs
- Access complexity: Finished walls, second-floor installations, and concrete slab work all add labor hours
Get quotes from top-rated pros.
| Fixture | DIY Material Cost | Professional Total | Permit Typically |
| Toilet (standard) | $115–$280 | $224–$533 | Not required |
| Kitchen sink (drop-in) | $50–$250 | $250–$700 | Not required |
| Bathroom sink (vanity) | $30–$200 | $100–$500 | Not required |
| Shower (prefab) | $300–$800 | $1,000–$3,000 | Required |
| Shower (tile custom) | Not practical DIY | $5,000–$15,000+ | Required |
| Bathtub (alcove) | Not practical DIY | $1,500–$5,000 | Required |
| Water heater (tank) | Not practical DIY | $700–$1,500 | Required |
| Water heater (tankless) | Not practical DIY | $1,450–$4,050 | Required |
| Dishwasher (replacement) | $50–$150 | $150–$350 | Varies by location |
| Sump pump | Not practical DIY | $500–$1,500 | Required most areas |
| Water softener | $400–$2,500 unit | $700–$3,500 installed | Usually not required |
| Backflow preventer (RPZ) | Not practical DIY | $300–$700 | Required |
For a deeper look at regional pricing variation and what affects plumber rates in your market, see our complete plumbing costs guide.
Real Installation Story
James and Patricia Huang of Austin, Texas hired a licensed plumber through NearbyHunt to handle a combined project: replacing a 14-year-old 40-gallon gas water heater and installing a new comfort-height toilet in their primary bathroom after the original floor flange cracked during a flooring renovation. The licensed plumber quoted $1,340 for both jobs together, including permits and inspection scheduling. The water heater replacement came in at $895 (40-gallon gas tank, labor, and permit), and the toilet installation with flange repair came to $445 (comfort-height elongated unit, wax ring, supply line, and labor). The flange repair added roughly 90 minutes to what would otherwise have been a one-hour toilet swap, which the Huangs were glad to have discovered before it became a leak behind the new flooring. Total project time: one full day. The combined quote saved them an estimated $180 compared to scheduling each job separately.
Water-Efficient Fixtures: What to Know Before You Install
Installing new fixtures presents an opportunity to upgrade to water-efficient models that reduce utility costs and meet current code. Several efficiency standards are relevant to 2026 installations:
WaterSense certification (EPA program):
- Toilets: maximum 1.28 gallons per flush (vs. older 3.5–7.0 GPF models)
- Kitchen faucets: maximum 1.8 GPM (down from standard 2.2 GPM)
- Bathroom faucets: maximum 1.2 GPM
- Showerheads: maximum 2.0 GPM (down from standard 2.5 GPM)
The EPA estimates that a household switching all fixtures to WaterSense-certified models saves approximately 20% of indoor water use and $380 per year on water and energy costs [6]. Some states (including California, Colorado, and Georgia) have made WaterSense or equivalent efficiency levels mandatory by code for new construction and renovation.
Tankless water heaters are 24–34% more energy-efficient than tank models for homes using fewer than 41 gallons of hot water per day [5]. For households using 86 gallons or more per day, the efficiency advantage drops to 8–14%.
Federal tax credits still available in 2026 under the Inflation Reduction Act include a 30% credit (up to $600) for qualifying heat pump water heaters, the most energy-efficient storage water heater technology currently available. If you're replacing an electric tank heater, a heat pump water heater qualifies and the federal credit substantially offsets the higher upfront cost.
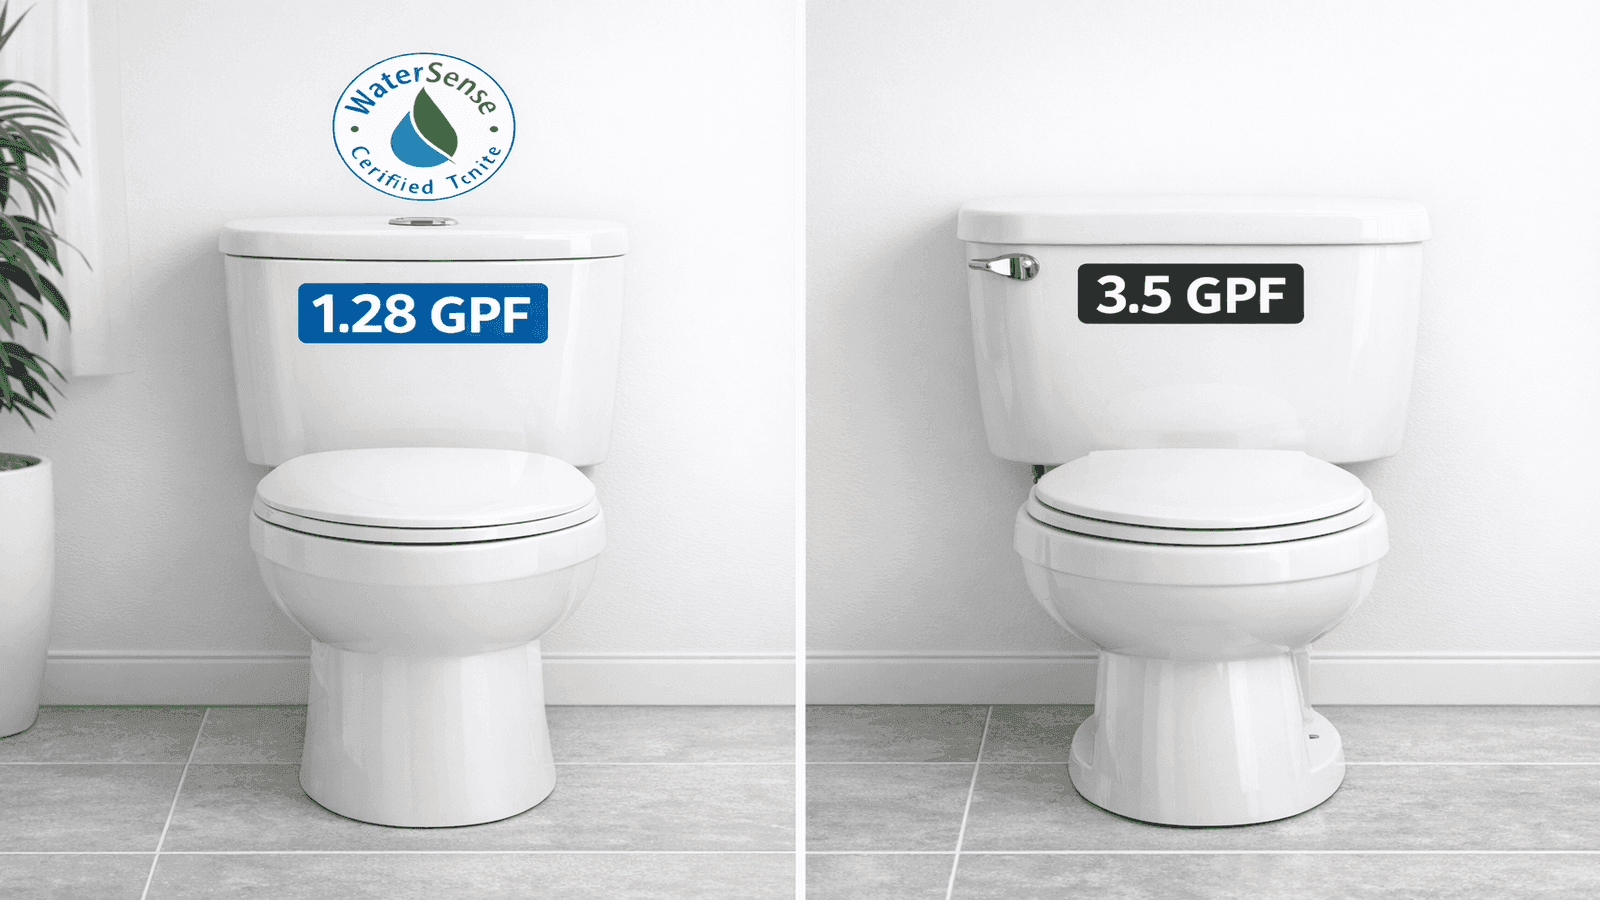
Photo: Side-by-side of WaterSense certified toilet and standard old-style toilet, showing GPF ratings and annual water savings comparison
Finding and Vetting a Licensed Plumber
With plumber availability tightening and installation costs rising, choosing the right contractor matters more than it did five years ago. The U.S. plumbing industry is already facing workforce challenges, and quotes vary 20–40% between contractors for identical jobs.
How to verify a plumber's license: Every state maintains an online license lookup through its contractor licensing board. Search "[your state] plumber license lookup" and the board website will appear in the first result. Verify the license is current, active, and in the correct classification (residential vs. commercial). The licensed plumbers in our NearbyHunt network report that verifying license status before signing any quote eliminates the majority of callback issues homeowners experience after installation.
What to clarify before signing a quote:
- Is the permit included in the quote price, or is it additional?
- Who is the licensed plumber of record on the permit?
- What happens if the rough-in doesn't match the new fixture?
- Does the quote include inspection scheduling and final sign-off?
Red flags to watch for:
- Cash-only pricing with no written quote
- "We can skip the permit to save you money"
- No license number offered when asked
- Can't name who will be on-site doing the work
Getting 2–3 written quotes before committing is standard practice. For a water heater replacement, the spread between legitimate quotes in most markets runs $200–$600. That spread is worth an hour of your time. Licensed plumbers in the NearbyHunt network consistently report that permit fees are the most commonly omitted line item in competing quotes: a quote that looks cheaper often simply excludes the permit.
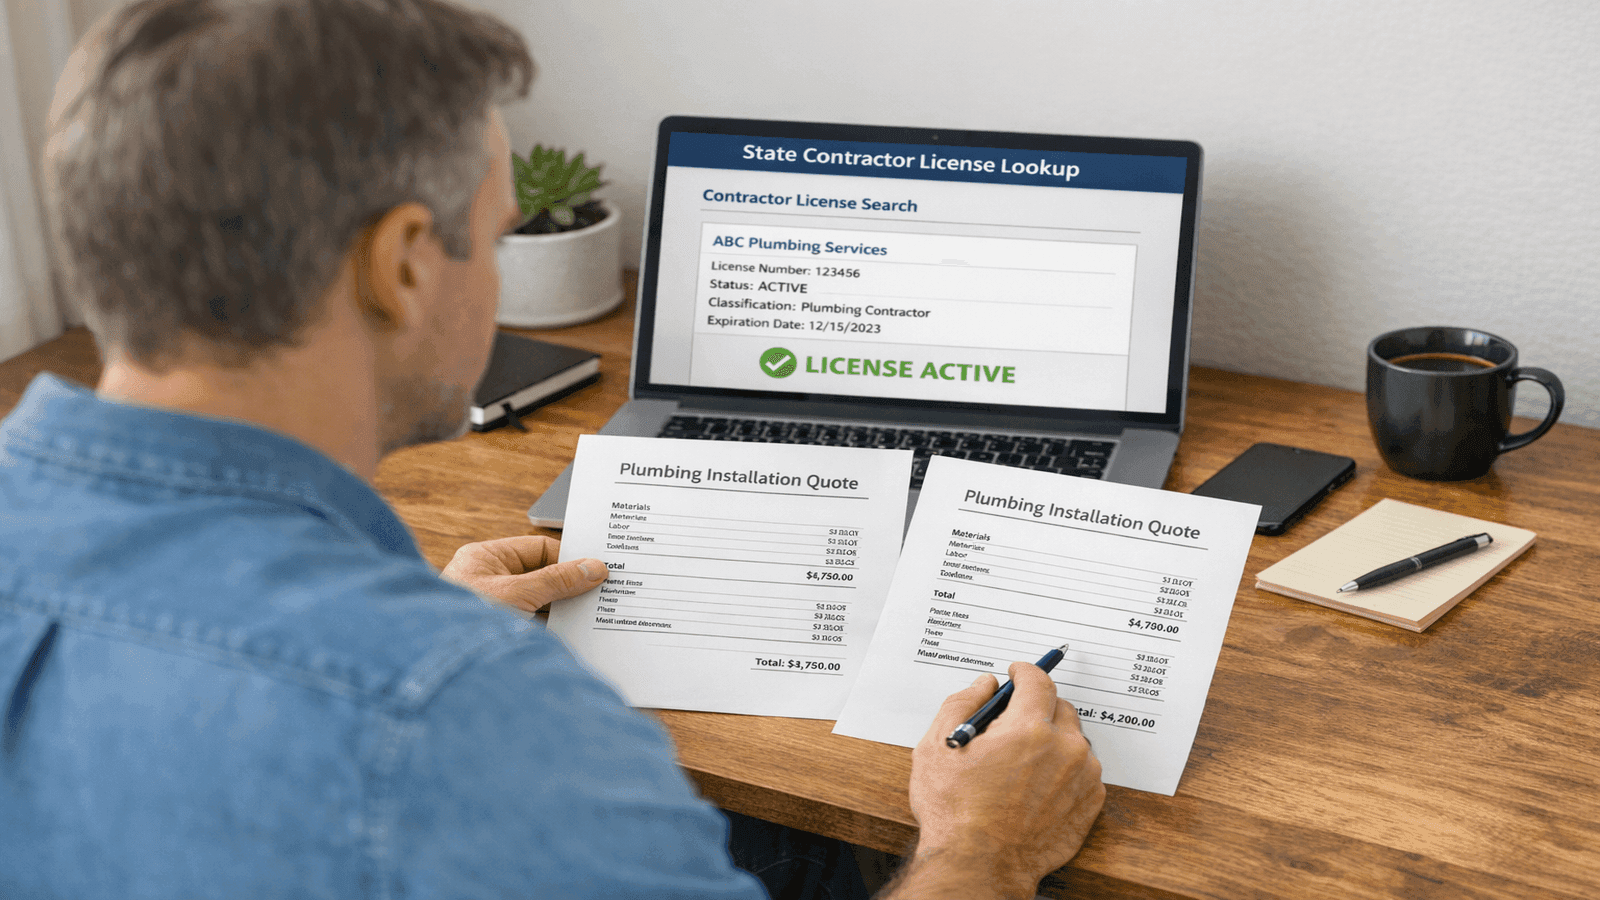
Photo: Homeowner comparing two written plumbing installation quotes on a kitchen table, laptop open to state contractor license lookup website
After Installation: Testing and Long-Term Care
The 24-Hour Rule
No installation should be considered complete until it has been under normal operating pressure for at least 24 hours. Connections that appear perfect on installation can develop slow drips as supply lines pressurize and relax through thermal cycles. Run every connected fixture through a full operating cycle (flush the toilet, run both hot and cold at the sink, cycle the dishwasher) then return 24 hours later and inspect every connection point.
Check under vanities, behind access panels, and anywhere a supply line or drain connection was made. Water stains, mineral deposits, or soft spots in wood cabinetry indicate a slow leak that started at installation.
Register Appliances and Maintain Them
Register all appliances immediately after installation. Manufacturer warranties often require registration within 30–60 days, and registration provides proof of installation date if a warranty claim arises later.
For major systems, follow scheduled maintenance:
- Water heaters: flush annually, check anode rod every 2–3 years; see our water heater maintenance guide
- Water softeners: clean the brine tank annually, check salt levels monthly
- Sump pumps: test the float switch annually by pouring water into the pit; replace backup battery every 3–5 years
- All supply lines: inspect braided stainless supply lines annually for corrosion at the crimped ends, as these are the most common source of under-sink floods
For a complete annual plumbing maintenance schedule that covers all systems in your home, see our plumbing maintenance guide.
My rule after any plumbing installation: wait 24 hours before considering the job done. I've come back to pull permits and found a connection that looked perfect on day one had a slow drip forming by the next morning. The joint dried, the water pressure cycled, and it moved slightly. Test everything under normal operating conditions, let it sit overnight, then check again. Most failure points show within the first 24 hours of service. The ones that don't show up for three years are usually supply lines that weren't fully tightened; a quarter-turn more at installation prevents a flooded cabinet two years later.
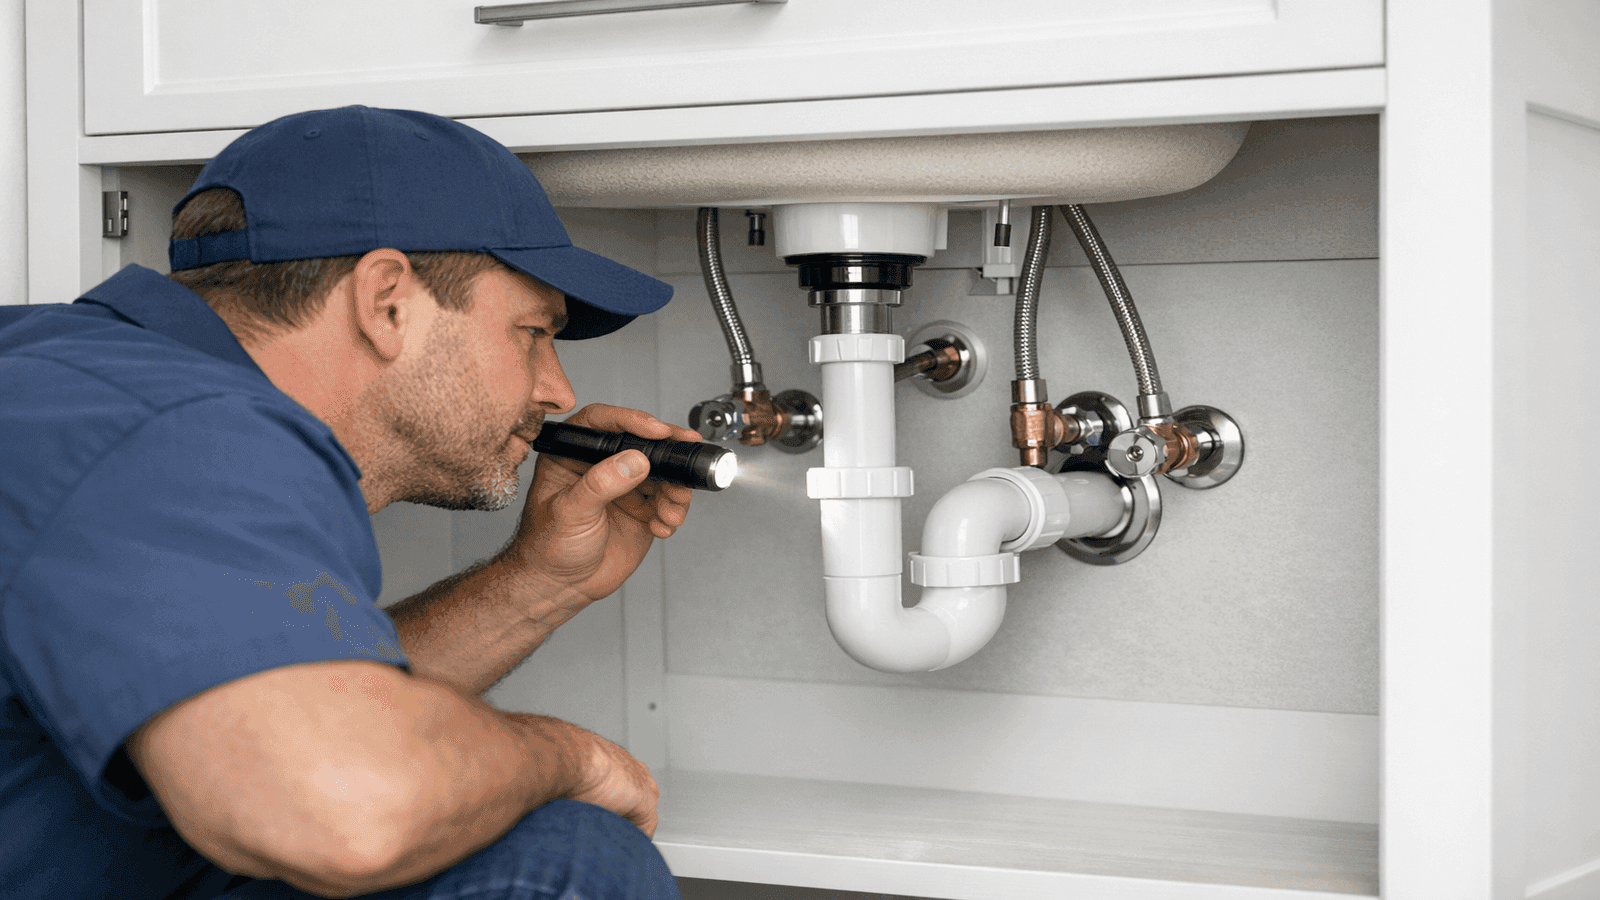
Photo: Plumber performing final pressure check on newly installed bathroom vanity sink, inspecting supply line connections with a flashlight
Conclusion
Every installation in this guide follows the same logic: understand what the job actually involves, know whether a permit is required, honestly assess your skill level against that specific job, and test thoroughly before declaring it done.
For occupied homes, the safest default is: DIY simple fixture swaps that don't require permits or rough-in changes; hire a licensed plumber for anything involving permits, gas lines, moving drain or supply locations, or structural elements like wall-hung fixtures.
Before any installation project, confirm your shutoff valve locations, verify permit requirements with your local building department, and get written quotes from 2–3 licensed contractors for any job that requires professional installation.
Use the guides below for complete step-by-step coverage of each fixture type:
- Toilet Installation: Complete Step-by-Step Guide
- Kitchen Sink Installation: Professional Guide
- Bathroom Sink Installation: All Types Covered
- Shower Installation: Complete Professional Guide
- Bathtub Installation: Professional Methods Guide
- Water Heater Installation: Tank & Tankless Guide
- Dishwasher Installation: Complete Hook-Up Guide
- Sump Pump Installation: Basement Protection Guide
- Water Softener Installation: Complete Setup Guide
- Backflow Preventer Installation Requirements & Guide
Disclaimer: Cost figures are national averages for 2026 and vary significantly by region, project complexity, and contractor availability. Always obtain 2–3 written quotes from licensed plumbers before committing to any installation project. Permit requirements vary by municipality; verify with your local building department before starting work.
Sources & References
- Fixr: Water Heater Installation Cost Data 2026
- This Old House: Water Heater Installation Cost Guide 2026
- Forbes Home: Toilet Installation Cost Guide 2026
- Bob Vila: Kitchen Sink Installation Cost 2026
- U.S. Department of Energy: Tankless vs. Tank Water Heater Efficiency
- EPA WaterSense Program: Residential Water Efficiency Statistics
- International Plumbing Code (IPC) 2024: Pressure-Balance Valve Requirements
- PHCC: Plumbing-Heating-Cooling Contractors Association Standards
- Bureau of Labor Statistics: Plumbers and Pipefitters Wages 2026
- Linxup: U.S. Plumbing Industry Statistics 2026
- Consumer Reports: Home Plumbing Fixture Ratings and Installation Guides


Michael Jennings is a licensed master plumber & water systems specialist with over 18 years of hands-on experience in residential and commercial plumbing, serving clients across California and Texas. At NearbyHunt, he shares practical advice on pipe installations, water heater maintenance, and home plumbing upgrades. Michael has helped thousands of homeowners prevent costly water damage and improve water efficiency through modern plumbing solutions.

Robert is a licensed master plumber with over 20 years of experience serving both residential and commercial clients across the Midwest. Specialising in advanced plumbing systems and sustainable water technologies, Rob brings deep technical insight and hands-on expertise to every project. As a reviewer for NearbyHunt, he ensures all plumbing content reflects the highest standards of safety, compliance, and practicality.