- Professional dishwasher installation costs $200 to $500 for labor when replacing an existing unit, rising to $300 to $1,300 when new plumbing and electrical circuits are required. [2]
- A 3/8-inch braided stainless steel supply line at 120 psi is the correct connection for virtually all residential dishwashers installed in 2026.
- High loop or air gap is mandatory for drain backflow prevention; California, Washington, and Hawaii require a physical air gap device by code. [5]
- A dedicated 20-amp circuit is required in most jurisdictions; sharing a circuit with a garbage disposal is allowed in some codes but not recommended. [6]
- Permits are required for new electrical circuit work and any new plumbing rough-in; a like-for-like replacement typically does not.
- Most professional installations take 2 to 3 hours on an existing hookup; add 4 to 6 hours if new plumbing or electrical work is needed. [4]
Dishwasher installation touches three trades at once: plumbing, electrical, and carpentry. Done correctly, a properly hooked-up dishwasher runs for 10 to 15 years without a leak. Done carelessly, a single loose fitting can cause thousands of dollars in water damage inside a cabinet you cannot see without pulling the unit. Michael has completed 2,400-plus residential plumbing projects across Dallas-Fort Worth and California in his 18-year career, and this guide reflects lessons from installations that range from straightforward swaps to complex remodels. This guide is part of the complete plumbing installation resource at NearbyHunt and walks through every connection step, from shutting off supply to running the first test cycle.

Get quotes from top-rated pros.
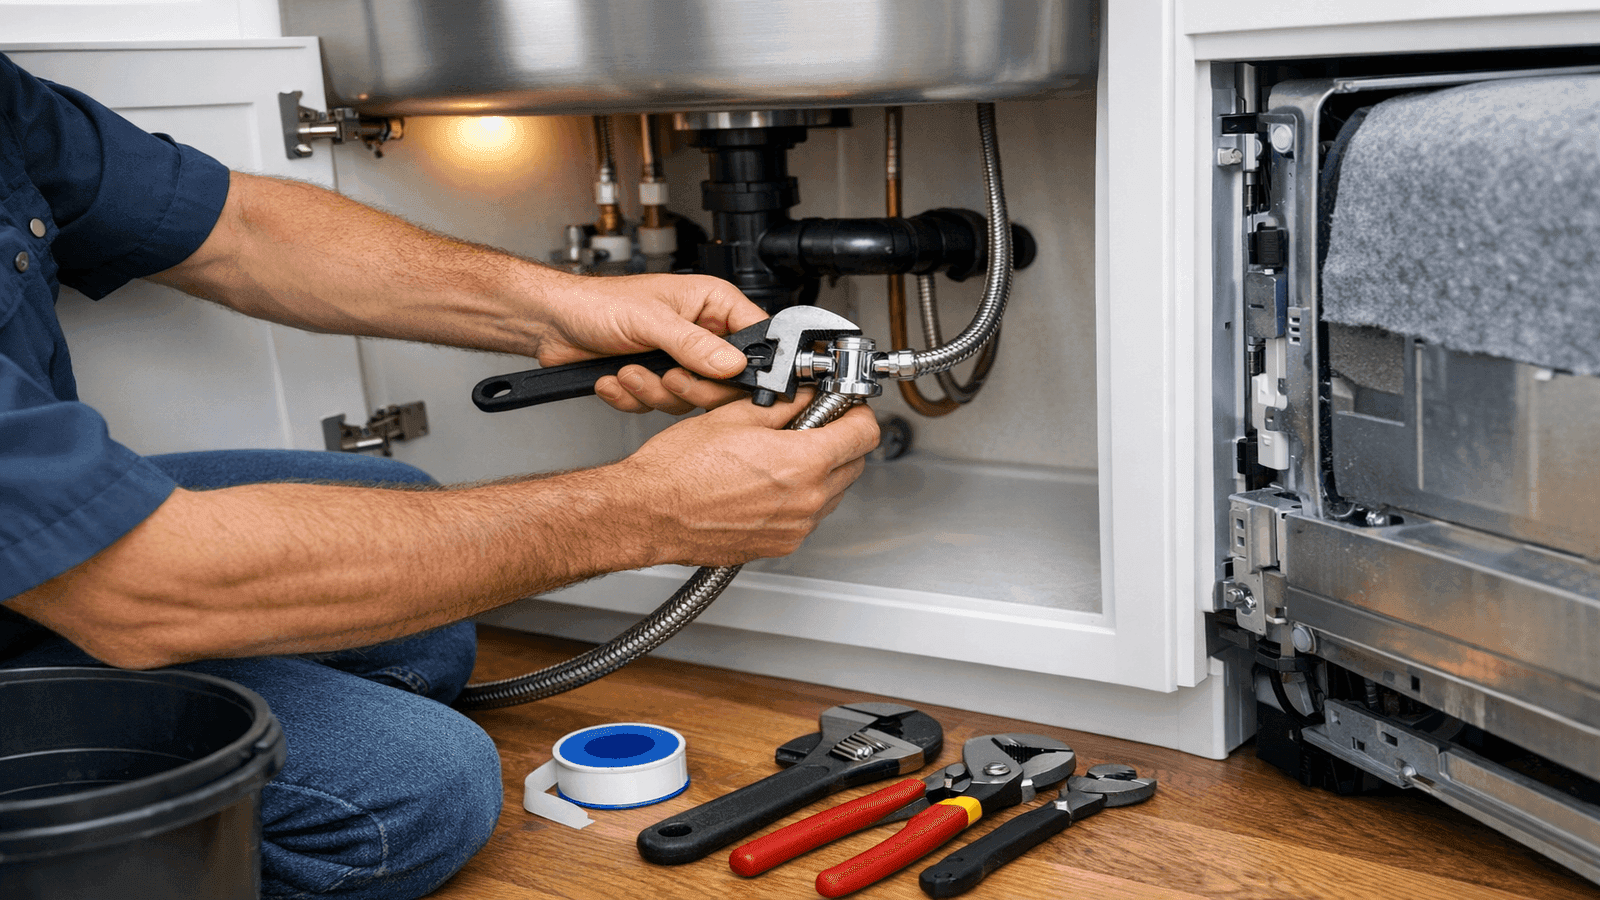
Photo: Licensed plumber connecting a braided stainless steel water supply line to a dishwasher under a kitchen sink, tools on countertop, cabinet open
What You Need Before Starting
Before any connections are made, confirm these four items exist and are in working condition.
Hot water supply: The dishwasher connects to the hot water line under the sink, typically at the angle stop valve. If no dedicated dishwasher shutoff exists, the sink shutoff must be used or a new angle stop added. Our guide on how to shut off your water supply covers valve types and shutoff locations.
Drain connection point: The drain hose connects to either the garbage disposal inlet or the sink drain tailpiece via a dishwasher wye fitting. If neither exists, a wye adapter must be installed.
Electrical supply: Most dishwashers require a dedicated 120V, 20-amp circuit with a ground. Older homes often have only a 15-amp kitchen circuit, which may not be sufficient. Verify with the dishwasher's nameplate amperage rating.
Cabinet space: Standard dishwashers fit a 24-inch wide by 24-inch deep by 34.5-inch high opening. Measure the opening before purchasing a unit; even 1/4-inch too narrow means cabinet modification.
Tools required: Adjustable wrench, basin wrench, channel-lock pliers, screwdrivers (flathead and Phillips), wire stripper, drill with bits, level, plumber's tape (PTFE), and a bucket.
Before I pull a dishwasher for replacement, I check the angle stop valve under the sink first. In about 30 percent of older kitchens I work in across Dallas, that valve hasn't been touched in 15 years and will seize or leak when I try to close it. Replacing a corroded angle stop takes 45 minutes; ignoring it means a flood when the supply line is off. Always address the shutoff valve before touching the dishwasher connection.
Supply Line Connection
The water supply connection is the most leak-prone point in a dishwasher installation. Use a 3/8-inch braided stainless steel supply line rated for dishwasher use -- never rubber or vinyl lines, which degrade and can burst. The supply line connects the angle stop valve under the sink to the dishwasher's water inlet valve, which is typically accessed through the bottom front kick panel.
Step-by-step supply connection:
- Turn off the hot water angle stop under the sink. If no dedicated dishwasher shutoff exists, install one now. See our guide on installing a shutoff valve for the process.
- Thread PTFE tape clockwise onto all male fittings -- three full wraps minimum.
- Connect the supply line to the angle stop first, hand-tightening then adding one-quarter turn with a wrench.
- Route the supply line through the cabinet side opening or under the dishwasher to the water inlet port.
- Connect to the inlet elbow at the dishwasher using an elbow fitting if the inlet points downward.
- Do not fully tighten until the dishwasher is positioned in its final location.
Common supply line mistake: Over-tightening brass fittings. Brass is soft -- more than one-quarter turn past hand-tight can crack the fitting or strip threads, creating a slow drip inside the cabinet that goes unnoticed for months.
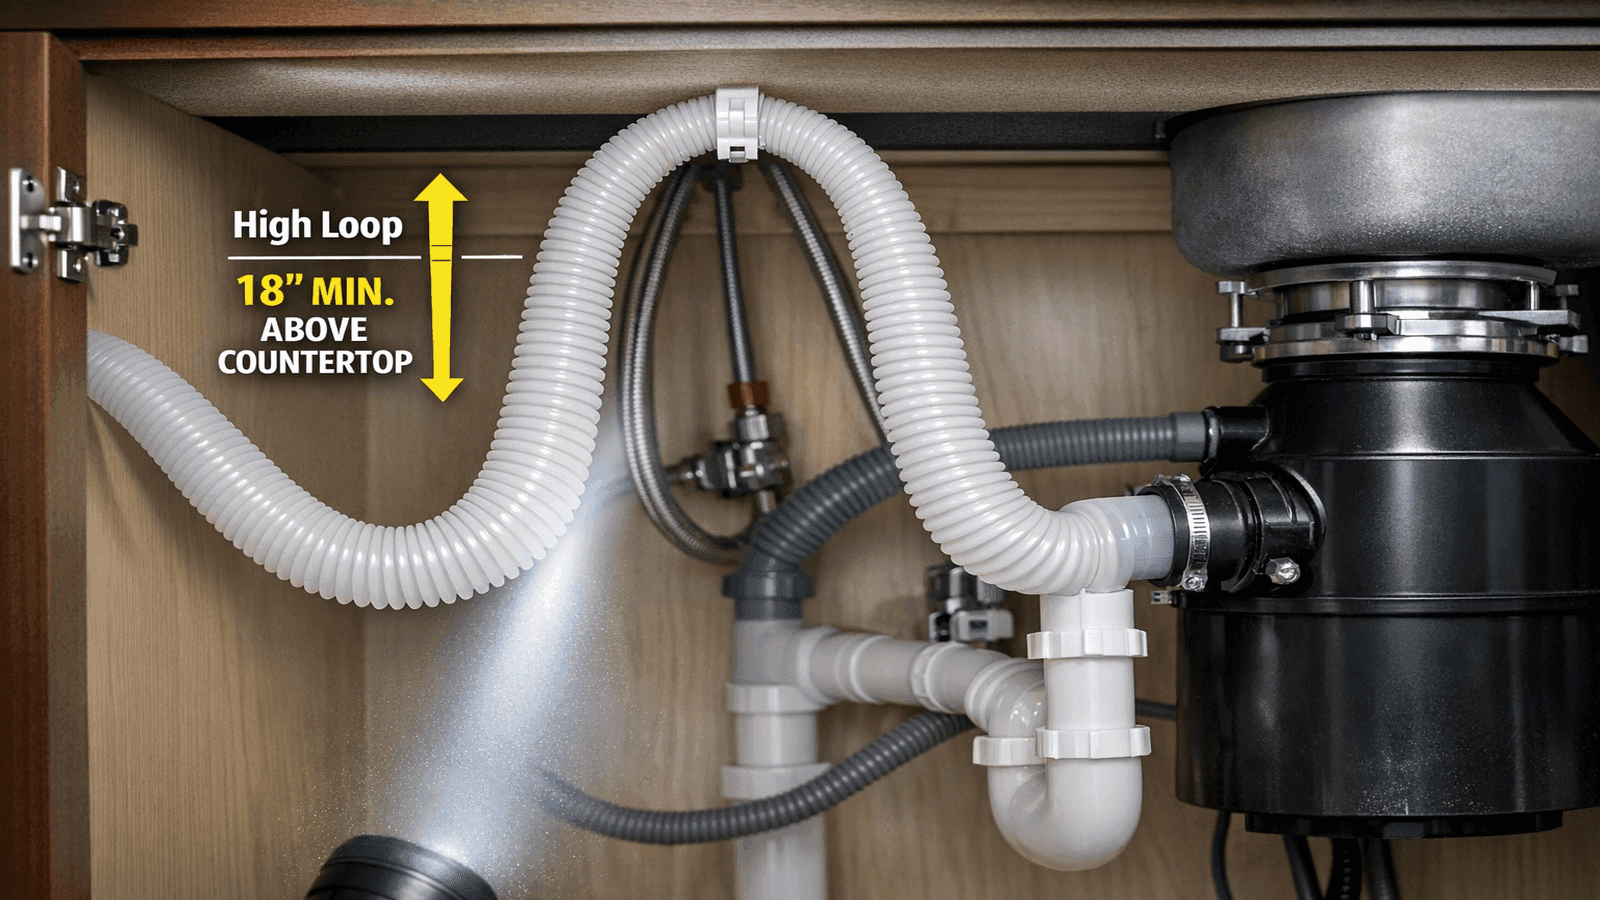
Photo: Dishwasher drain hose secured in a high-loop position under kitchen sink cabinet, hose clipped near top of cabinet interior
Drain Hose Routing: High Loop vs. Air Gap
The drain connection prevents contaminated sink water from back-siphoning into the clean dishwasher basin. Two methods are accepted by code, and your jurisdiction determines which is required.
High Loop Method
The drain hose is routed upward to the highest point possible inside the cabinet -- ideally within two inches of the underside of the countertop -- then back down to the drain connection. The elevation prevents backflow by gravity. The IRC (International Residential Code) accepts this method. The hose is secured with a clip or clamp at the peak of the loop.
Air Gap Device
An air gap is a physical plumbing device mounted through a hole in the countertop or sink deck. The dishwasher drain hose connects to the inlet, and a second hose runs from the air gap outlet to the disposal or drain. The air gap creates a physical break in the drain line that makes backflow physically impossible regardless of sink drain pressure.
California Plumbing Code Section 807.3, Washington, Hawaii, and Minnesota require an air gap device. [5] The high loop is not acceptable as a substitute in these states. An air gap device costs $10 to $35 and installs in under 30 minutes.
| Method | Jurisdictions | Cost | Backflow Protection |
| High Loop | IRC states (37 states) | $0 (hose only) | Good (gravity-dependent) |
| Air Gap Device | UPC states (CA, WA, HI, MN) | $10 to $35 | Excellent (physical break) |
Drain connection point: Connect the drain hose to the garbage disposal's dishwasher inlet (knock out the plug first if new disposal) or to the sink drain tailpiece using a wye fitting. The connection point must be above the trap arm -- never below the P-trap, which would defeat backflow protection entirely. See our plumbing code requirements guide for jurisdiction-specific rules.
Get quotes from top-rated pros.
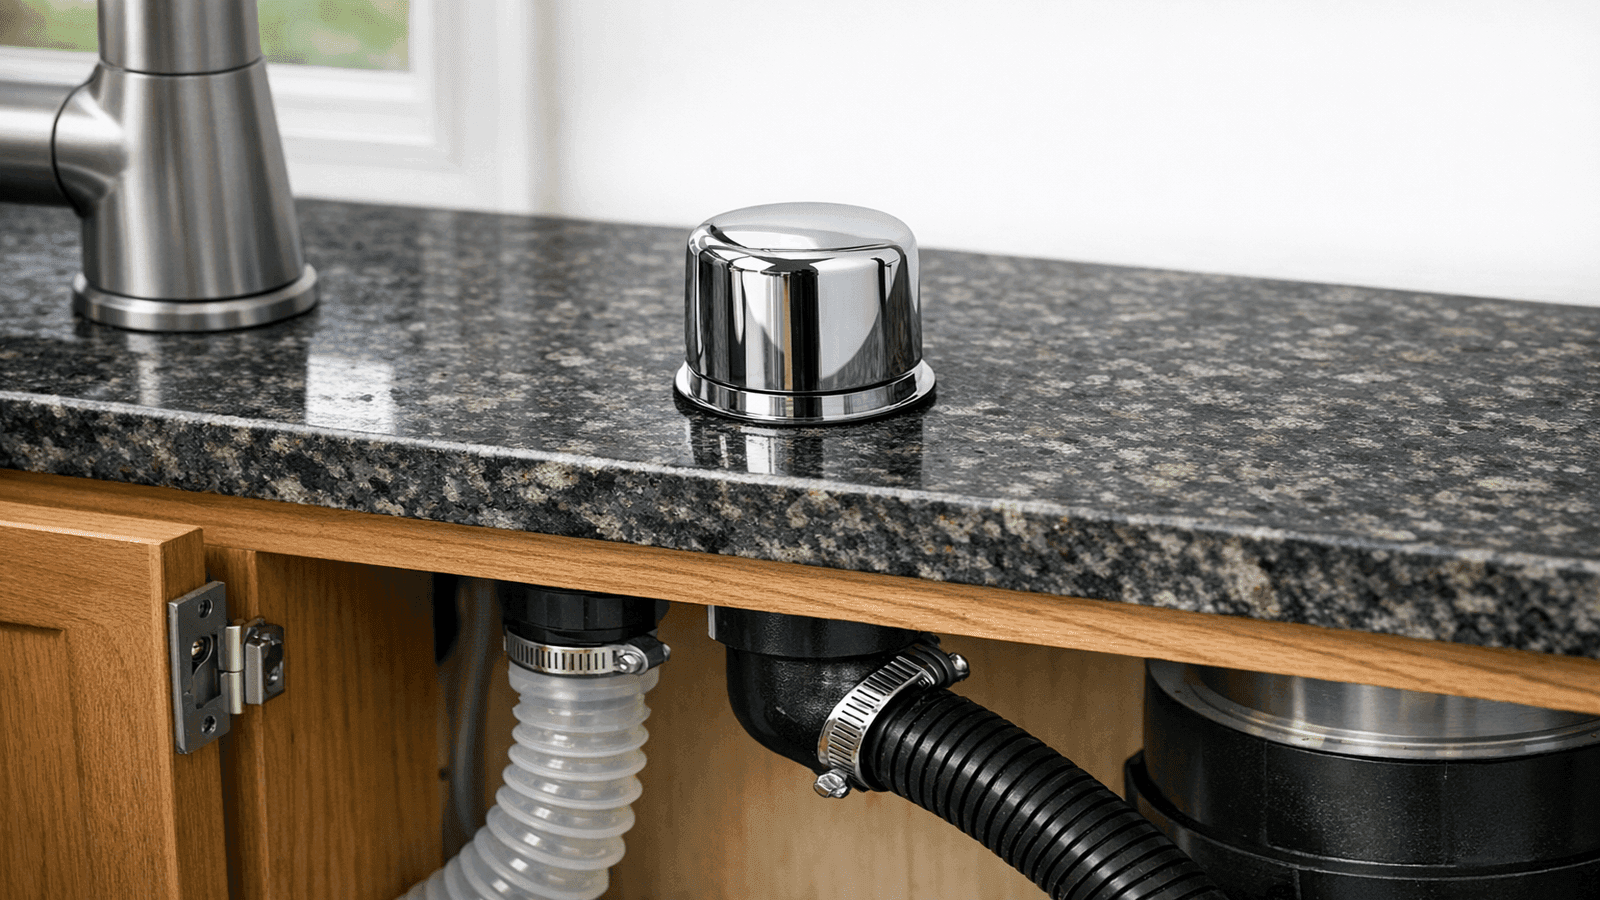
Photo: Air gap device installed on kitchen countertop near faucet, chrome cap visible, with hose connection running under sink
I see drain lines connected below the P-trap at least twice a month during inspections in the Dallas area. It is a serious cross-connection. If the disposal backs up while the drain hose goes below the trap, sewage can siphon directly into the dishwasher tub. Every plumbing code in the country prohibits it, and it is completely preventable. Always go above the trap, always use a high loop or air gap.
Electrical Requirements
Most residential dishwashers draw 12 to 15 amps. [3] The National Electrical Code (NEC) and most local codes require: [6]
- Dedicated 120V, 20-amp circuit with a 12-gauge wire minimum
- Ground fault circuit interrupter (GFCI) protection in most jurisdictions (NEC 210.8)
- Hardwired or cord-and-plug connection depending on local code and unit design
Some jurisdictions allow the dishwasher and garbage disposal to share a 20-amp circuit using a split-wired duplex receptacle. Check local code before relying on this configuration.
Installing a new circuit: If no dedicated circuit exists, a licensed electrician must run a new circuit from the main panel. This costs $250 to $900 depending on panel proximity and whether the run goes through finished walls. In most jurisdictions, this electrical work requires a permit and inspection separate from any plumbing permit.
Hardwired vs. cord-and-plug: Many dishwashers ship without a power cord. The junction box is accessed through the kick panel. Use wire nuts to connect black-to-black (hot), white-to-white (neutral), and green or bare copper to ground. Secure the junction box cover before sliding the unit in.
In Texas, I see a lot of dishwashers connected to 15-amp circuits that were originally run for the refrigerator. This trips breakers constantly and eventually damages the dishwasher's control board. A new 20-amp dedicated circuit from the panel costs $300 to $500 in most Dallas homes and eliminates the problem permanently. That is the right fix.
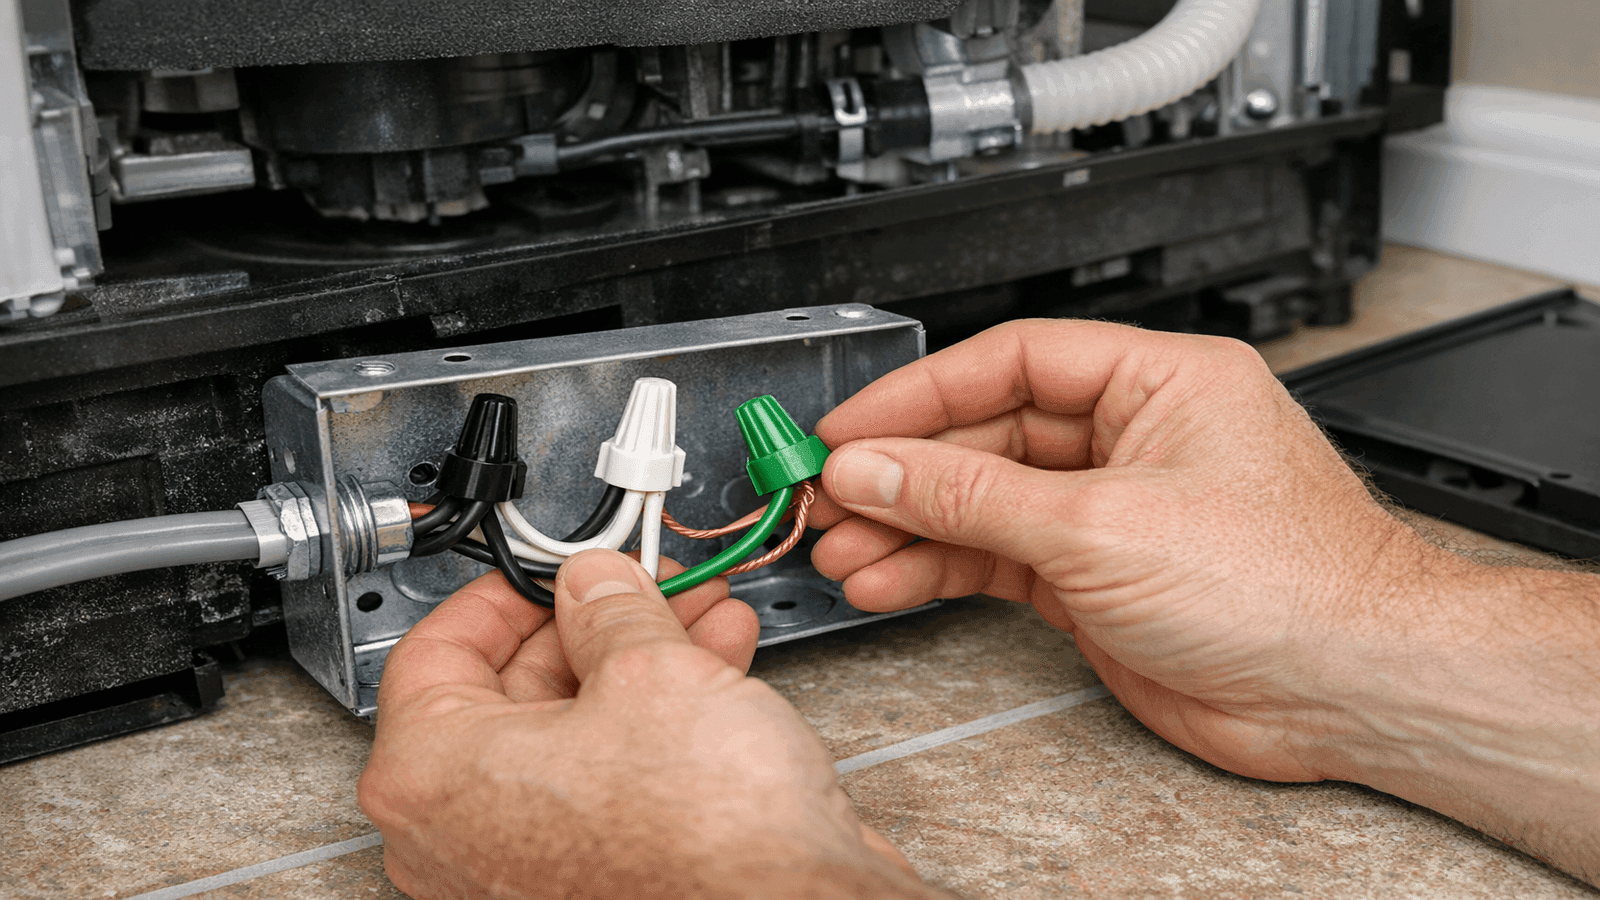
Photo: Electrician making hardwired connection inside dishwasher junction box, wire nuts visible, kick panel removed
Under-Counter Fitting and Securing
With supply, drain, and electrical connections made but not fully tightened, slide the dishwasher into the opening:
- Adjust the front leveling legs so the door clears the floor and the unit is level side-to-side and front-to-back. Check with a level across the top rail. An unlevel dishwasher strains the door gasket and causes premature seal failure.
- With the unit in position, make final tightening on the supply line and drain hose clamp (40 to 60 inch-pounds on the drain clamp, not more).
- Secure the dishwasher to the underside of the countertop using the mounting brackets and screws provided. If the countertop is stone (granite or quartz), use the side-mount brackets that attach to the cabinet sides instead.
- Install the toe kick panel.
- Restore the electrical circuit at the breaker.
- Open the angle stop valve slowly, checking immediately for supply line drips.
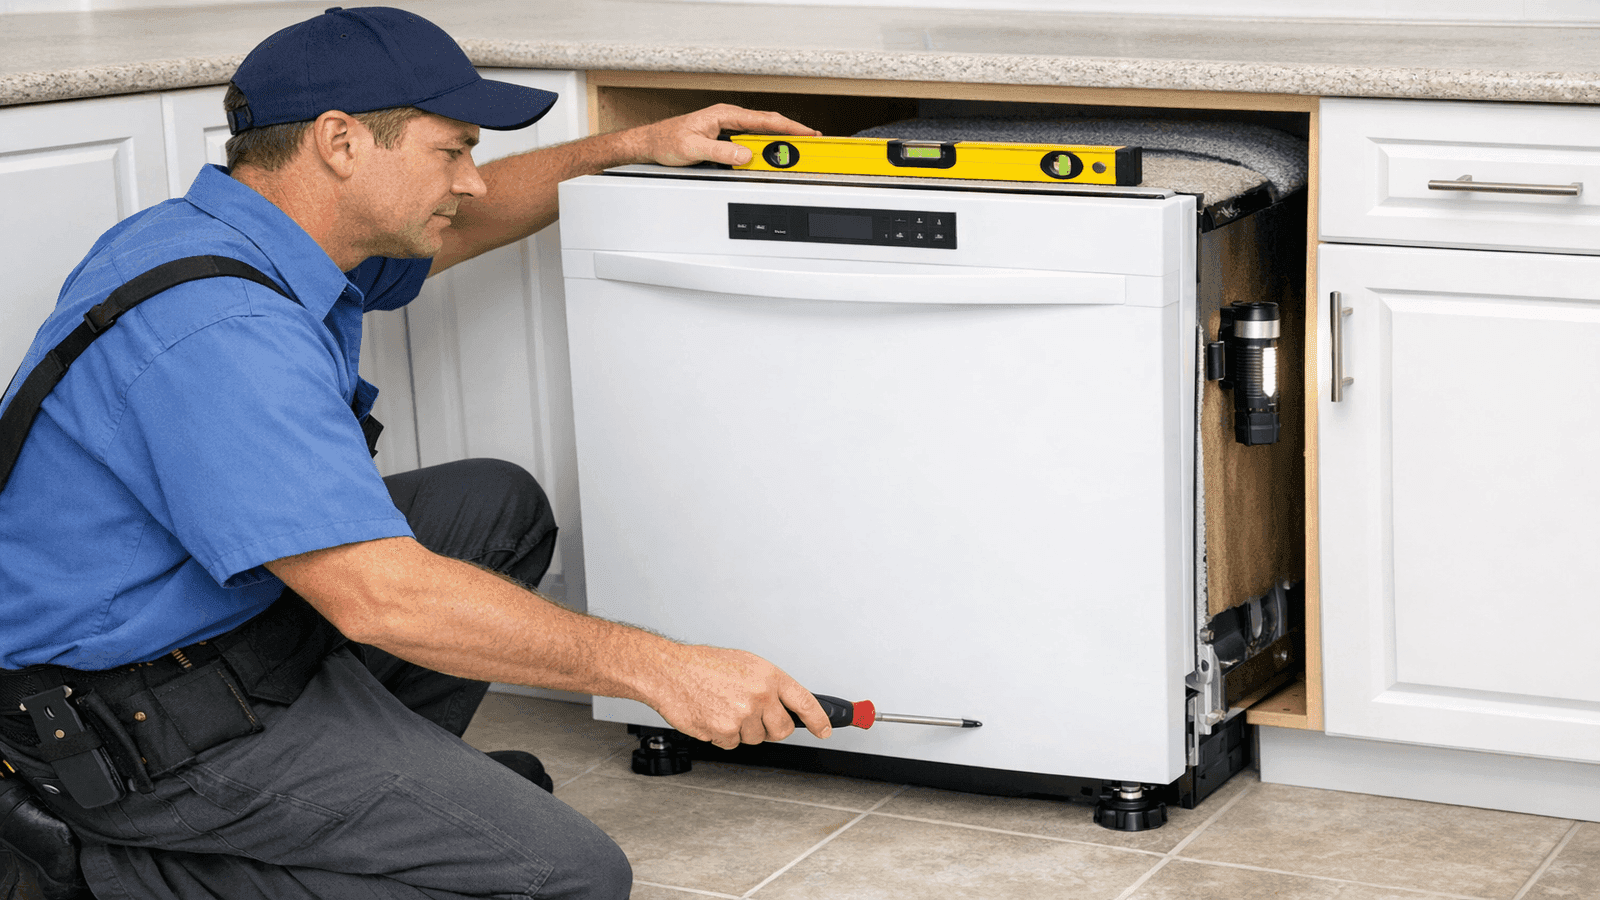
Photo: Dishwasher being leveled and slid into kitchen cabinet opening, installer adjusting front leveling legs, adjacent cabinet visible
Testing and Leak Check
Run the first cycle before declaring the installation complete.
Pre-cycle inspection: With the door closed and the first cycle running, open the cabinet underneath the sink and watch the supply line connection and the drain connection at the disposal or wye for 60 seconds. Any drip at this stage is visible and easy to address. Do not walk away.
During cycle: Listen for the drain pump engaging -- a low hum during the drain phase. Watch the drain hose at the connection point during draining.
Post-cycle: Check the inside of the dishwasher tub for any water remaining at the bottom (more than a cup of water indicates a drain issue). Inspect under the dishwasher by shining a flashlight along the floor -- any moisture indicates a supply or door gasket issue.
Pressure test note: Supply line connections should be checked again after 24 hours. Brass fittings can weep slightly initially and self-seat; a connection that shows a slight film of moisture at hour one but is dry at hour 24 is typically fine. A drip that continues past 24 hours requires re-tightening or replacement of the fitting.
I always run a full wash cycle before I leave. Not a rinse, a full wash. It is the only way to catch a drain hose that pops off during the pump's peak pressure. I caught that exact problem twice in 2025 -- the hose was on the disposal inlet but the clamp was not seated properly over the barb. Caught at the test cycle with a towel on the floor. Not caught, and that kitchen floods in six months when nobody is watching.
Get quotes from top-rated pros.
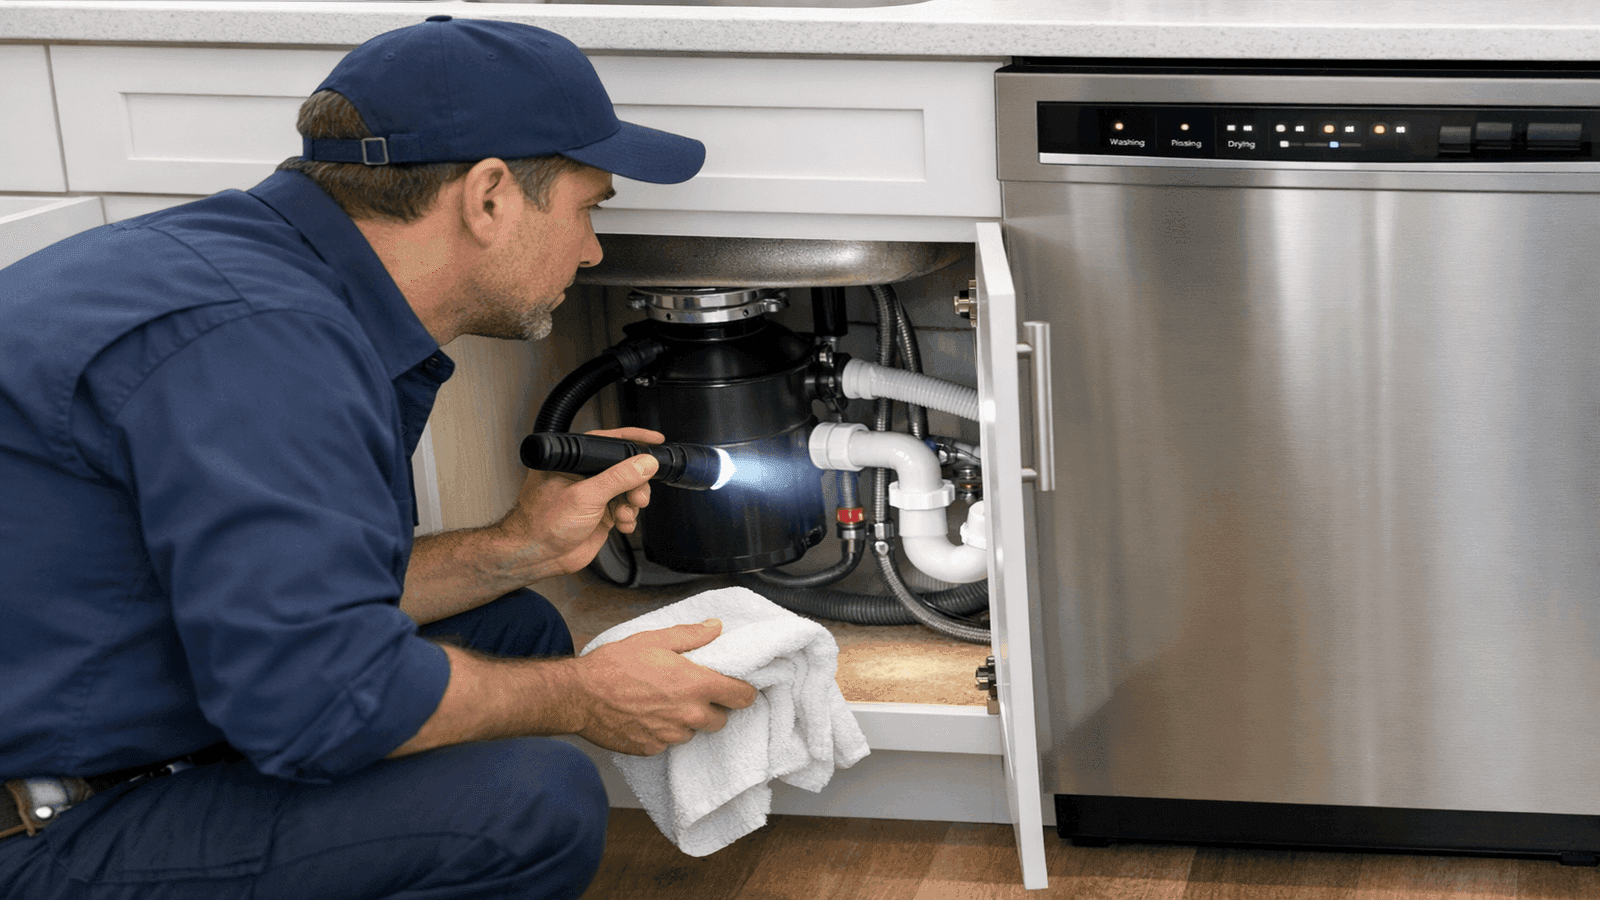
Photo: Plumber running first test cycle on newly installed dishwasher, checking under-sink connections with flashlight for leaks
Cost Breakdown
| Cost Item | Typical Range | Notes |
| Labor (replacement, existing hookup) | $200 to $500 | 2 to 3 hours at $75 to $150/hr |
| Labor (new installation, no prior hookup) | $300 to $1,300 | Add plumbing + electrical rough-in |
| Braided supply line | $15 to $40 | Replace old supply lines always |
| Air gap device | $10 to $35 | Required in UPC states |
| New angle stop valve | $15 to $40 installed | Replace if corroded |
| New electrical circuit | $250 to $900 | Permit + electrician required |
| Plumbing permit | $25 to $100 | Required for new rough-in |
| Total (replacement, standard) | $350 to $800 | Unit not included |
| Total (new installation) | $700 to $2,000+ | Unit not included |
According to Forbes Home's 2026 cost data, the national average dishwasher installation runs $1,000 to $1,500 all-in including the appliance. [2] For labor-only estimates, the $200 to $500 range for a standard replacement aligns with PHCC contractor pricing data for 2026. [4] The licensed plumbers in our NearbyHunt network report that the single most common cost surprise is discovering a corroded or seized angle stop valve under the sink, which adds $75 to $150 to a standard replacement job.
Real Installation Story
Maria Sandoval in Plano, Texas, called Michael to install a new dishwasher after buying a home that had never had one. The kitchen had no existing supply stub-out, no drain wye at the tailpiece, and only a 15-amp circuit shared with the refrigerator. Michael ran a new 3/8-inch hot water branch from under the sink, added a wye fitting to the drain tailpiece with a proper high loop, and coordinated with a licensed electrician to pull a dedicated 20-amp circuit from the panel. The full project took six hours across two trades. Total cost: $1,180 for labor and materials (appliance purchased separately by homeowner). Maria's dishwasher has run without issue for two years. New installations with no prior hookup cost significantly more than swaps -- always get a site assessment before accepting any phone quote.
Permit Requirements
When a permit is required:
- New dedicated electrical circuit (always)
- New plumbing rough-in (adding drain or supply where none existed)
- Relocating existing drain or supply lines
When a permit is typically NOT required:
- Replacing a dishwasher in the same location with the same connections
- Replacing supply lines or drain hose only
Permit costs range from $25 to $100 for a standard residential plumbing permit, with electrical permits priced separately. Always verify with your local building department before starting. For a full code and permit overview, see our plumbing code requirements guide.
Common Installation Mistakes
- No PTFE tape on male fittings. Water under pressure finds any imperfect thread. Tape is a 60-second step that prevents a slow drip.
- Drain hose connected below the P-trap. Creates a direct cross-connection with the sewer. Always above the trap.
- Forgetting to knock out the disposal plug. Blocking the drain inlet means the dishwasher will not drain and may overflow.
- Not securing the unit to the counter. Vibration from the pump cycle causes the unit to walk forward over time, stressing every connection.
- Skipping the test cycle. The most common professional step that DIYers skip -- and the one that catches most installation problems.

Photo: Homeowner reviewing dishwasher installation quote with a licensed plumber at kitchen counter, paperwork visible
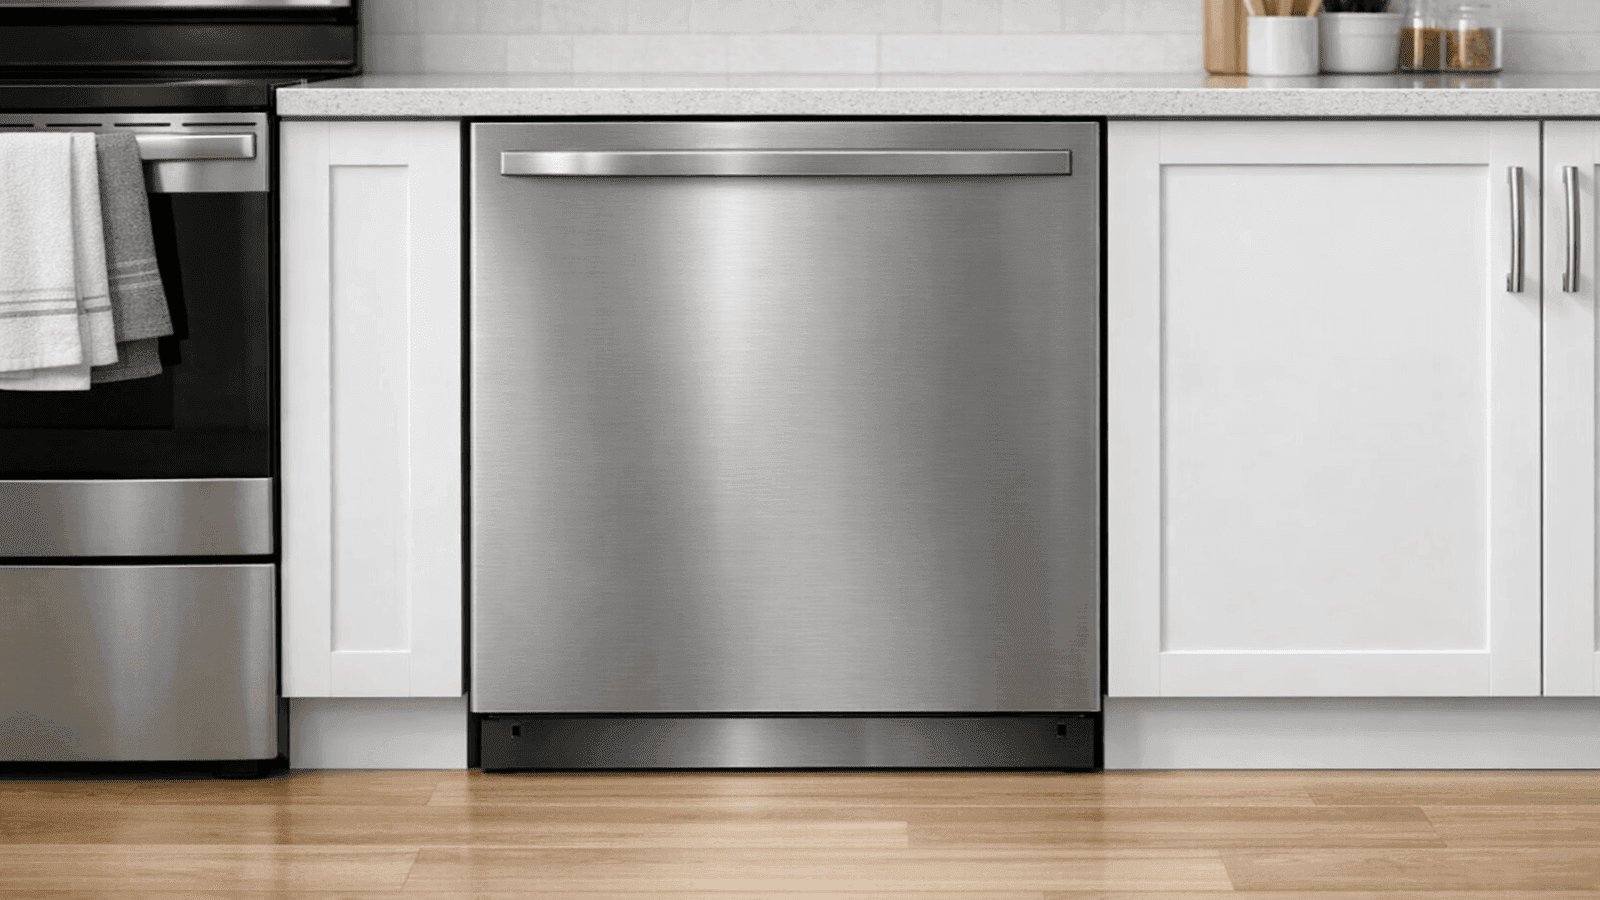
Photo: Fully installed dishwasher flush with surrounding cabinetry in modern kitchen, showing completed professional installation
Conclusion
Dishwasher installation in 2026 costs $350 to $800 for a standard replacement and $700 to $2,000 or more for a new installation from scratch. The supply line, drain routing, and electrical circuit each have specific code requirements and common failure points. Use a braided stainless steel supply line, route the drain with a proper high loop or air gap, and run a full test cycle before closing the cabinet. For complex installations requiring new plumbing or electrical work, hire a licensed plumber and electrician. For related guidance, see the full plumbing installation guide and kitchen sink installation.
Disclaimer: This article is for informational purposes only and does not constitute licensed plumbing or electrical advice. Plumbing and electrical codes vary by state, county, and municipality. Always consult a licensed professional and verify local permit requirements before beginning any installation work. NearbyHunt assumes no liability for installations performed without proper permits, inspections, or professional oversight.
Sources & References
- This Old House: Dishwasher Installation Cost 2026
- Forbes Home: How Much Does Dishwasher Installation Cost?
- Bob Vila: How to Install a Dishwasher
- Plumbing-Heating-Cooling Contractors Association (PHCC): Industry Pricing Data (2026)
- California Plumbing Code Section 807.3 (Air Gap Requirements)
- National Electrical Code (NEC): Article 210.8 GFCI Protection Requirements
- International Residential Code (IRC): Dishwasher Drain Requirements
- U.S. Bureau of Labor Statistics: Plumbers, Pipefitters, and Steamfitters Occupational Data (2024)
- King County, Washington: Domestic Dishwasher Connections Code Reference


Michael Jennings is a licensed master plumber & water systems specialist with over 18 years of hands-on experience in residential and commercial plumbing, serving clients across California and Texas. At NearbyHunt, he shares practical advice on pipe installations, water heater maintenance, and home plumbing upgrades. Michael has helped thousands of homeowners prevent costly water damage and improve water efficiency through modern plumbing solutions.

Robert is a licensed master plumber with over 20 years of experience serving both residential and commercial clients across the Midwest. Specialising in advanced plumbing systems and sustainable water technologies, Rob brings deep technical insight and hands-on expertise to every project. As a reviewer for NearbyHunt, he ensures all plumbing content reflects the highest standards of safety, compliance, and practicality.