- Professional toilet installation costs $224–$533 in 2026, including labor of $150–$450 and basic hardware.
- The standard rough-in distance is 12 inches from the finished wall to the drain center — measure before buying a toilet.
- A damaged floor flange turns a DIY job into a licensed-plumber job and adds $200–$400 to total cost.
- Like-for-like replacement rarely requires a permit, but any flange repair or drain relocation typically does.
- Overtightening the closet nuts cracks the porcelain base — tighten to snug plus one-quarter turn and stop.
- WaterSense toilets use 1.28 GPF, cutting toilet water use by up to 60% versus pre-1994 units.
Toilet replacement is one of the few plumbing jobs a confident homeowner can complete without calling a professional. The difference between a clean, watertight installation and a slow leak into your subfloor comes down to a handful of steps most guides skip. For a broader look at residential plumbing, see our complete plumbing installation guide.
In 18 years and more than 2,400 residential plumbing projects across Dallas-Fort Worth and California, Michael Jennings has seen one failure pattern repeat more than any other: homeowners rush the placement step, skip the level check, and discover a slow wax ring leak six months later when the subfloor is already soft. This guide walks through every step the way a licensed master plumber would do it.

Get quotes from top-rated pros.
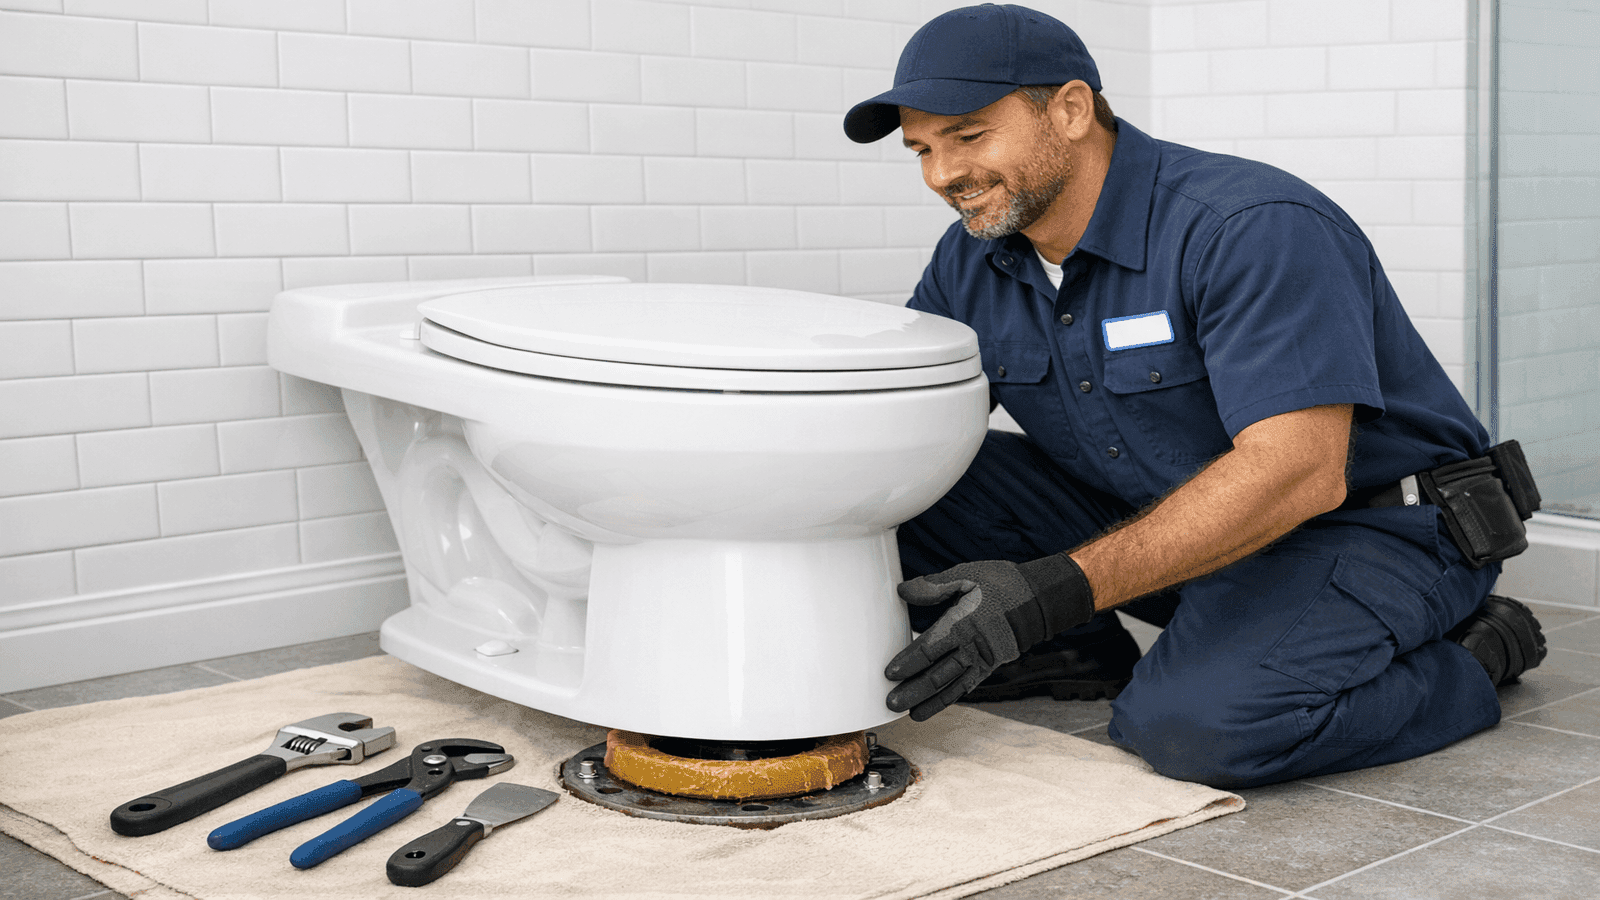
Photo: Licensed plumber setting a new toilet onto a floor flange in a clean bathroom, wax ring visible at the base, professional tools on a drop cloth nearby
Measure First: Rough-In Distance
Before purchasing a toilet, measure the rough-in: the distance from the finished wall (not the baseboard) to the center of the floor drain. Standard is 12 inches, but 10-inch and 14-inch rough-ins exist in older construction.
| Rough-In Size | Typical Setting | Availability |
| 10 inches | Pre-1960 homes, small bathrooms | Limited |
| 12 inches | Standard since 1960 | Widest selection |
| 14 inches | Older Southeast U.S. homes | Moderate |
Confirm clearances: 21 inches of open space in front of the toilet and 15 inches from the centerline to any sidewall — these are minimum IPC/UPC code requirements, not suggestions.
Measure the rough-in twice before buying anything. In my 18 years on the job, I've had at least 40 homeowners show up with a beautiful new toilet that won't sit flush against the wall because they measured to the baseboard. A 1.5-inch difference means the toilet physically won't fit. Some stores won't accept returns on unboxed toilets, and you're out $200–$400 before the job even starts.

Photo: Tape measure showing 12-inch rough-in distance from finished wall to toilet drain center, chalk line on bathroom tile floor
What Goes Wrong: A Real-World Example
A homeowner in Plano, Texas contacted Michael Jennings after a DIY toilet installation. She had followed a generic video tutorial, set the toilet, connected the supply, and everything looked fine. Eight months later, she noticed the floor felt soft near the base. By the time Michael assessed the damage, a 14-inch section of particle-board subfloor had absorbed water and needed full replacement. Total repair cost: $1,340, including subfloor removal, sister-joisting one damaged floor joist, new cement board, retiling, and a licensed reinstall.
The cause: She had set the toilet on a flange that sat 3/8 inch below the finished tile floor and used a standard-thickness wax ring. The wax never fully bridged the gap. Every flush pushed a small amount of wastewater under the toilet base rather than down the drain. The leak was invisible for months.
This outcome is preventable. A flange extender kit ($15–$35) or an extra-thick wax ring ($12–$18) would have solved the gap. Professional plumbers in the NearbyHunt network report that roughly 60% of toilet-related leak callbacks they receive involve a flange that sat below finished floor level.
Tools and Materials
Tools: Adjustable wrench, channel-lock pliers, putty knife, hacksaw (for rusted bolts), level, tape measure, bucket, sponge.
Materials: New wax ring, replacement closet bolts, 12-inch braided stainless supply line, plastic bolt caps and washers, foam drain plug to block sewer gas during removal.
Get quotes from top-rated pros.
Step 1: Remove the Old Toilet
Turn the supply valve clockwise to close. Flush once to drain the tank, then sponge out remaining water from the bowl and tank. Disconnect the supply line at the valve.
For two-piece toilets, remove the tank first by unscrewing the two tank bolts from inside. Pry off the plastic base caps to expose the closet nuts. Loosen the nuts, alternating sides. If they are rusted, cut the bolts with a hacksaw. Rock the toilet gently front-to-back to break the wax seal, then lift straight up. Plug the open drain immediately with a rag or foam plug to block sewer gases.
Never twist when you lift — rock front-to-back in small motions, feel it release, then lift straight up. Twisting smears wax into the flange threads and makes cleanup harder than it needs to be.
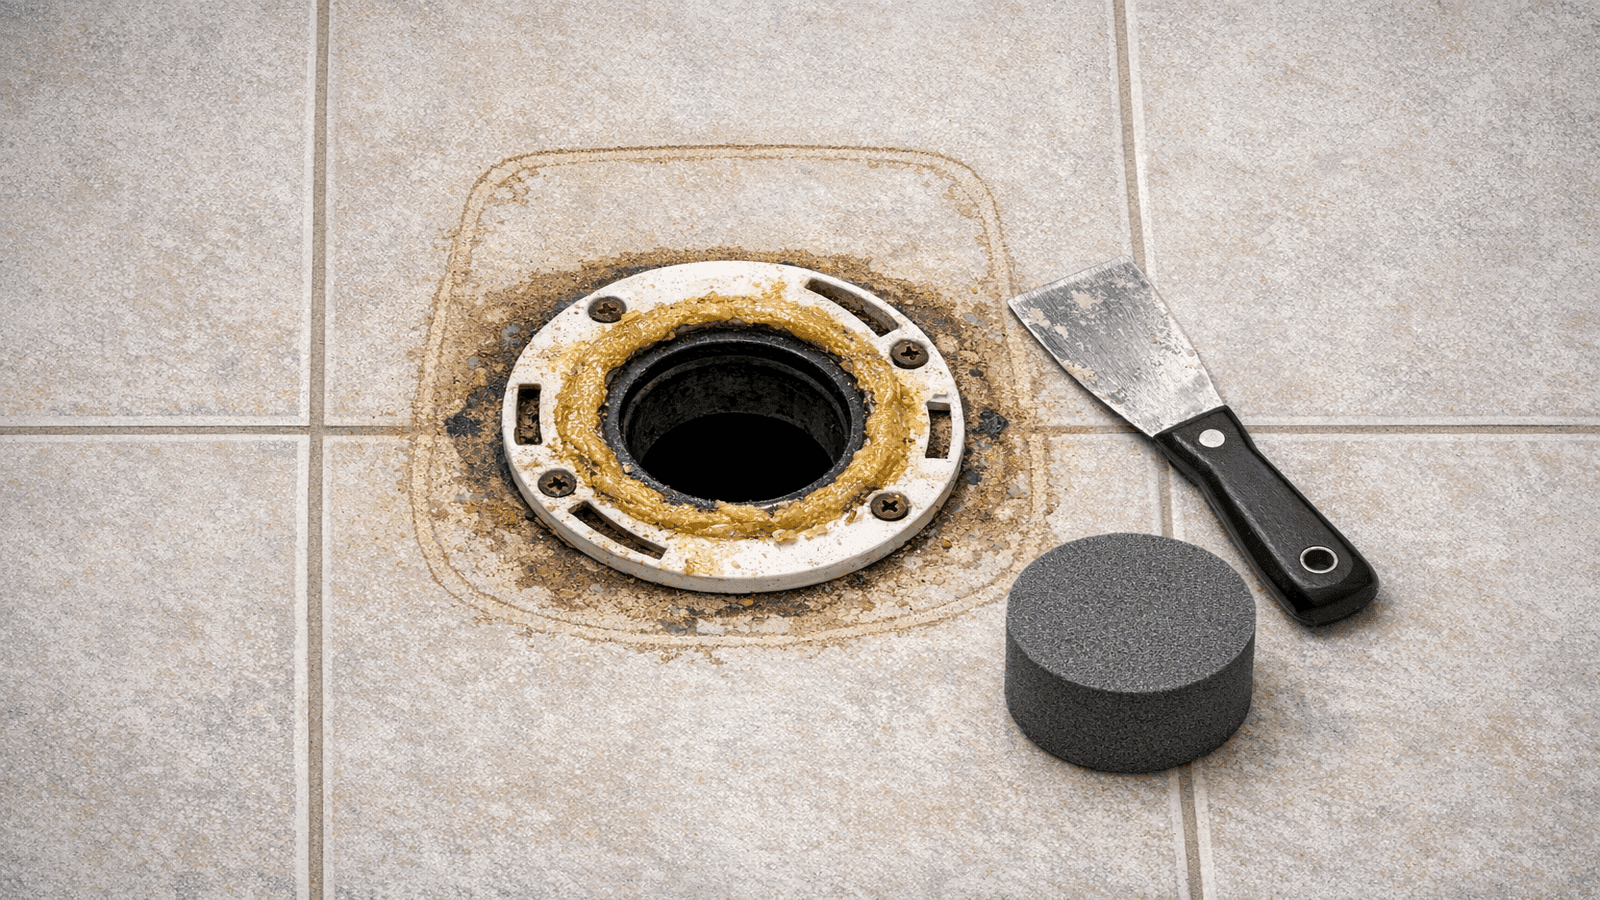
Photo: Old toilet lifted away from floor, exposed floor flange with old wax ring residue, putty knife beside the drain opening
Step 2: Inspect the Flange
Scrape all old wax from the flange and floor around it. The flange condition determines whether you continue DIY or call a plumber.
Continue DIY if: The flange ring is intact with no cracks, sits at or slightly above finished floor level, and the bolt slots hold a closet bolt firmly.
Call a licensed plumber if: The flange is cracked or corroded, sits more than 1/4 inch below floor level, or the cast-iron hub is deteriorating. A flange extender kit ($15–$35) can address a low-but-intact flange; a broken flange requires subfloor access and licensed repair.
Slide new T-bolts into the flange slots at the 3 o'clock and 9 o'clock positions. Tape them upright so they stay in position during toilet placement.
Licensed plumbers we work with across 12 states consistently flag the same problem: a cracked PVC flange that homeowners miss because it looks intact from above. Press on the flange ring at four points around the circle. If it flexes or shifts, it's cracked. A cracked flange cannot hold the closet bolts in the correct plane, and the toilet will rock no matter how tight you torque the nuts.
Step 3: Set the New Toilet
Place the new wax ring on the bottom of the toilet horn (the outlet). Press firmly so it seats on the ceramic. Lower the toilet slowly, aligning the bolt holes over the T-bolts. Once the bolts come through, press straight down with your full body weight. Do not twist.
Check that the toilet does not rock. Use plastic shims to level it if the floor is uneven. Never overtighten the nuts to stop rocking — tighten each nut hand-tight, then snug with one-quarter turn on alternating sides. Trim the bolt stubs to 1/2 inch above the nut with a hacksaw. Snap on the plastic caps.
Press down firmly and hold for five seconds after the toilet touches down — that sustained compression seats the wax. Then rock the toilet by hand. If it moves at all, shim it before tightening anything. A rocking toilet will break the wax seal within months.
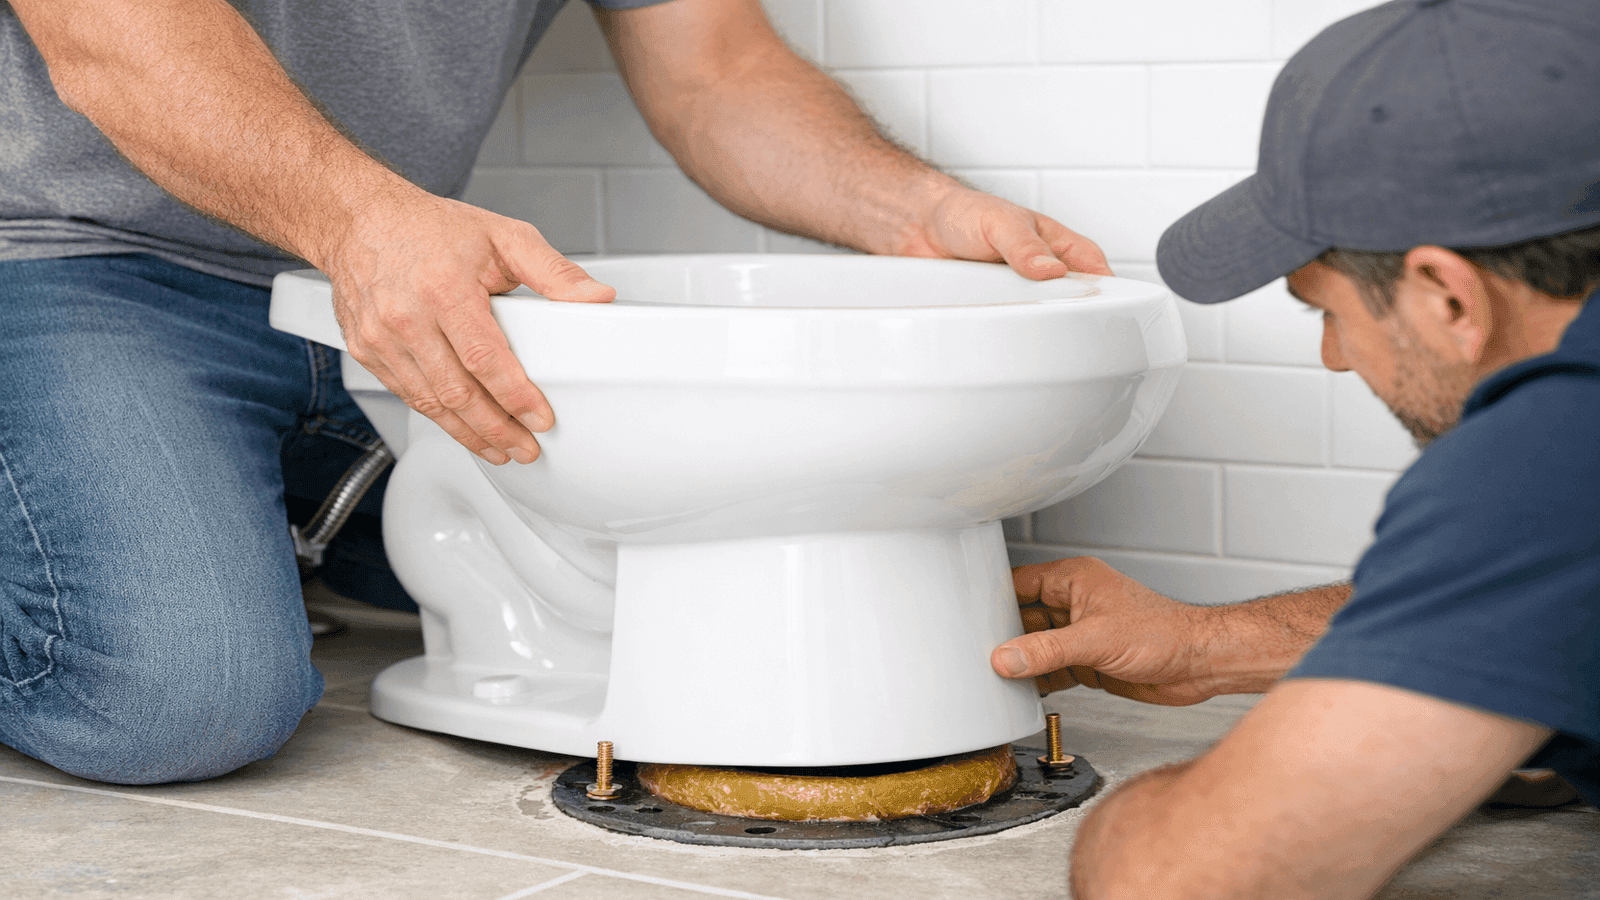
Photo: Homeowner pressing new toilet onto floor flange with wax ring, both hands on bowl rim applying downward pressure, helper visible at side
Step 4: Tank, Supply Line, and Testing
For two-piece toilets, seat the tank gasket on the flush valve, lower the tank onto the bowl, and snug the tank bolts alternating sides. Connect the supply line: hand-tight at both ends, then one-quarter turn with pliers. Do not overtighten the plastic fill valve connection.
Open the supply valve slowly. Let the tank fill completely, then flush three times while watching:
- At the toilet base: Any water during flushing means the wax ring failed — shut off the supply, remove the toilet, replace the wax ring.
- At supply line connections: Drips mean a loose fitting — tighten one-quarter turn.
- Under the tank: Dripping from the tank bottom means the tank gasket needs reseating.
Place a dry paper towel under the toilet base and check it 48 hours later. A wet towel caught on day two prevents a subfloor repair discovered in year two.
Get quotes from top-rated pros.
I teach every customer the paper towel test before I pack up my tools. In my experience, about 70% of wax ring failures produce no visible drip — the water wicks into the subfloor under the toilet base and goes undetected for months. A dry paper towel under the base, checked at 24 and 48 hours, catches every one of those silent failures before they cost you a subfloor repair.
Toilet Installation Costs in 2026
| Scenario | Estimated Cost |
| DIY (toilet and hardware only) | $115–$280 |
| Standard professional swap | $224–$533 |
| With flange repair | $400–$750 |
| With flange replacement | $500–$950 |
| Wall-hung toilet (professional only) | $800–$1,800 |
Labor alone is $150–$450 for a standard replacement. Cost rises with second-floor installation, corroded shut-off valves, or subfloor rot discovered under the old unit. For ongoing care, see our plumbing maintenance guide.
When to Call a Professional
- Damaged or low flange requiring subfloor access
- Wall-hung toilet installation (in-wall carrier frame)
- Macerating (upflush) toilet with electrical connections
- Any change to drain pipe location (requires permit and licensed work in virtually all jurisdictions)
- Corroded shut-off valve that won't fully close
For permit requirements by state, see our plumbing code requirements guide.
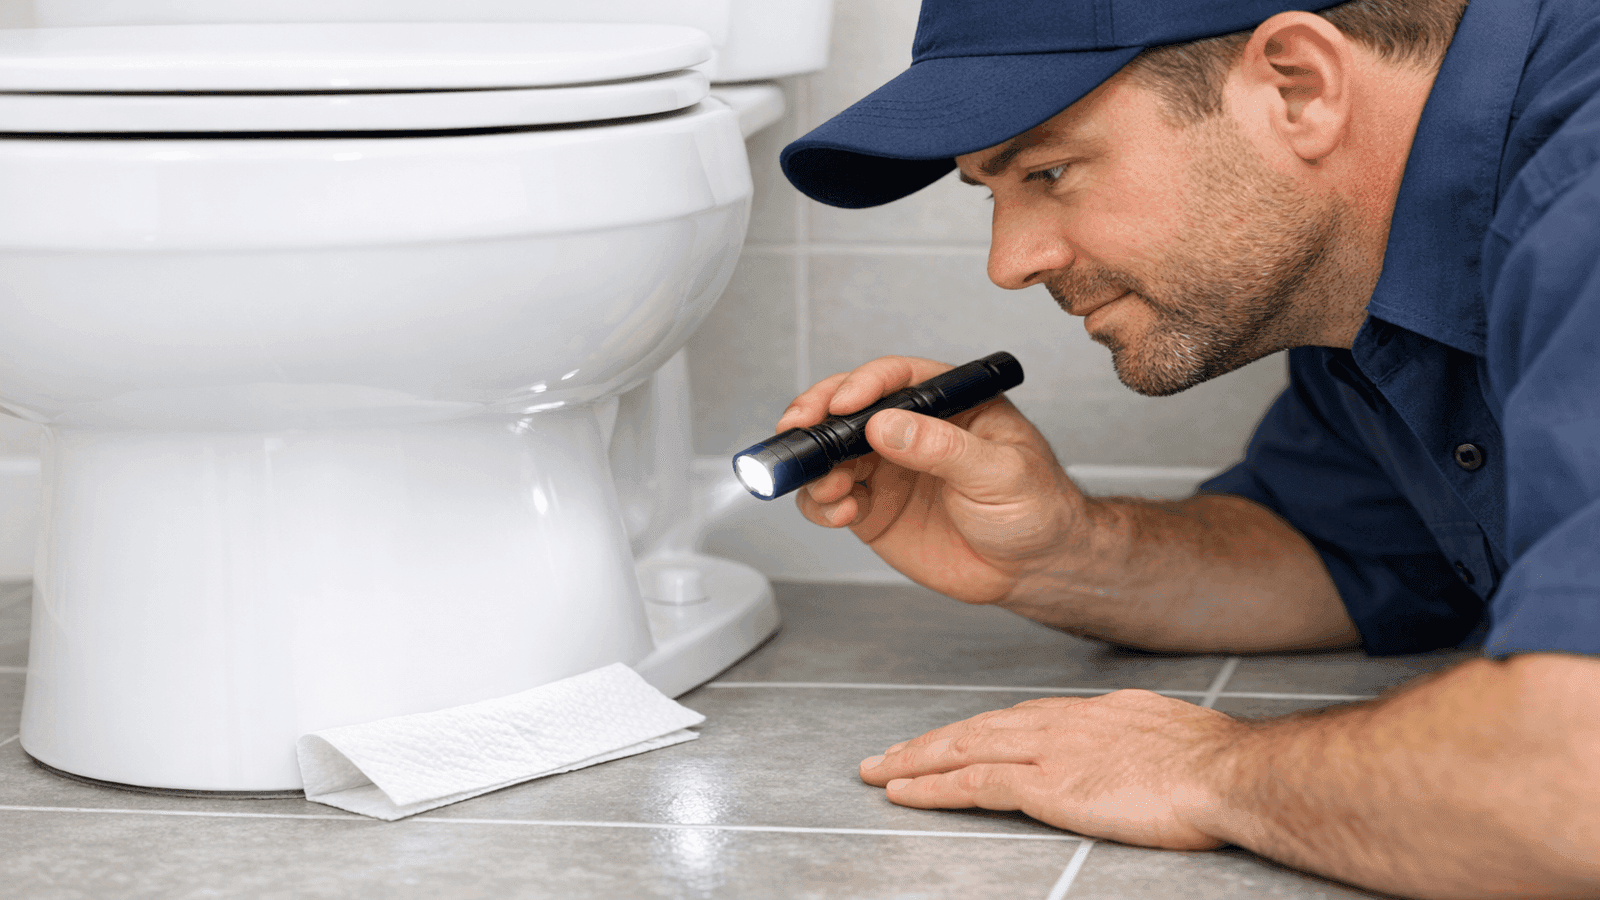
Photo: Licensed plumber testing flush mechanism on a newly installed toilet in a modern bathroom, checking for leaks with a flashlight at the base
Conclusion
Toilet installation follows a clear sequence: measure the rough-in, gather materials, remove the old unit, inspect the flange, set the wax ring, lower the toilet, connect the supply, and test. The most common failures, a rocking toilet, a failed wax seal, or a cracked base, all trace to rushing the placement step or overtightening the nuts. Take time to confirm the toilet is level before tightening anything and the installation will hold for decades.
When the job goes beyond a standard swap, such as flange repair, drain relocation, or a wall-hung unit, a licensed plumber is the right call. The labor cost on a standard professional replacement ($150–$450) is a fair trade against the risk of subfloor water damage from a failed seal.
Disclaimer: Toilet installation costs and code requirements vary by region, municipality, and project scope. Prices cited reflect national averages for 2026 and may differ significantly in your area. Always verify permit requirements with your local building department before beginning any plumbing work. This guide is for informational purposes and does not substitute for the advice of a licensed plumbing professional.
Sources & References
- Forbes Home. "How Much Does Toilet Installation Cost? [2026 Data]." https://www.forbes.com/home-improvement/bathroom/toilet-installation-cost/
- Bob Vila. "How Much Does Toilet Installation Cost? (2026)." https://www.bobvila.com/articles/toilet-installation-cost/
- Fixr. "How Much Does it Cost to Install a Toilet? [2026]." https://www.fixr.com/costs/toilet-installation
- Hammerpedia. "Toilet Rough-In (The 4 Dimensions You Need To Know)." https://www.hammerpedia.com/toilet-rough-in/
- This Old House. "Toilet Rough-In Dimensions: How to Measure for Toilet Installation." https://www.thisoldhouse.com/bathrooms/toilet-rough-in-dimensions
- Roto-Rooter. "How to Install a Toilet: Step-by-Step Guide." https://www.rotorooter.com/blog/toilet/how-to-remove-and-install-a-toilet/
- International Plumbing Code 2024, Section 405 (Water Closet Requirements).
- U.S. EPA WaterSense Program. "Toilets." https://www.epa.gov/watersense/toilets


Michael Jennings is a licensed master plumber & water systems specialist with over 18 years of hands-on experience in residential and commercial plumbing, serving clients across California and Texas. At NearbyHunt, he shares practical advice on pipe installations, water heater maintenance, and home plumbing upgrades. Michael has helped thousands of homeowners prevent costly water damage and improve water efficiency through modern plumbing solutions.

Robert is a licensed master plumber with over 20 years of experience serving both residential and commercial clients across the Midwest. Specialising in advanced plumbing systems and sustainable water technologies, Rob brings deep technical insight and hands-on expertise to every project. As a reviewer for NearbyHunt, he ensures all plumbing content reflects the highest standards of safety, compliance, and practicality.