- Most roofing repairs cost $150-$400 professionally but under $50 in DIY materials for minor fixes like replacing a few shingles
- 20,000 ladder injuries happen annually during gutter cleaning alone [1]: safety gear is not optional
- DIY labor savings range from $1,400 to $10,800 on full shingle replacement, but mistakes often exceed that in repair costs
- Inspect your roof twice a year (spring and fall) plus after every major storm; most problems caught early cost under $500 to fix
- 65% of roof leaks originate at flashing points (valleys, vents, chimneys) [2]; knowing where to look saves hours of investigation
- A roof tarp applied correctly within 24 hours of storm damage can prevent thousands in secondary water damage
Your roof takes more abuse than any other part of your home. Wind, hail, UV exposure, ice, and the constant expansion and contraction of temperature cycles test every shingle, every nail, and every flashing joint year after year. The good news: most routine roofing maintenance and a solid range of repairs are well within reach for a careful, safety-conscious homeowner.
This guide covers the full scope of DIY roofing work: finding and fixing leaks, replacing shingles, cleaning gutters, installing vents, removing moss, measuring roof area, tarping after storm damage, and knowing when a job is beyond DIY scope. Over 1,800-plus residential roofing projects across the U.S. South and Midwest, James Carver has seen every common roofing failure mode, and this guide reflects what he teaches homeowners who want to protect their homes without overpaying for simple repairs.
The licensed roofing contractors in our NearbyHunt network report that the majority of calls they receive for "roof emergencies" turn out to be minor issues a prepared homeowner could have addressed within hours of spotting the first signs. Knowing how to assess, respond, and repair is what separates a $75 material fix from an $800 service call.

Get quotes from top-rated pros.

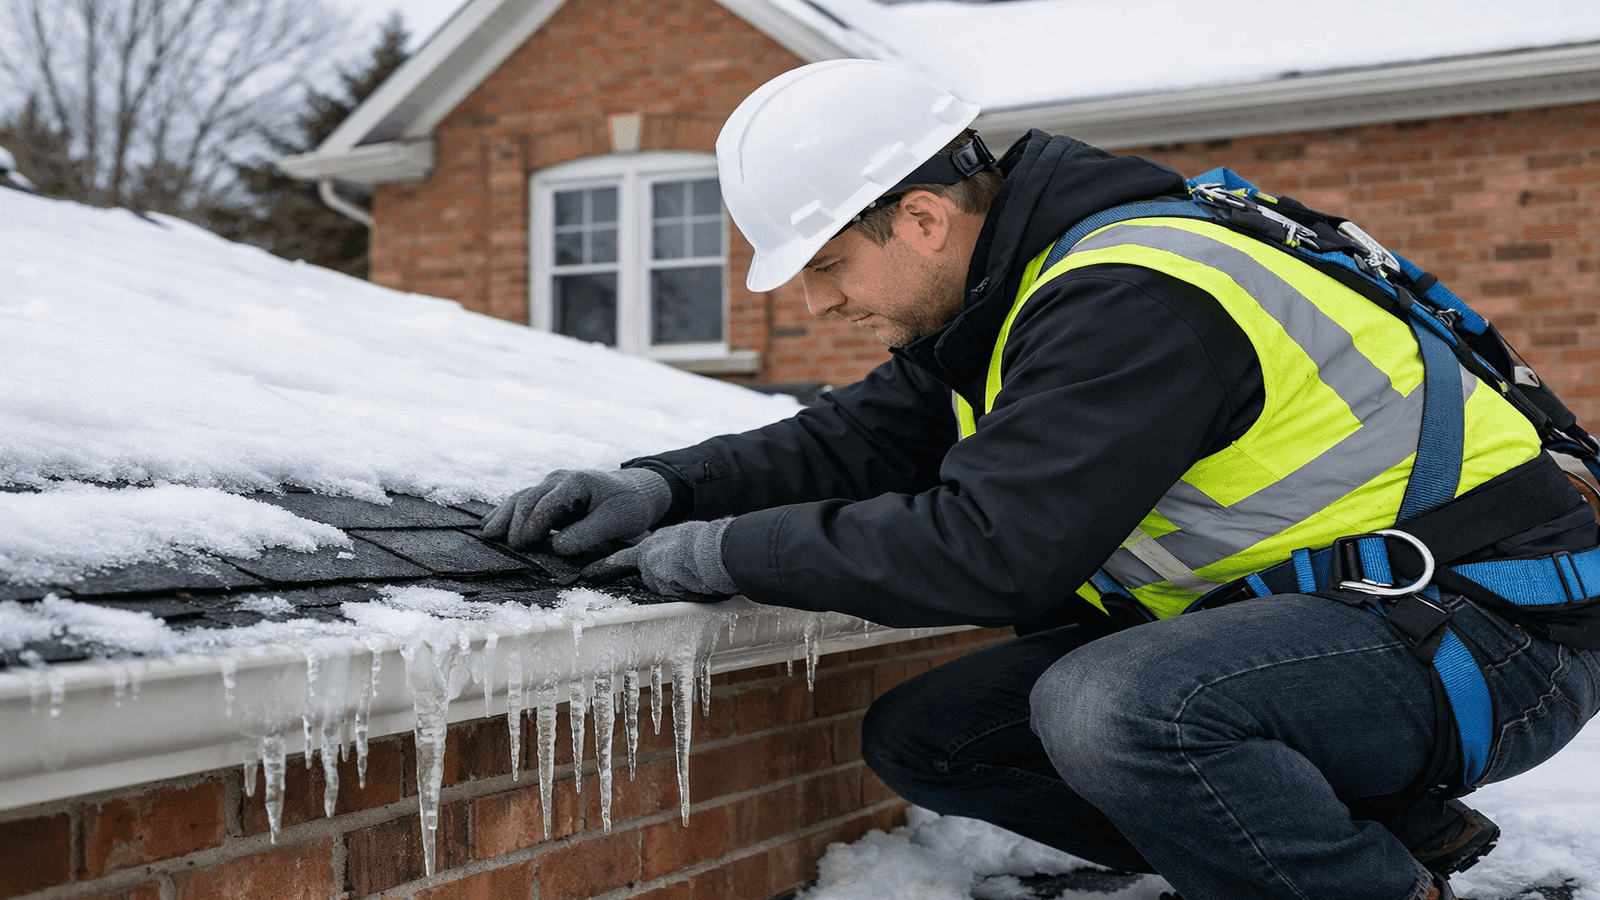
Photo: Homeowner wearing a safety harness and rubber-soled boots inspecting asphalt shingles on a residential roof with a ladder stabilizer visible at the eave
Safety First: What Every DIYer Must Know Before Climbing
Falls are the leading cause of fatal injuries in residential construction and maintenance. According to the National Safety Council, 500,000 ladder-related injuries send Americans to the emergency room each year [1], with an estimated 20,000 of those occurring during gutter cleaning alone. The roof is not a casual workspace; it demands the same preparation as any job site.
Required Safety Gear
Before you set foot on a roof, assemble this gear:
- Safety harness and rope grab: OSHA-compliant harness with a fall arrest lanyard anchored to a roof anchor rated for 5,000 lbs minimum
- Non-slip rubber-soled boots: Work boots with textured soles designed for roofing, not sneakers or smooth-soled work boots
- Safety glasses: Protect against granule debris, nails, and dust during shingle removal
- Hard hat: Mandatory if anyone is working at ground level below you
- Work gloves: Cut-resistant gloves for handling sheet metal flashing and shingles
Pitch Limits for Safe DIY Work
Roof pitch is expressed as rise over run (inches of vertical rise per 12 inches of horizontal run). The safe DIY limit is a 6:12 pitch or less for most homeowners without professional roofing experience. Above 6:12, the slope is steep enough that a single misstep becomes a serious fall even with a harness.
At 4:12 pitch or below, most homeowners with proper footwear and basic balance can move around comfortably. At 5:12 to 6:12, take it slowly and always use an anchor point. Above 8:12, leave it to a professional.
Weather Conditions: When to Stay Down
Never work on a roof in these conditions:
- Rain or wet shingles (wet asphalt is extremely slippery)
- Ice or frost, even partial shading that left ice in one corner
- Wind above 15-20 mph
- Temperatures below 40 degrees F (roofing cement and adhesives don't bond properly in the cold)
- During or immediately after an electrical storm
The most dangerous mistake I see DIYers make is climbing in shoes that aren't made for roofing. A smooth-soled work boot or sneaker on a 5:12 pitch wet shingle is as slippery as ice. I require everyone on my crew to wear proper roofing boots, and I'd require the same of any homeowner before they step off a ladder onto their roof. A $60 pair of rubber-soled roofing boots and a $50 harness rental have saved more people from serious injury than any other precaution.
Tools You Need for DIY Roofing
Having the right tools before you start saves time, improves results, and reduces the chance of making a small problem larger. Roofing doesn't require an enormous arsenal, but the tools you do need must be the right ones.
Essential Tool List
| Tool | Purpose | Approximate Cost | Buy or Rent |
| Pry bar (flat bar) | Removing shingles and nails | $15-$25 | Buy |
| Roofing hammer | Driving nails, adjusting shingles | $25-$50 | Buy |
| Utility knife with hook blade | Cutting shingles cleanly | $15-$30 | Buy |
| Chalk line | Aligning new shingle rows | $10-$20 | Buy |
| Caulk gun | Applying roofing cement and sealant | $10-$25 | Buy |
| Garden hose with nozzle | Locating leaks, cleaning | $15-$40 | Buy |
| Ladder (extension, min. 24 ft) | Roof access | $150-$350 | Rent or buy |
| Roofing nail gun | Faster shingle installation | $200-$400 | Rent |
| Stiff-bristle brush | Cleaning surfaces before patching | $10-$20 | Buy |
| Safety harness kit | Fall protection | $50-$150 | Rent or buy |
Roofing Materials: Understanding the Differences
Three materials create confusion for DIYers, and using the wrong one leads to failed repairs:
Roofing cement (also called plastic cement or flashing cement): A thick, trowel-grade compound designed for bedding flashing, filling gaps around penetrations, and emergency patching. It is not paintable and hardens to a semi-rigid state. Use it anywhere you need gap-filling capacity with adhesion to both shingles and metal.
Roofing sealant (brush- or caulk-tube grade): A thinner, more flexible compound applied with a caulk gun for sealing seams, edges, and small gaps. It remains more flexible than cement after curing, making it better for areas subject to thermal movement.
Flashing tape (butyl rubber or self-adhering membrane): A peel-and-stick product used for sealing around penetrations, valleys, and edges. High-quality butyl tape from a roofing supplier is far more durable than cheaper versions at hardware stores.
How to Find a Roof Leak
Finding the actual source of a roof leak is frequently harder than fixing it. Water enters at one point and travels along rafters, sheathing, or insulation before appearing on your ceiling, sometimes 10 or more feet from where it entered.
Start Inside: Attic Inspection
Begin every leak investigation in the attic with a flashlight. Look for:
- Darkened or stained wood: Water leaves brown mineral staining on rafters and sheathing. The stain pattern narrows toward the source as you trace it uphill.
- Rust stains: Nails that have been wet will show rust streaking on the sheathing below them.
- Damp or compressed insulation: Wet insulation compresses and may show mold growth in chronic leak areas.
- Mold growth: Black or green mold on wood framing indicates chronic moisture presence, not just a single event.
The Hose Method
If the attic investigation doesn't pinpoint the exact entry point, use a garden hose on a dry day with a second person inside the attic watching:
- Start at the lowest point of the suspected area and work upward in sections.
- Soak each section thoroughly for 3-5 minutes before moving up.
- Have your observer call out the moment water appears inside.
- The section being soaked when water appears is your entry zone.
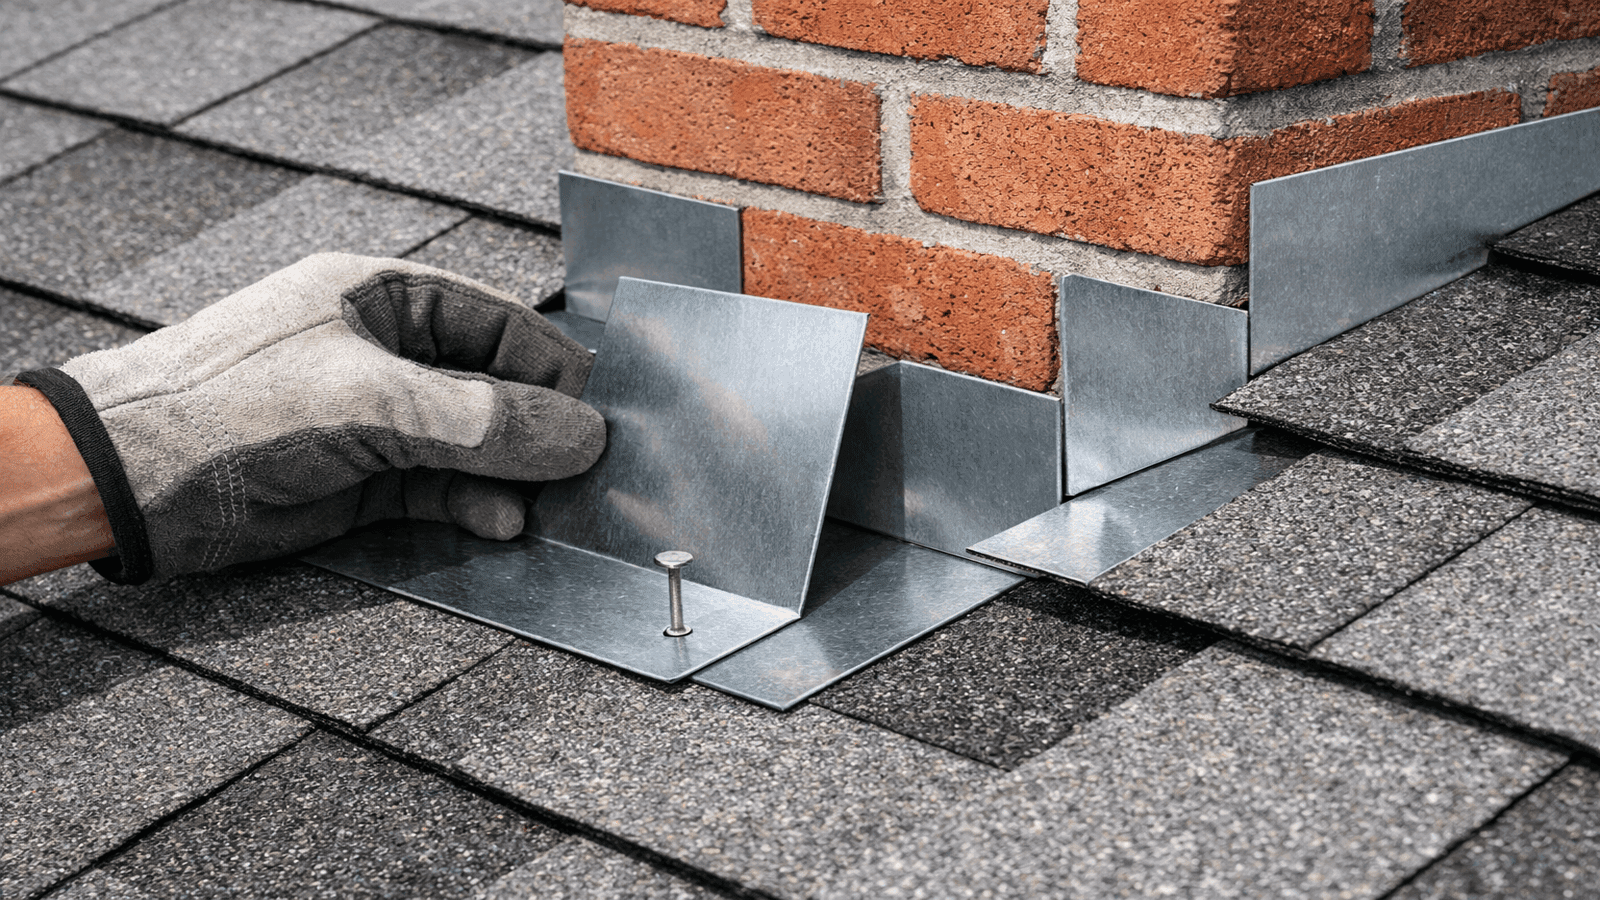
Where Leaks Actually Start
65% of roof leaks originate at flashing points, not in the field of the shingles themselves [2]. The highest-probability leak sources, in order:
- Chimney flashing (step flashing along sides plus counter-flashing over step): mortar cracks, separated counter-flashing
- Pipe boot flashings: the rubber boot around plumbing vents cracks with UV exposure after 10-15 years
- Valley flashings: where two roof slopes meet, water volume concentrates; improper sealing allows wicking
- Ridge cap: lifted or cracked ridge shingles allow wind-driven rain to enter at the peak
- Skylights: both the curb flashing and the apron flashing are common failure points
For a complete step-by-step leak investigation process, read our detailed guide on how to find a roof leak.
When a homeowner tells me their living room ceiling is leaking, I always look 6 to 10 feet uphill from where the water appears on the ceiling. Water doesn't fall straight down through a roof; it runs along the underside of sheathing until it finds a low point. I've had cases where water appeared at the center of a room and the actual entry point was a failed pipe boot 12 feet away at the ridge. Never patch where water appears on the ceiling. Find where it enters the roof deck.

Photo: Living room ceiling water stain on the left with an attic view showing darkened rafters and rust-stained nails above the damage on the right
How to Fix a Roof Leak
Once you've located the entry point, the repair approach depends on what's failing. Most leak repairs fall into one of three categories: flashing repair, pipe boot replacement, or shingle-level sealing.
Flashing Repair
Step flashing at a dormer or chimney typically fails at two points: the caulked joint between the flashing and the siding above it, or the joint where counter-flashing overlaps step flashing. The repair approach:
- Clean the joint thoroughly with a wire brush and dry completely.
- Apply roofing sealant in a continuous bead along the full length of the joint.
- Tool the sealant flat with a gloved finger to ensure full contact.
- For counter-flashing that has lifted or separated: press it firmly into place, apply sealant behind it, then add a bead along the top edge.
For heavily corroded or severely bent flashing, sealant is a temporary fix. Replace the flashing when you can do the job properly in dry, warm conditions.
Pipe Boot Replacement
Rubber pipe boot flashings crack and shrink with age. Replacing one takes about 30 minutes:
- Remove shingles around the boot (2-3 rows above and beside it).
- Cut the old boot free and remove it.
- Slide the new boot over the pipe and position it flat against the roof deck.
- Nail the upper portion of the boot flange to the roof deck.
- Apply roofing cement under the flange edges and replace the shingles over the lower portion of the boot.
For complete repair instructions including flashing cement application and shingle re-securing, see our full guide on how to fix a roof leak.
Get quotes from top-rated pros.
How to Patch a Roof (Emergency Repairs)
A roof patch is appropriate when you have a discrete damaged area, damage to a limited number of shingles, or an opening that needs sealing quickly before a full repair can be scheduled. Patching is not a substitute for replacing damaged sections; it's a bridge repair.
When to Patch vs. Replace a Section
Patch when:
- The damaged area is smaller than 2 square feet
- The underlying roof deck (sheathing) is intact
- You're bridging to a scheduled full repair within 30-60 days
Replace the section when:
- The deck is soft, rotted, or has visible holes
- The damaged area covers more than one section of shingles
- The patch area has leaked repeatedly
Emergency Patching Materials
- Roofing cement (plastic roof cement, trowel grade)
- Sheet metal flashing patch (cut from galvanized sheet or aluminum flashing roll)
- Roofing nails and a few matching shingles if available
- Rubber mallet and flat bar for shingle lifting
6-Step Emergency Patch Process
- Clear the area: Remove debris, broken shingle pieces, and any standing water from the damaged zone.
- Lift surrounding shingles: Use the flat bar to lift the shingles immediately above and beside the damage without cracking them.
- Examine the deck: If the deck is intact, continue. If rotted, this is a larger repair job requiring professional assessment.
- Apply roofing cement: Spread a generous layer of roofing cement over the damaged area and 3-4 inches onto intact shingles on all sides.
- Set the patch: Press a pre-cut metal flashing patch firmly into the wet cement, or insert matching shingle pieces to cover the gap.
- Seal edges: Apply roofing cement around all edges of the patch and under all lifted shingles before pressing them back down.
For the full detailed patching process including how to handle specific damage types, see our complete guide on how to patch a roof.

Photo: Gloved hand applying roofing cement over a damaged shingle area with a metal flashing patch pressed into the wet compound during a DIY roof repair
How to Clean Gutters Safely
Gutters are the part of the roofing system that homeowners most consistently neglect, often until they fail. A single season of clogged gutters allows water to back up under shingles (ice damming in winter), overflow against the fascia board (causing rot), and divert water toward the foundation. The average fascia board replacement runs $6-$20 per linear foot [3], making twice-yearly gutter cleaning one of the most cost-effective maintenance habits a homeowner can develop.
Frequency and Timing
Clean gutters at minimum twice a year:
- Late spring (after seed pods and flower debris finish falling)
- Late fall (after leaf drop is complete, before first freeze)
If you have overhanging trees, particularly pines that drop needles year-round, quarterly cleaning is worth the time.
Tools for Safe Gutter Cleaning
- Extension ladder with a ladder stabilizer (keeps the ladder away from the gutter itself, preventing gutter damage and improving stability)
- Gutter scoop or wide putty knife
- Garden hose with high-pressure nozzle
- Bucket with an S-hook to hang from the ladder
- Leaf blower with gutter attachment nozzle (optional, for dry debris)
Safe Ladder Positioning for Gutter Work
- Set the ladder at a 75-degree angle (1 foot out for every 4 feet of height)
- Use a ladder stabilizer anchored to the wall, not resting on the gutter
- Never lean sideways or overreach; move the ladder instead
- Keep three points of contact on the ladder at all times when transitioning
The licensed roofing contractors in our NearbyHunt network report that improperly positioned ladders account for the majority of DIY roofing injuries they hear about from homeowners, most of which happen during gutter cleaning, not actual roof work.
For complete safe techniques and downspout flushing procedures, see our full guide on how to clean gutters safely.
Gutter guards are sold as the solution to never cleaning gutters again, and that's simply not accurate for most products. The fine mesh guards that actually work cost $15-$25 per linear foot installed and still need occasional rinsing. The inexpensive foam inserts and basic covers at hardware stores get clogged with small debris, pine needles, and seed pods within one to two seasons. Most homeowners would save money skipping the guards and just cleaning twice a year. The exception is homes with heavy pine overhang where needle accumulation is severe.
How to Replace Roof Shingles
Shingle replacement is one of the most achievable DIY roofing repairs when the conditions are right. The key qualifier is scale: replacing 10 or fewer shingles on a low-slope, accessible section of roof is a manageable weekend job for a careful homeowner.
When Shingle Replacement Is DIY-Appropriate
DIY shingle replacement works when:
- Fewer than 10 shingles are damaged
- The roof pitch is 6:12 or below
- The shingles are standard three-tab or architectural asphalt (not specialty products)
- You can source matching shingles (bring an intact sample to the roofing supplier)
- The roof deck under the damaged shingles is solid
Call a professional when the deck is soft, the damage spans a valley, the pitch is above 6:12, or you cannot source matching shingles.
Materials and Cost Comparison
A bundle of asphalt shingles covers approximately 33 square feet and typically costs $35-$65 at a roofing supplier. Replacing 5-8 damaged shingles costs $50-$150 in materials for a DIYer versus $150-$400 for a professional repair call [4], making this one of the best DIY return-on-investment repairs.
Step-by-Step Overview
- Remove the damaged shingles using a flat bar to loosen the nails and break the adhesive seal from the course above.
- Inspect the exposed roof deck for soft spots, staining, or nail holes that need filling.
- Slide the new shingle into position, aligning with the shingle course on each side.
- Nail the shingle using the manufacturer's nailing pattern (typically 4 nails per shingle, 1 inch from each end, 1 inch above the exposure line).
- Apply roofing cement under the tab of the shingle above to re-seal the adhesive bond broken during removal.
- Check alignment from the ground before packing up.
For the complete nailing pattern details, shingle matching guidance, and step-by-step reference, see our full guide on how to replace roof shingles.

Photo: Side-by-side comparison of a cracked granule-bare damaged shingle on the left and a properly installed replacement shingle with correct nailing pattern on the right
How to Install Roof Vents
Proper attic ventilation is one of the least-understood aspects of residential roofing, but it has a direct impact on both shingle longevity and energy costs. The standard ventilation ratio is 1 square foot of net free ventilation area per 150 square feet of attic space [5], split roughly 50/50 between intake (soffit vents) and exhaust (ridge or box vents).
What Happens When Ventilation Is Poor
An under-ventilated attic creates two separate problems depending on the season:
In summer, trapped heat in an un-vented attic can reach 150 degrees F or higher. This accelerates shingle degradation from below, shortening a typical 25-year shingle lifespan by 5 to 10 years [5]. It also increases cooling costs as the heat radiates into living space.
In winter, warm moist air from living areas rises into a cold attic. Without adequate ventilation, it condenses on the underside of roof sheathing, causing mold, rot, and eventually structural damage. Ice dams form when attic heat melts snow that then refreezes at the cold eaves.
Types of Roof Vents
- Ridge vents: Installed along the entire ridge line, providing continuous exhaust; the most effective modern option
- Box vents (static vents): Individual vents cut into the sheathing near the ridge; less effective per unit but easier to add to an existing roof
- Turbine vents: Wind-powered spinning vents that create slight negative pressure; work well in windy climates
- Powered vents (electric): Thermostat-controlled fans for attics where passive ventilation is insufficient; require electrical connection
Installation Overview
Adding a box vent to an existing roof involves cutting through the sheathing, sliding the vent flange under the shingles above, and sealing with roofing cement. It's a manageable DIY task on a low-slope roof. Ridge vent installation during a re-roof is straightforward; retrofitting a ridge vent to an existing ridge cap is a more involved project that requires removing the ridge cap and cutting the ridge board.
For the complete installation process, vent sizing calculations, and placement guidance, see our detailed guide on how to install roof vents.
DIY Roof Inspection Checklist
A twice-yearly roof inspection takes 45-60 minutes and catches problems while they're still minor. Most issues identified in a routine inspection cost under $200 to address; the same issues left for a year or two often cost $800-$3,000 by the time water damage compounds the original problem.
Get quotes from top-rated pros.
Ground-Level Inspection (Always Start Here)
Using binoculars from the ground, look for:
- Missing or displaced shingles (gaps in the shingle field)
- Shingles that appear to be lifting or buckling
- Areas where granules are absent (shingles look dark or bare)
- Sagging sections that indicate deck problems below
- Moss or algae growth (dark streaks or green patches)
- Damaged or missing flashing at the chimney or any wall intersection
Attic Inspection Checklist
- Water stains or darkened wood on rafters or sheathing
- Rust-stained nails indicating chronic moisture
- Insulation that is compressed, discolored, or moldy
- Daylight visible through the roof deck (should never be visible)
- Adequate soffit vent openings not blocked by insulation
Exterior Inspection: Key Warning Signs
| Warning Sign | Urgency | DIY Fix | Call Pro |
| Missing 1-5 shingles | Moderate | Replace shingles | If steep pitch |
| Cracked pipe boot flashing | High | Replace boot | No |
| Lifted counter-flashing | High | Re-seal with caulk | If extensive |
| Sagging deck section | Urgent | Temporary tarp | Yes (deck repair) |
| Clogged gutters | Moderate | Clean gutters | No |
| Granule accumulation in gutters | Low-moderate | Inspect shingles | If widespread |
| Moss coverage over 25% of roof | Moderate | Moss treatment | For large areas |
For the complete 40-point inspection checklist with photography guidance, see our full guide on the DIY roof inspection checklist.
The thing homeowners consistently miss during inspections is the pipe boot flashings. They're small, they're tucked between shingles, and they look fine from a distance. Up close, the rubber collar around the pipe shows hairline cracks or UV hardening that means it will fail in the next rain. I'd estimate that 30% of the leak calls I get could have been caught six months earlier if the homeowner had looked closely at every pipe penetration. A $25 replacement boot versus a $600 water damage repair: that's the math.
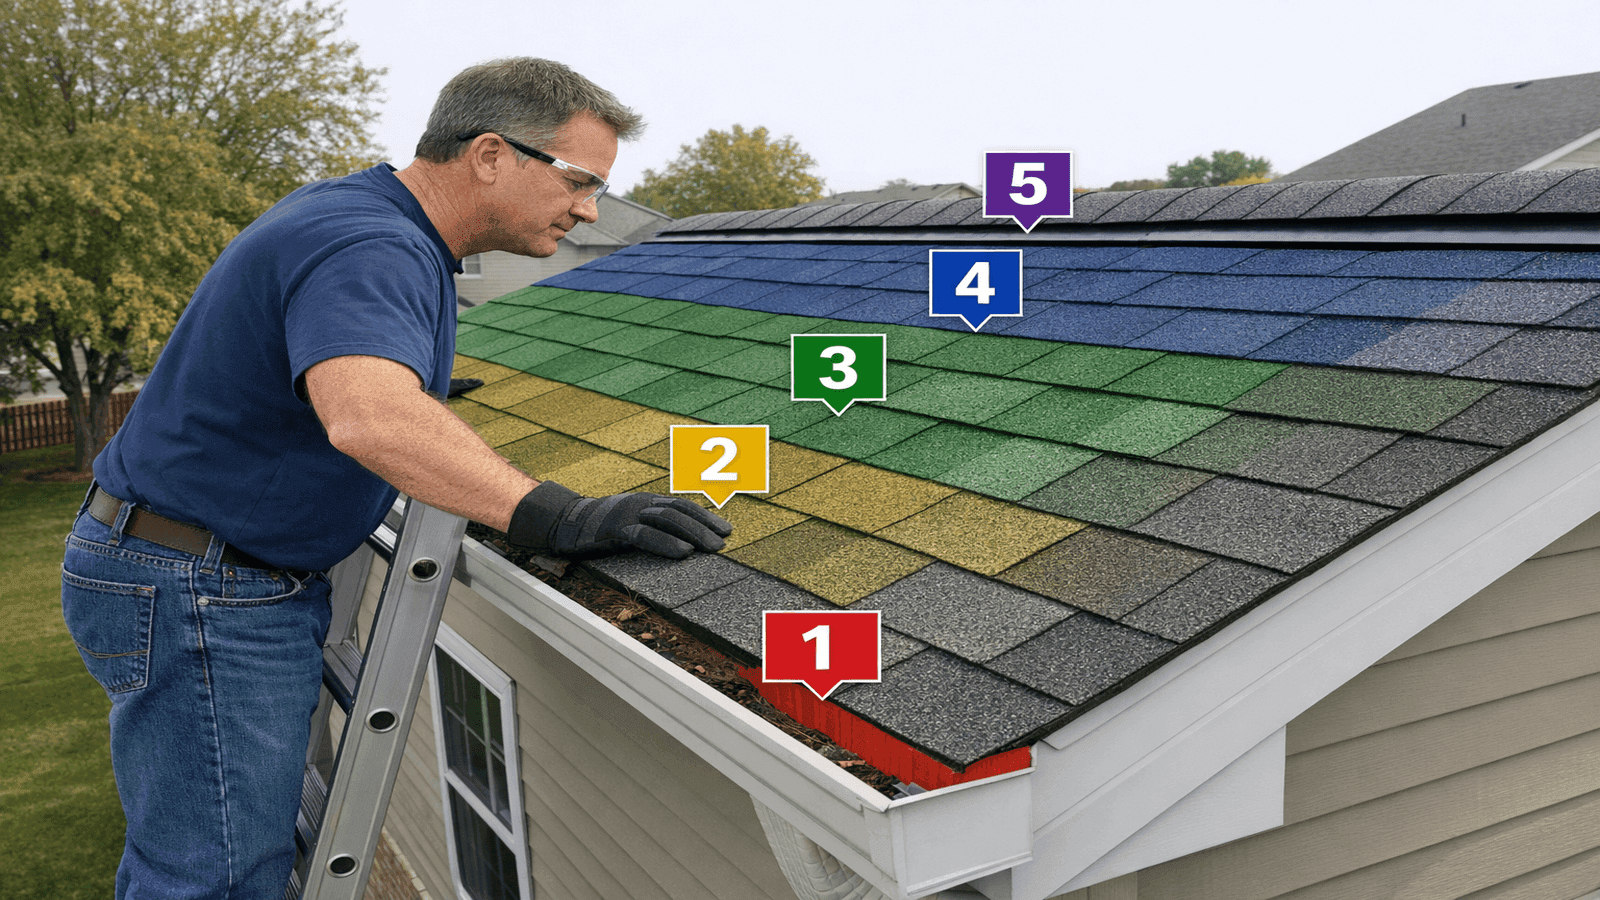
Photo: Homeowner on an extension ladder inspecting the roof eave with numbered inspection zone diagram overlaid showing five checkpoints across the roof surface
How to Tarp a Roof
A roof tarp is emergency weather protection: not a repair, but damage control that buys time for a proper fix. Applied correctly within 24 hours of storm damage, a tarp prevents secondary water damage that can cost far more than the original roof damage itself. Insurance adjusters consistently document that delays in emergency covering significantly increase total claim costs.
When Tarping Is Necessary
- A tree branch or fallen tree has penetrated the roof
- Hail or wind has removed a section of shingles, exposing the deck
- A chimney has partially collapsed and left an open hole
- You have confirmed active interior leaking and cannot get professional help immediately
Proper Tarp Sizing and Selection
Use a polyethylene tarp rated at 6 mil or heavier for any exposure beyond a day or two. A standard blue hardware store tarp (3 mil) degrades quickly and won't withstand sustained wind well.
Size the tarp to extend at least 4 feet beyond the damaged area on all sides and enough to drape over the ridge peak so water flows off, not under.
Anchoring Methods
Method 1 (boards and screws): Cut 2x4 boards to fit across the width of the tarp edge. Fold the tarp edge around the board and screw through both into the roof deck. This is the most secure method and avoids tarp-only anchor points that tear out in wind.
Method 2 (sandbag boards): Lay 2x4 boards along the tarp edges and weight them with sandbags. This works on low slopes but is less secure in high wind.
What not to do: Never use roofing nails driven only through the tarp without a board or backer. The tarp tears through the nail hole in the first moderate wind.
A correctly installed tarp provides up to 90 days of protection before UV degradation weakens the material significantly. For complete installation instructions and how to handle a ridge-crossing tarp, see our full guide on how to tarp a roof.
How to Remove Moss from a Roof
Moss is more than an aesthetic problem. The root-like structures (rhizoids) that moss uses to anchor to shingles physically lift the shingle edges, allowing water and wind to get underneath. Moss also traps moisture against the shingle surface, accelerating granule loss and the degradation of the asphalt layer. A moss-covered roof can lose 5-10 years of service life if growth is left untreated for more than one or two seasons.
Safe Removal Techniques
What works:
- Low-pressure garden hose rinse combined with a stiff-bristle brush: effective for light to moderate growth; scrub from ridge downward (never across the shingle face)
- Zinc sulfate or potassium salts spray (commercial moss killers): apply according to label, rinse after 15-30 minutes; most effective in wet weather
What damages shingles:
- High-pressure power washing: strips granules and forces water under shingles, causing the very damage you're trying to prevent
- Aggressive scrubbing across the shingle face: tears granules loose and abrades the shingle surface
Professional Treatment Costs
Professional moss removal typically runs $300-$1,200 depending on roof size and growth severity [6]. For severe infestations or roofs above 6:12 pitch, professional treatment is worth the cost.
Prevention: Zinc Strips
After removal, install a zinc or copper strip along the ridge line. Rain water that contacts the metal picks up zinc ions that inhibit moss and algae regrowth on the shingles below. A 50-foot zinc strip costs $50-$100 at roofing suppliers, and a full ridge treatment typically runs $100-$300 in materials [6]. The treated zone extends 10-15 feet downslope from the strip.
For the full removal process including chemical application and rinsing procedures, see our guide on how to remove moss from a roof.

Photo: Before-and-after comparison of a moss-covered asphalt shingle roof showing the cleaned surface and zinc prevention strip installed at the ridge on the cleaned half
How to Measure Roof Size
Accurate roof measurements matter for two reasons: ordering the right amount of materials (under-ordering means a second trip; over-ordering wastes money) and evaluating contractor quotes. A quote listing "24 squares" for a house where accurate measurement shows 18 squares is a red flag worth investigating.
The Roofing Square
Roofing materials are sold by the square: 1 roofing square equals 100 square feet. A bundle of asphalt shingles covers approximately 33 square feet, so a full square requires 3 bundles. Always add 10-15% waste factor to your material order for cuts and course starts.
Ground-Level Estimation Method
For a preliminary estimate without going on the roof:
- Measure your home's footprint from the ground (length x width).
- Multiply by your pitch factor from the table below.
- Add 10% for waste.
| Pitch | Pitch Factor |
| 4:12 | 1.054 |
| 5:12 | 1.083 |
| 6:12 | 1.118 |
| 7:12 | 1.158 |
| 8:12 | 1.202 |
A 30x50-foot house (1,500 sq ft footprint) with a 6:12 pitch estimates to 1,500 x 1.118 = 1,677 sq ft, which equals approximately 17 squares.
Get quotes from top-rated pros.
House Type Reference Table
| House Type | Typical Roof Area | Typical Squares Needed |
| Small ranch (1,000 sq ft floor) | 1,200-1,400 sq ft | 13-15 squares |
| Medium two-story (2,000 sq ft) | 1,800-2,200 sq ft | 19-23 squares |
| Large home (3,000 sq ft) | 2,800-3,400 sq ft | 29-35 squares |
| Complex hip roof (add 10-20%) | Varies | Varies |
For the complete measurement walkthrough including hip roofs, dormers, and valleys, see our full guide on how to measure roof size.
DIY vs. Professional Roofing: When to Call an Expert
The roofing industry has a clear dividing line between work homeowners can safely do and work that requires professional skills, equipment, and licensing. Getting this distinction right protects both your safety and your home's value.
Tasks Appropriate for DIY
- Replacing 1-10 damaged shingles on accessible, low-slope sections
- Cleaning gutters and downspouts
- Applying moss treatment and installing zinc strips
- Tarping after storm damage
- Sealing and re-caulking visible flashing joints
- Conducting routine inspections from ground level or the eave line
- Patching small areas with roofing cement
Always Call a Professional For
- Structural damage: Any soft decking, damaged rafters, or sagging ridge board
- Full reroof: Tear-off and replacement of the entire shingle field requires professional-grade equipment, crew coordination, and typically a permit
- Steep roofs above 8:12 pitch: The fall risk without professional rigging is not acceptable
- Valley work: Water concentration points require precision flashing installation
- Skylight installation or replacement: Curb flashing, membrane integration, and watertight seals require experience
- Any work requiring a permit: The permit process typically requires a licensed contractor of record
Decision Matrix
| Task | DIY Safe? | Risk Level | Typical Pro Cost |
| Replace 1-5 shingles (low slope) | Yes | Low | $150-$350 |
| Clean gutters | Yes | Low with proper ladder | $100-$250 |
| Remove moss (low slope) | Yes | Low-medium | $300-$700 |
| Tarp storm damage | Yes (temporary) | Medium | $200-$500 |
| Seal flashing joints | Yes | Low | $150-$300 |
| Replace pipe boot flashing | Yes | Medium | $200-$400 |
| Structural deck repair | No | High | $500-$3,000+ |
| Full shingle reroof | No | Very high | $8,000-$20,000 |
| Steep-pitch repairs (>8:12) | No | Very high | $400-$1,500 |
| Valley flashing replacement | No | High | $300-$800 |
The most expensive DIY mistakes I've fixed involve water intrusion from improperly installed step flashing. A homeowner watches a video, installs new step flashing without weaving it correctly with the shingles, and creates a water channel that drives water directly into the wall cavity. By the time they call me, there's mold in the wall framing, rotted sheathing, and a bill that's 10 times what the original professional repair would have cost. Step flashing and valley flashing are not beginner tasks. Everything else on this list, done carefully, is within reach of a motivated homeowner.

Photo: Two-column infographic comparing DIY-safe roofing tasks on the left with professional-only roofing tasks on the right, with risk level indicators for each item
Roofing Permits and Insurance Considerations
The permit and insurance dimensions of DIY roofing are often ignored until they create serious financial problems. Understanding them before you start is the difference between a smart repair and an expensive mistake.
When Permits Are Required for DIY Roofing
Most jurisdictions require permits for:
- Complete reroof (tear-off and replacement of entire shingle system)
- Structural repairs (deck replacement, rafter repair, ridge board work)
- New penetrations (adding a skylight, adding a new roof vent that requires cutting the deck)
Permits are typically not required for:
- Like-for-like shingle repairs covering a small area
- Gutter cleaning and minor maintenance
- Moss treatment and minor sealant application
Permit costs for residential roofing range from $75-$450 in most markets, with inspection included [7]. The inspection is the real value: a licensed inspector confirming the work meets code before it's covered up.
How Unpermitted Roof Work Affects You
Homeowner's insurance: Unpermitted structural work gives your insurance company grounds to deny claims related to that portion of the roof. If you replaced your roof without a permit and a storm damage claim triggers an investigation, the adjuster who finds no permit record may deny or reduce the claim.
Home resale: Unpermitted work discovered during a buyer's home inspection creates a disclosure obligation and typically requires retroactive permitting, which means uncovering and inspecting the work, often at significantly higher cost than the original permit would have been.
Manufacturer warranty: Most shingle manufacturers require licensed contractor installation for their full warranty coverage. DIY installation of a full shingle system typically limits or voids the shingle warranty [8].
NearbyHunt Network Insight on Permit Compliance
The licensed roofing contractors in our NearbyHunt network report that approximately 40% of homeowners who attempt full DIY reroofs do so without pulling the required permit, and a substantial portion of those later face warranty claim denials or insurance complications. The pattern is consistent: skipping the permit saves $150-$300 upfront and costs $2,000-$15,000 when the consequences arrive.
Real-World Case Study: Sarah M., Austin TX
Sarah M. of Austin, Texas noticed a water stain spreading across her living room ceiling after the second heavy rain of the season. She'd been putting off a roof inspection, and now the evidence was unavoidable.
Before calling a contractor, Sarah went into her attic with a flashlight and followed the investigation process from our how to find a roof leak guide. She found darkened wood at a rafter about 8 feet uphill from where the ceiling stain appeared, tracing it to rust staining around a pipe boot flashing above the master bathroom.
On a dry Saturday morning, she climbed her 6:12 pitch roof with proper rubber-soled boots and a rented harness. She confirmed the pipe boot had cracked badly at the base of the collar. Instead of calling a roofer for what had been quoted as an $800 service call, she bought a replacement boot for $18 at the roofing supply house and followed the step-by-step replacement process.
The repair took 90 minutes, held through the remainder of the rainy season, and saved her $780 compared to the professional quote she had received. James Carver reviewed her approach afterward:
"She did three things right. She investigated before she climbed; she knew exactly what she was fixing before she got on the roof. She used roofing cement under the boot flange rather than just nailing it down. And she had her husband in the attic watching while she worked so someone knew she was up there. That's the right process for a low-complexity repair on an accessible slope."
Her full inspection that spring also identified two additional minor issues that a contractor addressed during a subsequent visit, confirming that the rest of the roof was in solid condition for another 8-10 years. The combination of her DIY repair and the professional inspection cost her under $300 total, a fraction of what an emergency service call for the leak alone would have run.

Photo: Homeowner replacing a pipe boot flashing on a residential roof with proper tools laid out and a safety harness line visible running to an anchor point
Conclusion
DIY roofing is not for every homeowner or every job. But for a motivated, safety-conscious homeowner with the right gear and information, a solid range of roofing maintenance and repair tasks are achievable without calling a contractor.
The critical decisions are simple: assess pitch and access before climbing, match your skill level to the task complexity, use proper safety equipment without exception, and understand the permit and insurance implications before touching structural elements.
For minor repairs (shingle replacement, gutter cleaning, moss treatment, tarping, minor flashing seals), DIY is a smart, cost-effective choice. For anything involving structural components, steep pitches, full reroofs, or valley and skylight work, a licensed roofer is the right call.
Use the cluster guides linked throughout this article for step-by-step detail on each specific task. For jobs that require professional help, Find Licensed Roofers Near You and connect with vetted contractors who can handle everything from a single shingle replacement to a complete reroof.
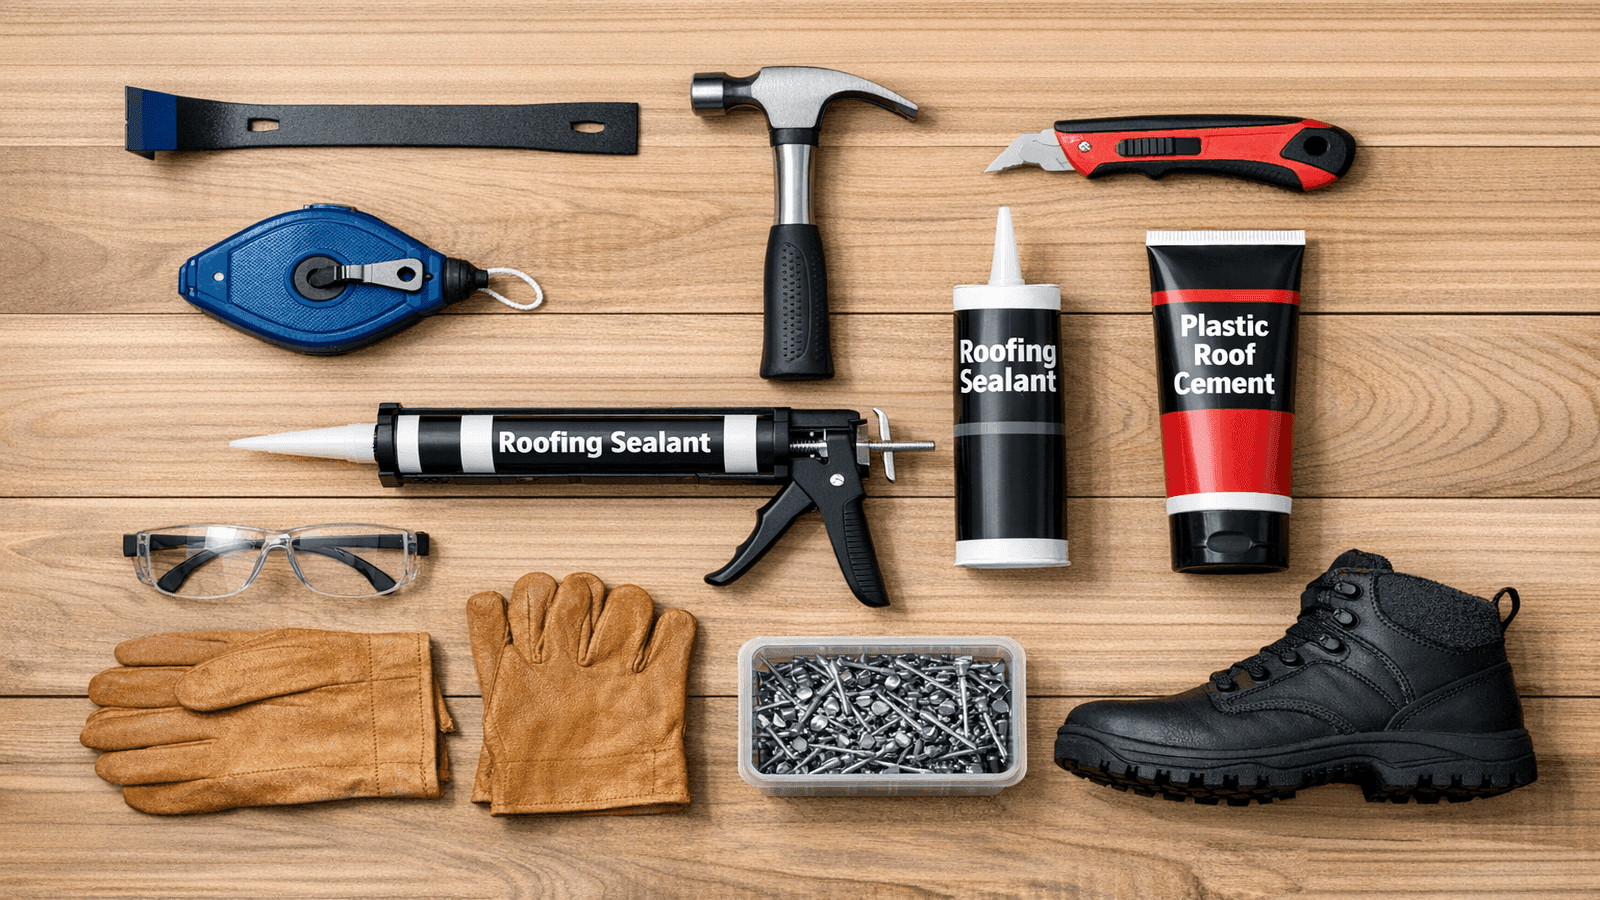
Photo: Overhead flat-lay of a complete DIY roofing toolkit showing a pry bar, roofing hammer, utility knife, chalk line, caulk gun, roofing cement, safety glasses, gloves, and roofing nails
Disclaimer: Cost figures are national averages for 2026 and vary significantly by region, project complexity, and contractor availability. Always obtain 2-3 written quotes from licensed roofing contractors before committing to any roofing project.
Sources & References
- National Safety Council: Ladder Safety Statistics 2026
- NRCA (National Roofing Contractors Association): Common Roof Leak Sources
- Forbes Home: Gutter and Fascia Replacement Cost Guide 2026
- This Old House: Roof Repair Cost Guide 2026
- ENERGY STAR: Attic Ventilation Requirements and Shingle Longevity
- Bob Vila: Roof Moss Removal Cost Guide 2026
- NAHB (National Association of Home Builders): Residential Roofing Permit Data
- Consumer Reports: Roofing Warranties and Contractor Requirements
- This Old House: Complete Roofing and Shingle Installation Guide
- OSHA: Ladder Safety Standards for Residential Construction Work
- Bureau of Labor Statistics: Roofing Contractor Wages and Employment 2026
- Bankrate Home: Roof Replacement Cost Guide 2026


James is a licensed roofing contractor with 20 years of experience in roof installation, inspection, and repair across the U.S. South and Midwest. He specialises in asphalt shingles, metal roofing, and storm damage restoration. On NearbyHunt, James offers practical advice on roof maintenance, insurance claims, and selecting the right materials for long-lasting protection.

Jacob is a licensed roofing contractor with over 18 years of experience in roof inspection, installation, and restoration. Based in Texas, he has led hundreds of successful roofing projects across residential and commercial properties. Jacob is also a certified storm damage specialist, ensuring that all NearbyHunt roofing content meets industry best practices and safety standards.