- Flashing repairs fix 65% of roof leaks and cost $10-$50 in materials; most homeowners can do this themselves on accessible low-slope roofs
- A temporary tarp applied within 24 hours of storm damage prevents secondary water damage that typically costs 5-10x more than the original leak repair
- Never caulk over shingles as a permanent fix: it lasts 1-2 seasons and masks the real structural problem underneath
- DIY roof leak repairs save $150-$500 on service calls for minor fixes; complex structural leaks and steep-pitch roofs always need a licensed roofer
- Pipe boot replacements cost $15 in parts and are the single most overlooked DIY fix: James Carver has completed 1,800-plus residential roofing projects across the U.S. South and Midwest and calls this repair the highest-value, lowest-cost fix available to homeowners
Water is patient. A roof leak that starts as a damp spot on your ceiling after a hard rain can cause structural rot, mold, and insulation damage worth thousands of dollars if left unaddressed for even one season. The critical window is the first 24-48 hours: stopping active water intrusion temporarily, then identifying the true source and making a permanent repair before the next rain event.
This guide covers the full spectrum of residential roof leaks, from emergency tarping through permanent flashing and boot repairs, to the complex situations that require a licensed contractor. For a broader view of roofing repairs and maintenance, see our complete roofing DIY guide. Each section below includes step-by-step instructions, honest DIY vs. professional assessments, and current cost ranges for 2026.

Get quotes from top-rated pros.
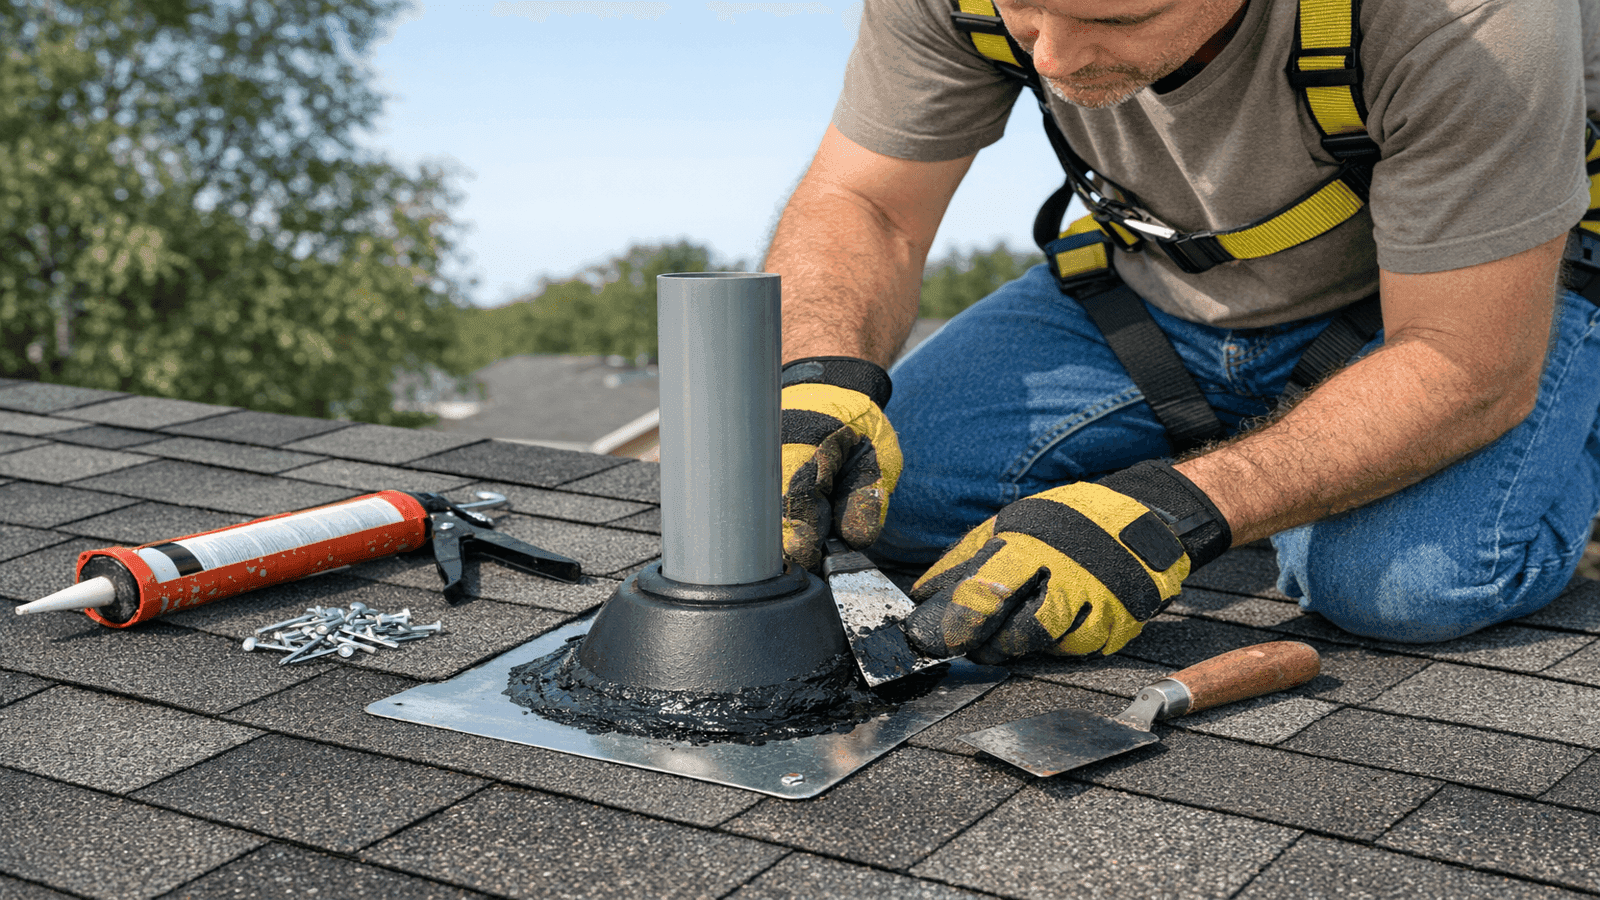
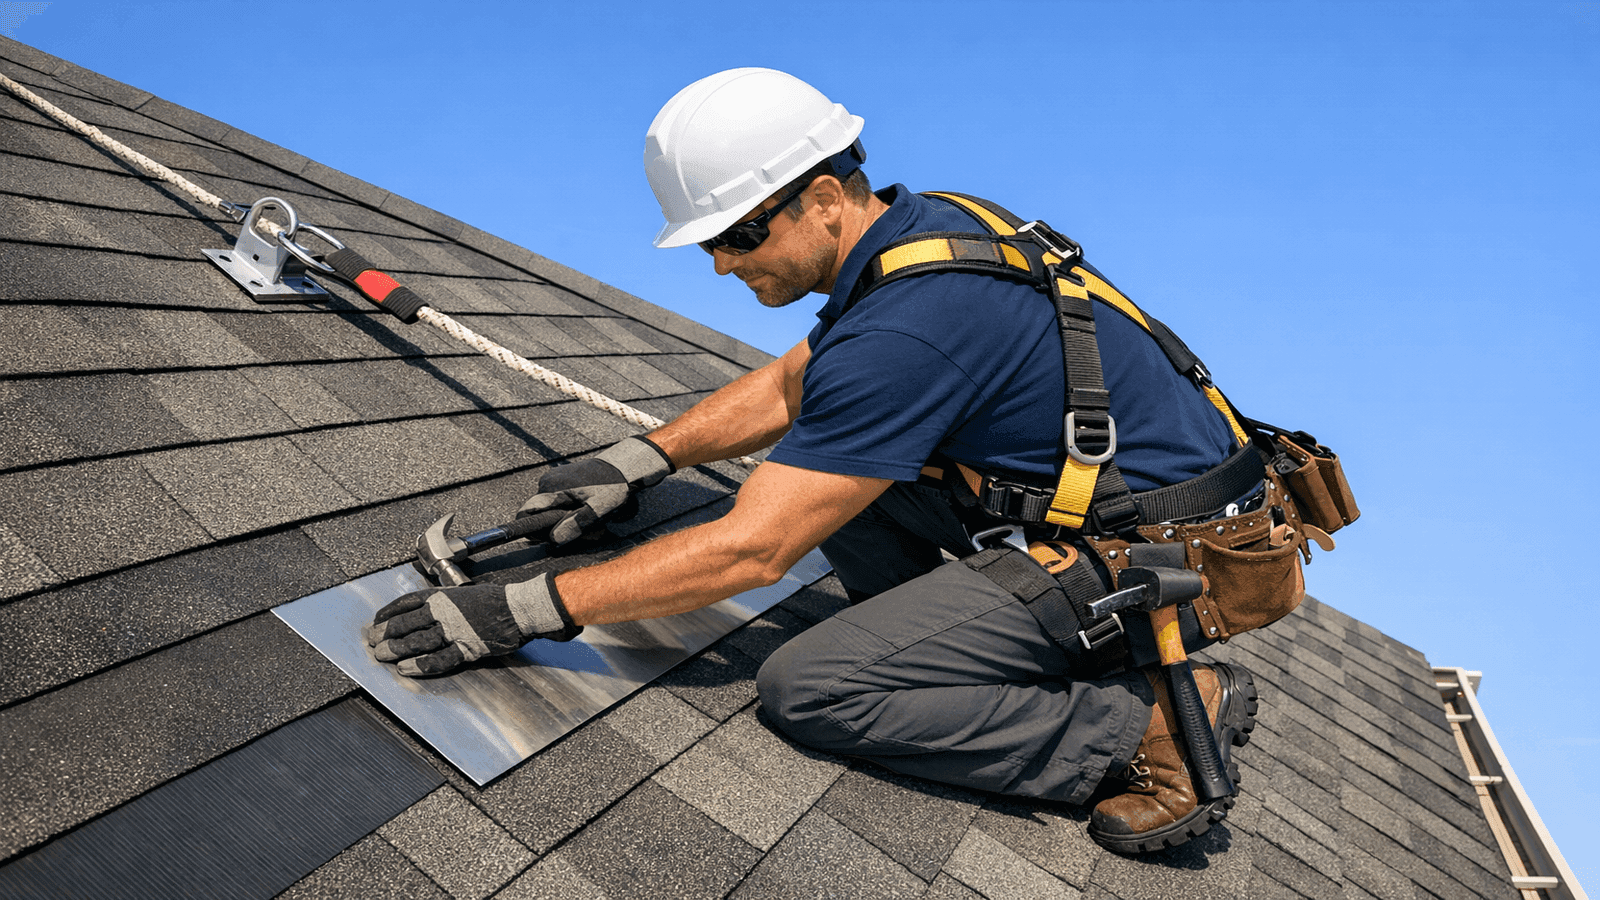
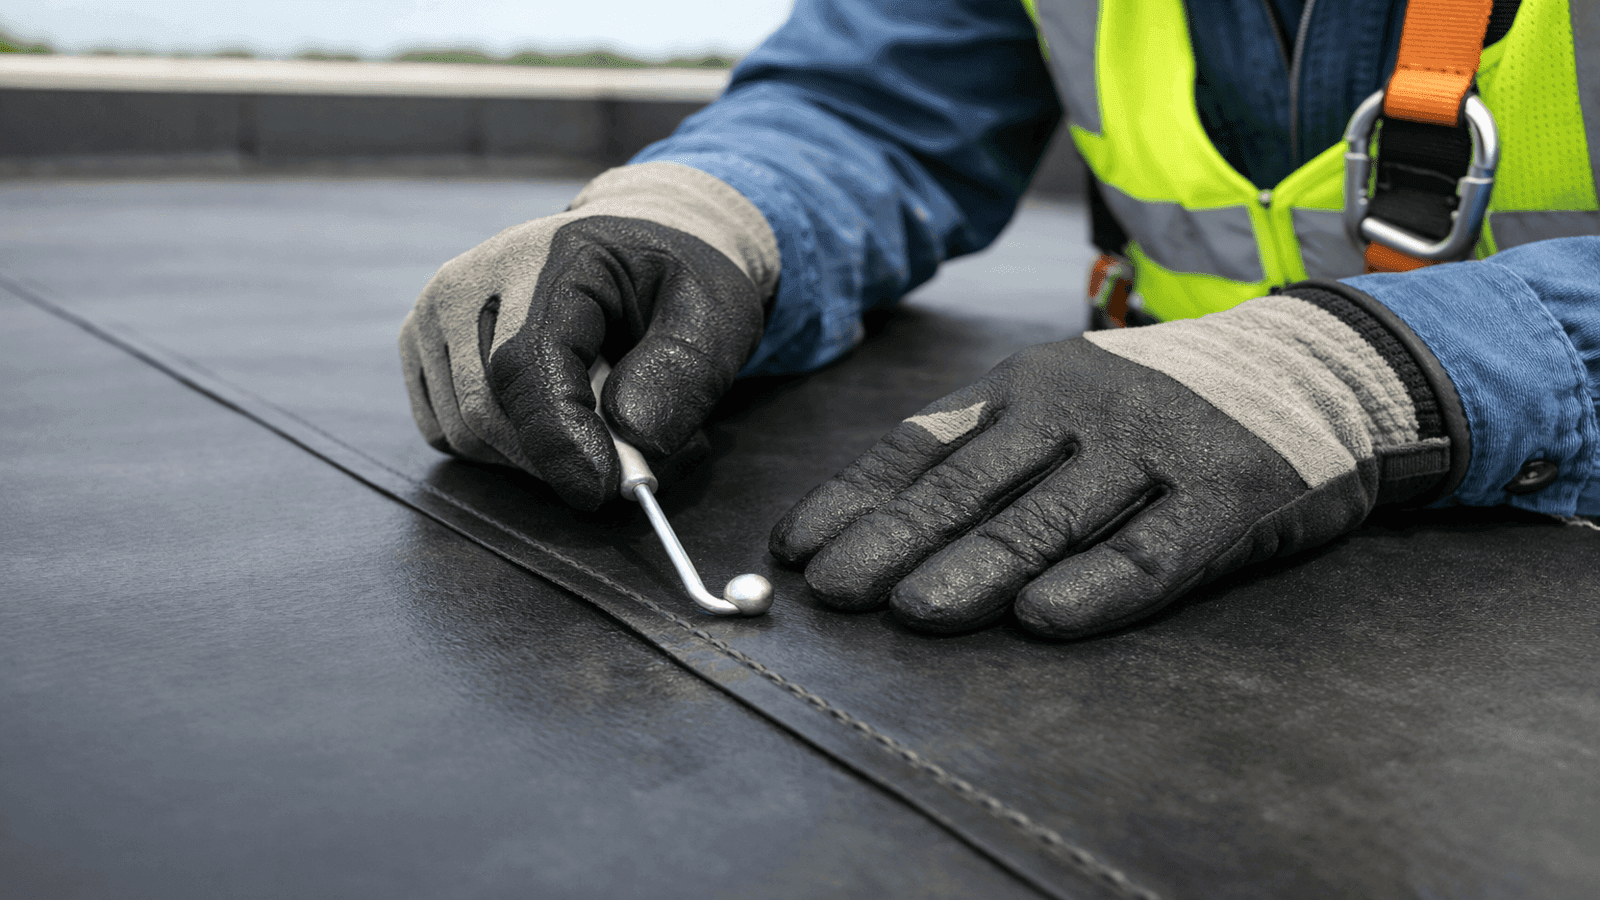
Photo: Homeowner applying roofing cement around a pipe boot on a residential asphalt shingle roof with proper safety equipment and tools
Emergency Temporary Repairs: Stop the Water Now
When a leak is active, your first priority is limiting interior damage while you prepare for a proper repair. The right sequence matters: work inside first, then outside.
Interior steps (do these immediately):
Place buckets or plastic bins under active drip points. Spread plastic sheeting or tarps on the floor below to protect flooring. Move furniture, electronics, and valuables out of the affected area. If water is pooling on a ceiling and the drywall is sagging, use a screwdriver to puncture the lowest point and drain it into a bucket: a controlled drain prevents the entire drywall panel from collapsing.
In the attic, locate the entry point. Water travels: the drip point on your ceiling is almost always several feet downhill from where water actually enters the roof deck. Trace the wet trail uphill along the rafters until you find the actual penetration point, then mark it for exterior work.
Exterior temporary fix: roof tarp method
A properly installed tarp buys you days or weeks until permanent repairs can be made. Use a tarp at least 6 feet wider than the damaged area on each side. Secure the tarp with 2x4 boards sandwiching the tarp edges and nailed or screwed down along the perimeter; do not puncture the undamaged shingle field with nails alone, as this creates new leak points. Wrap the ridge edge of the tarp over the peak and weigh it down, or secure it with strapping.
Roofing cement as a temporary sealant: Products like Henry's 208R Wet Patch or similar rubberized roofing cement can seal small gaps around flashing and around pipe boots as a short-term fix. Apply generously with a putty knife and smooth it out to prevent water pooling. This is not a permanent repair but will hold for 1-2 rain events while you arrange proper materials.
I get calls after every major storm from homeowners asking whether they can wait two weeks for our schedule to open up. The answer depends on what they're dealing with. A loose piece of step flashing with a small gap: apply roofing cement and you're fine to wait. A soft spot on the deck, active water over electrical, or multiple simultaneous entry points: those are call-us-today situations. The triage question is whether the structure is at risk, not just the drywall.
How to Fix a Leaking Pipe Boot
Pipe boots (also called pipe collars or roof jacks) seal the gap where plumbing vent pipes exit through the roof deck. The rubber gasket that forms the seal degrades in 8-15 years depending on UV exposure and climate. Failed pipe boots are the most common single-point residential roof leak source and one of the most cost-effective DIY repairs available.
How to identify a failed boot: Climb to the roof and inspect each pipe penetration. A failed boot shows cracking, splitting, or complete separation of the rubber gasket from the pipe. Hairline cracks are often only visible when you flex the rubber by hand. A split boot has visible gaps that open when wet.
Tools and materials needed:
- Utility knife
- Pry bar or flat bar
- Roofing nails (1.5-inch galvanized)
- Hammer
- Replacement pipe boot (match the pipe diameter: common sizes are 1.5", 2", 3", and 4")
- Roofing cement
- Caulk gun with polyurethane or urethane sealant
Material cost: $10-$25 for the replacement boot.
Step-by-step replacement process:
- Remove surrounding shingles: Starting from the shingle above the boot, carefully lift and remove the 4-6 shingles surrounding the boot. Pry up the roofing nails with your flat bar and set the shingles aside intact if they are in good condition.
- Remove the old boot: Pry up the flanged base of the old boot. It will have 4-6 roofing nails around the perimeter. Pull each nail or cut the old sealant holding it down.
- Inspect the roof deck: Check the decking under and around the boot for soft spots, rot, or water staining. Soft decking must be replaced before installing the new boot (this becomes a professional job if the damaged area exceeds about 4 square feet).
- Install the new boot: Slide the new boot down over the pipe. The rubber collar compresses around the pipe to form a seal. Press the flange flat against the roof deck and nail it with roofing nails every 4-6 inches around the perimeter. Do not nail through the shingle courses that will overlap the boot flange.
- Reinstall surrounding shingles: Slide the upper course of shingles back under any overlapping shingles above, and lay the side courses back in place. Nail per the original pattern.
- Seal nail heads: Apply a small dab of roofing cement over every nail head exposed on the boot flange. Seal the overlap point where the boot flange meets the overlapping upper shingle.
Hairline cracks in a rubber boot and a split boot are two completely different repairs. A hairline crack where the rubber is still intact and pliable can be sealed with urethane caulk and will last another 2-3 years. A split boot where the rubber has hardened and separated from the pipe: replace the whole boot, full stop. I have seen homeowners caulk a split boot three times over five years instead of spending $18 on a replacement. The caulk lasts one winter. The new boot lasts 15 years.
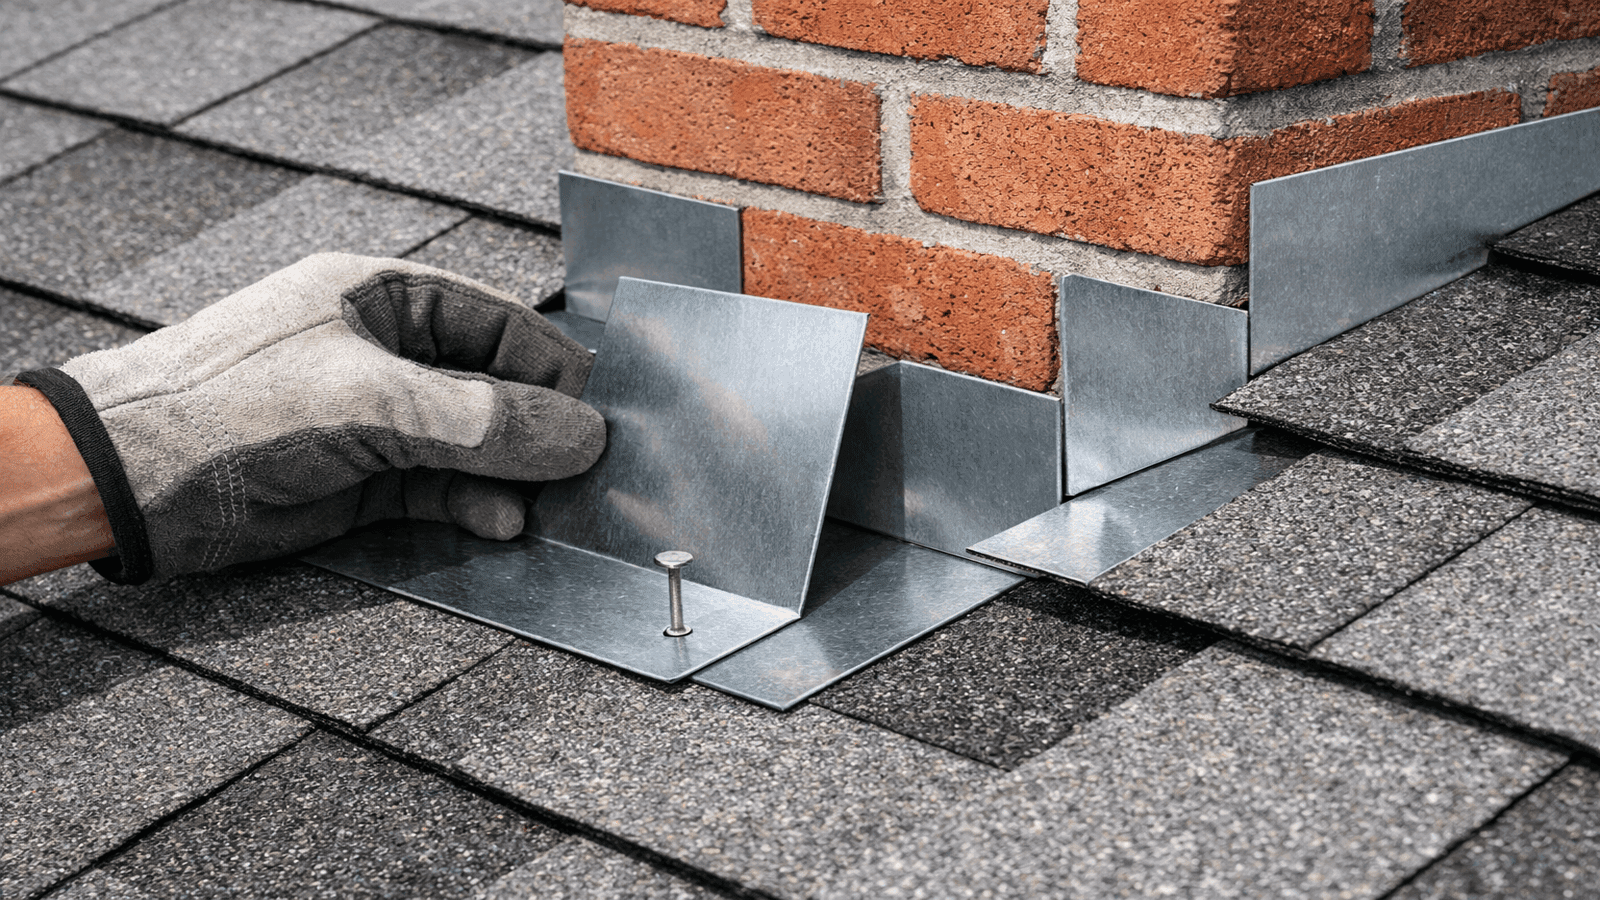
How to Fix Leaking Step Flashing
Step flashing consists of L-shaped metal pieces woven alternately with shingles where a roof plane meets a vertical wall (typically at dormers, additions, and chimneys). Each piece of step flashing covers one shingle course and redirects water away from the wall joint. When step flashing fails, water runs straight down the wall-roof intersection and into the building.
How step flashing fails: Two failure modes dominate. First, building settlement or thermal expansion pulls the flashing away from the wall, creating a gap at the top edge. Second, the original installation was done incorrectly: the flashing was nailed through the top and sealed with caulk rather than being properly counter-flashed, so the caulk eventually fails.
The licensed roofing contractors in our NearbyHunt network report that 30% of the step flashing failures they investigate were caused by improper original installation, not age or weather, meaning the flashing was never properly integrated with the wall covering in the first place.
Identifying the problem: Look for water staining that runs from a wall-roof junction toward the interior. From the exterior, inspect the step flashing by gently lifting shingle tabs. Loose or bent flashing pieces, visible gaps at the wall, or missing sealant at the counter-flashing are clear indicators.
DIY repair for reseating loose flashing:
- Carefully lift the shingle overlapping each loose flashing piece.
- Press the flashing back flat against the wall and deck.
- Apply roofing cement under the flashing and press it down firmly.
- Re-nail the shingle over the flashing per the original pattern.
- Seal the top edge of each flashing piece where it meets the wall with polyurethane sealant (not silicone; silicone does not bond reliably to painted siding or masonry).
When step flashing needs full replacement: If the metal is corroded, bent beyond re-seating, or was never properly installed (nailed through the face rather than the top), full replacement is needed. This involves removing the affected shingle courses and the siding section to access the full flashing run. This is manageable for a competent DIYer on a low-slope accessible roof; it becomes a professional job on steep-pitch roofs or when the adjacent siding is stucco, brick, or fiber cement.
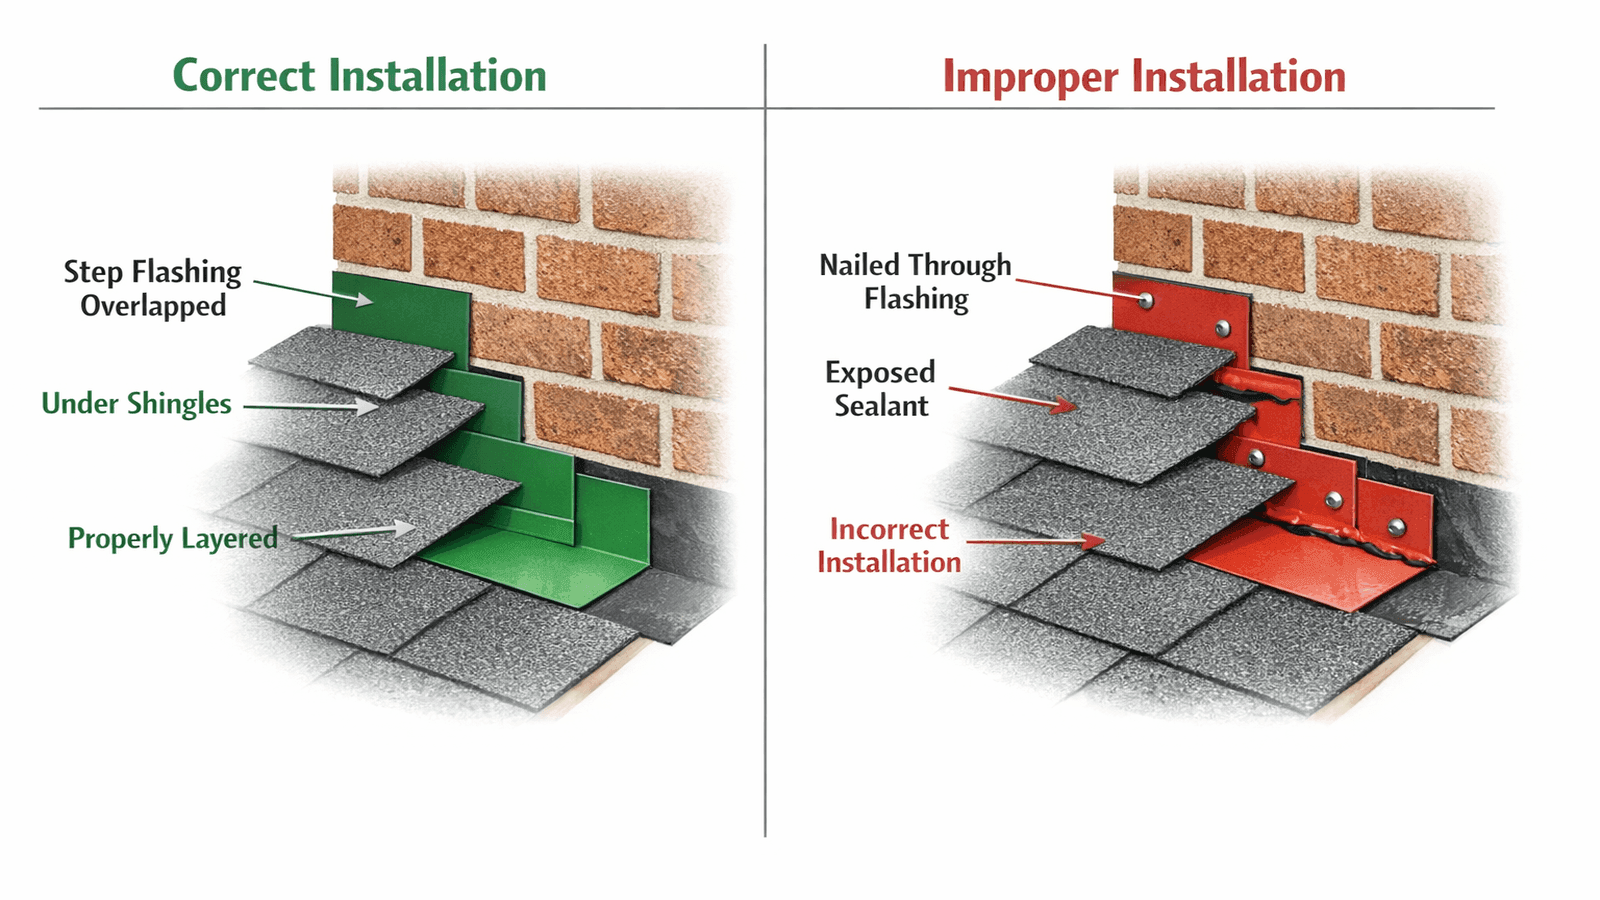
Photo: Diagram comparing correct step flashing installation woven with shingles versus improper face-nailed flashing at a wall-roof junction
How to Fix Chimney Flashing Leaks
Chimney flashing is a two-part system: base flashing lays against the roof deck and wraps up the chimney sides; counter-flashing is embedded in the chimney mortar joints and laps down over the base flashing. Water must never have a path between these two layers.
Common chimney flashing failure modes:
- Mortar joint cracks where counter-flashing is embedded, allowing water to wick behind the flashing
- Counter-flashing pulled out of the mortar by thermal expansion over years
- Base flashing separating from the chimney face as the roofing cement holding it dries out and shrinks
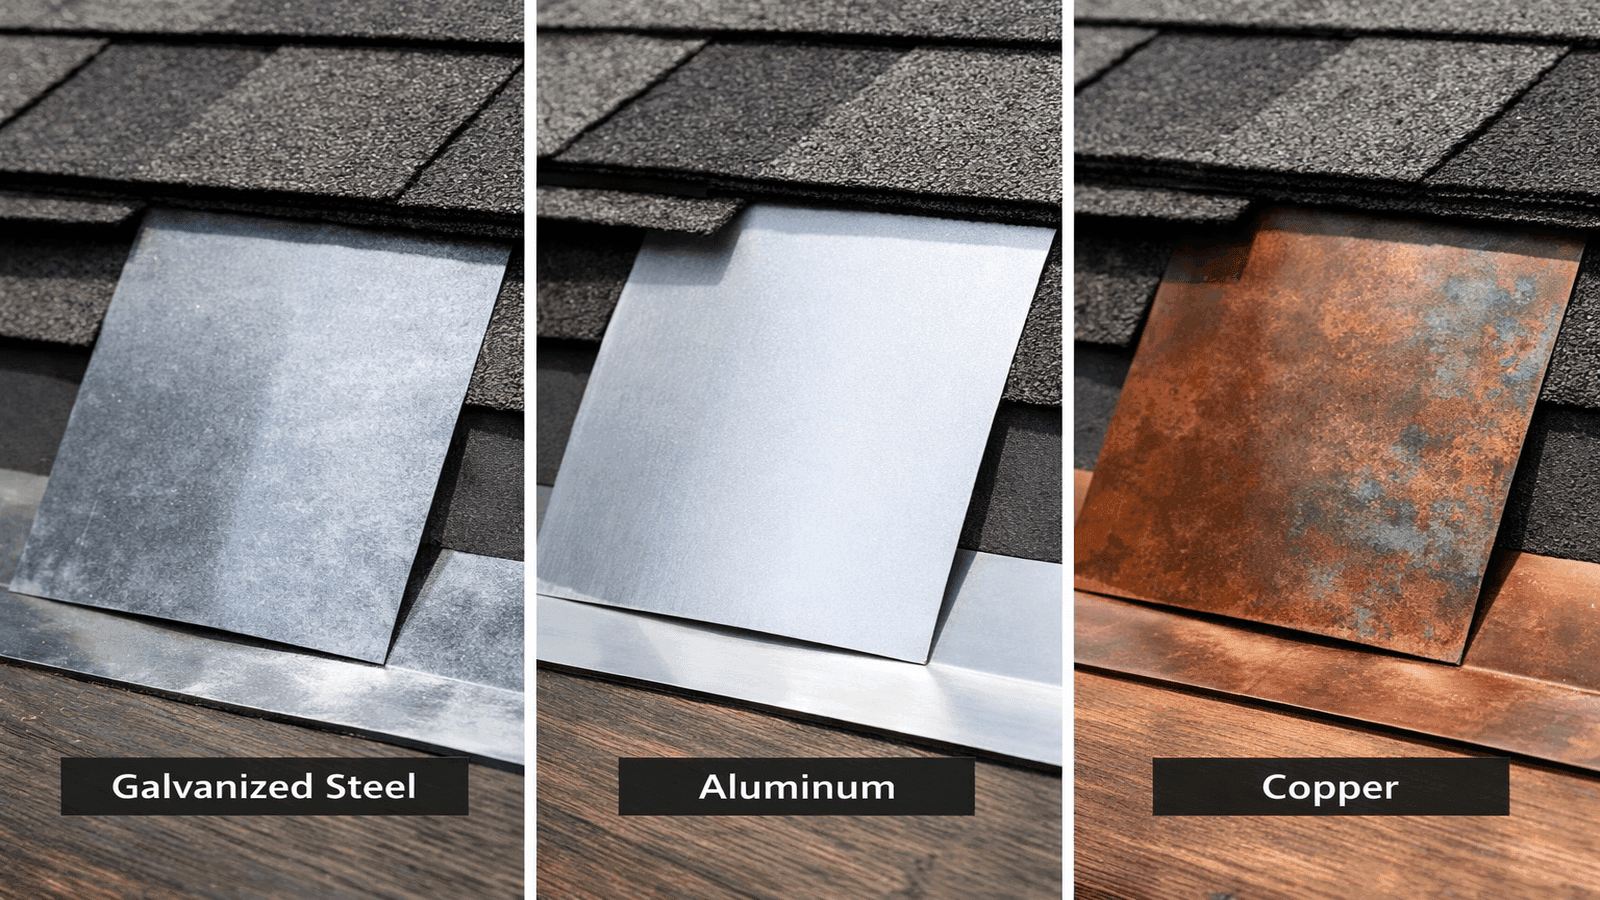
DIY fix for minor gaps (cost: $20-$50): For gaps in the mortar joint where counter-flashing is embedded, use polyurethane or urethane sealant (products like NP1 or Vulkem 116), not silicone. Silicone does not bond reliably to masonry surfaces and will pull away within one freeze-thaw cycle. Clean the joint thoroughly, remove loose mortar, and inject the sealant into the gap. Smooth with a gloved finger and allow to cure fully before rain exposure.
For base flashing that has separated from the chimney face, apply roofing cement under the flashing, press firmly, and seal the top edge with polyurethane sealant. This is a temporary-to-medium-term fix (2-5 years) depending on climate.
Full chimney re-flashing: when to hire a pro (cost: $500-$1,500): If the mortar joints are failing systemically, the counter-flashing has been pulled completely, or the base flashing is corroded or torn, the full flashing system needs replacement. This involves cutting new reglets (channels) into the chimney masonry, installing new base and counter-flashing (typically lead or aluminum), and re-pointing the mortar joints. This is always a professional job because it requires both masonry work and roofing installation skills simultaneously.
Get quotes from top-rated pros.
Every time a homeowner describes a chimney leak and I get up there, the first thing I check is the caulk. Half the time I find someone applied silicone caulk to the masonry (either they did it themselves or a handyman did it). Silicone does not stick to masonry. It bonds to itself and peels off within one winter. The second time I see that joint, the silicone is rolled up like a tube of old paint. Use polyurethane. It costs $15 versus $8, and it actually works.
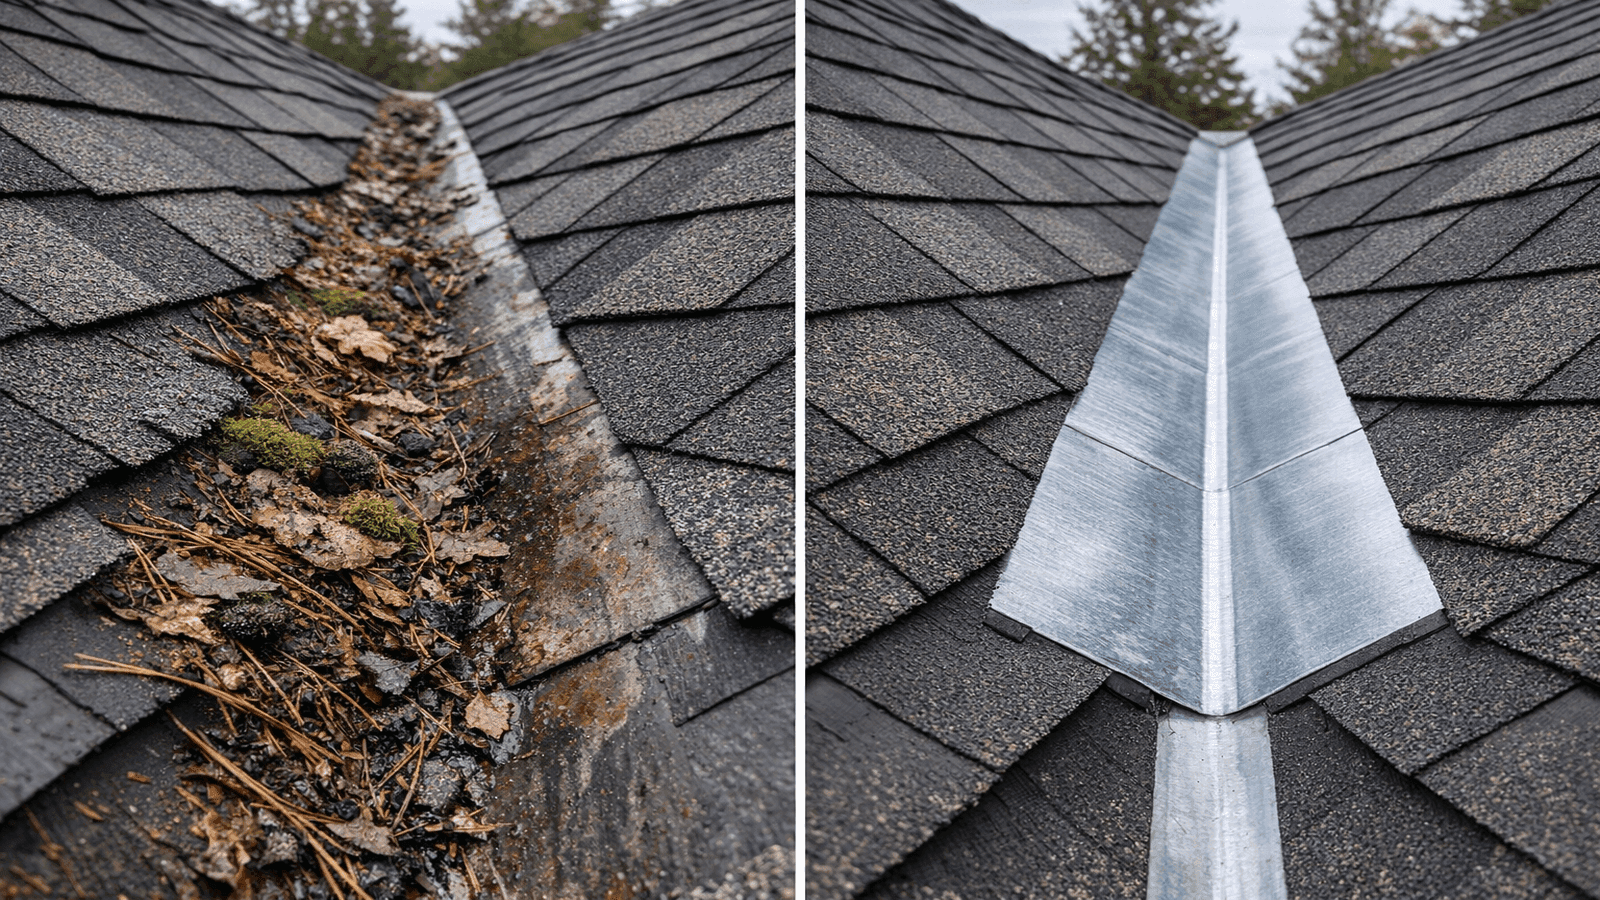
Photo: Side-by-side comparison of a debris-clogged roof valley and a clean properly maintained open metal valley with galvanized flashing
How to Fix Valley Leaks
Roof valleys are the V-shaped channels where two roof planes meet and direct large volumes of water toward gutters. Three valley styles appear in residential construction, each with different failure patterns.
| Valley Type | Common Failure | DIY Fix | Pro Required? |
| Open metal valley | Debris dam, corrosion | Clean debris; patch with bitumen tape | Only if corroded through |
| Closed cut valley | Shingle edge lifting | Re-seat and nail edges; apply cement | If shingles need replacement |
| Woven valley | Improper weave pattern | Usually no DIY fix | Yes: full weave replacement |
Open valley maintenance and repair:
Open valleys use exposed metal (typically galvanized steel or aluminum) running the full valley length. The most common problem is debris accumulation: leaves, moss, and compacted material dam water at the valley floor and force it under surrounding shingles. Clean the valley of all debris twice per year. After cleaning, inspect the metal for surface rust or corrosion. Light surface rust is normal and does not indicate failure; deep pitting or holes require patching.
For small corroded areas (under 12 inches), apply a self-adhering modified bitumen membrane patch (products like Grace Ice and Water Shield or similar). Cut the patch 6 inches larger than the damaged area on all sides, press firmly to the clean metal surface, and press the edges down completely. This repair holds for 5-10 years on a properly cleaned surface.
Full valley replacement requires removing 40-60 linear feet of shingles on both sides of the valley, installing new underlayment and valley metal, and reinstalling shingles. This is always a professional job due to the volume of shingle removal and reinstallation required.
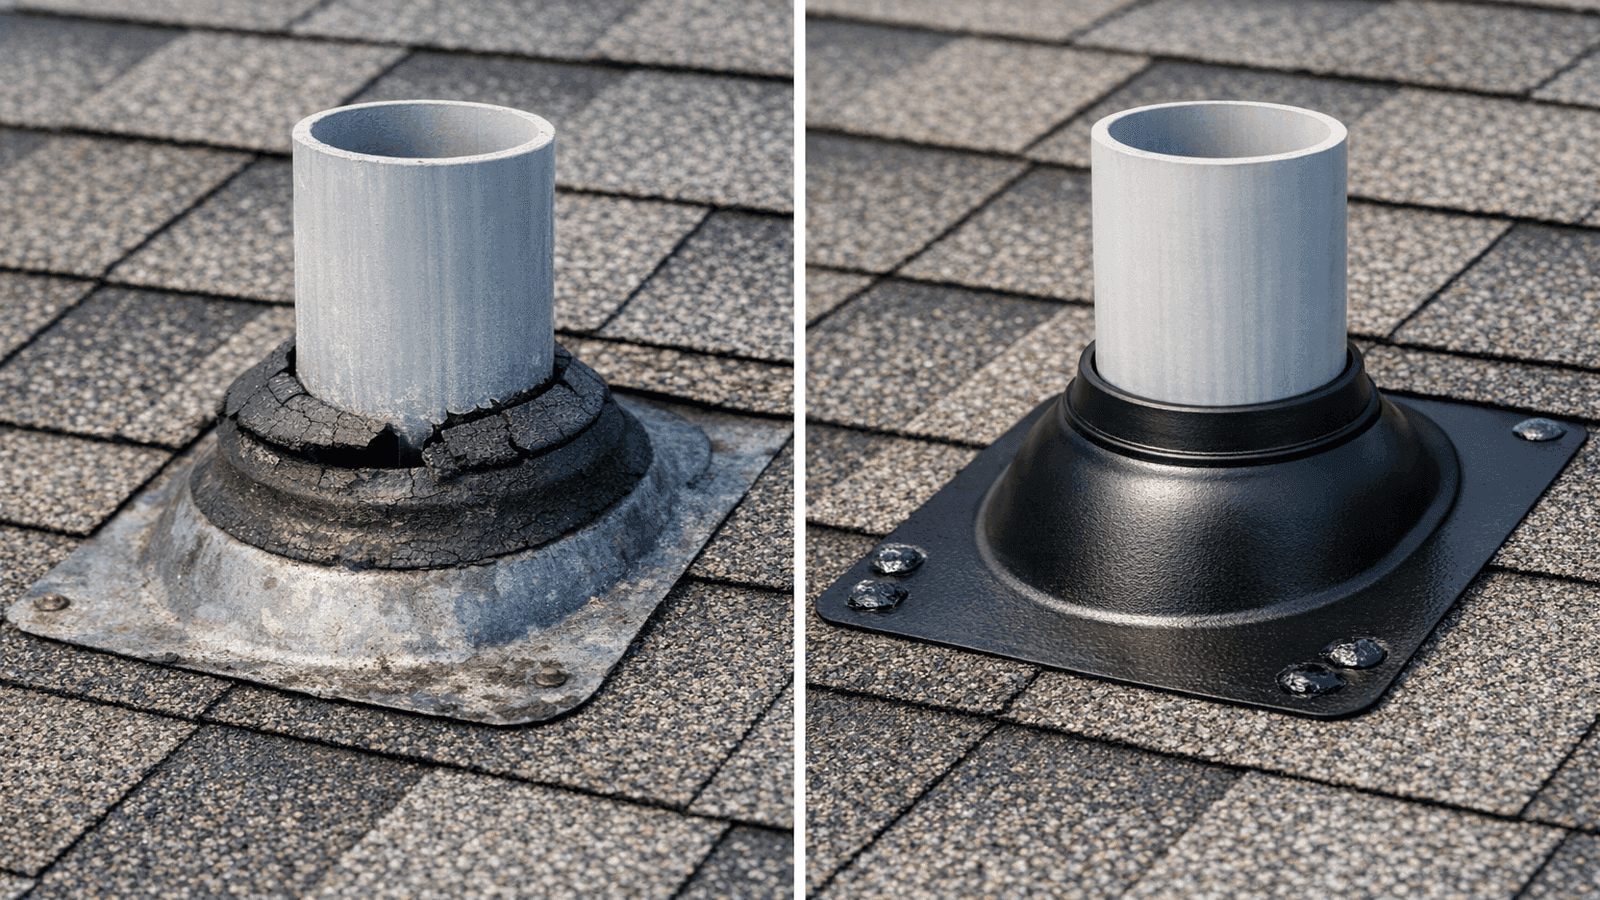
Photo: Before and after comparison of a cracked failed rubber pipe boot versus a new properly installed replacement pipe boot on a residential roof
How to Fix Skylight Leaks
Most skylight leaks are not glass failures. The leak originates at the corner seals or the surrounding flashing, not through the glass or frame itself. Condensation on the inside of the glass is often mistaken for a leak: water appearing on dry days when temperatures drop sharply is condensation, not intrusion.
Identify the actual source: On a dry day, run a hose over the skylight and have a helper watch the interior. Start at the bottom of the skylight and move upward slowly. The point at which water appears inside identifies which section is failing. Corner seals and the junction between the flashing trim and the curb are the most common failure points.
Re-sealing the perimeter (DIY cost: $30-$75):
Remove the old lap sealant around the skylight perimeter with a utility knife and putty knife. Clean the surface with acetone or a silicone remover. Apply new silicone sealant (skylight glass-to-frame joints are an appropriate silicone application, unlike masonry) in a continuous bead with no breaks. Tool smooth with a gloved finger.
Flashing trim re-bedding: Carefully lift the metal trim pieces around the skylight perimeter. These are typically secured with screws under the lap sealant. Clean the bedding surface and apply fresh roofing cement before pressing the trim back down. Replace any corroded screws with stainless steel.
When skylight replacement is needed: A cracked glass unit, failed thermal seal in a double-pane unit (shown by fogging between panes), or a warped or cracked frame all require full unit replacement. Professional skylight replacement runs $800-$2,500 depending on size and unit cost. Re-sealing by a pro runs $200-$400.
Get quotes from top-rated pros.
Real-World Case Study: The 3-Year Mystery Leak
Linda R. of Nashville, TN contacted a roofing contractor after three years of an intermittent leak over her master bedroom. The leak appeared after heavy rain but not after every storm, and no one had been able to identify the source in two previous inspection visits.
The pattern was the clue: the leak appeared only after sustained rain with a southwesterly wind, never after brief storms from other directions. Working from this information, James inspected the HVAC flue pipe boot on the south side of the roof, a location that would only receive heavy wind-driven rain from the southwest.
The boot appeared intact from two feet away. Only when James flexed the rubber by hand did a hairline crack open along the base of the collar: invisible in its normal resting state, but wide enough to admit wind-driven water under pressure. The crack had been there for an estimated two or three years, explaining the intermittent pattern.
The repair: a new $18 replacement boot installed in 45 minutes. Three years of interior water damage had cost Linda approximately $3,200 in drywall repair, repainting, and mold remediation. The pipe boot that caused all of it cost $18 to replace.
The lesson: intermittent or wind-directional leaks almost always originate at pipe boots or step flashing. Always physically flex rubber components during inspection rather than relying on visual inspection alone. James Carver has completed 1,800-plus residential roofing projects across the U.S. South and Midwest and reports that this diagnostic step catches roughly one-third of pipe boot failures that would otherwise be missed on visual-only inspection.

Photo: Close-up of residential chimney flashing showing base flashing on roof deck and counter-flashing embedded in brick mortar joints
When DIY Is Not Enough: Signs You Need a Pro
Certain conditions make DIY roof repair inadvisable or impossible, regardless of skill level. Identifying these situations early prevents injury and avoids incomplete repairs that fail in the next storm.
Structural deck damage: Step on the roof surface and feel for soft or spongy spots underfoot. These indicate rot in the underlying OSB or plywood deck. Soft decking cannot support proper fastener holding strength, meaning any repair installed over it will eventually fail. Deck repair requires cutting out and replacing the damaged panels, which is best left to professionals for areas larger than 4 square feet.
Multiple simultaneous leak sources: If water is entering from two or more independent points, the roof has reached end-of-service-life degradation that individual repairs cannot solve. A full re-roof is more cost-effective than repairing each source separately.
Steep pitch (above 8:12): Roofs with a rise greater than 8 inches per 12 inches of horizontal run are dangerous without professional safety equipment (fall arrest systems, roof brackets, and safety lines). An 8:12 pitch feels significantly more severe than it looks from the ground.
Active interior flooding: Mitigate inside (buckets, plastic sheeting, drywall drain holes) and call a contractor immediately. Do not climb a wet roof.
| Repair Type | DIY Appropriate? | Pro Cost Range |
| Pipe boot replacement | Yes (accessible slopes, up to 6:12) | $150-$350 |
| Step flashing re-seating | Yes (up to 6:12) | $200-$500 |
| Step flashing full replacement | Intermediate (up to 6:12) | $400-$900 |
| Chimney flashing seal | Yes (minor gaps only) | $150-$300 |
| Chimney full re-flashing | No | $500-$1,500 |
| Valley cleaning | Yes | $100-$200 |
| Valley full replacement | No | $600-$1,800 |
| Skylight re-sealing | Yes | $200-$400 |
| Skylight full replacement | No | $800-$2,500 |
| Deck rot repair | No (over 4 sq ft) | $500-$2,000 |
| Full re-roof | No | $6,000-$15,000+ |
Conclusion
Roof leaks follow predictable patterns. The majority originate at the same handful of locations: pipe boots, step flashing, chimney flashing, and valley systems. A systematic inspection starting at each of these points, combined with the ability to physically test rubber and metal components rather than relying on visual inspection alone, will locate most residential leaks within a single visit.
Act on temporary repairs immediately to stop interior damage. Then make permanent repairs using the correct materials: polyurethane sealant on masonry, roofing cement on metal-to-deck joints, replacement boots rather than repeatedly re-caulked cracked ones. Know your limits with pitch and structural damage, and call a licensed contractor when the scope exceeds safe DIY territory.
Regular inspection twice per year (spring and fall) catches developing problems before they become active leaks. Most of the scenarios in this guide cost $10-$75 in materials if caught early, and hundreds to thousands of dollars if discovered only after interior damage has occurred.
Disclaimer: Cost figures are national averages for 2026 and vary significantly by region, project complexity, and contractor availability. Always obtain 2-3 written quotes from licensed roofing contractors before committing to any roofing project.
Sources & References
- [1] This Old House: Roof Sealant Guide — Best Products for Flashing and Leak Repairs
- [2] Bob Vila: Roof Leak Repair Cost Guide 2026
- [3] Family Handyman: How to Fix a Roof Leak Step-by-Step
- [4] U.S. Department of Energy: Roof Systems and Moisture Control
- [5] Insurance Information Institute: Homeowners Insurance and Roof Damage Claims
- [6] National Roofing Contractors Association: Residential Roofing Installation Standards
- [7] Fixr: Roof Leak Repair Cost 2026 — National Average Data
- [8] Consumer Reports: When to Repair vs. Replace Your Roof

James is a licensed roofing contractor with 20 years of experience in roof installation, inspection, and repair across the U.S. South and Midwest. He specialises in asphalt shingles, metal roofing, and storm damage restoration. On NearbyHunt, James offers practical advice on roof maintenance, insurance claims, and selecting the right materials for long-lasting protection.

Jacob is a licensed roofing contractor with over 18 years of experience in roof inspection, installation, and restoration. Based in Texas, he has led hundreds of successful roofing projects across residential and commercial properties. Jacob is also a certified storm damage specialist, ensuring that all NearbyHunt roofing content meets industry best practices and safety standards.