- Approximately 90 percent of roof leaks originate at flashing locations, not through intact shingles [1].
- Galvanized steel flashing lasts 20 to 40 years but requires sealant reapplication every 5 to 7 years to remain watertight [2].
- Copper flashing can last 50-plus years with minimal maintenance and is the best long-term investment where budget allows [2].
- Chimney flashing repairs range from $200 for resealing to $1,800 for full replacement in 2026 [4].
- The NearbyHunt contractor network reports that 68 percent of interior water damage service calls trace back to flashing failure, not shingle damage.
- A preventive reseal every 5 to 7 years costs $20 to $400 and can prevent water damage repairs averaging $2,500 to $5,000 [4].
Roof flashing is the thin metal barrier installed at every joint, seam, and penetration on your roof, and it is far more important than most homeowners realise. Industry data shows that approximately 90 per cent of all residential roof leaks originate at flashing locations, not through intact shingles [1]. Yet flashing receives almost no attention in routine homeowner maintenance schedules. If you have already read the roofing maintenance guide on NearbyHunt, you know that proactive care extends roof life by years. Flashing maintenance is where that philosophy pays off most directly.
In this guide, James Carver, a licensed roofing contractor with more than 1,800 roofing projects across the U.S. South and Midwest, walks you through every aspect of roof flashing maintenance: what it is, where it fails, how to inspect it yourself, and when to call a professional.

Get quotes from top-rated pros.
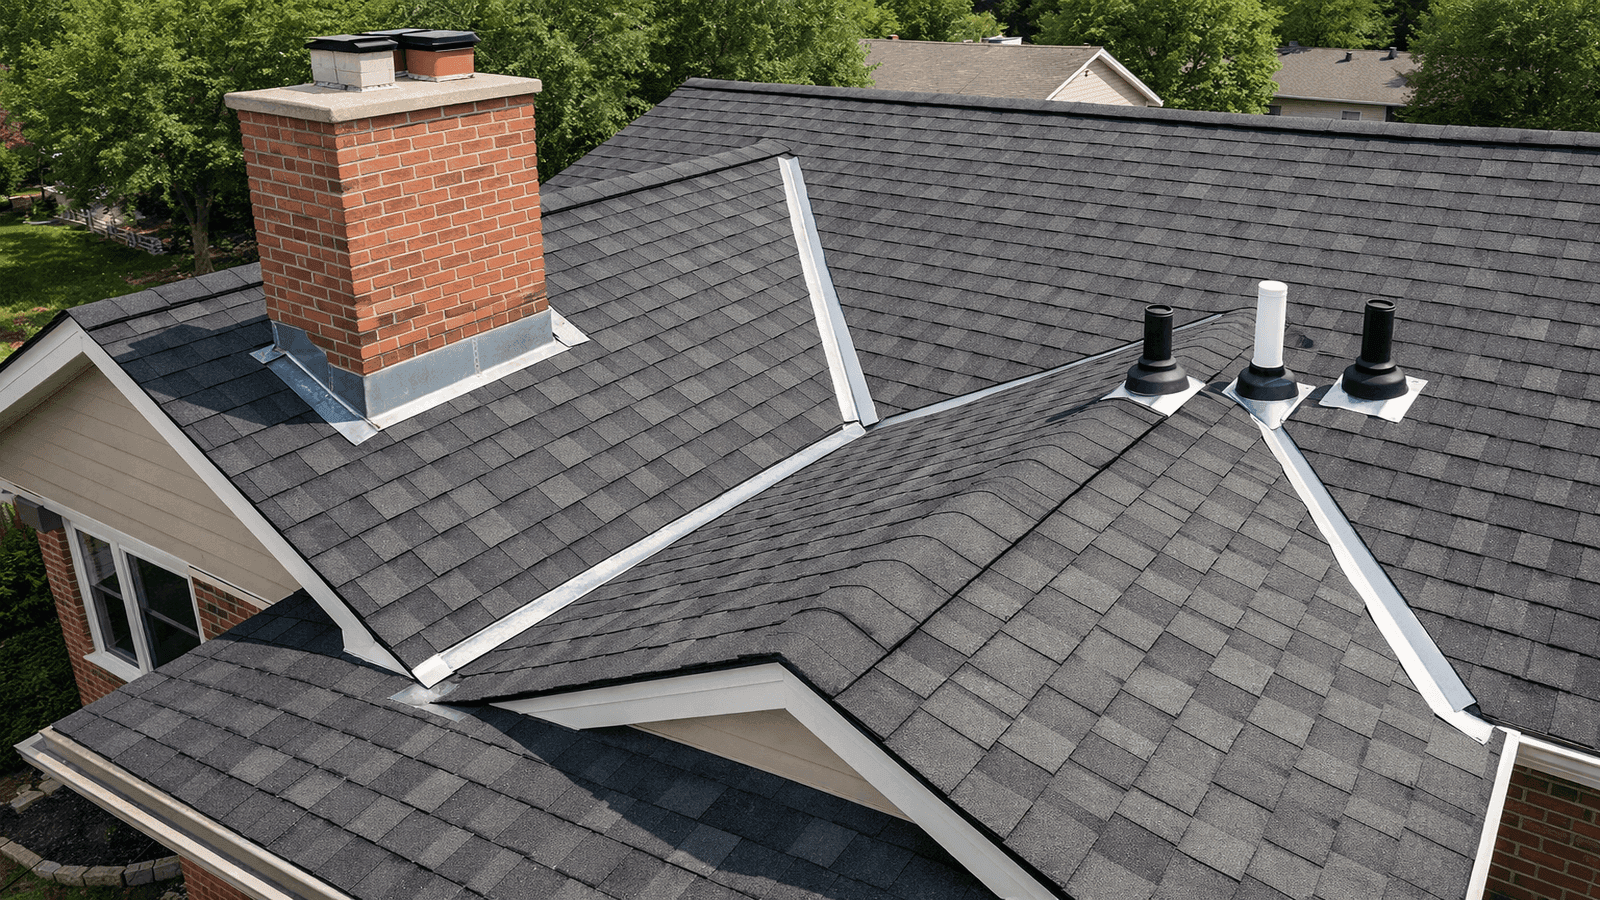
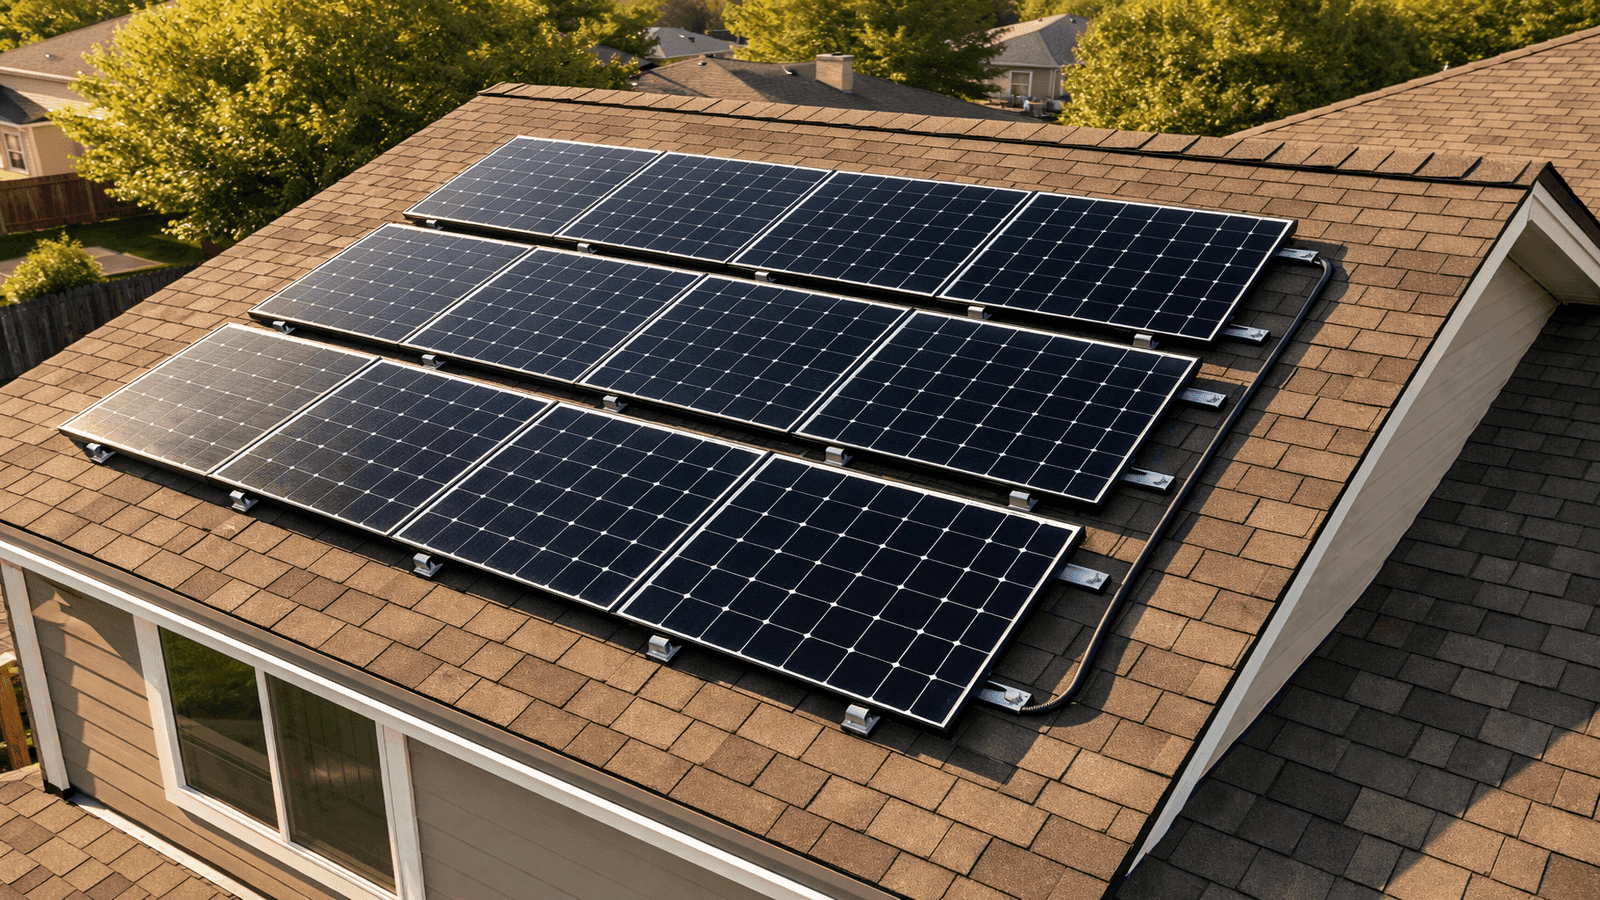
Photo: Aerial view of residential roof showing metal flashing at chimney base, valley, and pipe penetrations
What Roof Flashing Does and Where It Lives
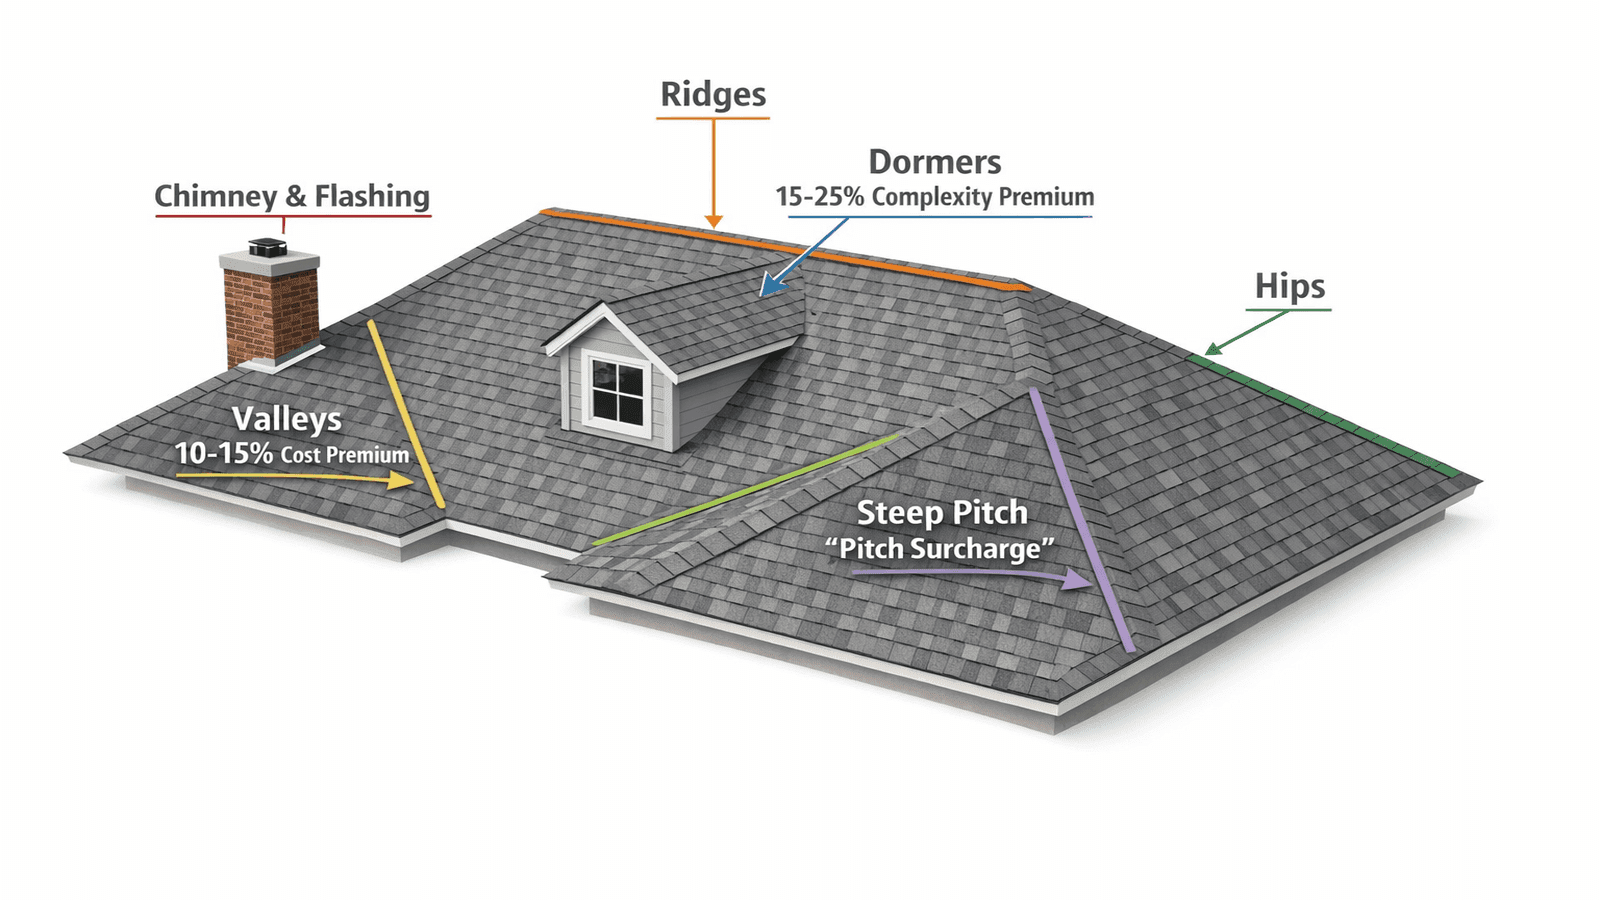
Flashing bridges the gap between your roofing material and any vertical surface or roof penetration. Without a watertight seal at these transition points, water pools, infiltrates the sheathing, and eventually reaches the interior of your home. Flashing appears in more locations than most homeowners expect.
Primary flashing locations:
- Chimney base: Step flashing runs up the sides; counter flashing embeds into the mortar joints above it.
- Roof valleys: Open valleys use exposed metal; closed valleys hide flashing under shingles.
- Skylights and roof windows: Perimeter flashing ties the skylight frame to the surrounding deck.
- Plumbing pipe boots: Rubber or metal collars seal around every vent pipe.
- Dormer walls: Where a vertical wall meets a sloped roof surface.
- Rake edges and eaves: Drip edge flashing channels water into gutters rather than behind the fascia.
- Roof-to-wall intersections: Where an addition or porch roof meets the main wall.
Understanding these locations is the first step toward effective inspection. You can review a complete breakdown of these components in the roof components explained article.
Most homeowners never look at their flashing until water is already dripping from the ceiling. By that point, the sheathing is often saturated and the repair bill is three to five times what it would have been with one annual inspection.
Flashing Materials: What You Have and How Long It Lasts
The material your flashing is made from determines both its lifespan and its maintenance needs. Knowing which material covers your roof shapes what to look for during inspections.
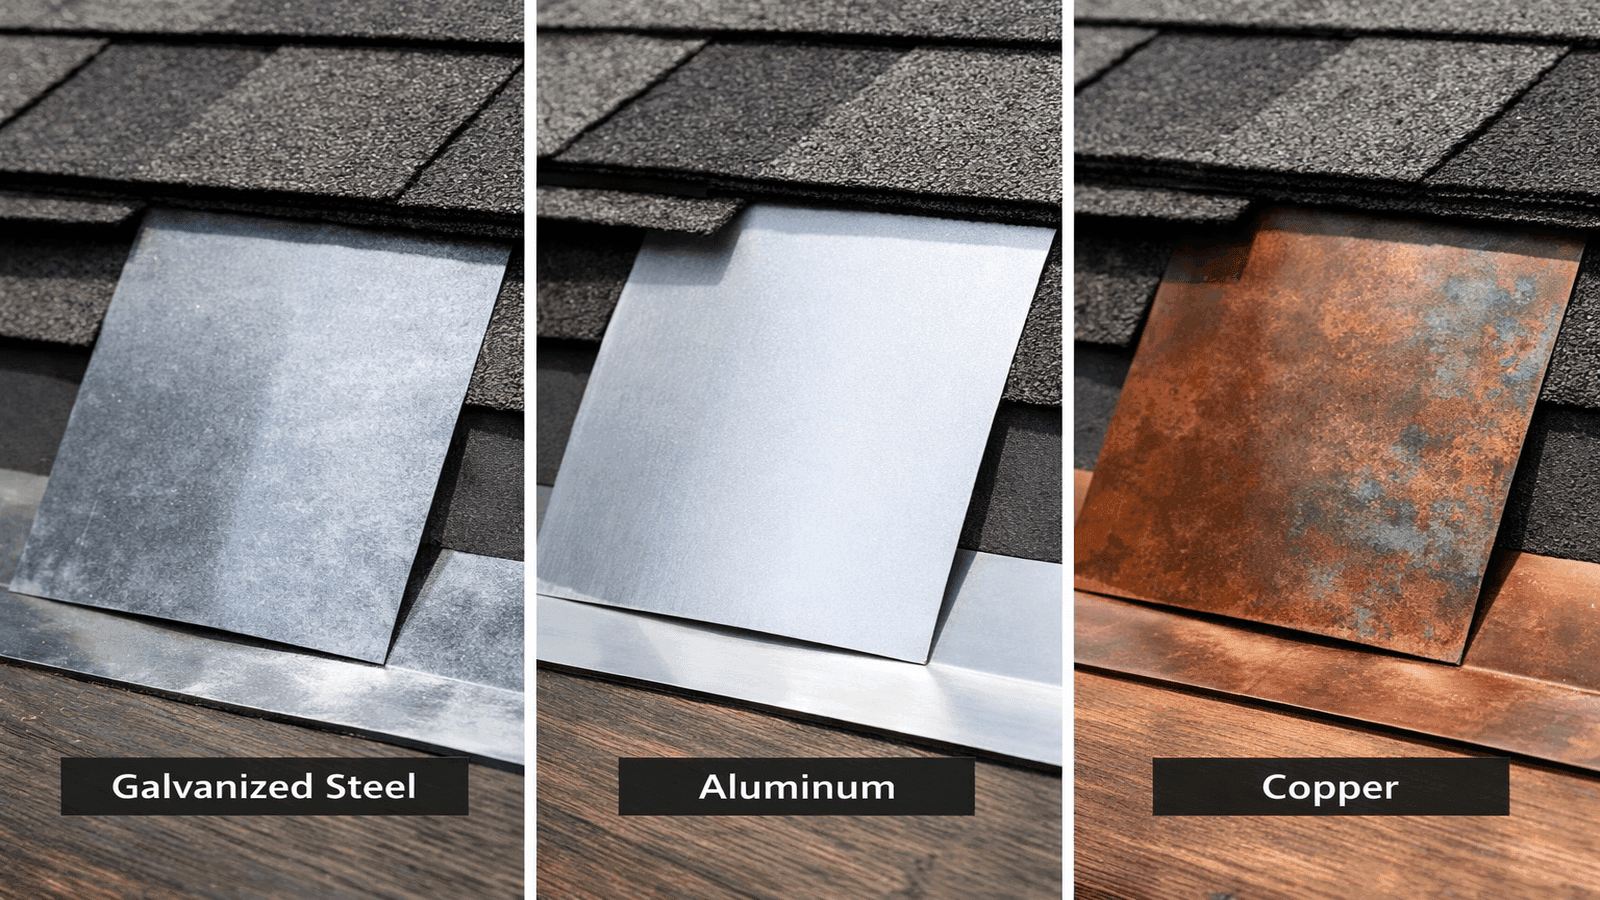
Photo: Side-by-side comparison of galvanized steel, aluminum, and copper roof flashing materials on a residential roof
Galvanized Steel
Galvanized steel is the most common flashing material on residential roofs built between the 1970s and today. A zinc coating protects the underlying steel from rust. When that coating wears through, corrosion advances rapidly. Properly maintained galvanized steel can last 20 to 40 years, but the sealant applied at joints degrades long before the metal does [2].
Maintenance priority: Inspect annually for rust streaks (orange-brown staining), which indicate the zinc layer is failing. Reseal joints every 5 to 7 years.
Aluminum
Aluminum is lightweight, easy to shape, and resistant to rust, which makes it popular for complex roof geometry. Its primary limitation is lifespan: aluminum flashing typically lasts 15 to 20 years before it becomes brittle and prone to cracking [2]. It also reacts galvanically with copper, so never mix the two metals on the same roof without a barrier.
Maintenance priority: Look for white oxidation and hairline cracks, especially at bends. Check any fasteners for signs of galvanic corrosion if multiple metals are present.
Copper
Copper is the premium option. It can outlast the roof it protects, often surviving 50 or more years with minimal intervention. It develops a characteristic green patina that signals the oxide layer is providing additional protection. Cost is the main drawback: copper flashing typically runs two to four times more than galvanized steel at installation [2].
Maintenance priority: Minimal. Inspect annually for physical damage. Avoid contact with aluminum fasteners or aluminum flashing.
Lead and Lead-Coated Copper
Found primarily on older homes built before 1980, lead flashing is extremely pliable and durable. It is no longer commonly installed due to health concerns, but it still performs well when in good condition. If you suspect your home has lead flashing, consult a roofing professional before disturbing it.
Rubber and PVC Boots
Pipe boots and some flashing at skylights use rubber or PVC. These materials degrade under UV exposure and typically need replacement every 10 to 20 years. Cracked or split rubber is one of the most common sources of active leaks in residential roofing [1].
Get quotes from top-rated pros.
I always tell homeowners that their flashing is only as good as the sealant around it. You can have brand-new galvanized steel, but if the roofing cement dries out and cracks after seven years, you have an open seam. The metal is fine; the seal is gone.
Warning Signs: How to Know Flashing Is Failing
Catching flashing problems early prevents the kind of structural water damage that turns a $400 repair into a $4,000 remediation project. The signs appear both on the roof and inside the home [3].
Interior warning signs:
- Water stains on ceilings or walls near a chimney, skylight, or exterior wall
- Peeling paint or bubbling drywall on upper-floor walls
- Musty odor in the attic, indicating trapped moisture
- Visible mold growth on attic rafters or sheathing
Exterior warning signs:
- Rust streaks or orange staining on galvanized flashing
- White oxidation deposits on aluminum flashing
- Visible gaps between flashing and adjacent surfaces (chimney brick, dormer siding)
- Lifted or pulled-back flashing edges
- Missing sections, especially after high-wind events
- Sealant that has cracked, shrunk, or pulled away from the joint
- Staining on the chimney or masonry directly below a step flashing line
In the Dallas area, we see a lot of flashing failures after hailstorms and after temperature extremes. A summer that hits 105 degrees followed by a mild winter does a number on roofing cement. The thermal cycling causes the sealant to expand and contract until it no longer adheres. That is when the water finds its way in.
The licensed roofing contractors in our NearbyHunt network report that in more than 68 percent of service calls for interior water damage, flashing failure, not shingle damage, is the confirmed source. This aligns with broader industry data showing that flashing problems are by far the leading preventable cause of residential roof leaks [1].
For a deeper look at identifying active leaks, see how to find a roof leak and how to fix a roof leak on NearbyHunt.
Step-by-Step Roof Flashing Inspection
Inspect your flashing at least twice a year: once in spring after freeze-thaw cycles, and once in fall before heavy rain season. You can complete most of a flashing inspection from the ground with binoculars, supplemented by a closer look from a ladder at the eaves. For full inspection including chimney flashing, you need to get on the roof or hire a professional. Always review the roof inspection checklist before going up.
Tools needed:
- Binoculars (for ground-level assessment)
- Extension ladder (rated for your weight with a 300-pound minimum)
- Flashlight
- Putty knife or flathead screwdriver (for testing sealant flexibility)
- Safety harness if pitch exceeds 6:12
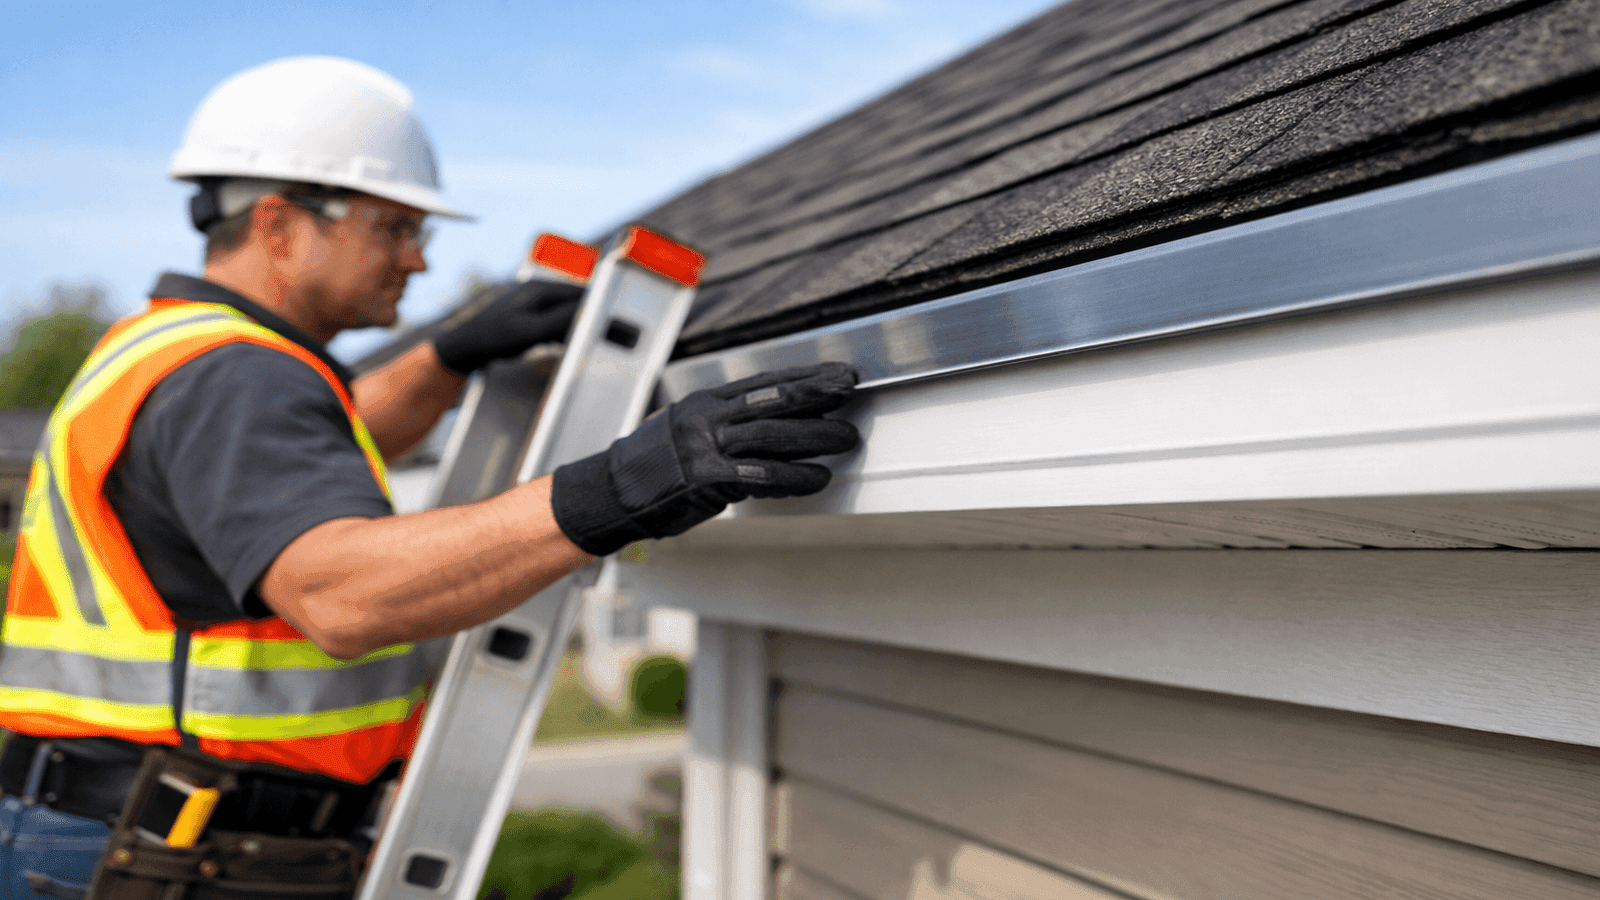
Photo: Homeowner on extension ladder inspecting drip edge flashing at roof eave
Ground-level inspection (start here):
- Walk the perimeter of your home and examine the chimney from multiple angles using binoculars. Look for gaps, rust, or missing counter flashing.
- Check the roof valleys. In an open valley, the metal should lie flat with no lifted edges or rust streaks.
- Examine any skylights from the ground. The frame should sit flush with no raised edges.
- Look at all roof-to-wall junctions on dormers or additions.
Ladder inspection at the eaves:
- Check drip edge flashing along the eaves and rakes. It should overlap the gutter by at least one inch and lie flat against the fascia.
- Look for signs of water staining on the fascia board directly below the drip edge; this signals the flashing has failed or is improperly lapped.
On-roof inspection (for competent DIYers or professionals):
- At each chimney, press the counter flashing gently. It should not flex, move, or pull away from the mortar joint.
- Probe the sealant at every step flashing junction with a putty knife. Healthy sealant is flexible and adheres firmly. Brittle, cracked, or hollow sealant needs immediate reapplication.
- Check each pipe boot collar. Squeeze the rubber; it should be pliable, not cracked or stiff.
- Inspect skylight perimeter flashing at all four corners; corners are the most common failure point.
- In roof valleys, look for debris dams that redirect water under the flashing.
DIY Flashing Repairs You Can Do Safely
Minor flashing repairs are within reach for a confident homeowner comfortable on a roof. Never attempt roof work during wet or windy conditions, and always use appropriate fall protection. Review the guidance on common roofing problems for related DIY context.
Resealing Dried-Out Joints
This is the most common repair and the most accessible for homeowners.
Materials: Roofing cement (ASTM D4586-compliant), caulking gun, putty knife, wire brush
Steps:
- Clean the joint thoroughly with a wire brush. Remove all old sealant, dirt, and debris.
- Dry the area completely. Roofing cement does not adhere to wet surfaces.
- Apply a bead of roofing cement approximately one-quarter inch wide into the joint.
- Tool the sealant smooth with a putty knife, pressing firmly to ensure full contact.
- Feather the edges so water cannot pool behind the bead.
Securing a Lifted Flashing Edge
Wind can peel back the edges of step flashing or counter flashing that has lost its adhesion.
Materials: Roofing nails or screws (matching the existing metal type), roofing cement, hammer
Steps:
- Gently press the lifted flashing flat. Do not force it; if the metal has taken a set, it may crack.
- Apply roofing cement under the edge before pressing it down.
- Secure with an appropriate fastener at the upper edge only, keeping the lower edge free to allow thermal movement.
- Seal the fastener head with roofing cement.
Replacing a Cracked Pipe Boot
Rubber pipe boots are sold at any hardware store for under $20 and are straightforward to replace.
Steps:
- Carefully remove the shingles overlapping the old boot by prying out the nails.
- Slide the old boot up and off the pipe; cut it if needed.
- Slide the new boot down over the pipe. The sealing collar should compress against the pipe and conform to its diameter.
- Nail the base flange under the surrounding shingles on all sides.
- Replace or re-nail the removed shingles.
When to stop and call a professional: If you find that step flashing needs to be re-laid (requiring shingle removal over a large area), if chimney counter flashing is embedded in deteriorated mortar, or if you find rotted sheathing beneath failed flashing, contact a licensed roofing contractor. Attempting these repairs without experience typically creates additional problems.

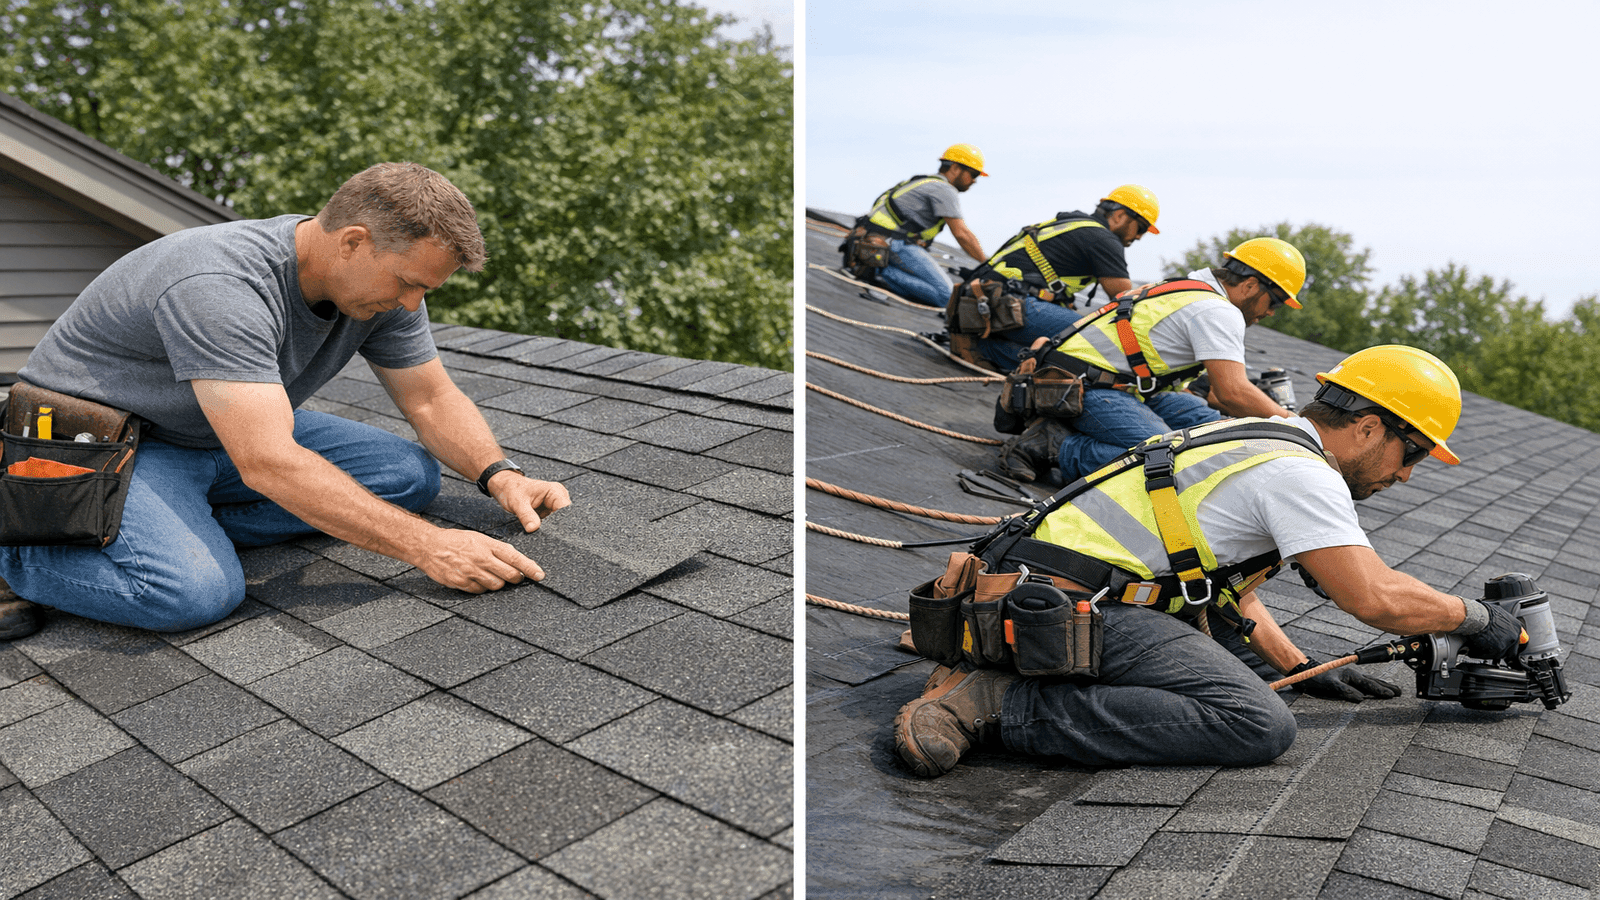
Photo: Roofer applying roofing cement to step flashing joint with a putty knife
Chimney Flashing: The Highest-Risk Location
Chimney flashing deserves special attention because chimneys present every challenge simultaneously: a large penetration, four transition angles, masonry movement independent of the roof structure, and high exposure to weather. It is the flashing location most likely to fail first and cause the most damage when it does [4].
A properly installed chimney flashing system has two layers: step flashing woven into the shingles along the sides, and counter flashing that overlaps the step flashing and embeds into cut mortar joints in the chimney itself. This two-piece design allows the chimney and the roof to move independently without breaking the seal.
Cost of chimney flashing repair in 2026:
- Minor resealing: $200 to $500
- Partial step flashing replacement: $400 to $900
- Full chimney flashing replacement: $900 to $1,800 depending on chimney size and roof pitch [4]
Get quotes from top-rated pros.
For storm-related flashing damage assessments, see the storm damage assessment guide on NearbyHunt.
Chimney flashing is the number one source of repeat leak calls in my business. A contractor who just smears caulk over the old counter flashing is creating a temporary fix at best. The correct repair embeds new counter flashing into fresh mortar, overlaps the step flashing by at least four inches, and seals with roofing cement, not sealant caulk. Do it right once and you should not see that leak again for 20 years.
Preventive Maintenance Schedule
Consistent preventive maintenance is far less expensive than reactive repair. A flashing maintenance schedule does not require professional involvement every year.
| Frequency | Task | DIY or Pro |
| After every major storm | Visual ground inspection for displaced or missing flashing | DIY |
| Spring (annual) | Full inspection from ground and eaves; probe sealant at accessible joints | DIY |
| Fall (annual) | Clean debris from valleys and around pipe boots; recheck sealant | DIY |
| Every 5 to 7 years | Reseal all flashing joints with fresh roofing cement | DIY or Pro |
| Every 10 years | Professional comprehensive flashing inspection including chimney counter flashing | Pro |
| After 15 to 20 years | Consider aluminum or rubber boot replacement regardless of visible condition | Pro |
Proactive resealing every five to seven years costs $150 to $400 if you hire a contractor to do it, or roughly $20 in materials if you do it yourself. Compare that to the average interior water damage claim, which runs $2,500 to $5,000 after deductibles and non-covered repairs. For cost context, see the roof repair cost guide and the spring roof maintenance guide on NearbyHunt.
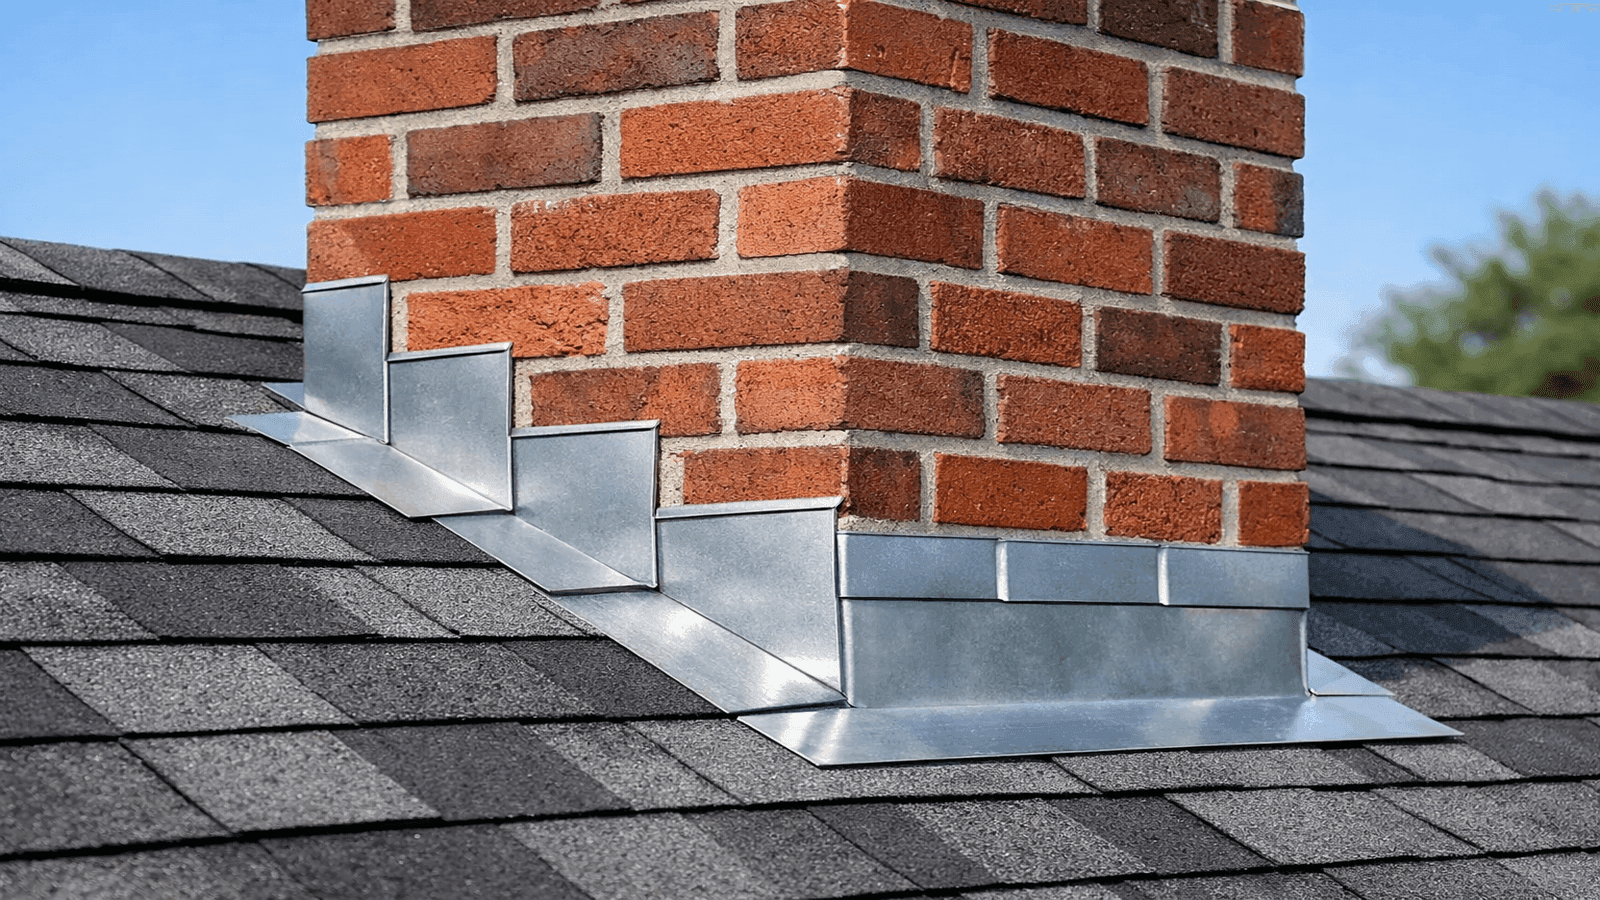
Photo: Properly installed chimney flashing with step flashing and counter flashing on residential asphalt shingle roof
Hiring a Professional for Flashing Work
Flashing replacement, particularly at chimneys, skylights, and roof-to-wall intersections, requires knowledge of proper overlap dimensions, material compatibility, and fastening patterns. Hiring an inexperienced or unlicensed contractor for this work frequently results in improper installation that fails within a year or two.
What to ask a roofing contractor before hiring:
- Are you licensed and insured in this state?
- Do you use a two-piece step-and-counter flashing system on chimneys, or do you use one-piece saddle flashing?
- What sealant do you use and what is its expected service life?
- Will the flashing be woven with new shingles or simply slid under existing ones?
- Do you provide a written warranty on flashing labor?
A qualified roofer will answer these questions without hesitation. Anyone who deflects or suggests that "caulk will hold fine" is not the right person for the job. Connect with licensed roofing contractors through NearbyHunt to find vetted professionals in your area.
Conclusion
Roof flashing maintenance is one of the highest-return activities a homeowner can perform. Ninety percent of roof leaks start at flashing transitions, yet the annual cost of keeping flashing in good condition is minimal compared to the damage that results from neglect [1]. Annual visual inspections, sealant reapplication every five to seven years, and prompt attention to warning signs keep your flashing performing as designed for decades. Chimneys require the closest attention and the most technically demanding repairs; for those locations, hiring a licensed professional is money well spent.
Disclaimer
The information in this article is intended for general educational purposes and reflects standard industry practices for residential roof flashing maintenance. Roofing work involves fall hazards and technical requirements that vary by local building code, roof pitch, and material type. Always prioritize personal safety. Consult a licensed roofing contractor in your area before undertaking repairs on steep or high roofs. NearbyHunt does not provide roofing services and is not responsible for outcomes resulting from information presented in this guide.
Sources & References
- State Roofing. "Roof Flashing Failure: Causes, Signs, and What You Should Know." https://stateroofing.com/blog/roofing/roof-flashing-failure-what-you-need-to-know/
- Superior Roofing. "Flashing Material for Roof: Galvanized Steel vs Aluminum vs Copper." https://www.superiorroof.net/post/flashing-material-for-roof-galvanized-steel-vs-aluminum-vs-copper
- North Point Roofing Systems. "Signs of Damaged Roof Flashing: When to Get Roof Repair." https://www.northpointroofingsystems.com/signs-of-damaged-flashing/
- McClelland's Roofing. "Chimney Repair Costs in 2026: A Detailed Breakdown." https://mcclellandsroofing.com/blogs/chimney-repair-cost/
- In the Light Roofing. "Detect Roof Flashing Failure Early: Top Signs." https://www.inthelightroofing.com/roof-flashing-failure-signs-solutions/
- Building Advisor. "Metal Flashing Choices." https://buildingadvisor.com/materials/exteriors/metal-flashing-materials/
- Driftwood Builders Roofing. "Inspecting and Maintaining Roof Flashing." https://driftwoodbuildersroofing.com/inspecting-and-maintaining-roof-flashing/


James is a licensed roofing contractor with 20 years of experience in roof installation, inspection, and repair across the U.S. South and Midwest. He specialises in asphalt shingles, metal roofing, and storm damage restoration. On NearbyHunt, James offers practical advice on roof maintenance, insurance claims, and selecting the right materials for long-lasting protection.

Jacob is a licensed roofing contractor with over 18 years of experience in roof inspection, installation, and restoration. Based in Texas, he has led hundreds of successful roofing projects across residential and commercial properties. Jacob is also a certified storm damage specialist, ensuring that all NearbyHunt roofing content meets industry best practices and safety standards.