- Roof decking is the structural foundation of the entire system: rotted or undersized sheathing (anything below 7/16-inch OSB) puts every layer above it at risk.
- Ice and water shield prevents the most destructive leaks: it's the self-adhering membrane at eaves and valleys that stops water from wicking under shingles during freeze-thaw cycles.
- Flashing is responsible for roughly 95% of all roof leaks when improperly installed or left unmaintained, according to field data from contractors in the NearbyHunt network [1].
- Proper attic ventilation requires a minimum of 1/150 net free ventilation area under the IRC, with 50% intake at soffits and 50% exhaust at the ridge [2].
- Gutters and fascia protect the foundation: a single clogged downspout can redirect thousands of gallons of water per year toward the home's footer.
- Understanding all 12 roof components before you hire a contractor means you can evaluate bids intelligently, spot shortcuts, and ask the right questions.
Your roof isn't a single material nailed onto a frame. It's a carefully sequenced system of 12 or more distinct components, each with its own function, lifespan, and failure mode. When one part fails, the layers below it suffer the consequences. After 20 years and 1,800-plus projects across the U.S. South and Midwest, James Carver has seen every combination of corner-cutting imaginable, and the pattern is consistent: homeowners who understand their roofing system catch problems early and pay far less over time. This guide covers every component from the structural deck to the ridge cap, so you know exactly what's above your head. For the broader context on roofing systems, materials, and costs, start with the parent guide: All About Roofing.

Get quotes from top-rated pros.

Photo: Cross-section diagram illustration showing all layers of a residential roofing system from structural decking up through shingles and ridge cap, with labels for each component
Roof Decking and Structural Sheathing
Every roofing system starts with the deck. Roof decking (also called sheathing) is the flat panel layer that fastens to your rafters or trusses and provides the nailing surface for everything above it. Without a solid deck, no roofing material performs as designed.
Materials Used for Roof Decking
The two most common materials are oriented strand board (OSB) and plywood. OSB is the industry standard for new construction: it's strong, cost-effective, and widely available in 7/16-inch and 1/2-inch thicknesses. Plywood is preferred by many contractors in high-humidity climates (Florida, coastal Georgia) because it tends to hold up better when exposed to repeated moisture cycles before shingles are installed.
The minimum acceptable thickness for most residential applications is 7/16-inch OSB or 1/2-inch plywood [1]. Anything thinner creates "nail pops," where fasteners back out over time and create small puncture points in the overlying roofing material.
Decking failure is something homeowners rarely think about until water is dripping through the ceiling. In high-wind zones especially, I've opened up roofs after a hurricane season and found entire sections of decking with zero structural integrity left, not from the storm itself, but from years of slow moisture infiltration through bad flashing above it. You can't just replace shingles over rotted decking. The whole assembly has to come off.
Decking that's properly installed, kept dry by the layers above it, and not subjected to repeated wetting can last the life of the roof structure (50 to 100 years). Once moisture penetrates, however, the timeline shortens dramatically. If you see sagging, soft spots, or visible mold in the attic, the decking may already be compromised.
Water Barriers: Underlayment and Ice and Water Shield
Between the deck and the visible roofing material sit two critical water-management layers. Most homeowners never see them, but they're doing the heaviest lifting during rainstorms, ice dams, and wind-driven rain events.
Roofing Underlayment
Underlayment is a secondary moisture barrier that lies directly on top of the decking, beneath the shingles or other surface material. If a shingle blows off or cracks, underlayment is the last line of defense keeping water off the deck. There are two main types:
- Felt underlayment (15 lb or 30 lb): the traditional option, made from asphalt-saturated felt paper. It's affordable but can absorb moisture and wrinkle if left exposed too long before shingles are installed.
- Synthetic underlayment: the current industry preference. Made from woven polypropylene or polyester, synthetic underlayment is lighter, more tear-resistant, and significantly more water-resistant than felt. Most manufacturers now specify synthetic underlayment to maintain warranty validity [1].
The NRCA's 2025 Steep-slope Roof Systems manual specifies synthetic underlayment as best practice for all climate zones, with felt as an acceptable alternative only in certain low-slope applications.
Ice and Water Shield
Ice and water shield is a self-adhering, rubberized asphalt membrane applied at eaves, valleys, and around all roof penetrations before underlayment goes down. Unlike felt or synthetic underlayment (which are mechanically fastened and can allow water to migrate under them), ice and water shield bonds directly to the decking and creates a fully waterproof seal.
Its primary purpose is stopping ice dams. During freeze-thaw cycles, meltwater backs up under shingles and would otherwise reach the deck. Because ice and water shield is self-sealing around fastener penetrations, water can't track through nail holes. Most building codes require ice and water shield to extend at least 24 inches past the interior wall line at all eaves [2].
For more on how roofing material choices interact with these layers, see: Types of Roofing Materials.
Edge Details: Drip Edge, Fascia, and Gutters
The edges of a roof are among its most vulnerable points. Water that doesn't shed cleanly off the edge can travel sideways, wick under shingles, and rot the fascia or even the structural rafter tails over time.
Drip Edge
Drip edge is an L-shaped metal flashing installed along eaves and rake edges to ensure water drops cleanly away from the fascia. Without it, water follows the surface tension of the decking edge and runs behind the fascia or into the soffit cavity.
The NRCA's 2025 manual explicitly recommends drip edge at all eaves and rakes for every steep-slope roof system, including asphalt shingle, tile, and slate. It's one of the least expensive components in a roofing system (typically $1-$2 per linear foot installed) and one of the most commonly skipped by budget contractors.
Drip edge is installed in a specific sequence: at eaves, it goes under the underlayment; at rakes, it goes over the underlayment. Getting this sequence wrong is a common installation error that creates a water entry point.
Get quotes from top-rated pros.
Fascia
Fascia is the horizontal board that runs along the lower edge of the roofline, covering the exposed ends of the rafter tails. It's both structural (gutters mount to it) and cosmetic. Fascia is typically made from wood, aluminum-wrapped wood, or composite PVC. PVC and aluminum-capped fascia are the lowest-maintenance options in humid climates.
When drip edge is missing or when gutters are improperly sloped (allowing standing water against the fascia), fascia rot is the predictable result. Replacing rotted fascia costs $6-$20 per linear foot and often requires partial soffit removal to access.
Gutters and Downspouts
Gutters collect runoff from the roof surface and channel it to downspouts, which direct water away from the foundation. They're technically not part of the roofing assembly, but they're a critical support component. A 1,500-square-foot roof in a 1-inch rainstorm sheds roughly 935 gallons of water. That volume needs to go somewhere controlled.
The standard residential gutter sizes are 5-inch K-style (most homes) and 6-inch K-style (high-rainfall areas or large roof pitches). Downspouts should extend at least 4-6 feet from the foundation, with splash blocks or underground extensions where grading doesn't carry water away naturally.
I've seen gutter-related damage that cost homeowners $15,000-plus to fix: rotted fascia, damaged soffits, wet crawl spaces, even cracked foundations. A $150-per-year gutter cleaning would have prevented every dollar of it. Gutters are the most ignored component of a roofing system and the most likely to cause collateral damage when neglected.
Flashing
If there's one roofing component that demands your attention above all others, it's flashing. Flashing is the metal (or rubberized-metal) sheeting installed at every joint, transition, and penetration on a roof surface. These are the points where two planes meet or where a pipe, chimney, skylight, or wall interrupts the roofing surface.
The licensed roofers in our NearbyHunt network report that approximately 95% of all roof leak calls involve failed or improperly installed flashing [1]. New shingles over bad flashing is money wasted.
Types of Roof Flashing
There are six distinct flashing types used on a typical residential roof:
Step flashing is used where a roof plane meets a vertical wall (such as a dormer or sidewall). Individual L-shaped metal pieces are woven between each course of shingles and bent up against the wall. Each piece overlaps the one below by at least 2 inches. Step flashing must be integrated with counter-flashing above it.
Counter-flashing is the upper piece that laps over step flashing at wall-to-roof junctions. It's embedded into mortar joints on masonry walls or fastened under siding on frame walls. Counter-flashing keeps water from running down the wall and behind the step flashing below it.
Chimney flashing combines base flashing (around the chimney's base), step flashing (up the sides), saddle or cricket flashing (a small peaked diverter behind the chimney to shed water), and counter-flashing. It's the most complex flashing assembly on most homes and a very common leak source when done by inexperienced contractors.
Valley flashing is installed in the V-shaped trough where two roof planes meet. Open metal valleys (visible metal strip) and closed-cut valleys (shingles cut over metal) are both acceptable per the NRCA, but open metal valleys using 24-gauge galvanized steel or aluminum are generally considered more durable in high-rainfall environments.
Pipe boot flashing (also called pipe boot or pipe collar) seals the penetration where plumbing vent stacks exit the roof. Traditional rubber pipe boots last 10-15 years before the rubber collar cracks and begins leaking. Lead pipe boots and two-part metal pipe boots last considerably longer. Boot flashing is one of the most common sources of slow, intermittent leaks that are hard to trace.
Skylight flashing is factory-integrated on modern skylights, but the curb-to-roof junction still requires careful step and counter-flashing by the installer. Improper skylight flashing is among the top reasons homeowners pursue warranty claims.
For a complete reference on terminology, see the Roofing Terms Glossary.
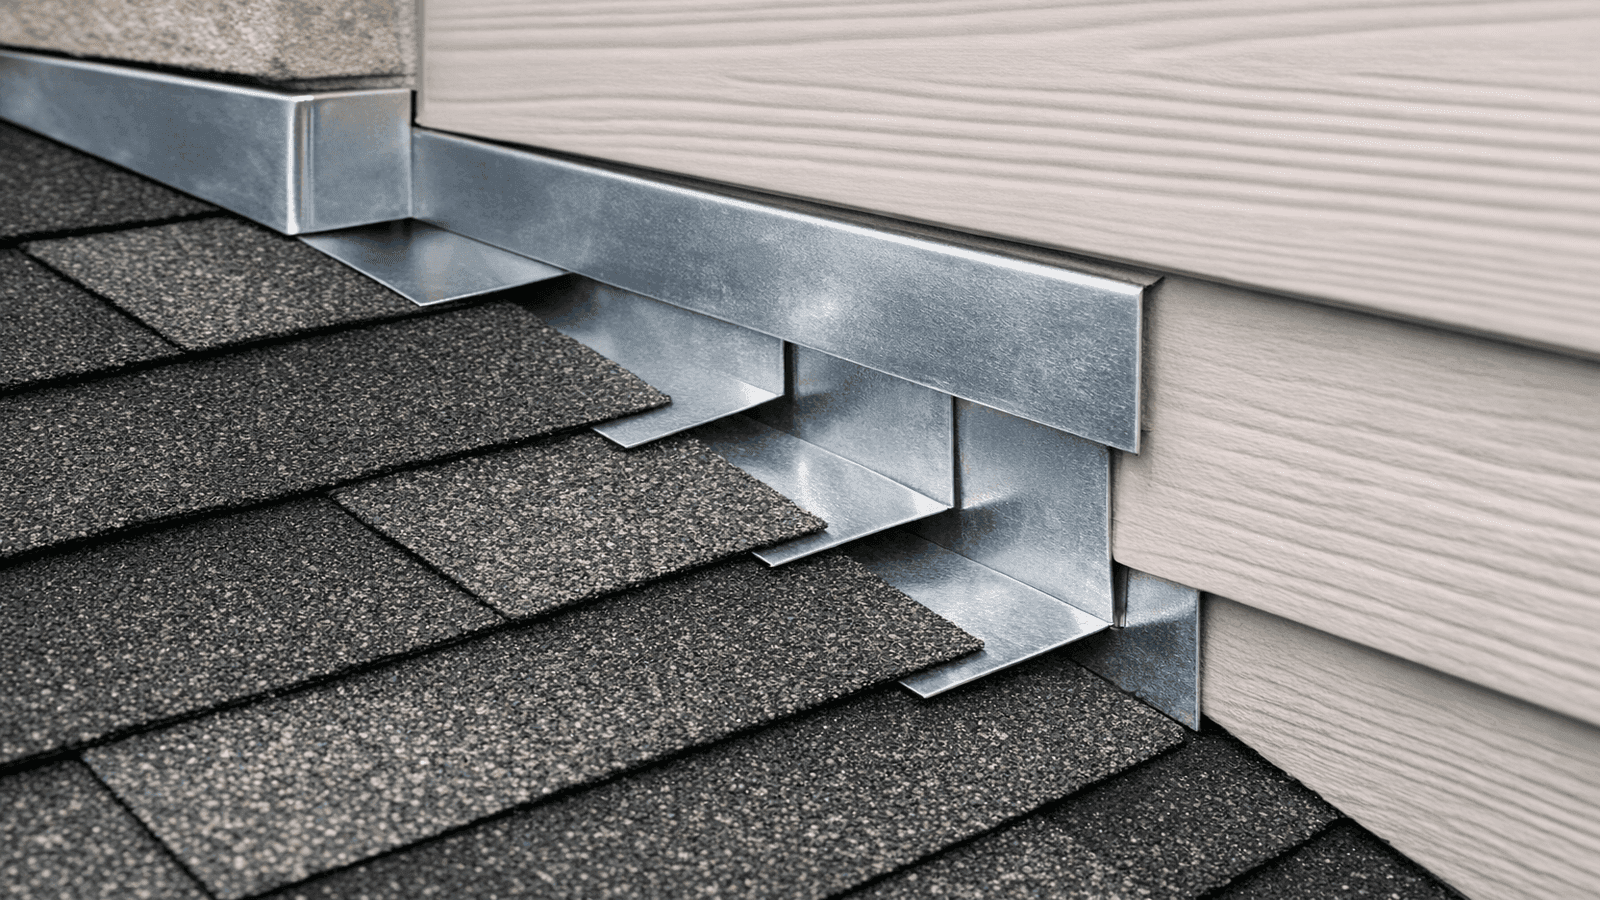
Photo: Close-up photo of properly installed step flashing and counter-flashing at a dormer wall-to-roof junction, showing the overlapping metal layers and correct integration with shingles
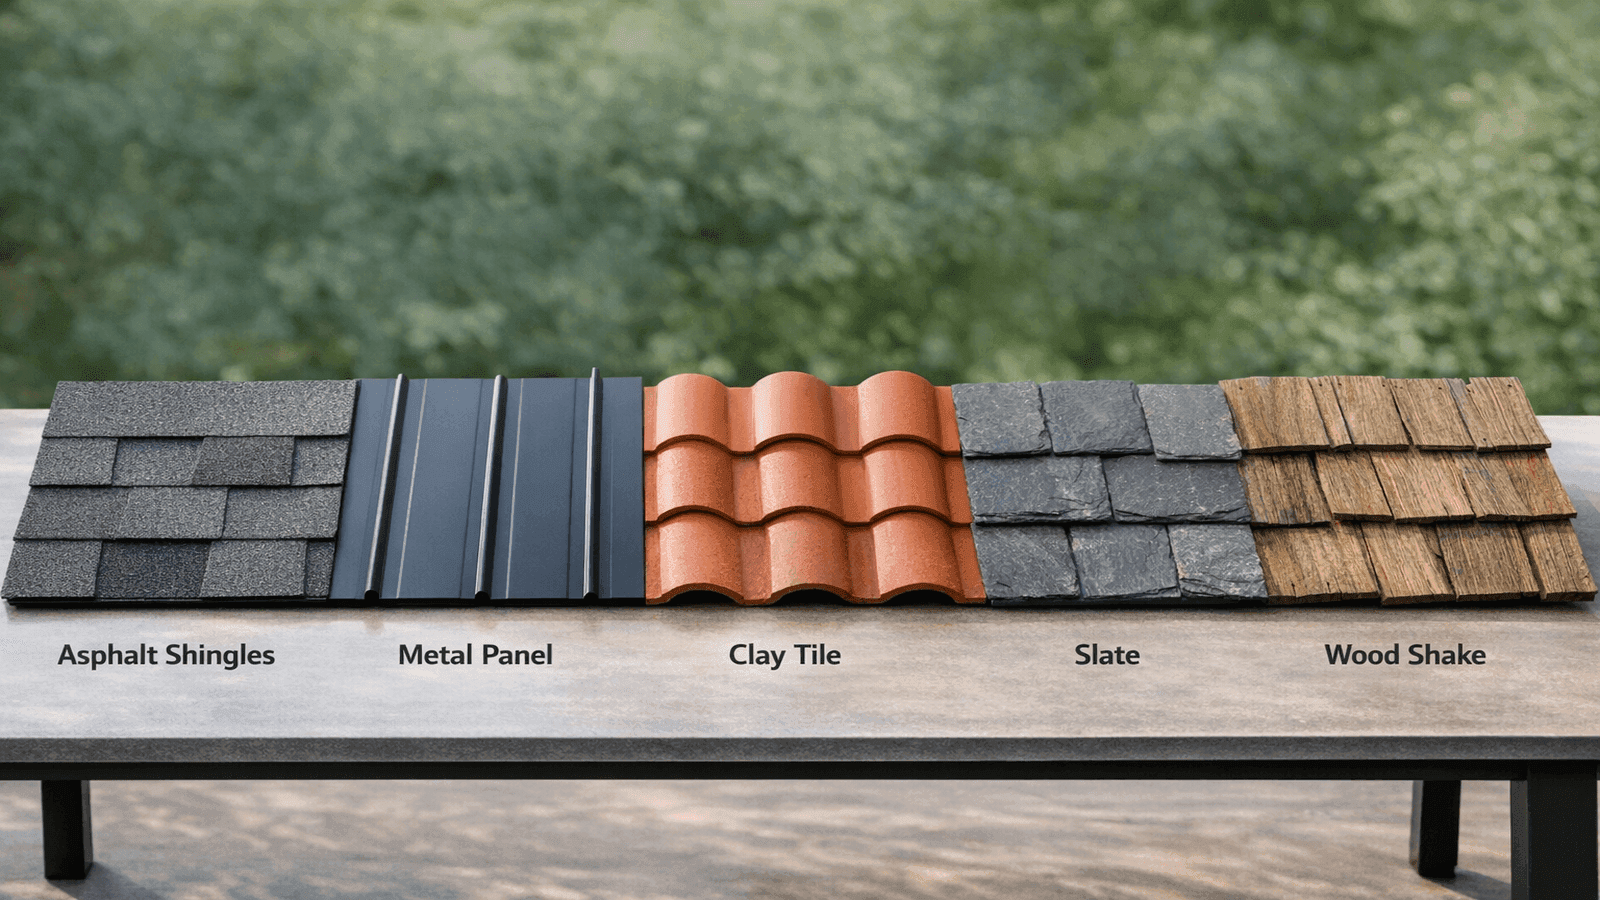
Shingles and Roofing Material
The visible outer layer of a roofing system is what most people picture when they think "roof." Surface material serves three functions: it sheds the bulk of precipitation mechanically, provides UV protection for the layers below, and gives the home its curb appeal.
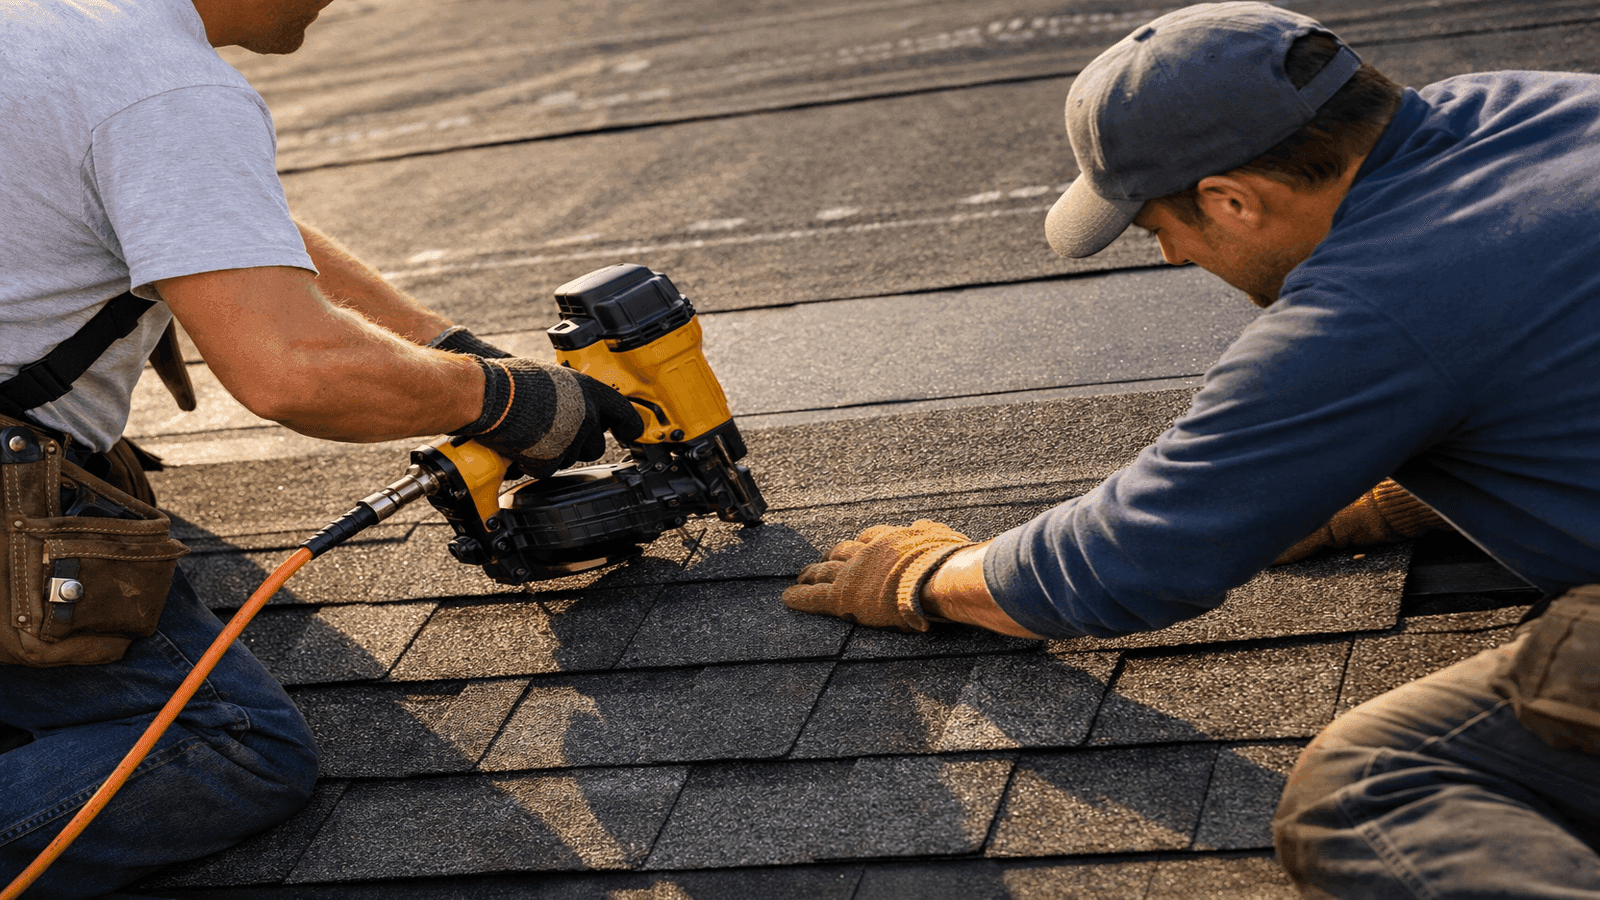
Asphalt Architectural Shingles
Architectural (dimensional) shingles are the standard for residential new construction and re-roofing in the U.S. They consist of a fiberglass mat base coated with asphalt and embedded with ceramic granules. The granules reflect UV radiation and protect the asphalt from accelerated degradation.
Standard architectural shingles carry a 30-year rated lifespan under normal conditions, though actual performance depends heavily on attic ventilation, geographic climate, and installation quality. In high-temperature climates (Arizona, Texas, Florida), granule loss and thermal cracking can shorten real-world lifespan to 18-22 years [3]. For a comprehensive look at how long different surface materials actually last, see: How Long Do Roofs Last.
Ridge Cap Shingles
Ridge cap shingles are a distinct, thicker product designed to cover the ridge (the horizontal peak where two roof planes meet) and hip ridges. Standard shingles bent over a ridge crack and leak within a few years because they're not designed to flex around a sharp angle. Ridge cap shingles are pre-bent, thicker, and carry their own separate warranty.
Ridge caps also serve a ventilation function: when installed over a ridge vent, they cover the opening while allowing air to exhaust freely. The alignment and nailing of ridge cap shingles is the last step in a roofing installation and one of the most visible indicators of craftsmanship.
Soffit and Attic Ventilation
The soffit and ventilation systems work together to regulate heat and moisture in the attic space. They're not glamorous, but they directly determine how long everything above them lasts.
Soffit
Soffit is the material that forms the underside of the roof overhang, between the fascia board and the exterior wall. It closes off the rafter bay visually and, more importantly, provides the housing for soffit intake vents.
Soffit is commonly made from aluminum, vinyl, or fiber cement. Vented soffit panels have small perforations or slots that allow outside air to enter the attic. Non-vented soffit in a home that relies on passive ventilation is a significant problem: it starves the ventilation system of intake air, which causes the ridge vent to either pull conditioned air from the living space or create negative pressure that draws moisture inward.
A real example: Marcus T. from Plano, TX contacted NearbyHunt after two roofing contractors told him his 14-year-old architectural shingles were failing prematurely. The investigation found that his builder had installed solid (non-vented) soffit panels on 60% of the overhangs, creating a severe intake air deficit. The attic was reaching 155 degrees Fahrenheit in July. His shingles were curling and losing granules six years ahead of schedule. The fix: replace soffit panels with vented panels ($1,800) and add a ridge vent ($600), saving the cost of a full re-roof for at least another five to seven years.
Get quotes from top-rated pros.
Roof Ventilation: Ridge Vents and Attic Airflow
Proper attic ventilation protects the roof from two distinct threats: heat damage in summer (which degrades shingles and bakes attic structure) and moisture damage in winter (which condenses on cold sheathing and causes rot and mold).
The International Residential Code (IRC) requires a minimum net free ventilation area of 1/150 of the vented attic floor area, or 1/300 if at least 40-50% of the ventilation is provided within 3 feet of the ridge and the balance at the lower third of the attic (soffit level) [2]. In practice, the 1/300 balanced split-ventilation approach (50% intake at soffit, 50% exhaust at ridge) is the standard most roofing professionals install to.
Ridge vents are the preferred exhaust device for most residential applications. A continuous ridge vent running the full length of the ridge allows uniform air exhaust across the entire attic. Static box vents and power ventilators are alternatives, but continuous ridge vents are quieter, lower-maintenance, and more effective at creating balanced airflow.
Ventilation is one of those things that's invisible when it's working correctly and catastrophic when it's not. I inspected a 10-year-old home in Georgia last year where the homeowner was on their third set of shingles in a decade. The issue wasn't the shingles at all. There was zero ridge ventilation: the original builder had installed a ridge cap directly over the sheathing with no vent slot cut. The attic was a heat trap destroying every shingle from the inside out. Fixing the ventilation cost $900. The shingle replacements had cost over $24,000 total.

Photo: Diagram showing the airflow path in a properly ventilated attic: cool air entering through soffit intake vents, rising through the attic space, and exhausting through ridge vents at the peak
Roof Components Reference Table
The table below summarizes all primary roof components, their function, typical material, and expected lifespan under normal conditions.
| Component | Primary Function | Typical Material | Expected Lifespan |
| Roof Decking | Structural nailing base | OSB or plywood (7/16"-1/2") | 50-100 years (if kept dry) |
| Ice and Water Shield | Waterproof seal at vulnerable zones | Rubberized asphalt membrane | 20-30 years |
| Underlayment | Secondary moisture barrier | Synthetic woven PP or felt | 15-25 years |
| Drip Edge | Directs water away from fascia | Galvanized steel or aluminum | 20-40 years |
| Step Flashing | Seals roof-to-wall junctions | Galvanized steel or aluminum | 20-30 years |
| Counter-Flashing | Covers step flashing at walls | Galvanized steel or aluminum | 20-30 years |
| Chimney Flashing | Full seal around chimney base/sides | Galvanized steel, copper, or lead | 20-30 years |
| Pipe Boot Flashing | Seals plumbing vent penetrations | Rubber (10-15 yr) or lead/metal | 10-30 years (varies by type) |
| Architectural Shingles | Primary water shedding and UV protection | Fiberglass-asphalt composite | 25-30 years (rated) |
| Ridge Cap Shingles | Covers ridge; integrates with ridge vent | Fiberglass-asphalt composite | 25-30 years |
| Soffit | Closes rafter bay; houses intake vents | Vinyl, aluminum, or fiber cement | 30-50 years |
| Fascia | Covers rafter tails; gutter mounting surface | Wood, aluminum-wrapped, or PVC | 20-40 years |
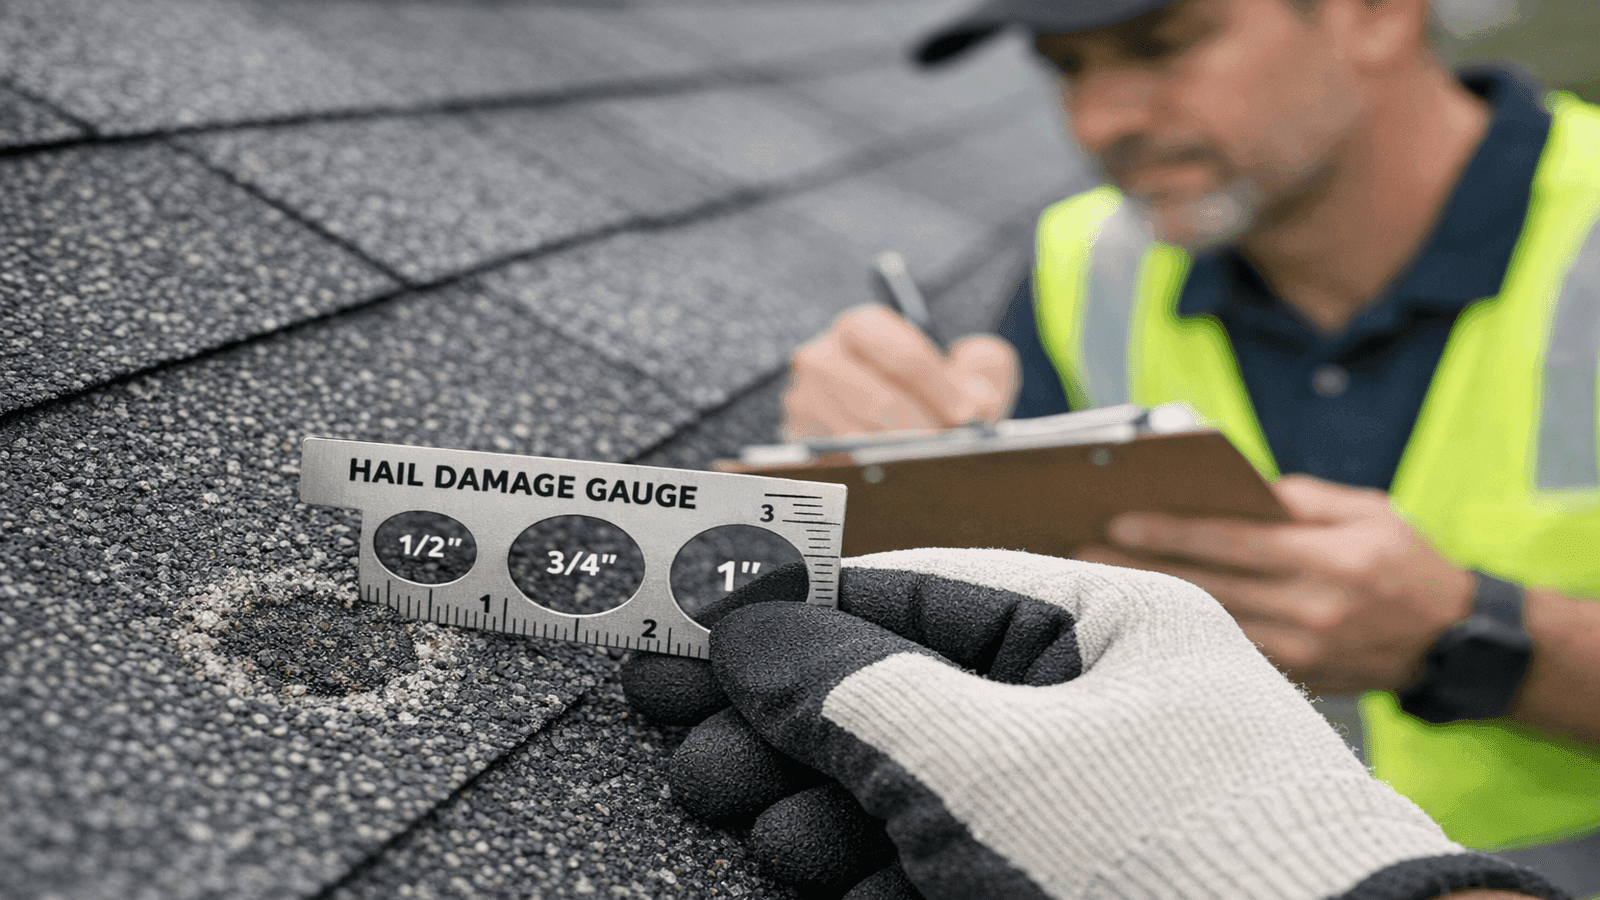
Common Failure Points and What They Cost
Understanding where roofs fail most often helps you prioritize inspections and maintenance spending.
Flashing failures are the most common source of leaks. Pipe boot rubber cracks and should be proactively replaced every 10-15 years ($50-$150 per boot). Chimney flashing re-caulking runs $150-$400; full chimney reflashing costs $500-$1,500. Valley reflashing is $300-$1,000 depending on length and access.
Soffit and fascia rot typically runs $6-$20 per linear foot to replace. On a standard home with 150 linear feet of fascia, a full fascia replacement is a $900-$3,000 project. Catching it at one or two sections costs $200-$500.
Decking replacement is the cost that surprises homeowners most. When a re-roofing contractor removes old shingles and finds soft spots, decking replacement runs $70-$100 per sheet (4x8 OSB). A moderately damaged 1,800 sq ft roof might require 10-20 sheets: an additional $700-$2,000 added to the re-roofing quote.
For a detailed look at what problems look like before they become expensive, see: Common Roofing Problems.

Photo: Homeowner and roofing contractor on a residential roof during an inspection, pointing to step flashing at a dormer; sunny day, suburban neighborhood background
How Roof Pitch Affects Component Selection
Roof pitch (the slope angle, expressed as rise-over-run) determines which roofing materials and components are appropriate. A 4:12 pitch (rises 4 inches for every 12 inches of horizontal run) is the standard minimum for asphalt shingles. Pitches below 4:12 require modified low-slope materials or membrane systems.
At lower pitches, water drains more slowly, meaning underlayment quality and flashing precision matter more. Ice and water shield installation zones are typically extended on lower-pitched roofs to compensate for slower drainage. At steeper pitches (8:12 and above), certain flashing styles need adjustment to accommodate the sharper angle. For a full breakdown of pitch and its implications, see: Roof Pitch Explained.
Hiring a Contractor Who Knows Every Component
A bid from a qualified roofing contractor should explicitly list every component being installed or replaced. If a bid says "tear off and reshingle" without specifying underlayment type, flashing approach, ventilation plan, and decking inspection protocol, you're being asked to sign a blank check on quality.
Questions to ask any roofing contractor before signing:
- What underlayment product are you using, and does it meet the manufacturer's warranty specifications for the shingle you're installing?
- Are you replacing all pipe boot flashings, or reusing the existing rubber boots?
- How are you handling the ridge vent and soffit vents: inspecting existing or installing new?
- What is your decking replacement policy if soft spots are discovered during tear-off?
- Will the drip edge be installed in the correct sequence (under underlayment at eaves, over at rakes)?
A contractor who can answer all five questions clearly and specifically is far more likely to produce a roof that performs as warranted.
Conclusion
A residential roofing system is only as good as its weakest component. Decking, ice and water shield, underlayment, drip edge, flashing, surface material, ridge cap, soffit, fascia, gutters, and ventilation all work together as a system. Cutting any one of them creates a vulnerability the whole system must absorb. The homeowners who spend the least on roofing over time are the ones who understand what they have, inspect it annually, and address small failures before they cascade. You now have the knowledge to be one of them.
Disclaimer: The information in this article is intended for general educational purposes only. Roofing systems vary significantly based on geographic climate, local building codes, and specific home construction. Always consult a licensed roofing contractor licensed in your state before undertaking any roofing project. Component lifespans and cost estimates are general ranges based on field experience and industry data and may differ in your market. This article does not constitute professional roofing advice for any specific project.
Sources & References
[1] O'LYN Roofing: Components of a Roof: Decking and Flashing
[2] International Residential Code Attic Ventilation Requirements via Pearson Family Roofing
[3] FoxHaven Roofing: Roof Layers Explained 2026
[4] NRCA 2025 Steep-slope Roof Systems Manual
[5] IKO: Roof Components: The Parts That Make a Roof
[6] NOVA Exteriors: Maximizing Durability with Roof Decking, Flashing, and Underlayment

James is a licensed roofing contractor with 20 years of experience in roof installation, inspection, and repair across the U.S. South and Midwest. He specialises in asphalt shingles, metal roofing, and storm damage restoration. On NearbyHunt, James offers practical advice on roof maintenance, insurance claims, and selecting the right materials for long-lasting protection.

Jacob is a licensed roofing contractor with over 18 years of experience in roof inspection, installation, and restoration. Based in Texas, he has led hundreds of successful roofing projects across residential and commercial properties. Jacob is also a certified storm damage specialist, ensuring that all NearbyHunt roofing content meets industry best practices and safety standards.