- A P-trap replacement is a 15 to 30 minute DIY job that costs $5 to $20 in materials vs. $150 to $393 for a licensed plumber
- Bathroom sinks use 1.25-inch P-traps; kitchen and utility sinks use 1.5-inch traps; measure before buying
- PVC and ABS plastic traps last longer than chrome metal and resist corrosion; use transition cement if switching between the two
- No water shutoff is required to replace a P-trap because the trap sits below the sink drain, not the supply lines
- The P-trap water seal blocks sewer gases including hydrogen sulfide and methane from entering your home through the drain
- Overtightening slip-joint nuts on PVC is the most common DIY mistake and will crack the fitting; hand-tight plus a quarter turn is sufficient
The P-trap is the curved section of pipe directly beneath every sink drain. Its shape holds a small standing pool of water that acts as a physical barrier against sewer gases, including hydrogen sulfide and methane, that would otherwise travel up the drain and into your home. Building codes require a properly functioning trap on every drain fixture. This is one of the foundational repairs covered in the DIY Plumbing Guides hub.
Licensed plumbers in the NearbyHunt network confirm that overtightened slip-joint nuts are the primary cause of cracked P-trap fittings they are called to repair after DIY installations.
A P-trap fails for a handful of predictable reasons: the slip-joint washers deteriorate, plastic cracks from age or overtightening, metal corrodes from the inside out, or a hard knock under the cabinet shears a connection. When any of these happen, replacement is straightforward and requires no special plumbing license. Most homeowners finish the job in under 30 minutes with tools already on hand.
This guide covers sizing, material selection, step-by-step installation, and when a job is better handed to a pro.

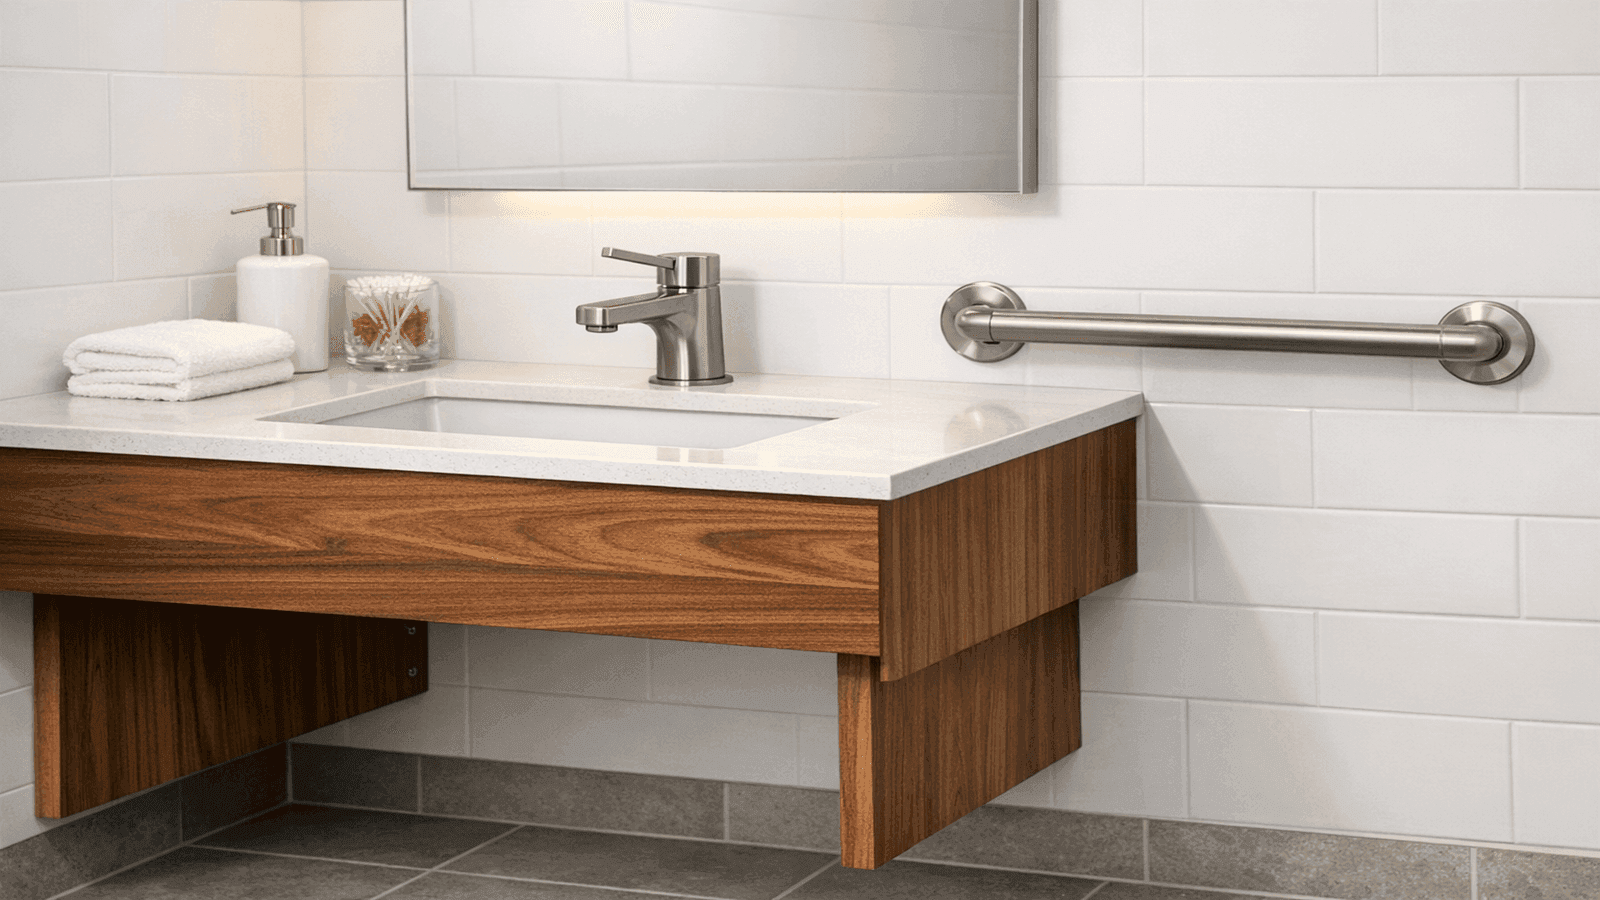
Photo: Wide-angle view of completed PVC P-trap assembly under a bathroom vanity sink showing trap arm, P-bend, and tailpiece connection
What Is a P-Trap and Why It Matters
How the water seal works
A P-trap holds roughly 2 to 4 ounces of water in its curved lower bend at all times. That standing water is the only thing separating your kitchen or bathroom air from the municipal sewer system. When drain water flows, it replenishes the seal automatically.
If a drain goes unused for weeks, that water can evaporate and allow sewer gas to pass through freely. This is why infrequently used sinks develop a rotten-egg smell even with a trap that is structurally intact.
The four components of every P-trap assembly are:
- Tailpiece (vertical drop from the sink basket or drain flange)
- P-bend (the U-shaped curved section that holds the water seal)
- Trap arm (the horizontal pipe running into the wall stub-out)
- Slip-joint nuts and washers (compression fittings that seal each connection without glue)
Signs a P-trap needs replacing
- Active drip or standing puddle directly under the sink cabinet
- Persistent sewer smell that does not clear after running water for 30 seconds
- Visible hairline cracks in the P-bend or trap arm
- White mineral deposits or green corrosion on chrome metal fittings
- A slow drain where no clog is found further down the line (the trap bend itself may be partially blocked)
My first diagnostic stop on any slow or smelly sink is always the P-trap. I pull it off, look inside, and probably half the time I find the problem right there in that bend rather than deeper in the drain line. It saves the homeowner a service call and saves me from running a snake unnecessarily.

Choosing the Right P-Trap
Size: measure before you buy
P-traps are sized by the inside diameter of the pipe, not the outside. Standard sizes are:
- 1.25 inch: standard bathroom sink (most common residential bathroom application)
- 1.5 inch: kitchen sink, utility/laundry sink, secondary bathroom sink with larger drain
- 2 inch: shower drain, floor drain (not a standard under-sink P-trap size)
To confirm size, measure the outside diameter of the tailpiece coming down from your sink drain basket and subtract roughly 1/8 inch. Or simply remove the old trap and read the size molded into the plastic. Buying the wrong diameter is the most common first-time mistake.
Material: PVC, ABS, or chrome metal
| Material | Color | Typical Cost | Pros | Cons | Best Use |
| PVC | White | $5 to $15 | Lightweight, does not corrode, easy to cut, widely available | Can crack if overtightened; cannot glue to ABS without transition cement | Hidden installations: under kitchen or bathroom vanity |
| ABS | Black | $5 to $15 | Slightly more rigid than PVC, common in western US, glue or rubber coupling options | Less common in eastern US; do not mix with PVC without transition cement | Hidden installations where ABS drain pipe is already present |
| Chrome metal (brass) | Polished or brushed silver | $15 to $40 | Attractive finish, appropriate for exposed installations | Corrodes from the inside out over time; heavier; harder to cut | Visible installations: pedestal sinks, open shelving, designer bathrooms |
| Polypropylene | White or black | $8 to $18 | Flexible trap kits simplify connection to offset rough-in | Accordion-style flexible traps trap debris and clog faster | Offset rough-ins where rigid pipe cannot reach; temporary use |
Critical rule: Never connect PVC directly to ABS using standard PVC cement. Use a dedicated transition cement (gray color, dual-rated) or a rubber fernco coupling. Mixing without the correct adhesive creates a joint that holds initially but fails within months.
Get quotes from top-rated pros.
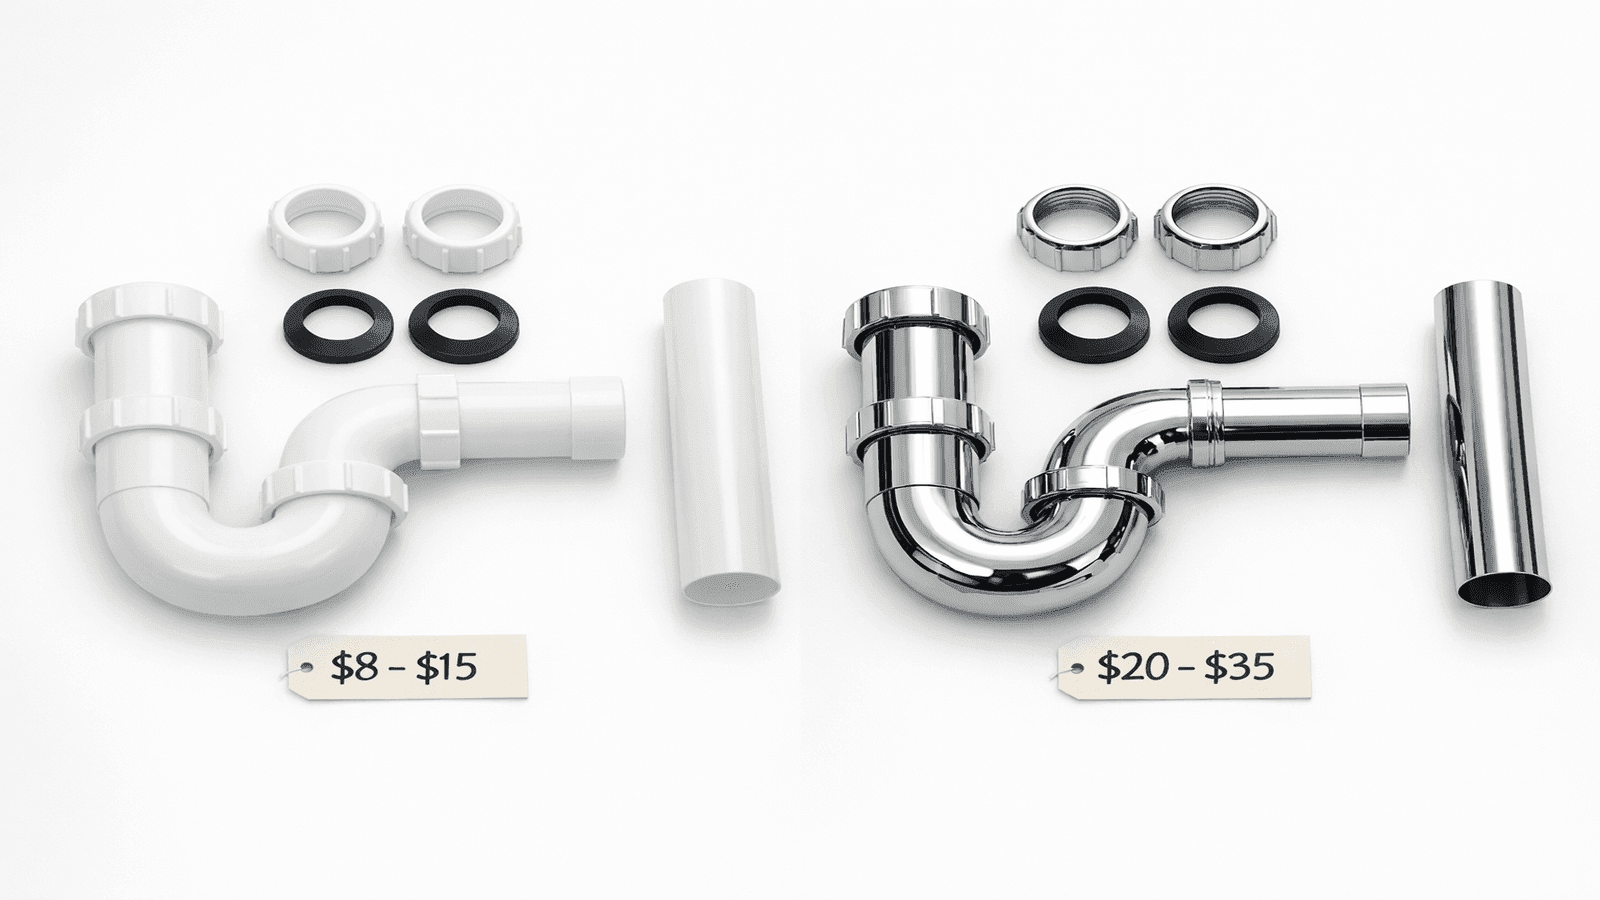
Photo: Side-by-side comparison of PVC P-trap kit and chrome metal P-trap kit on white surface with visible price difference
Tools and Materials Needed
No specialized plumbing tools are required. The complete list:
- Bucket or shallow pan (the trap holds water; it will spill when removed)
- Channel-lock (groove-joint) pliers (for stubborn plastic slip-joint nuts)
- Slip-joint pliers (optional; for chrome metal traps with tighter tolerances)
- New P-trap kit ($5 to $20 for PVC; $15 to $40 for chrome) including P-bend, trap arm extension, slip-joint nuts, and washers
- Plumber's tape (PTFE tape) (optional; some plumbers wrap threaded wall stub-outs)
- Utility knife or PVC pipe cutter (only if cutting the trap arm to length)
- Rags or paper towels (for cleanup)
- Flashlight or headlamp (under-sink cabinet lighting is poor)
No water shutoff is needed. The P-trap is on the drain side, not the supply side. The supply valves under the sink control only the hot and cold water lines feeding the faucet and are completely separate from the drain assembly. For a refresher on locating shutoffs for other repairs, see the guide on how to shut off your water supply.
Step-by-Step P-Trap Replacement
Follow these eight steps in order. The full job takes 15 to 30 minutes for a standard slip-joint plastic trap.
- Place a bucket under the P-trap. Position it directly beneath the curved P-bend. When you loosen the slip-joint nuts, the water held in the trap will drain immediately. Without a bucket, this water goes into the cabinet floor.
- Loosen the slip-joint nut at the wall stub-out first. Turn counterclockwise. This nut connects the trap arm to the horizontal pipe exiting the wall. Plastic nuts can usually be loosened by hand; chrome nuts require channel-lock pliers.
- Loosen the slip-joint nut connecting the P-bend to the tailpiece. Again counterclockwise. The trap assembly will now be free. Pull the trap arm out of the wall stub-out and lower the P-bend into the bucket.
- Inspect the wall stub-out opening. Look inside with a flashlight. Clear any visible debris. Check that the stub-out pipe itself is not cracked or corroded. If the stub-out pipe in the wall is damaged, this is no longer a simple P-trap swap and a plumber should assess the wall drain.
- Dry-fit the new trap before making any connections. Slide a slip-joint nut (threaded end first, away from the fitting) onto the tailpiece, then slide on the beveled washer with the tapered side facing down toward the P-bend. Test that the P-bend will reach the trap arm inlet at the correct height and angle. Cut the trap arm to length with a pipe cutter if needed.
- Connect the P-bend to the tailpiece. Push the P-bend up into the tailpiece, ensuring the washer seats cleanly, then thread the slip-joint nut clockwise by hand until snug. Do not use tools yet.
- Connect the trap arm to the wall stub-out and to the P-bend outlet. Slide the trap arm into the wall stub-out (it should insert at least 1.5 inches), then thread the slip-joint nut at the P-bend outlet clockwise by hand. Adjust the angle of the trap arm so the P-bend is level or slopes very slightly toward the wall (never back toward the sink).
- Hand-tighten all slip-joint nuts, then snug each one with channel-lock pliers no more than a quarter turn past hand-tight. This is the critical step. PVC and polypropylene plastic will crack if overtightened with pliers. Hand-tight plus a quarter turn creates a watertight seal on a fresh washer without stressing the fitting.
The number-one callback I get after homeowners replace their own P-trap is a cracked nut or fitting. They assume tighter is better. On PVC and poly, all that does is split the nut or fracture the fitting. I tell people: hand-tight plus a quarter turn. That is all you need with a fresh washer. If it still leaks after that, the washer is seated wrong, not loose.
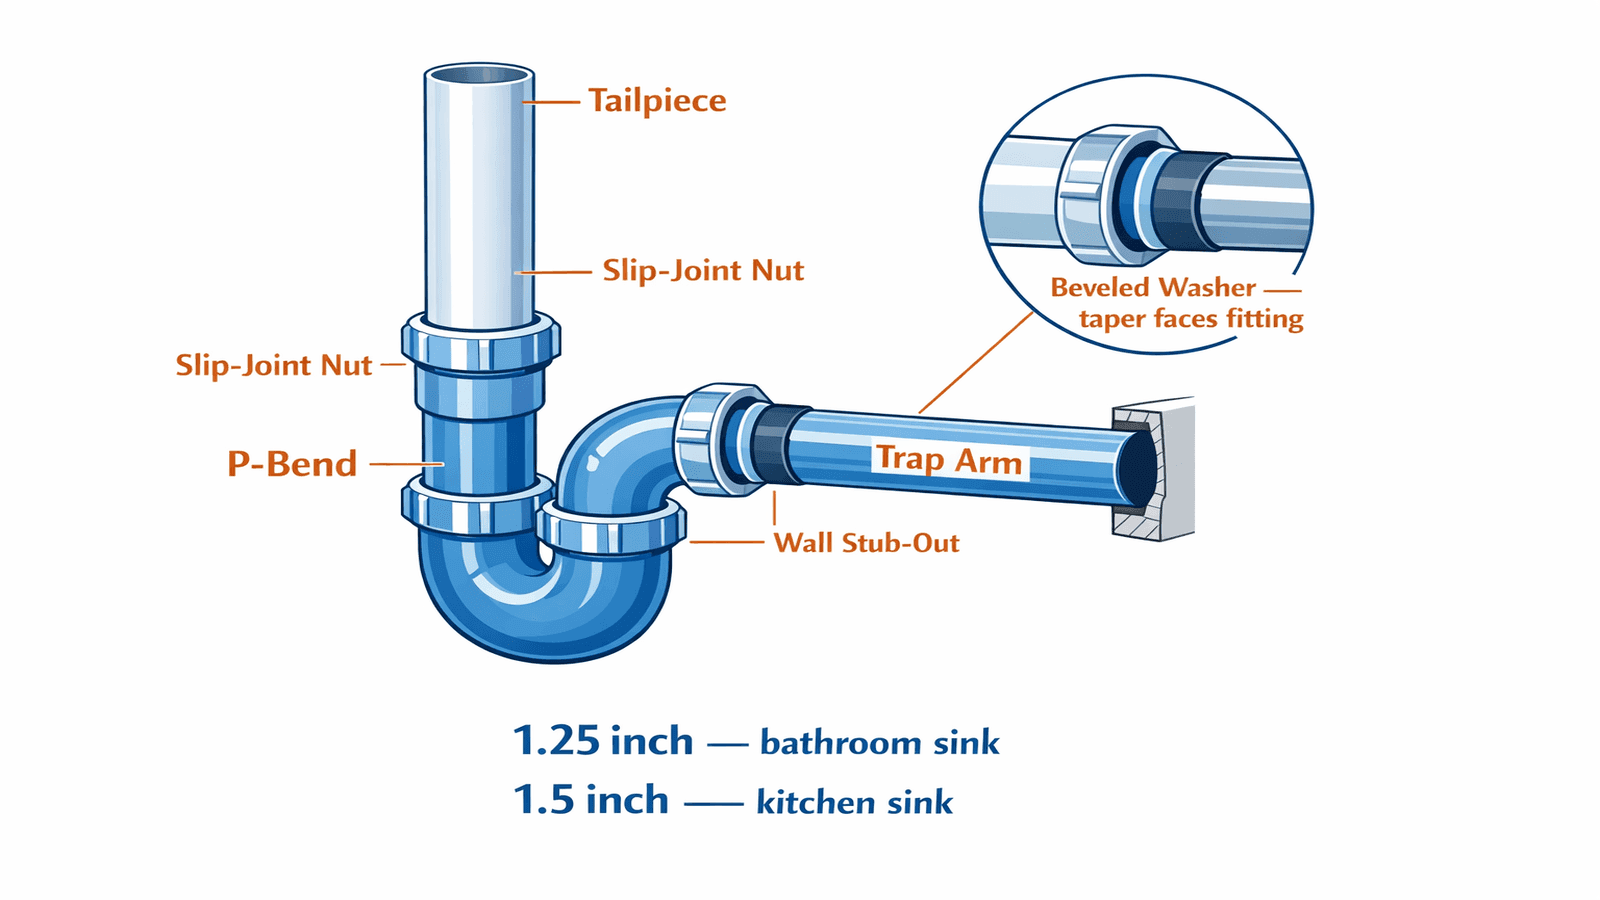
Photo: Labeled diagram of P-trap assembly showing tailpiece, slip-joint nut, beveled washer with taper direction, P-bend, trap arm, and wall stub-out with 1.25-inch and 1.5-inch size callouts
Testing for Leaks and Troubleshooting
How to test
After installation, run water at full pressure for 30 seconds, then bend down and visually inspect every slip-joint connection with a flashlight. Run your finger around each nut; even a slow drip will be immediately obvious on your fingertip. Dry the connections with a rag first so you are not misreading residual water from the installation.
If you have a double-bowl kitchen sink, test both drains individually and simultaneously. The shared drain connection point above the P-trap is a separate potential leak point.
Get quotes from top-rated pros.
Common causes of leaks after installation
| Symptom | Likely Cause | Fix |
| Drip at tailpiece nut immediately after tightening | Washer seated crooked or beveled side facing up | Loosen, reseat washer with taper facing the fitting, re-tighten |
| Drip at wall stub-out nut | Trap arm not inserted far enough into stub-out | Push arm in deeper, at least 1.5 inches, then tighten |
| Slow drip that appears only under flow | Nut cross-threaded during tightening | Loosen fully, realign threads, tighten carefully |
| Crack in plastic nut or fitting | Overtightened with pliers | Replace the cracked component; they are sold individually |
| Sewer smell persists after replacement | Trap arm slope is wrong (sloping back toward sink), allowing seal to drain out | Reinstall trap arm with slight downward slope toward wall |
Chrome is genuinely worth the extra money in one situation: a pedestal sink where the trap is fully visible. A white PVC trap under a designer pedestal sink looks terrible and lowers the perceived quality of the whole bathroom. Spend the $25 on a chrome assembly, take your time with alignment, and it becomes part of the design rather than an eyesore.
If your drain still runs slowly after replacing the P-trap and you confirmed the new trap is clear, the clog is likely further down the line in the branch drain or main stack. See the full guide on how to snake a drain for the next diagnostic steps.
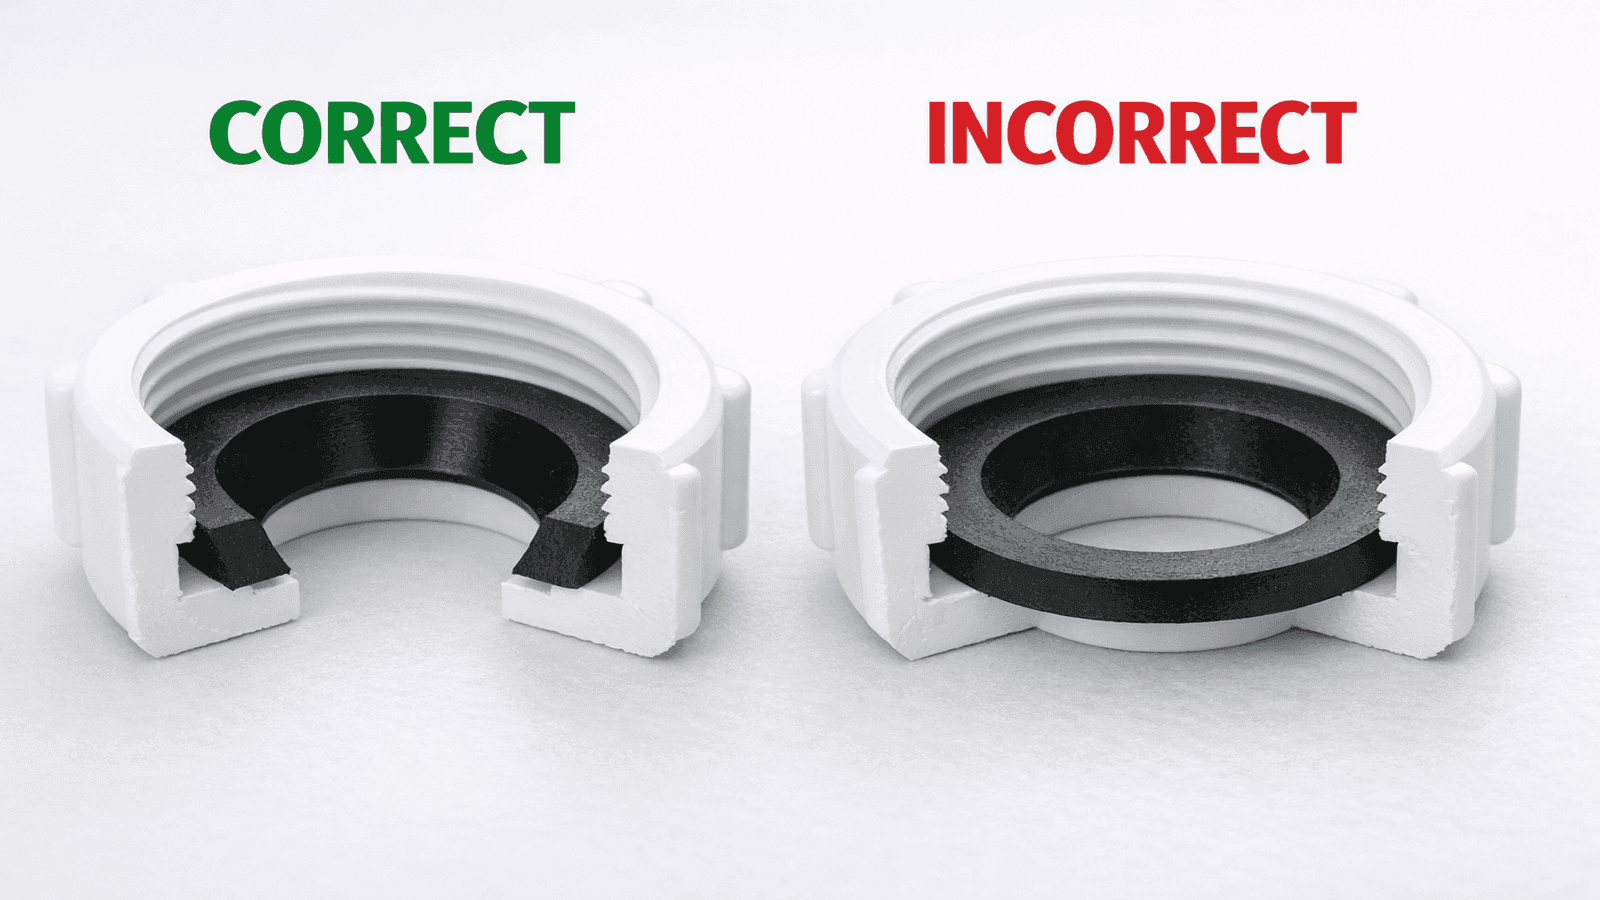
Photo: Close-up of correctly oriented beveled washer inside a slip-joint nut with tapered side facing the fitting, compared to incorrectly oriented washer
When to Call a Plumber
DIY P-trap replacement is appropriate for the vast majority of situations. However, call a licensed plumber if any of the following are true:
- The wall stub-out pipe is cracked, corroded through, or pulling away from the wall. Repairing the drain pipe inside the wall requires opening the wall or accessing a cleanout and is not a standard DIY task.
- The rough-in height is incorrect for the new P-trap. If a previous remodel installed the wall stub-out at a height that prevents the trap arm from maintaining a proper slope, correcting the rough-in requires cutting and repositioning the drain pipe inside the wall.
- Sewer gas smell persists after a confirmed correct installation. A persistent smell with a properly installed trap may indicate a venting problem (a blocked or undersized vent stack), a dried-out trap elsewhere in the building, or a cracked drain pipe behind the wall. A licensed plumber can also resolve a leaky faucet or other supply-side issues discovered during the visit.
- The drain pipe material in your home is cast iron. Connecting modern plastic traps to cast-iron stub-outs requires specific Fernco rubber couplings and proper sizing. A mistake here can cause a slow, undetected leak inside the wall. If you are dealing with any cast-iron connections, review the plumbing soldering guide for guidance on working with older metal pipe systems.
Professional P-trap replacement costs $150 to $393, depending on location and whether additional drain work is needed. That cost is justified when the problem extends beyond the trap itself.
Disclaimer: Cost ranges listed in this guide are national averages based on 2025-2026 industry data. Actual costs vary by location, severity, and contractor. Always get multiple quotes for plumbing work. Prices in major metro areas may be 20-40% higher than the national average. This guide is for educational purposes; consult a licensed plumber for issues beyond basic DIY repairs.
When a homeowner tells me they've replaced the P-trap twice in two years and it keeps leaking, I look at the wall stub-out almost every time. If that drain pipe inside the wall has a hairline crack or the hub is deteriorating, no amount of trap replacement fixes the underlying problem. That is a $300 to $400 repair that needs a plumber, not a $10 kit from the hardware store.

Michael Jennings is a licensed master plumber & water systems specialist with over 18 years of hands-on experience in residential and commercial plumbing, serving clients across California and Texas. At NearbyHunt, he shares practical advice on pipe installations, water heater maintenance, and home plumbing upgrades. Michael has helped thousands of homeowners prevent costly water damage and improve water efficiency through modern plumbing solutions.

Robert is a licensed master plumber with over 20 years of experience serving both residential and commercial clients across the Midwest. Specialising in advanced plumbing systems and sustainable water technologies, Rob brings deep technical insight and hands-on expertise to every project. As a reviewer for NearbyHunt, he ensures all plumbing content reflects the highest standards of safety, compliance, and practicality.