- Drip edge is required by code since IRC 2012 (Section R905.2.8.5) on all shingle roofs at both eaves and rake edges -- most jurisdictions enforce this strictly during re-roofing inspections
- Installation order is critical: drip edge goes UNDER underlayment at eaves, OVER underlayment at rakes -- reversing this order sends water directly into the fascia and framing
- 2-inch minimum overlap at all joints is an IRC requirement -- short overlaps create gaps that water will exploit within a season or two
- Material choice matters for your region: aluminum works in most climates, galvanized steel holds up better in high-wind areas, copper is premium-tier for historic or high-end projects
- Retrofitting costs $5-$9 per linear foot on an existing roof -- compared to $1-$3 per linear foot on a new installation, proper drip edge from the start saves significant money

Get quotes from top-rated pros.
Missing or improperly installed drip edge is one of the most expensive overlooked details in residential roofing. The flashing itself is inexpensive. The damage it prevents -- rotted fascia boards, deteriorated sheathing, and water intrusion into the wall assembly -- is not. James Carver has handled more than 1,800 residential roofing projects across the U.S. South and Midwest, and he estimates that a significant portion of emergency roof calls involve water damage that originated at the roof edges. In most cases, a properly installed drip edge would have stopped it.
This guide covers everything from code requirements and profile types to step-by-step installation order and common mistakes to avoid. Whether you are overseeing a new roof installation or retrofitting drip edge onto an existing roof, the principles here follow IRC requirements and industry best practices from the National Roofing Contractors Association (NRCA) and the Asphalt Roofing Manufacturers Association (ARMA). For a broader look at roof installation systems and how drip edge fits into a complete roofing assembly, see the full roofing installation guide. If you are also planning a full roof replacement, the cost to replace a roof guide covers how drip edge factors into overall project budgets.
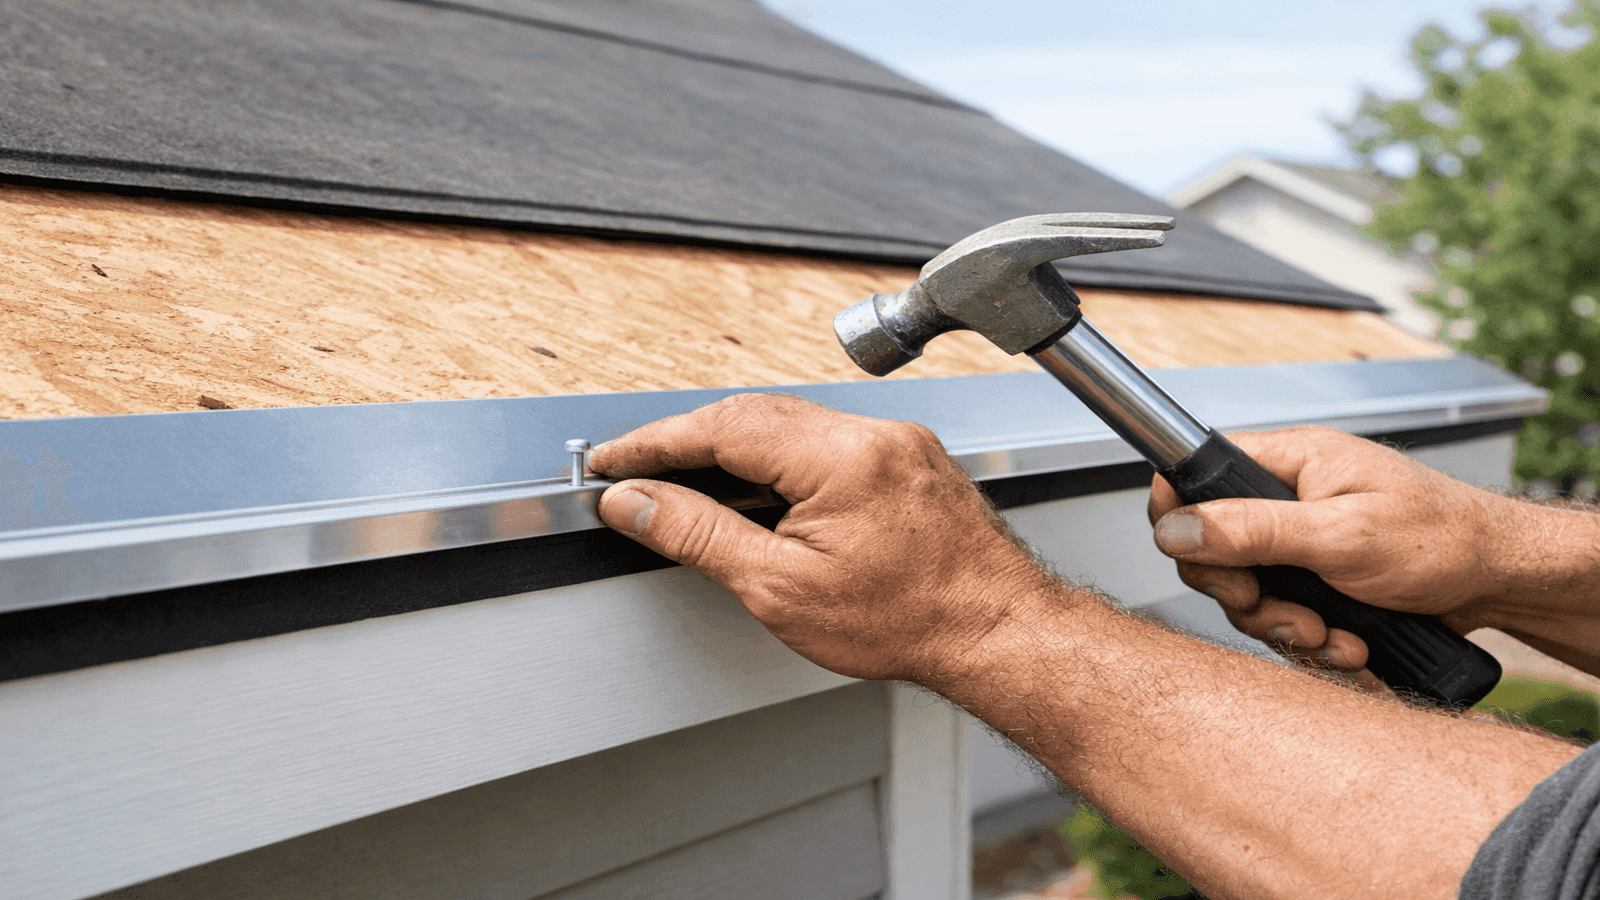
Photo: Licensed roofer installing aluminum drip edge along the eave of a residential roof before laying underlayment, showing proper L-shaped profile extending over the fascia board
What Drip Edge Does
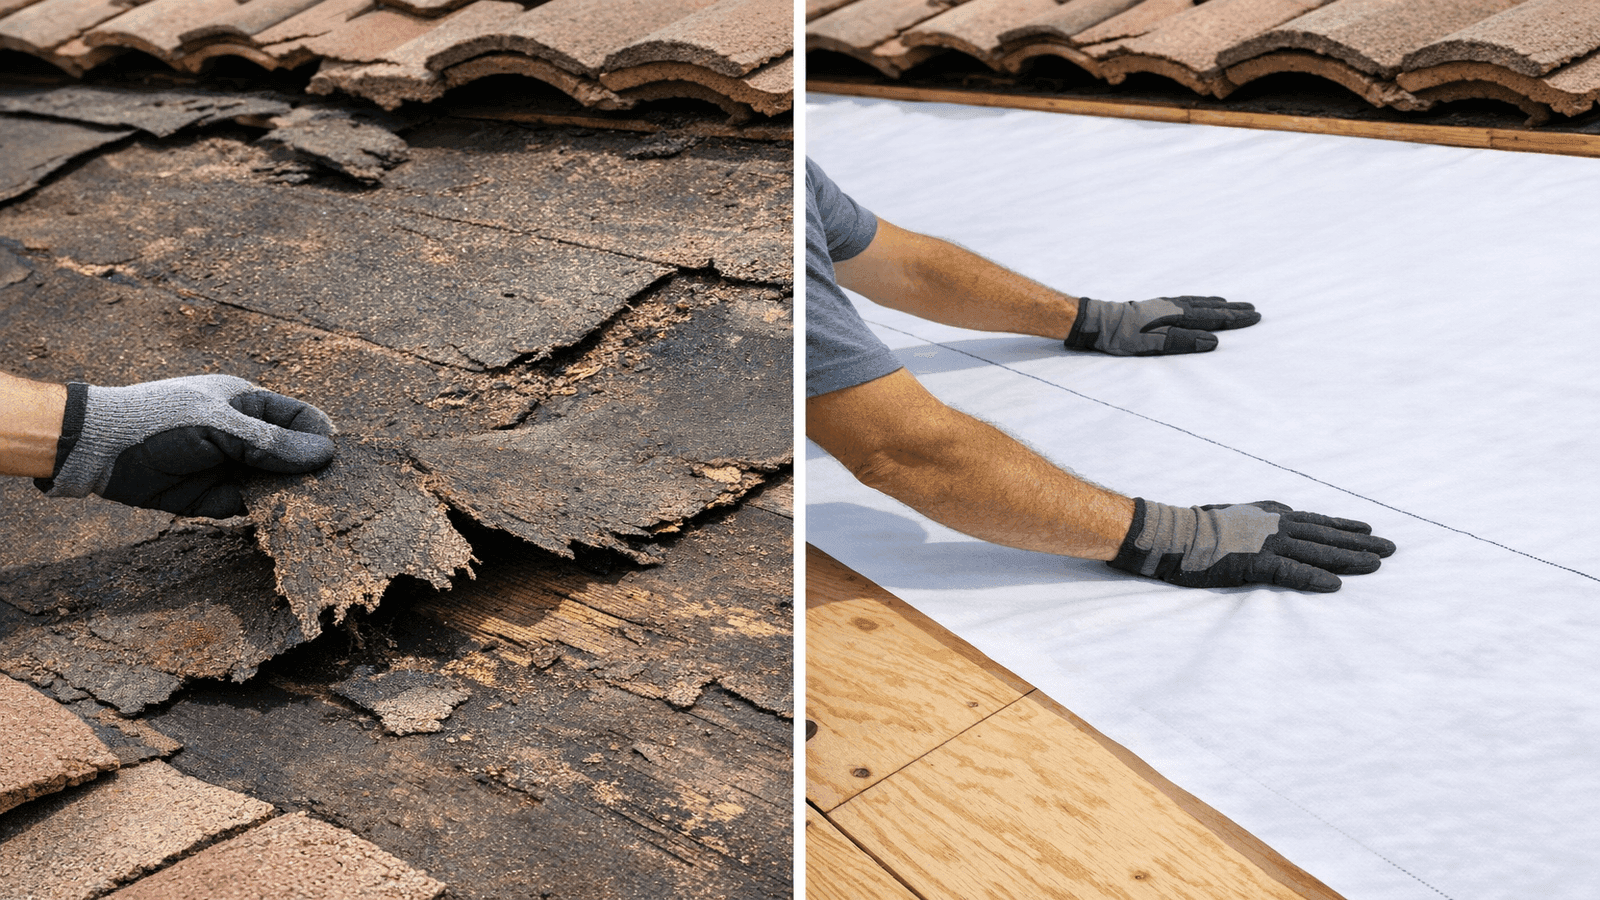
Drip edge is a metal flashing installed along the perimeter of a roof at the eaves (the horizontal bottom edges) and rake edges (the sloped side edges along gable ends). Its primary function is to direct water away from the fascia board and roof sheathing and into the gutters or safely past the edge of the roof.
Without drip edge, water running off shingles hits the edge of the roof deck and follows the path of least resistance -- which is often backward, along the underside of the shingles and directly against the fascia board. Over time, this causes:
- Fascia rot from constant moisture contact
- Sheathing deterioration at the roof edge where shingles end
- Mold and mildew growth behind the fascia
- Foundation damage when water cascades against the structure instead of draining into gutters
A drip edge serves as a breakpoint. Its profile extends below the roof sheathing and past the fascia, so water runs along the metal surface and drips off the structure. When properly installed, it eliminates the backward water migration that causes the damage described above.
The Marcus T. case study:
Marcus T., a homeowner in St. Louis, Missouri, had his roof replaced eight years before contacting James Carver. The original contractor did not install a drip edge. Over those eight years, water ran behind the shingles at the eave line with every rain event. By the time Marcus noticed the peeling paint and soft spots on the roofline, the fascia boards on three sides of his house had rotted through. The repair required replacement of 60 linear feet of fascia board, $2,400 in labour and materials, plus $380 to properly install the drip edge that should have been included from day one. A $2,780 repair bill that a $380 component would have prevented entirely.
James Carver's assessment after completing the repair: "I see this exact situation more often than I should. The contractor saved maybe $300 in material and labour by skipping the drip edge. The homeowner paid nearly ten times that years later, plus the aggravation of discovering rot damage on what they thought was a recently replaced roof."
Code Requirements
The International Residential Code (IRC) made drip edge mandatory for asphalt shingle roofs beginning with the 2012 edition [1]. Section R905.2.8.5 specifies:
- Drip edge is required at both eaves and rake edges on all shingle roofs
- Drip edge must extend a minimum of 0.25 inch below the roof sheathing
- Drip edge must extend up the roof deck a minimum of 2 inches
- Adjacent sections must overlap a minimum of 2 inches
- Fastening: maximum 12 inches on center with appropriate roofing fasteners
Most jurisdictions in the U.S. have adopted the 2012 or later IRC, which means drip edge is a code requirement for virtually all permitted roofing work. Inspectors check for it. Re-roofing contractors who skip it are creating a liability issue for themselves and leaving homeowners exposed to the exact damage the code was written to prevent.
NearbyHunt network data: Licensed roofers in the NearbyHunt network report that more than 70% of older homes built before 2012 that they inspect during re-roofing projects have improperly installed or completely missing drip edge. It is the single most overlooked component in residential roofing -- and among the cheapest to install correctly from the start [2].
Local adoption note: While IRC 2012 is the national baseline, some states and municipalities have adopted later editions or have additional local amendments. Your licensed contractor should verify the current adopted code edition in your jurisdiction before beginning work.
Drip Edge Profile Types
Three profile types are commonly used in residential roofing. Each serves the same function but handles the transition between the roof deck and fascia differently.
| Profile | Shape | Best Use | Cost Range |
| Type C (L-Style) | 90-degree L shape | Roofs with adequate overhang and gutters | $0.30-$1.00/LF material |
| Type D (T-Style) | Extended T or F profile | Roofs with minimal overhang | $0.50-$1.20/LF material |
| Type F (F-Style / Gutter Apron) | Extended nose with kick | Retrofit over existing shingles, rake edges | $0.60-$1.50/LF material |
Type C (L-Style)
Type C is the most basic profile: a simple 90-degree bend creating a vertical leg that sits against the fascia and a horizontal leg that extends up the roof deck. It is the most affordable option and works well on roofs with adequate overhang where water naturally drips clear of the fascia. Type C is the standard choice for most new residential installations with gutters.
Type D (T-Style)
Type D extends further from the fascia face with an additional kick or tab, creating a profile that more closely resembles a T. This extra extension ensures water drops completely clear of the fascia even on roofs with minimal overhang. Type D is preferred by many contractors, including James Carver, on homes where the roof pitch is low and the overhang is less than 1 inch, since the extended profile provides additional insurance against backward water migration.
Type F (F-Style / Gutter Apron)
Type F has a longer upper flange that slides under existing shingles, making it the correct choice for retrofitting drip edge on an existing roof without a full tear-off. The extended leg tucks behind the current shingles and directs water forward. It is also commonly used at rake edges. If you are adding drip edge to a roof that is otherwise in good condition, Type F is the profile you need.
Get quotes from top-rated pros.

Photo: Side-by-side comparison of Type C L-style, Type D T-style, and Type F F-style drip edge profiles showing cross-section shapes and extended flanges
Material Options
Aluminum
Aluminum is the most widely used material for residential drip edge. It is lightweight, corrosion-resistant, easy to cut and bend, and available in a wide range of colors to match trim or gutters. Most standard residential installations use aluminum. Cost runs approximately $0.30 to $0.80 per linear foot for material, making it the most affordable option [3].
Aluminum does not hold up as well as steel in extremely high-wind environments, and it can be damaged by impact (hail strikes on exposed profiles, for example). For most residential applications in moderate climates, aluminum is the correct choice.
Galvanized Steel
Galvanized steel drip edge is heavier and more rigid than aluminum, making it a better choice in high-wind regions where the drip edge profile is more exposed. It costs approximately $0.50 to $1.20 per linear foot for material. The galvanized coating provides rust resistance, though it will eventually wear in coastal or high-humidity environments. In those conditions, look for thicker galvanized coating specifications.
Copper
Copper drip edge is the premium option. It will outlast both aluminum and galvanized steel by decades, develops a natural patina that many homeowners find aesthetically desirable, and is the standard choice for historic restoration work or high-end projects where longevity and appearance both matter. The cost premium is significant: copper drip edge runs $3.50 to $9.50 per linear foot for material, compared to under a dollar for aluminum. Copper requires specialized installation -- never mix copper with galvanized fasteners, as dissimilar metals in contact with water cause accelerated corrosion.
Material selection guidance from James Carver: "For 90% of the residential work we do, aluminum is the right call. It's code-compliant, it's easy to work with, and it performs well for the life of the shingles. I use galvanized steel in coastal Mississippi and Alabama where wind events are more frequent and more severe. Copper is reserved for historic homes and premium custom projects where the client specifically requests it."
Installation Order (Critical)
The installation sequence for drip edge is one of the most commonly botched details in residential roofing. Getting it wrong -- even slightly -- defeats the entire purpose of the component and can cause the fascia rot it is designed to prevent.
The correct sequence:
At eaves (bottom horizontal edge):
- Install drip edge first, directly on the roof sheathing, before any underlayment
- Roll out the underlayment OVER the drip edge
- The underlayment lapping over the drip edge ensures water that gets under the shingles flows onto the drip edge and into the gutter, not behind it
At rakes (sloped side edges at gable ends):
- Install underlayment first across the entire deck
- Install drip edge OVER the underlayment along the rake edges
- The drip edge lapping over the underlayment prevents wind-driven rain from getting under the edge and behind the underlayment at the gable
The reasoning behind the different sequences comes down to water flow physics. At the eave, you want water moving down and off the edge -- underlayment over drip edge accomplishes this. At the rake, you want protection from wind-driven rain moving horizontally -- drip edge over underlayment closes that gap.
Ice and water shield exception: When self-adhering underlayment (ice and water shield) is used at the eaves -- required by many codes in cold climates -- the drip edge is installed first, then the ice and water shield overlaps it. This creates a fully sealed transition at the most vulnerable part of the roof assembly. In some cold-climate specifications, a second layer of ice and water shield is added on top of the drip edge, effectively sandwiching the drip edge between two waterproof layers.
Nail spacing and fastening:
IRC Section R905.2.8.5 specifies a maximum fastener spacing of 12 inches on center for drip edge attachment [1]. Most contractors use roofing nails or staples appropriate to the deck material. Fasteners should penetrate into the sheathing -- do not rely solely on the mechanical grip of the bend against the fascia. At joints, maintain the 2-inch minimum overlap and nail through both layers at the overlap point to lock the joint.
Corner treatment:
Where the eave drip edge meets the rake drip edge at the corner, the rake piece goes on top. The bottom corner is mitered at 45 degrees by most experienced installers, or folded over, to create a clean watertight corner. Do not simply butt the two pieces together -- a butt joint at the corner creates a gap directly above the highest-stress water flow point on the roof.
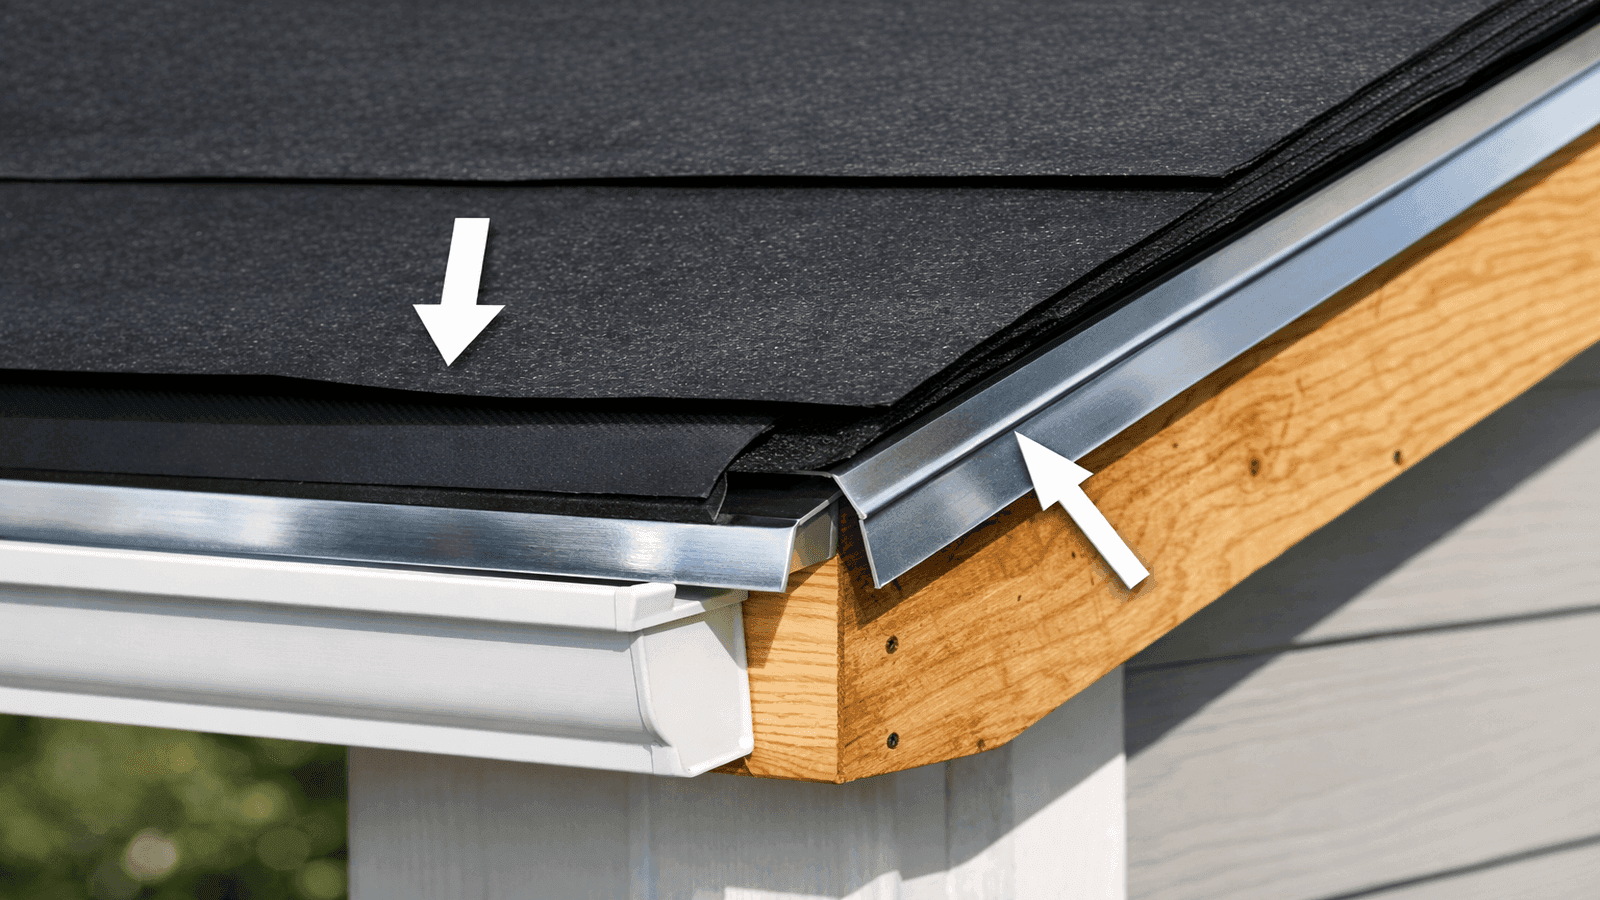
Photo: Roof edge showing correct installation sequence with underlayment over drip edge at the eave and drip edge over underlayment at the rake with water flow direction indicated
How to Install Drip Edge on an Existing Roof
When homeowners discover their roof lacks drip edge and the roof itself is otherwise in acceptable condition, a full tear-off is not always necessary. Type F drip edge is specifically designed for retrofit installation. James Carver has completed this work hundreds of times on homes across the U.S. South and Midwest.
Tools and materials needed:
- Type F drip edge in appropriate material (aluminum for most applications)
- Tin snips for cutting to length and notching corners
- Roofing nails or coil nailer with roofing nails
- Flat bar or zip tool to lift existing shingles
- Sealant for corner joints
- Safety equipment: non-slip footwear, harness on steep pitches
Step-by-step retrofit process:
Step 1: Measure the perimeter. Measure all eave edges and all rake edges separately. Order Type F drip edge plus approximately 10% for waste from cuts and overlaps. The standard section length is 10 feet.
Step 2: Remove or lift existing shingles at the edge. Using a flat bar, carefully lift the first course of shingles at the eave. You do not need to remove them, just lift enough to slide the upper leg of the Type F profile underneath. At the rake edge, lift the edge course similarly.
Step 3: Slide the drip edge into position. The upper flange (the longer leg on Type F) slides under the existing shingles. The lower flange wraps around the fascia face. Check that the profile is sitting flush against the sheathing edge and that the lower flange covers the full depth of the fascia.
Step 4: Nail at 12-inch intervals. Nail through the upper flange into the sheathing at maximum 12-inch on center spacing. Do not over-drive nails -- the head should sit flush with the metal surface, not dimple through it.
Step 5: Overlap joints by 2 inches minimum. Each new section overlaps the previous by at least 2 inches. At overlaps, nail through both layers. On retrofit work where you cannot get into a standard nail position, construction adhesive rated for metal roofing applications can supplement mechanical fastening at overlaps.
Step 6: Treat corners carefully. At gable corners where eave and rake meet, cut and fold or miter the corner piece. Apply sealant to the joint before lowering the shingles back down.
Step 7: Nail down lifted shingles. After drip edge is secured, re-nail any lifted shingles. If shingles cracked during lifting (common on older, more brittle asphalt), replace those courses rather than re-nailing cracked material.
When retrofit is not appropriate: If the first 6-12 inches of sheathing at the eave is visibly deteriorated or soft when probed, or if the fascia itself is rotted, a retrofit drip edge installation is not enough. At that point, a full tear-off with sheathing and fascia replacement is required before installing new drip edge and underlayment. A thorough roof inspection checklist will help you assess whether edge damage has already compromised the sheathing before you start.
>James Carver, Licensed Roofing Contractor: "On retrofit jobs, I probe every inch of sheathing within 12 inches of the eave before I touch the existing shingles. I've lifted shingles for a simple drip edge retrofit and found sheathing so deteriorated it crumbled when I pressed it. At that point, the homeowner needs to know immediately -- putting new drip edge on rotted decking is a waste of money. Across 1,800-plus projects, I can tell you: the condition of the sheathing edge determines whether you're doing a retrofit or a tear-off. There's no in-between."
Common Installation Mistakes
Reversed installation order
Installing drip edge over the underlayment at the eave instead of under it is the most common and most damaging error. It seems counterintuitive to some installers -- why would you put metal under the underlayment? -- but the physics are clear. If drip edge sits on top of the underlayment at the eave, water that travels under the shingles runs onto the underlayment and then backward behind the drip edge and directly against the fascia. This is exactly the scenario drip edge exists to prevent. This mistake is invisible from the exterior and can go undetected until fascia rot appears years later.
Insufficient overlap at joints
Butting sections of drip edge end-to-end without overlap creates a gap that water finds immediately. The IRC requires 2-inch minimum overlap. Field observations from experienced contractors suggest 3-inch overlaps are better practice, particularly in high-rainfall regions. Seal the overlap joint with sealant on retrofit applications for additional protection.
Missing drip edge at gable ends
Some contractors install drip edge only at the eaves and skip the rake edges. This leaves the gable ends unprotected from wind-driven rain. Rake edges are where shingles terminate, and without drip edge, that edge is exposed to direct weather. IRC Section R905.2.8.5 explicitly requires drip edge at both eaves and rakes.
Using the wrong profile for retrofit work
Attempting a retrofit with Type C drip edge instead of Type F is a common shortcut that produces poor results. Type C does not have the extended upper flange needed to tuck under existing shingles. The result is a gap at the sheathing edge that wind and water exploit. Always use Type F for retrofit applications.
Improper fastening
Nailing at 24-inch intervals instead of the code-required 12-inch maximum leaves sections of drip edge that can lift in wind events. In high-wind areas (wind zones III and IV), some local codes require closer spacing than the IRC minimum. Confirm local wind zone requirements before finalizing fastener schedule.
Poor corner treatment
Butted corners without overlap or folding create a gap at the most water-stressed point on the entire roof perimeter. Corner treatment requires either a mitered cut with overlap, or a factory-bent corner piece. Sealant at corners is not a substitute for proper mechanical overlap, but it does supplement it effectively.
Get quotes from top-rated pros.
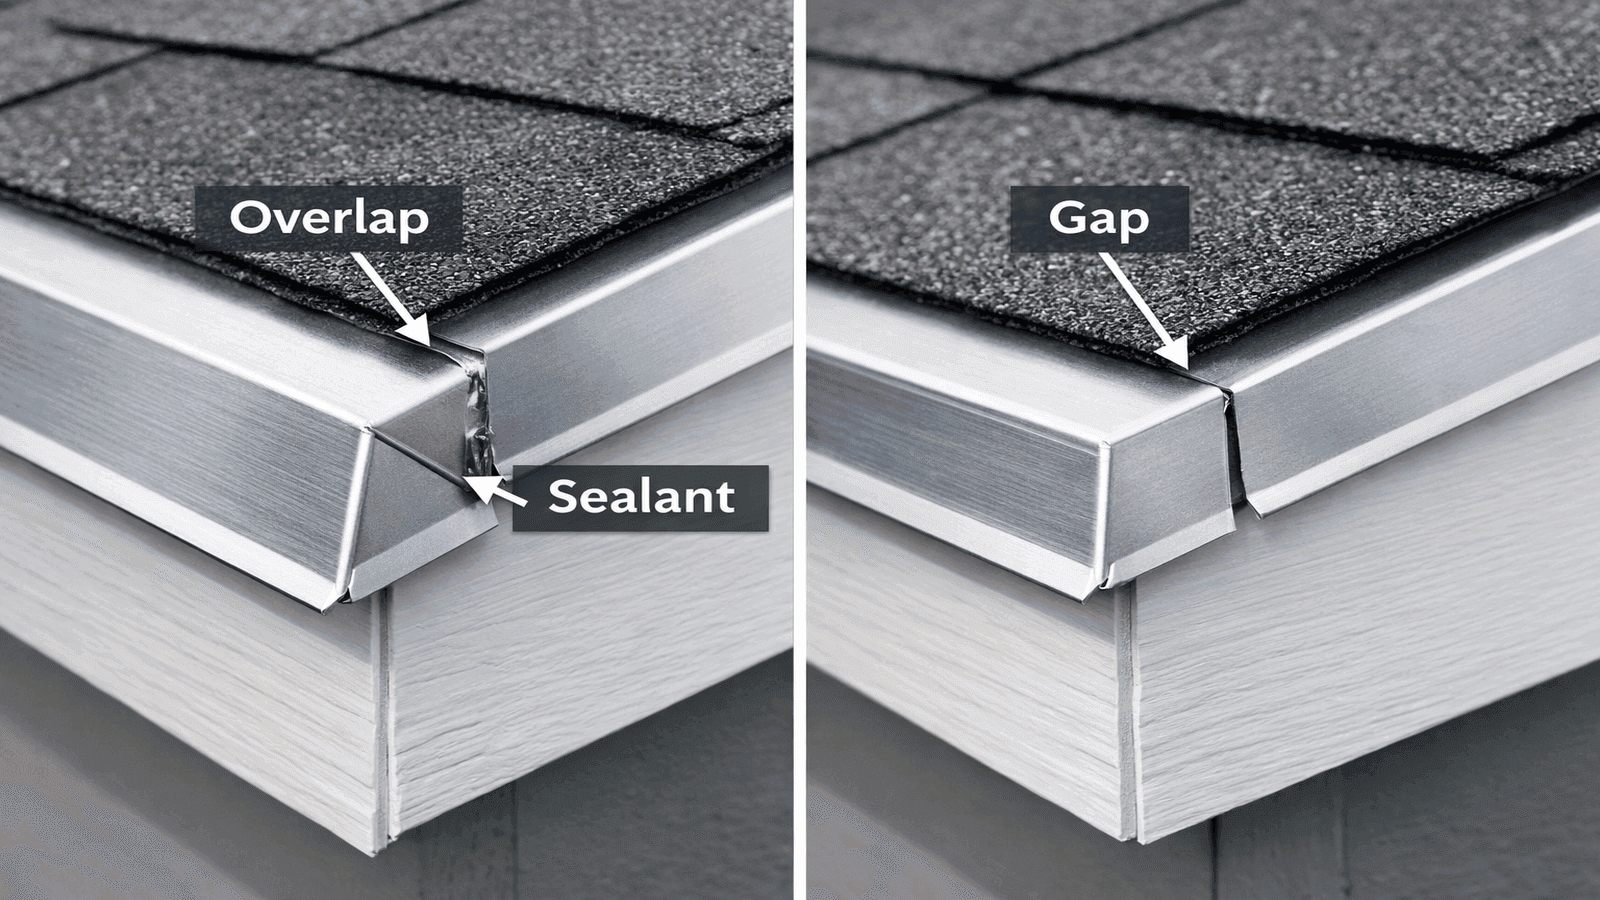
Photo: Comparison of correct drip edge corner with proper overlap versus incorrect butt joint corner showing gap at the roof edge where eave and rake meet
Drip Edge Installation Cost
| Cost Category | Low | High | Notes |
| Material only (aluminum) | $0.30/LF | $0.80/LF | Most common; 10-foot sections |
| Material only (galvanized steel) | $0.50/LF | $1.20/LF | High-wind regions |
| Material only (copper) | $3.50/LF | $9.50/LF | Premium / historic |
| Labor during new roof install | $1.00/LF | $2.00/LF | Part of full roofing contract |
| Labor retrofit on existing roof | $3.00/LF | $7.00/LF | Lifting existing shingles required |
| Total installed (new roof) | $1.50/LF | $3.00/LF | Material + labor combined |
| Total installed (retrofit) | $5.00/LF | $9.00/LF | Includes shingle handling |
For a typical 2,000 square foot home with approximately 200 linear feet of eave and rake perimeter, new installation drip edge costs run $300-$600 total. Retrofit work on the same home runs $1,000-$1,800 [6].
What drives cost variation:
- Roof pitch: Steeper pitches require more time and safety equipment, adding to labor costs
- Material choice: Copper can add $600-$1,200 to a typical home compared to aluminum
- Condition of existing shingles: Brittle or damaged shingles at the eave line on retrofit work may require partial replacement
- Local labor rates: Rates vary significantly by region -- Gulf Coast markets often run higher due to demand from storm repair work
If you are having a full roof replacement, the cost of drip edge is a line item in the contract. Any contractor who excludes it entirely without explicit discussion should be asked directly why it is missing. Since 2012, drip edge is not optional on permitted work. For more on what a complete roof replacement scope covers, see the guide on replacing roof shingles.
Find a licensed roofer who will install drip edge correctly from the start. Find Licensed Roofers Near You
Disclaimer: This article provides general information about drip edge installation based on industry standards and IRC requirements as of March 2026. Local building codes vary -- always consult your local building authority and a licensed roofing contractor for requirements in your jurisdiction. This content is for informational purposes only and does not constitute professional engineering or contracting advice. Always hire a licensed contractor for permitted roofing work.
Sources & References
[1] International Code Council, International Residential Code 2012 and 2024, Section R905.2.8.5 — Drip Edge. https://codes.iccsafe.org/s/IRC2024P2/chapter-9-roof-assemblies/IRC2024P2-Pt03-Ch09-SecR905.2.8.5
[2] Asphalt Roofing Manufacturers Association (ARMA) — Installation of Drip Edge at Eaves and Rakes. https://www.asphaltroofing.org/installation-of-drip-edge-at-eaves-and-rakes/
[3] National Roofing Contractors Association (NRCA) — Roofing Manual: Steep-slope Membrane Roofing.
[4] GAF Roofing — Installation Best Practices for Drip Edge Flashing. https://www.gaf.com
[5] This Old House — Roof Drip Edge Types. https://www.thisoldhouse.com/roofing/roof-drip-edge-types
[6] Bob Vila — How to Install Drip Edge on a Roof. https://www.bobvila.com/articles/drip-edge/


James is a licensed roofing contractor with 20 years of experience in roof installation, inspection, and repair across the U.S. South and Midwest. He specialises in asphalt shingles, metal roofing, and storm damage restoration. On NearbyHunt, James offers practical advice on roof maintenance, insurance claims, and selecting the right materials for long-lasting protection.

Jacob is a licensed roofing contractor with over 18 years of experience in roof inspection, installation, and restoration. Based in Texas, he has led hundreds of successful roofing projects across residential and commercial properties. Jacob is also a certified storm damage specialist, ensuring that all NearbyHunt roofing content meets industry best practices and safety standards.