- Roof decking is the structural wood layer nailed to rafters; it must be properly rated, fastened, and gapped before any roofing material is installed.
- OSB (7/16" minimum) is the standard choice for cost and structural performance; CDX plywood (1/2" minimum) offers better moisture tolerance and nail-holding in high-humidity climates.
- APA-rated panels must be fastened with 8d ring-shank nails at 6" on edges and 12" in the field, per IRC nailing schedules.
- H-clips are required on panel edges that span between rafters at 24" on center when edge support is absent.
- A 1/8" expansion gap between all panel edges and ends is mandatory to allow for thermal and moisture movement.
- Damaged decking must be fully replaced before installing new roofing — partial repairs under new shingles routinely void manufacturer warranties.

Get quotes from top-rated pros.
Roof decking is the layer of structural wood panels fastened to rafters or trusses that forms the continuous surface on which every other roofing component sits. When it is installed correctly, it is invisible for the life of the roof. When it is installed incorrectly — or when it is damaged and left in place it becomes the most expensive mistake in the entire roofing system.
This guide covers OSB versus plywood material selection, APA panel ratings, IRC fastening requirements, H-clip placement, expansion gaps, how to identify damaged sections during a re-roofing project, replacement costs, and how decking condition affects roofing warranty coverage. For the complete installation sequence from decking through flashing, underlayment, and shingles, see the Roofing Installation Guide. For a detailed look at what a full re-roofing project costs from start to finish, see the Cost to Replace a Roof guide. Homeowners dealing with storm damage may also want to review the Emergency Roof Repair Cost breakdown.
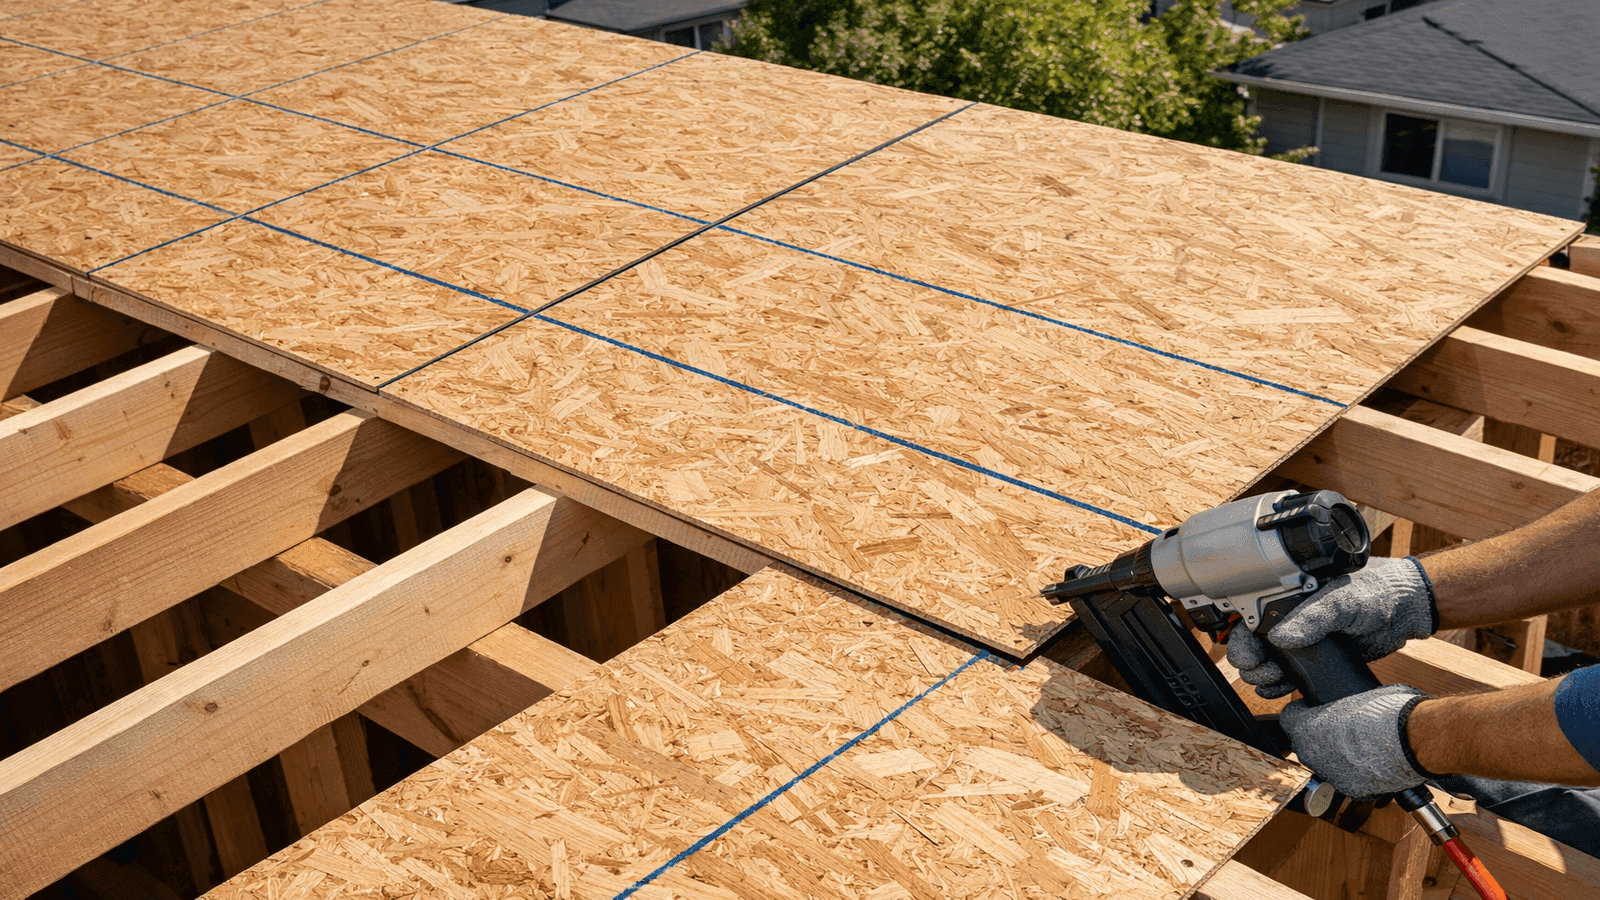
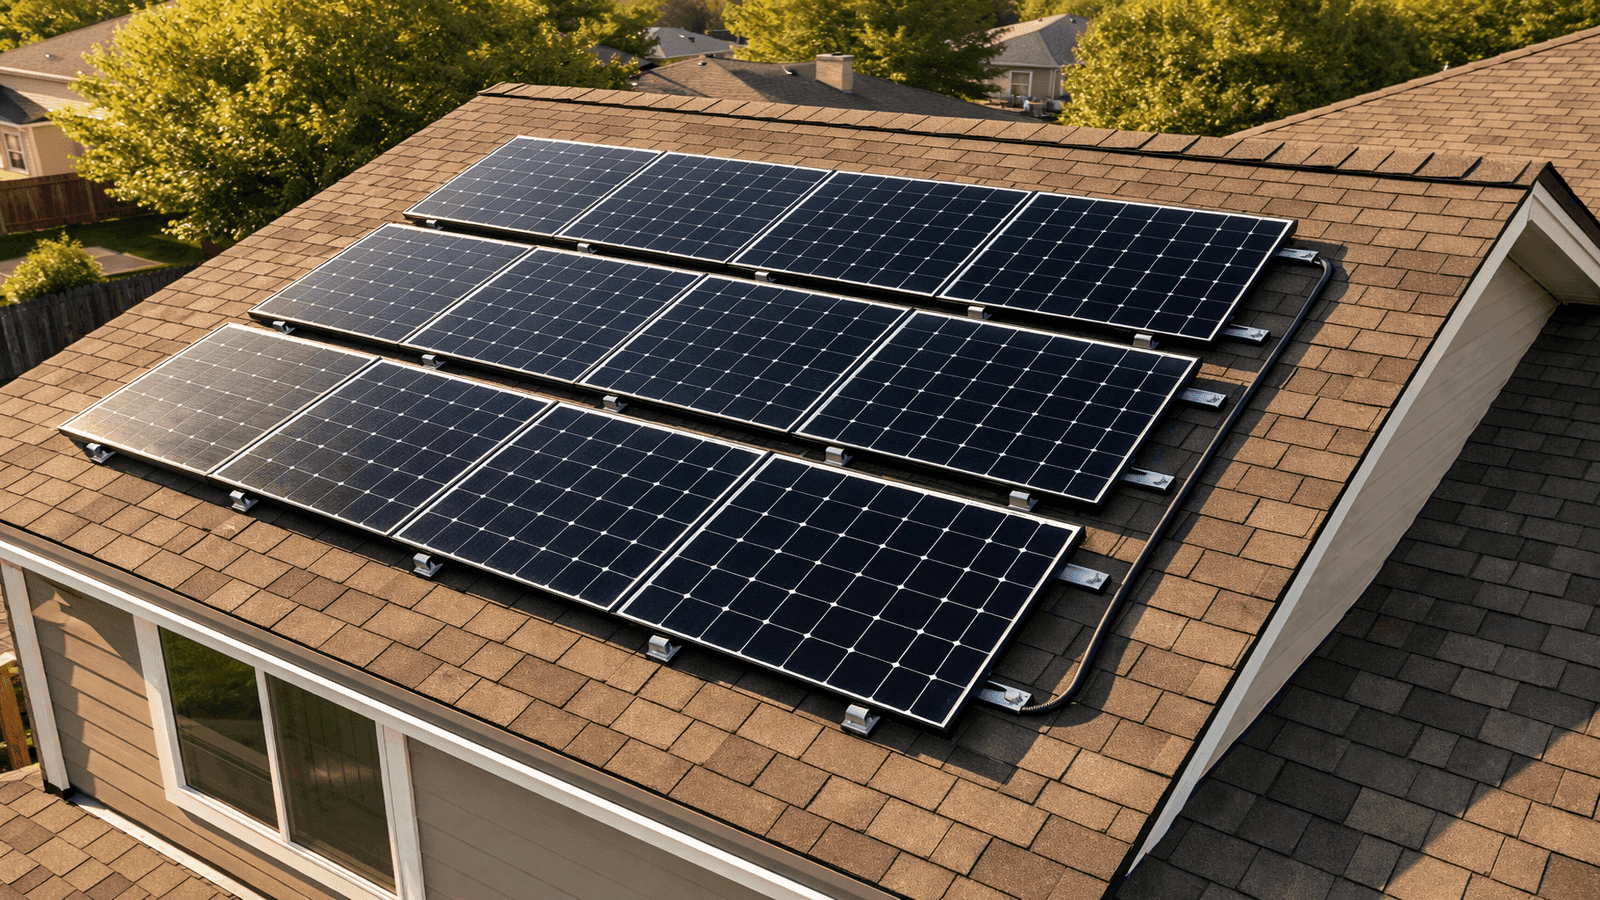
Photo: Aerial close-up view of a residential roof mid-installation showing OSB decking panels being laid across rafters with visible panel gaps, chalk lines for nailing, and a contractor applying the first row of panels in bright afternoon light.
Why Decking Condition Determines Everything Above It
Every component layered above the roof deck — underlayment, ice-and-water shield, drip edge, flashing, shingles, ridge vent — depends on the deck being flat, solid, properly nailed, and free of moisture damage. A compromised deck bends under point loads, produces visible waves in finished shingles, causes nail pops, and ultimately allows water infiltration that works downward into the structure.
According to the National Roofing Contractors Association (NRCA), improper deck preparation is among the leading contributors to premature roofing system failure [1]. The ICC International Residential Code (IRC) Section R803 establishes minimum structural requirements for wood structural panel roof sheathing, and those requirements exist because improperly installed decking has documented failure histories in wind events, under snow loads, and from sustained moisture exposure.
James Carver is a licensed roofing contractor with 1,800-plus residential projects completed across the U.S. South and Midwest over a 20-year career. He is direct about where re-roofing projects most often go wrong.
The number one mistake I see on tear-offs is contractors rushing past bad decking. A soft spot is not just a soft spot. It means moisture has been sitting there long enough to degrade the wood, and that moisture has probably traveled further than the spot you can feel. You cannot put $10,000 in shingles over a compromised deck and call it a quality job.
Data from the NearbyHunt network supports this directly: approximately 35% of re-roofing jobs that licensed roofers in the NearbyHunt network start uncover at least one section of damaged or delaminated decking that must be replaced before new roofing can be installed. That is not a rare edge case — it is the expectation on any home older than 15 years.
OSB vs CDX Plywood
The two standard residential roof decking materials are oriented strand board (OSB) and CDX plywood. Both carry APA structural ratings, both meet IRC requirements when properly specified, and both perform reliably over a normal roof lifespan when installed correctly. The differences matter in specific situations.
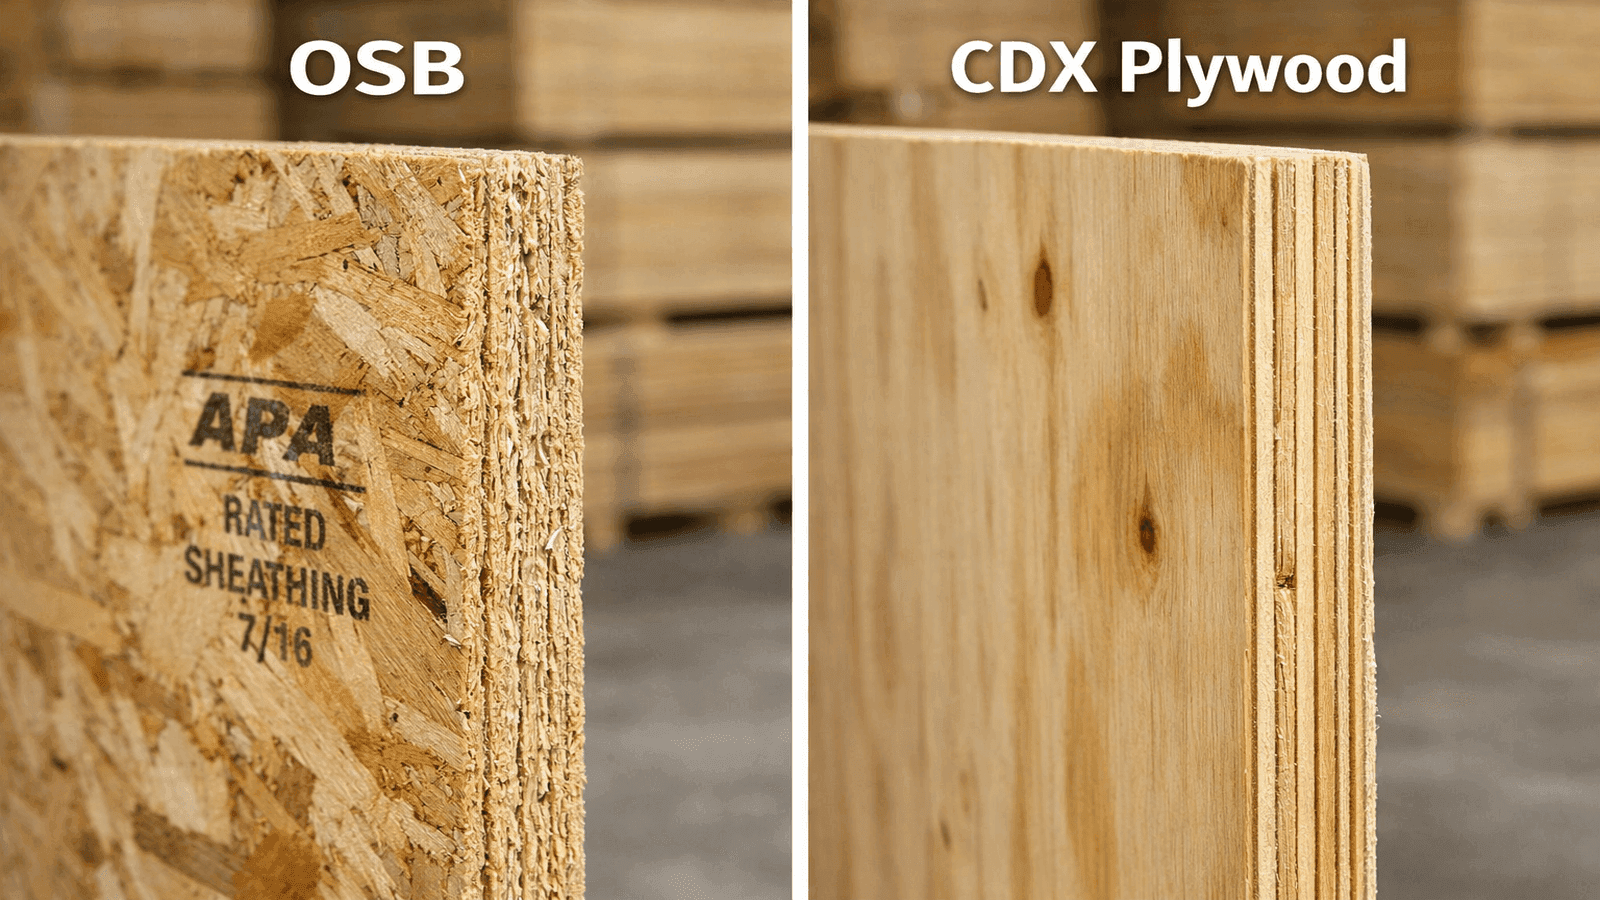
Photo: Side-by-side close-up comparison of OSB and CDX plywood sheets standing vertically against a wall in a lumber yard, with visible edge profiles showing OSB's strand composition versus plywood's laminated veneer layers, labeled clearly.
OSB
OSB is manufactured from oriented wood strands compressed and bonded with resin under heat and pressure. It is engineered for uniform strength in both directions across the panel. A standard 7/16" OSB panel rated for 24" rafter spacing costs $30–$55 per sheet in 2026 material pricing.
Advantages of OSB for roof decking:
- Lower material cost than plywood, typically 15–20% less per sheet
- Consistent thickness throughout — no voids or delamination layers
- High shear strength; meets or exceeds plywood in diaphragm applications
- Widely available at all major building supply chains
Limitations of OSB:
- More moisture-sensitive than plywood at the edges; edge swell from chronic wet exposure creates visible ridges ("ghost lines") through asphalt shingles
- Average edge swell of 10–15% on exposure compared to 6–8% for plywood
- Once OSB edge swelling occurs, it does not fully reverse when the panel dries
- Requires careful storage and protection on-site before installation
OSB is the appropriate default choice for most residential re-roofing and new construction projects in dry to moderate climates. It is the dominant product in the market precisely because it performs well at a lower cost when installed and protected properly [2].
Get quotes from top-rated pros.
CDX Plywood
CDX plywood for roofing is cross-laminated from multiple wood veneers. The "C" and "D" designations refer to the face veneer grades (C on the exposed face, D on the back), and "X" means the adhesive is rated for exterior exposure. Minimum thickness for residential roofing on 16" rafter spacing is 1/2"; 19/32" is the standard specification for 24" on-center framing.
A 1/2" CDX plywood sheet costs $50–$85 per sheet in 2026, depending on regional availability and wood species.
Advantages of CDX plywood:
- Significantly better moisture tolerance; performs better under chronic leak exposure before degrading
- Superior nail-holding power due to layered grain structure distributing stress across veneers
- Bending stiffness approximately 10% higher than OSB at equivalent rafter spacing
- Recovers better from one-time wet events once dried
Limitations of CDX plywood:
- Higher material cost
- May contain voids in interior plies (visible on cut edges), which can affect nail placement near edges
- Heavier than OSB at equivalent thickness, adding to labor time
CDX plywood is the preferred choice in high-humidity climates (Gulf Coast, Southeast, Pacific Northwest), on re-roofing projects where a history of slow leaks is suspected, and when the contractor has specified a manufacturer warranty that specifies plywood as the required substrate.
In Memphis and across the Mid-South, I default to OSB on straightforward replacements where there's no history of moisture issues. But if I pull off the old shingles and see any sign of chronic water — dark staining that goes back more than one season — I switch to CDX plywood on every replacement panel, regardless of what was originally there. The extra $15–$20 per sheet is nothing compared to redoing the work in five years.
APA Panel Ratings and Span Classifications
All structural wood panels used for roof decking must carry an APA (Engineered Wood Association) performance-rated stamp. This stamp tells the installer everything they need to know about proper application.
The APA panel stamp includes:
- Span Rating: The two-number designation on OSB and plywood (e.g., 24/16) where the first number is the maximum rafter spacing for roof sheathing use and the second is the maximum joist spacing for floor use. A panel stamped "24/16 Structural 1" is rated for rafters at up to 24" on center.
- Exposure Rating: "Exposure 1" means the panel can withstand temporary exposure to weather during construction but should not remain exposed indefinitely. "Exterior" panels use fully waterproof adhesive and are rated for permanent exposure.
- Thickness: Nominal thickness is stamped on the panel. For roof applications, 7/16" is the IRC minimum for 16" rafter spacing; 19/32" is required at 24" on center for most live and dead load combinations.
- Grade: Structural 1 panels have higher shear values than standard-grade panels and are required in some high-wind zones.
When a re-roofing job requires adding decking over existing board sheathing (common in homes built before the 1970s), the APA recommends using panels rated for the applicable rafter span and fastening through both the new panel and the existing boards into the rafter below.
Installation Requirements: Fasteners, Gaps, and H-Clips
Correct installation of APA-rated roof sheathing follows the fastening schedule specified in IRC Table R803.2.1.2 and the APA's published installation guide (Form N335). The key requirements are:
Fastener Type and Size
The IRC specifies 8d common nails (2-1/2" length, 0.131" shank diameter) as the standard fastener for roof sheathing. Ring-shank nails of the same size are the code-preferred option when wind uplift resistance is a design consideration, because they withdraw at significantly higher loads than smooth-shank equivalents. Power nailers (pneumatic or cordless) are acceptable when set to the correct depth; the fastener head should be flush with the panel surface, not countersunk.
In coastal high-wind zones (ASCE 7 wind zones), some jurisdictions specify 8d ring-shank nails throughout with no substitution. Always verify local requirements before beginning installation.
Nailing Pattern
- Panel edges (supported on rafters or blocking): fasteners at 6" on center maximum
- Field nailing (interior of panel, spanning between rafters): fasteners at 12" on center maximum
- Perimeter of roof diaphragm: 6" on center throughout, or as specified by the structural engineer of record for high-wind or seismic zones
Nail placement must be at least 3/8" from the panel edge to prevent splitting. A chalk line at 3/8" from each edge helps maintain consistent placement with a pneumatic nailer.
Expansion Gaps
A minimum 1/8" gap between adjacent panel ends and edges is required by APA to allow for thermal and moisture expansion. Without this gap, panels swell against each other and buckle, producing visible waves across the finished roof surface. Use a 10d common nail as a spacing gauge between panels during installation — its shank diameter is approximately 0.148", which provides the correct clearance. Some panel edge clip manufacturers build the spacer function into the clip design.
Do not caulk or fill expansion gaps. They serve a structural function and must remain open.
H-Clips
H-clips (panel sheathing clips) are galvanized steel connectors that slide onto the unsupported long edges of adjacent panels between rafters. They provide edge support at the panel's midspan, which is required when the panel Span Rating matches the actual rafter spacing (i.e., a 24/16 panel over 24" on-center rafters).
Installation of H-clips:
- One clip at the midpoint between each pair of adjacent rafters, centered on the unsupported panel edge
- For rafter spans of 48" or greater, two clips equally spaced between supports are required per APA guidance
- H-clips do not substitute for shear nailing — they are edge support devices only and do not replace nails at unsupported edges
- APA-approved tongue-and-groove (T&G) edge panels eliminate the need for H-clips when the T&G edge is used at the long dimension
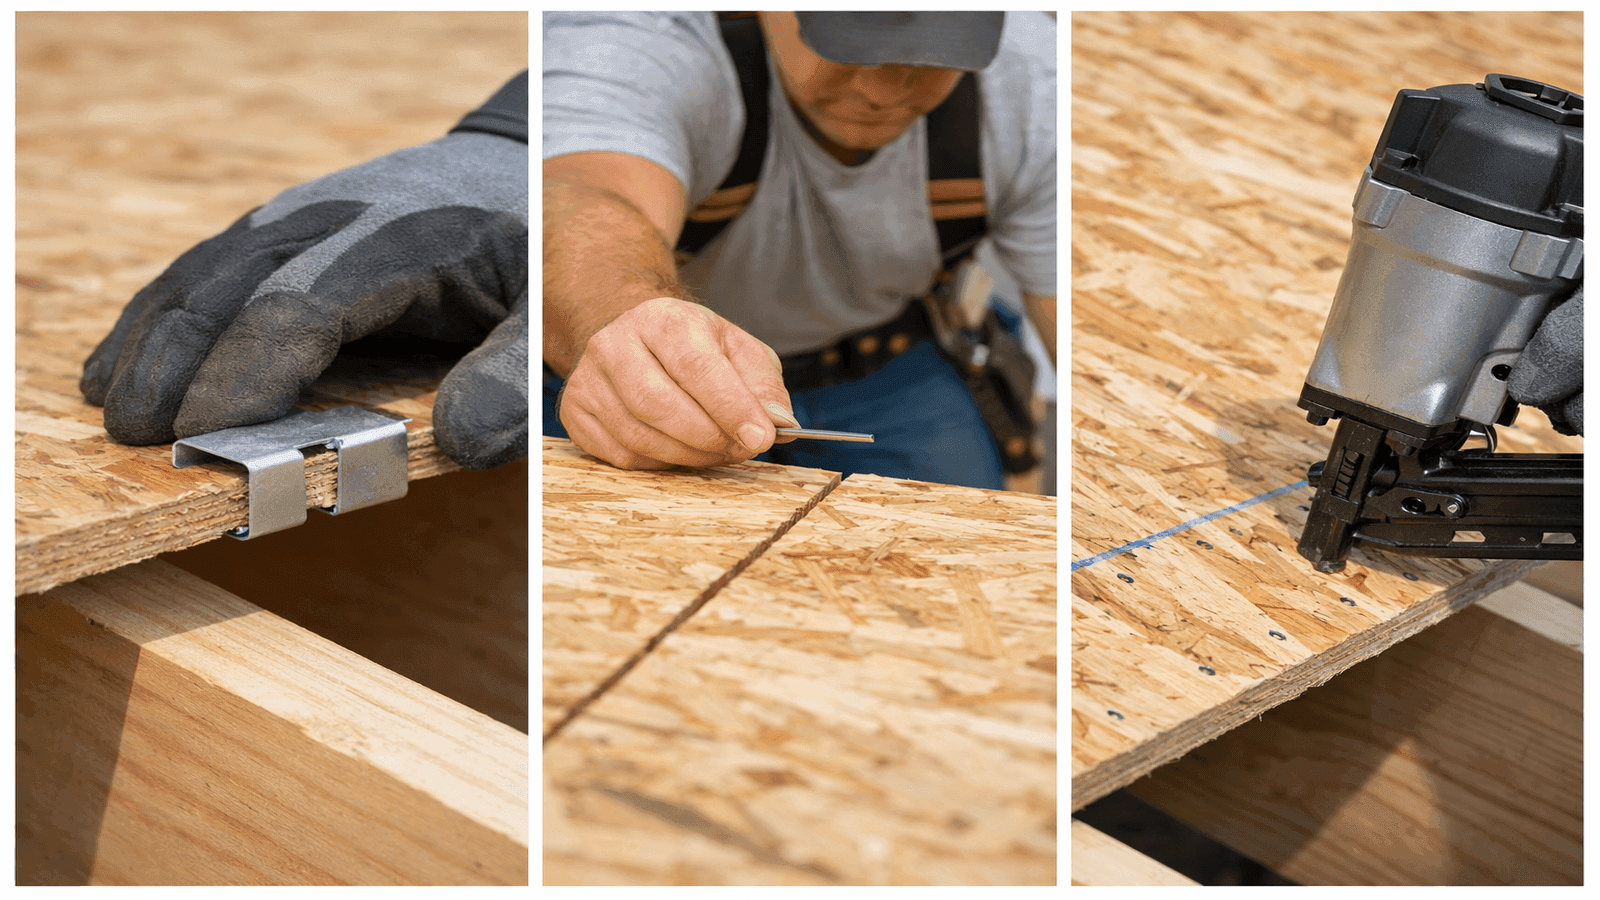
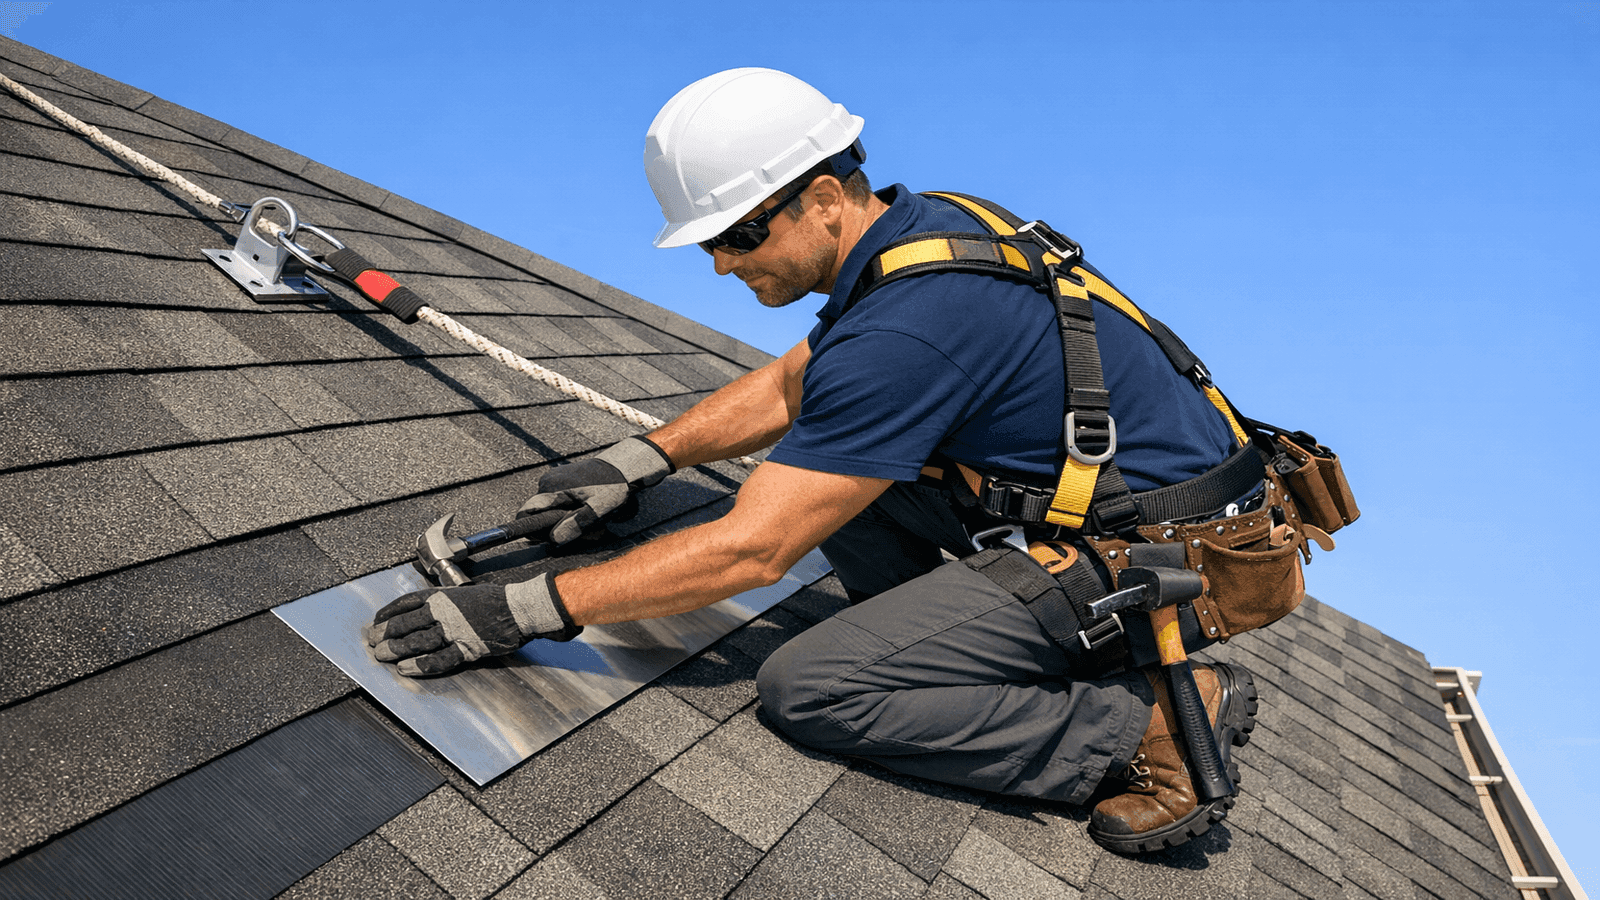
Photo: Step-by-step sequence photo showing a contractor installing OSB roof decking panels on rafters, with visible chalk nailing lines, an H-clip being placed between panel edges, and a pneumatic nailer fastening the edge at 6 inches on center.
How to Identify Damaged Decking
On a re-roofing project, decking inspection happens in two phases: before tear-off (from the attic) and during tear-off (from above, once shingles are removed). Both phases are necessary — the attic view catches moisture damage that has traveled from a leak source, while the above view reveals surface damage, delamination, and soft spots that are not visible from below.
Get quotes from top-rated pros.
Attic Inspection (Before Tear-Off)
Walk the attic with a bright flashlight before any demolition begins:
- Look for dark staining or discoloration on the underside of decking panels — this indicates past or ongoing moisture infiltration
- Check for visible daylight showing through cracks or gaps — gaps that large indicate panel failure or missing fasteners
- Press against the underside of panels at stained areas; solid panels resist, compromised panels flex or feel soft
- Note any panels with visible separation between layers (delamination in plywood) or swollen, friable edges (edge failure in OSB)
- Mark problem areas on your site sketch with approximate dimensions before climbing out
Roof Surface Inspection (During Tear-Off)
Once old shingles and underlayment are removed:
- Walk the entire deck and note areas that feel soft or spongy underfoot — any bounce or flex in a panel that is flat and fully supported by rafters indicates moisture damage
- Look for discoloration, staining, and mold growth on the exposed face
- Probe soft areas with a screwdriver or roofing pick — the point should not penetrate more than 1/8" under moderate hand pressure in any panel that will remain in service
- Check panel edges for swelling and delamination
- Inspect areas around pipe boots, valleys, chimneys, skylights, and at the eaves — these are the highest-probability leak locations
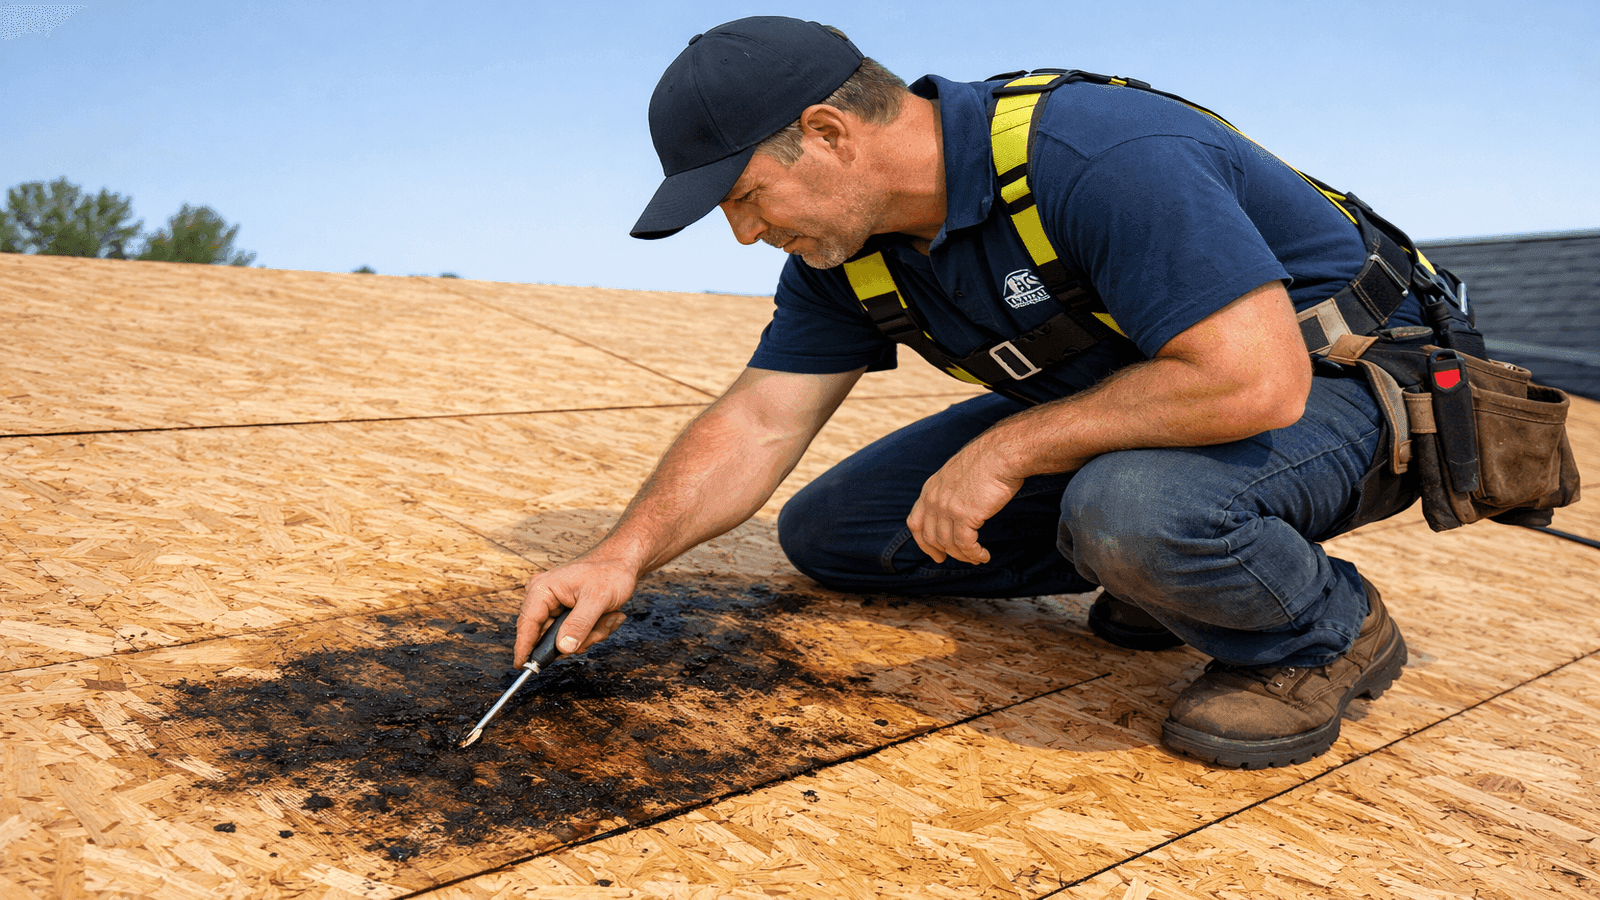
Photo: Contractor on bare roof deck during tear-off, pressing a screwdriver into discolored OSB sheathing with dark staining and edge swelling to identify damaged panels before re-roofing.
Case Study: Thomas R., Memphis, TN: Thomas hired a licensed contractor for a complete re-roofing project on his 2,100 sq. ft. home. The original quote was $14,200 covering tear-off, underlayment, new architectural shingles, and flashing. When the old shingles were removed, the crew discovered three sections of delaminated OSB totalling approximately 140 square feet, concentrated around an old pipe boot that had been slowly leaking for an estimated 2 to 3 years. The contractor documented each damaged section with photos, timestamped and tied to the inspection report, before recommending repair. An additional $880 for decking replacement, 4 sheets of OSB, and labour brought the final total to $15,080. Thomas later said, "When I saw the inspection photos, the extra cost was impossible to dispute. You could see exactly where the water had been sitting. I was glad they caught it."
When to Repair vs Replace Decking
The repair versus full replacement question depends on the extent and pattern of damage.
Replace the section when:
- Any panel is soft, spongy, or yields to probe pressure
- Delamination is visible in plywood panels
- OSB edges are swollen more than 1/4" and the swell area extends more than 3" into the panel face
- Mold growth has penetrated into the panel (surface mold can sometimes be treated; deep mold indicates structural degradation)
- The panel has been wet for long enough that fasteners are backing out
Repair or retain when:
- Staining is surface-only with no structural softening (panel is solid underfoot and passes probe test)
- Isolated granule staining from old shingles with no moisture intrusion evident
- Previous patch areas are solid, properly nailed, and at the same plane as surrounding panels
When replacing individual sections, cut to the center of the nearest rafter on each side of the damaged area. Never leave a partial-width cut panel edge unsupported. New panels must match the APA rating of the original deck. Use H-clips at any new unsupported edges.
Cost of Roof Decking Replacement
Decking replacement cost varies by material, labor market, and extent of damage discovered during tear-off.
Material cost per 4x8 sheet (2026):
- 7/16" OSB: $30–$55 per sheet (covers approximately 29 usable square feet after cutting waste)
- 1/2" CDX plywood: $50–$85 per sheet
Installed cost per sheet (material plus labor):
- OSB: $50–$80 per sheet installed
- CDX plywood: $70–$110 per sheet installed
Full re-deck (complete replacement of all decking) per square foot:
- Material only: $1.00–$2.00 per square foot
- Installed (contractor): $2.00–$5.00 per square foot
A full re-deck on a 2,000 sq. ft. home typically runs $4,000–$10,000 depending on material selection, regional labor costs, and whether the existing rafter framing is in good condition. Partial replacement of damaged sections during a re-roofing project typically adds $50–$110 per sheet to the base contract, as the scaffolding, labor mobilization, and waste removal are already in place.
Get replacement decking quantities specified in writing before signing a re-roofing contract. A clause stating the per-sheet price for any decking discovered during tear-off protects both homeowner and contractor from mid-project disputes.
How Decking Affects Roofing Warranties
Most major asphalt shingle manufacturers condition their product warranty on correct installation over an adequate substrate. GAF, CertainTeed, Owens Corning, and Atlas all publish installation specifications that reference deck requirements. Common warranty conditions include:
- Minimum deck thickness (GAF specifies 3/8" for 16" rafter spacing; most specify 7/16" as practical minimum)
- Deck must be structurally sound, free of soft spots, and properly fastened before installation begins
- Any replaced deck sections must use APA-rated panels matching the span and exposure requirements
If a contractor installs shingles over a deck with documented soft spots or delamination — and the issue is discovered during a warranty claim inspection — the manufacturer can void the shingle warranty on grounds that the substrate did not meet specifications. This is not hypothetical. Warranty inspectors routinely use moisture meters and probe tests on the deck when investigating claim submissions.
Deck condition documentation (photos with timestamps, square footage of replaced panels, material receipts) is the contractor's evidence that warranty conditions were met. Ask for that documentation before the new roofing goes on.
I've had warranty claims come back on other contractors' work where the inspector found soft panels under the shingles that were installed over a defective deck. Those warranties were voided, and the homeowner was stuck with the repair bill. Every re-deck panel I replace gets photographed, labeled on a site sketch, and listed on the invoice with the APA rating of the panel used. That paper trail matters when you file a 30-year warranty claim.
Hiring a Contractor for Decking Work
Roof decking installation and replacement is structural work. Permits are required in most jurisdictions for re-roofing projects that include deck replacement, and the permit inspection may include a stage inspection of the deck before roofing cover-up.
Find Licensed Roofers Near You:https://www.nearbyhunt.com/roofing
When interviewing contractors, ask specifically:
- What is the per-sheet price for any decking replacement found during tear-off?
- Do you document damaged sections with photos before replacing?
- What panel rating and thickness will you use for replacement sections?
- Will you pull a permit, and does the permit include a deck inspection stage?
- Who provides the material receipt, and will that documentation be included in the project file?
A contractor who cannot answer these questions clearly is a contractor who has not thought carefully about the structural work they are doing.
Disclaimer: This article is intended for general educational purposes and reflects current industry practice and IRC standards as of March 2026. Local building codes and requirements vary by jurisdiction. Always consult a licensed roofing contractor and your local building department before beginning any roofing project. Roofing work involves fall hazards and structural risk. Do not perform roof work without proper safety equipment and training.
Sources & References
[1] National Roofing Contractors Association (NRCA). *Roofing Manual: Residential Steep-Slope Roofing
[2] APA — The Engineered Wood Association. *Proper Installation of APA Rated Sheathing for Roof Applications,
[3] International Code Council. *International Residential Code (IRC) Section R803: Lumber Decking and Panel Roof Sheathing.
[4] APA — The Engineered Wood Association. *Engineered Wood Construction Guide
[5] Fine Homebuilding. *Roof Sheathing: OSB vs Plywood.
[6] Pro Builder Magazine. *Roof Deck Basics for Residential Construction.


James is a licensed roofing contractor with 20 years of experience in roof installation, inspection, and repair across the U.S. South and Midwest. He specialises in asphalt shingles, metal roofing, and storm damage restoration. On NearbyHunt, James offers practical advice on roof maintenance, insurance claims, and selecting the right materials for long-lasting protection.

Jacob is a licensed roofing contractor with over 18 years of experience in roof inspection, installation, and restoration. Based in Texas, he has led hundreds of successful roofing projects across residential and commercial properties. Jacob is also a certified storm damage specialist, ensuring that all NearbyHunt roofing content meets industry best practices and safety standards.