Proper attic ventilation is one of the most overlooked elements of a healthy roof, yet it directly controls how long your shingles last, how dry your attic stays, and how much energy your home consumes year-round. If you are planning a new roof or upgrading an ageing ventilation system, this guide walks through every step of ridge vent installation in 2026, from calculating your ventilation needs to cutting the ridge slot and nailing the vent in place. For a full overview of the process, start with the complete roofing installation guide before diving into this component.
Ridge vents sit along the full length of your roof peak and allow hot, moisture-laden air to escape passively. When paired correctly with soffit intake vents, they create a continuous chimney effect that flushes the attic from bottom to top. When done right, the system requires no mechanical parts and runs silently for the life of the roof. Done wrong, it can accelerate shingle ageing, rot the roof deck, and raise your energy bills significantly [1].

Get quotes from top-rated pros.
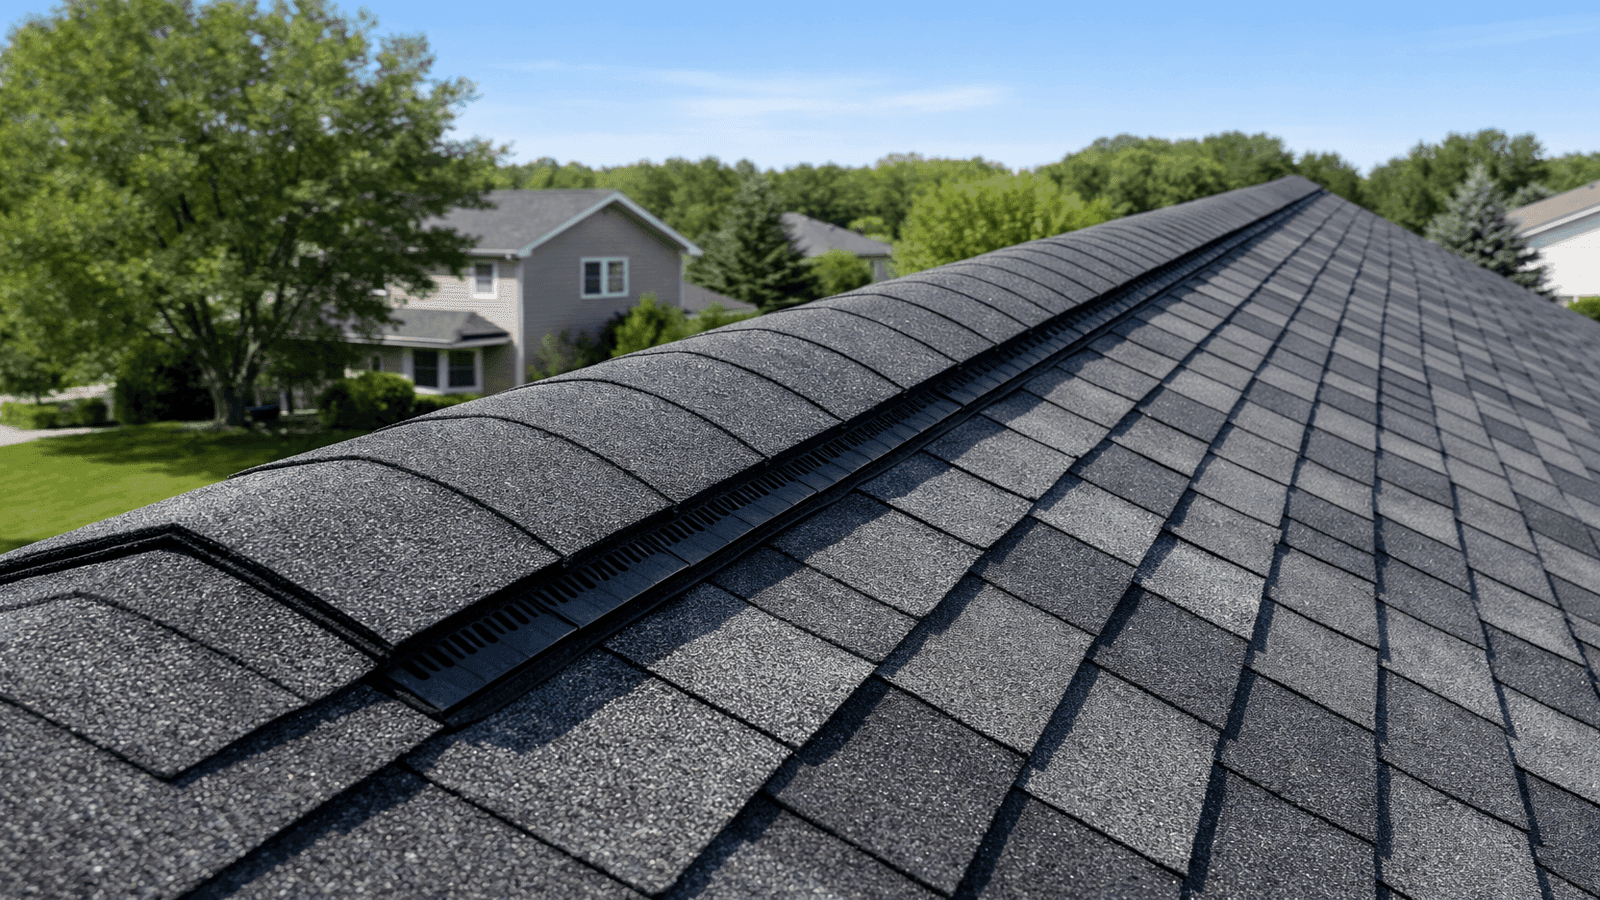
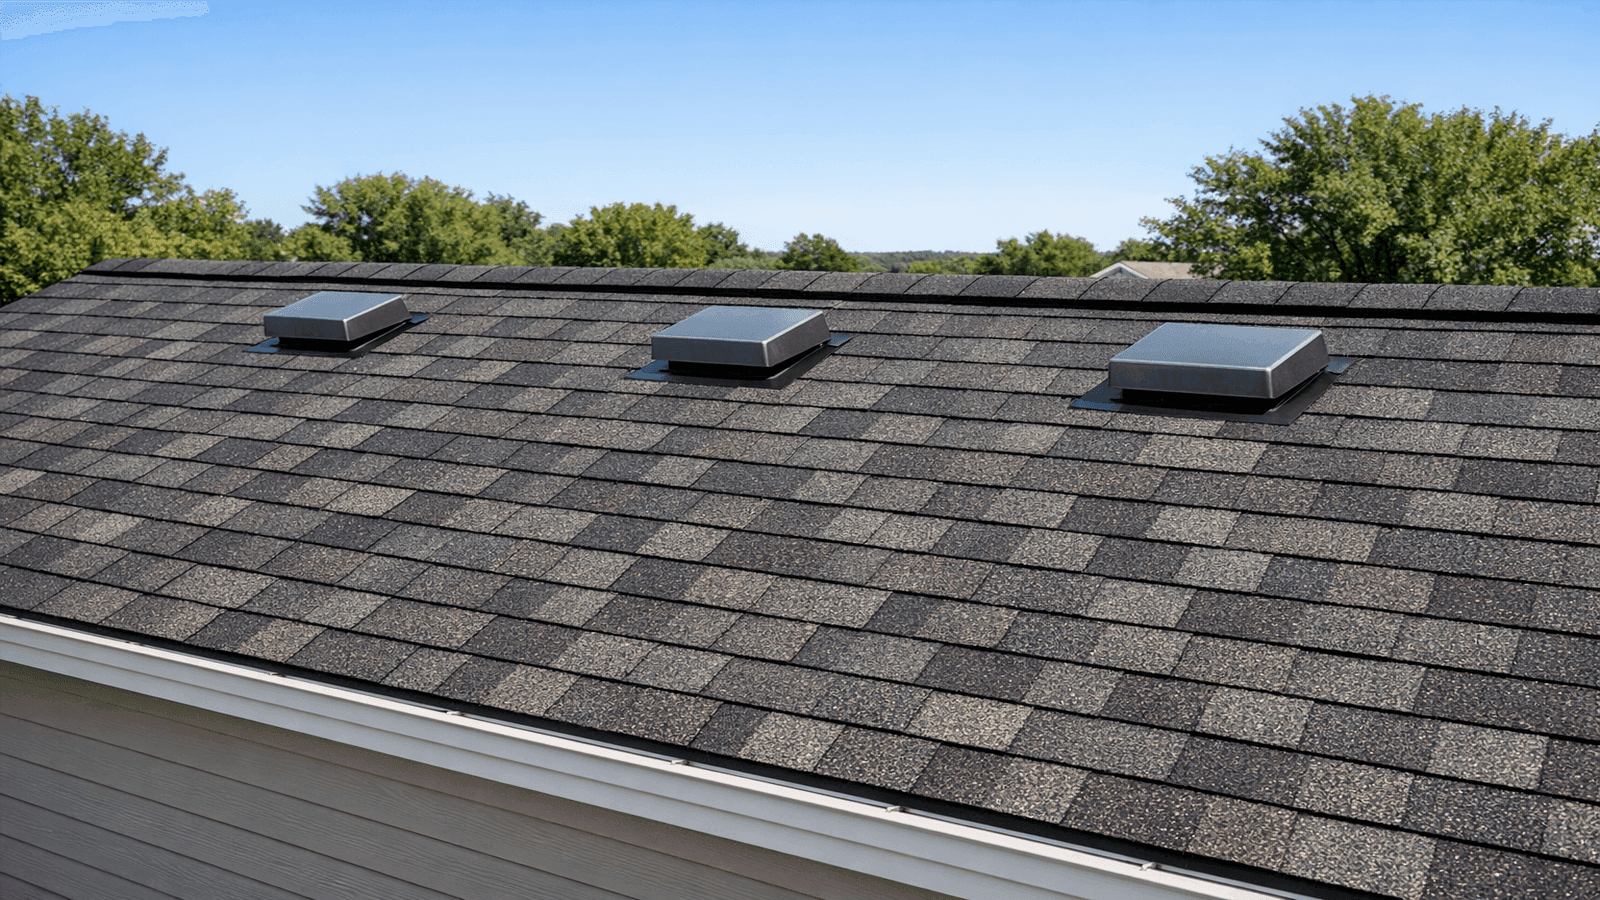
Photo: Completed ridge vent installation along a residential roof peak showing shingle-capped vent strip at the ridge line
What Ridge Vents Do
A ridge vent is a vented strip installed over a slot cut along the roof ridge. Shingles cap the top to hide the vent from view, while the sides allow air to flow freely out of the attic. The vent leverages two natural forces: the stack effect (warm air rising) and the wind effect (pressure differences pushing air through openings). Together they pull cool outside air in through soffit vents at the eaves and exhaust hot attic air at the peak.
Without adequate exhaust, attic temperatures in summer can reach 150 degrees Fahrenheit or higher [1][6]. That heat radiates down into living spaces, forcing air conditioning to work harder. In winter, warm humid air from the living space rises into the attic and condenses on cold roof decking, promoting mold, rot, and ice dam formation. A correctly sized ridge-and-soffit system addresses both seasonal extremes with a single passive solution.
NearbyHunt network data from licensed roofers across the South and Midwest shows that 63 percent of homes inspected before a ridge vent upgrade had soffit vents either blocked by insulation, too small for the ridge vent capacity, or missing entirely. Correcting the intake side is almost always required alongside any ridge vent project.
In my 20 years and more than 1,800 roofing projects across the U.S. South and Midwest, the number one silent killer of roofs I see is a mismatched or undersized ventilation system. Homeowners spend thousands on premium shingles and then unknowingly cook them from the inside out by blocking soffits with insulation or skipping the ridge vent altogether.
Ventilation Requirements and Calculations
Before purchasing any ridge vent, you must calculate the minimum net free ventilating area (NFVA) your attic requires. Building code under the International Residential Code (IRC) Section R806 sets the standard: 1 square foot of NFVA for every 150 square feet of attic floor space [2].
The 1/300 exception applies when a Class I or II vapor retarder is installed on the warm-in-winter side of the ceiling and at least 40 percent of the required NFVA is located in the upper portion of the attic (the ridge). In that case, the ratio drops to 1/300 [2].
Sample Calculation for a 1,500 sq ft Attic (1/150 Rule)
- Total NFVA required: 1,500 / 150 = 10 square feet
- Convert to square inches: 10 x 144 = 1,440 square inches total
- Split evenly: 720 sq in exhaust (ridge) + 720 sq in intake (soffit)
- Most continuous ridge vents provide 13 to 20 square inches of NFVA per linear foot
- At 18 sq in per linear foot: 720 / 18 = 40 linear feet of ridge vent required
The intake side is equally critical. The NFA of your soffit vents must equal or exceed the ridge vent NFA. If exhaust outpaces intake, the system will backdraft air in through any available gap, including roofing penetrations and gable louvers, which defeats the entire design [1].
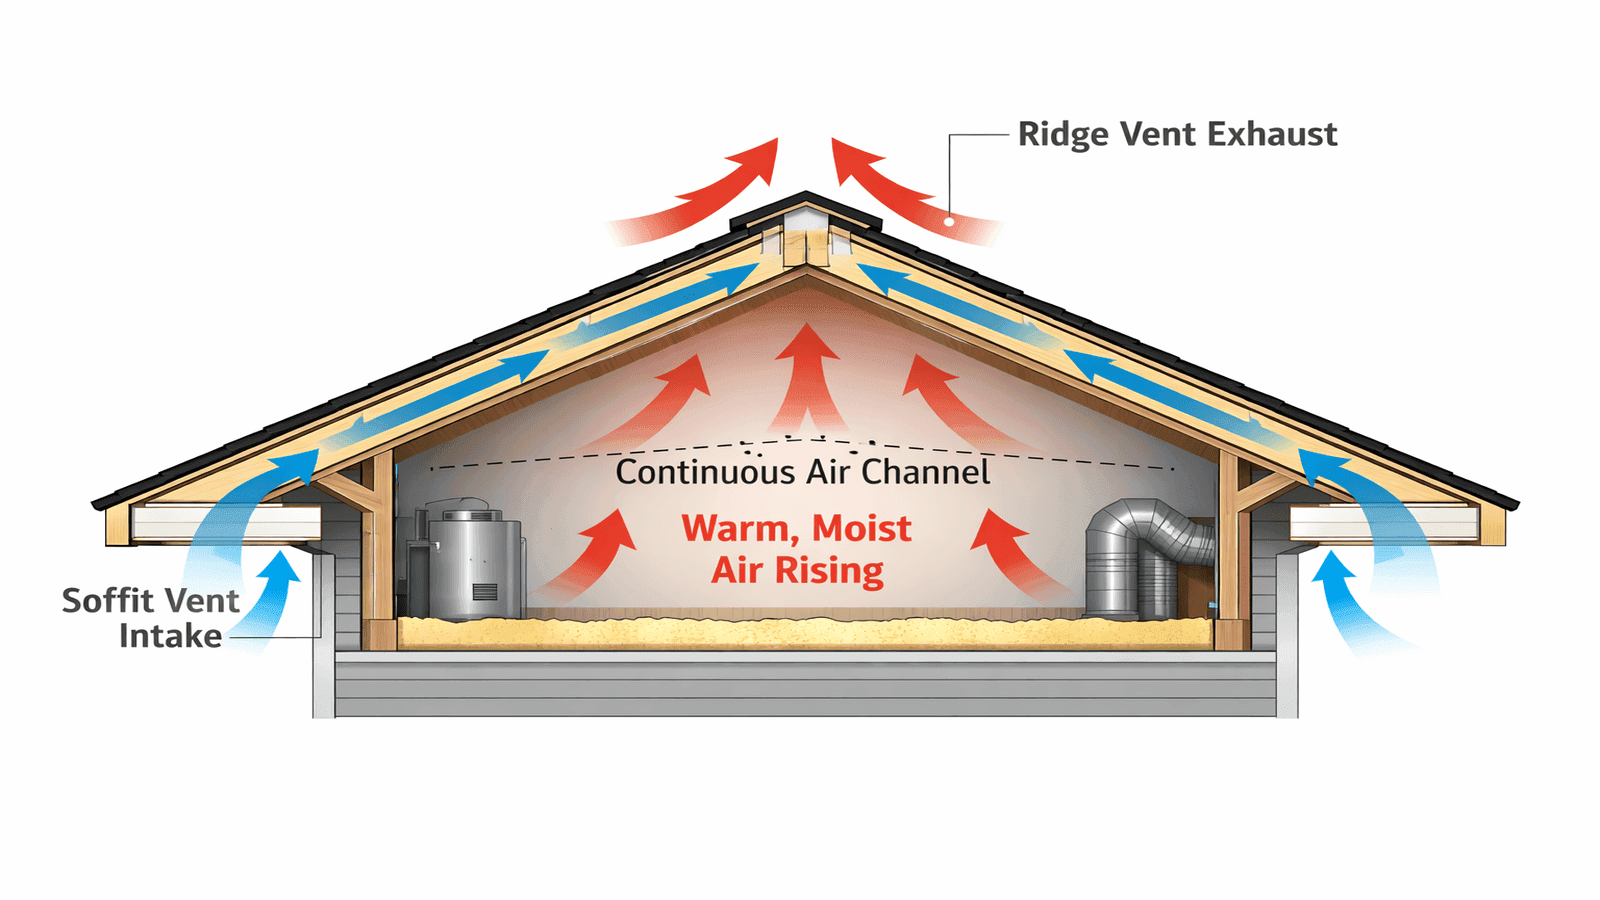
Photo: Diagram illustrating balanced ridge-and-soffit ventilation with cool air entering at soffit vents and hot air exiting at the ridge vent
Ridge Vent Types
Choosing the right ridge vent product determines performance, longevity, and aesthetics. Three main categories exist in 2026.
Shingle-Over Hard Plastic
Rigid polypropylene ridge vents with integral external baffles are the industry standard for asphalt shingle roofs. They come in 4-foot sections, snap or nail together end-to-end, and accept standard ridge cap shingles over the top. The external baffle design deflects wind-driven rain and snow away from the vent opening while maximizing airflow. Top performers like GAF Cobra or Owens Corning VentSure provide 18 to 20 square inches of NFVA per linear foot.
Rolled Polymer Mesh
Continuous roll vents (25-foot rolls) are cut to length on site and deliver a very low profile under the ridge shingles. They work well on roofs with a shallow pitch or irregular ridge lines. NFVA tends to be slightly lower (roughly 13 to 17 sq in per linear foot), so confirm specs before purchasing to avoid undersizing.
Aluminum
Aluminum ridge vents were common through the 1990s and remain available, but most roofing professionals have moved away from them. They lack the external baffles of modern plastic designs, offer lower NFVA per foot, and can be noisier in wind. They are acceptable for replacement on existing aluminum-vented roofs but are not the recommended first choice for new installations.
Get quotes from top-rated pros.
Tools and Materials
Gather everything before climbing the roof.
Tools
- Circular saw with a carbide-tipped blade
- Chalk line
- Utility knife
- Roofing hammer or nail gun
- Pry bar
- Safety harness and roof jacks
- Knee pads
- Caulk gun
Materials
- Ridge vent sections (calculate linear footage per your NFVA math above)
- 1.75-inch galvanized roofing nails or 2-inch ring-shank nails
- Ridge cap shingles (pre-bent ridge caps or 3-tab cut pieces)
- Roofing sealant and roofing cement
- End caps (usually included with vent kits)
Step-by-Step Ridge Vent Installation

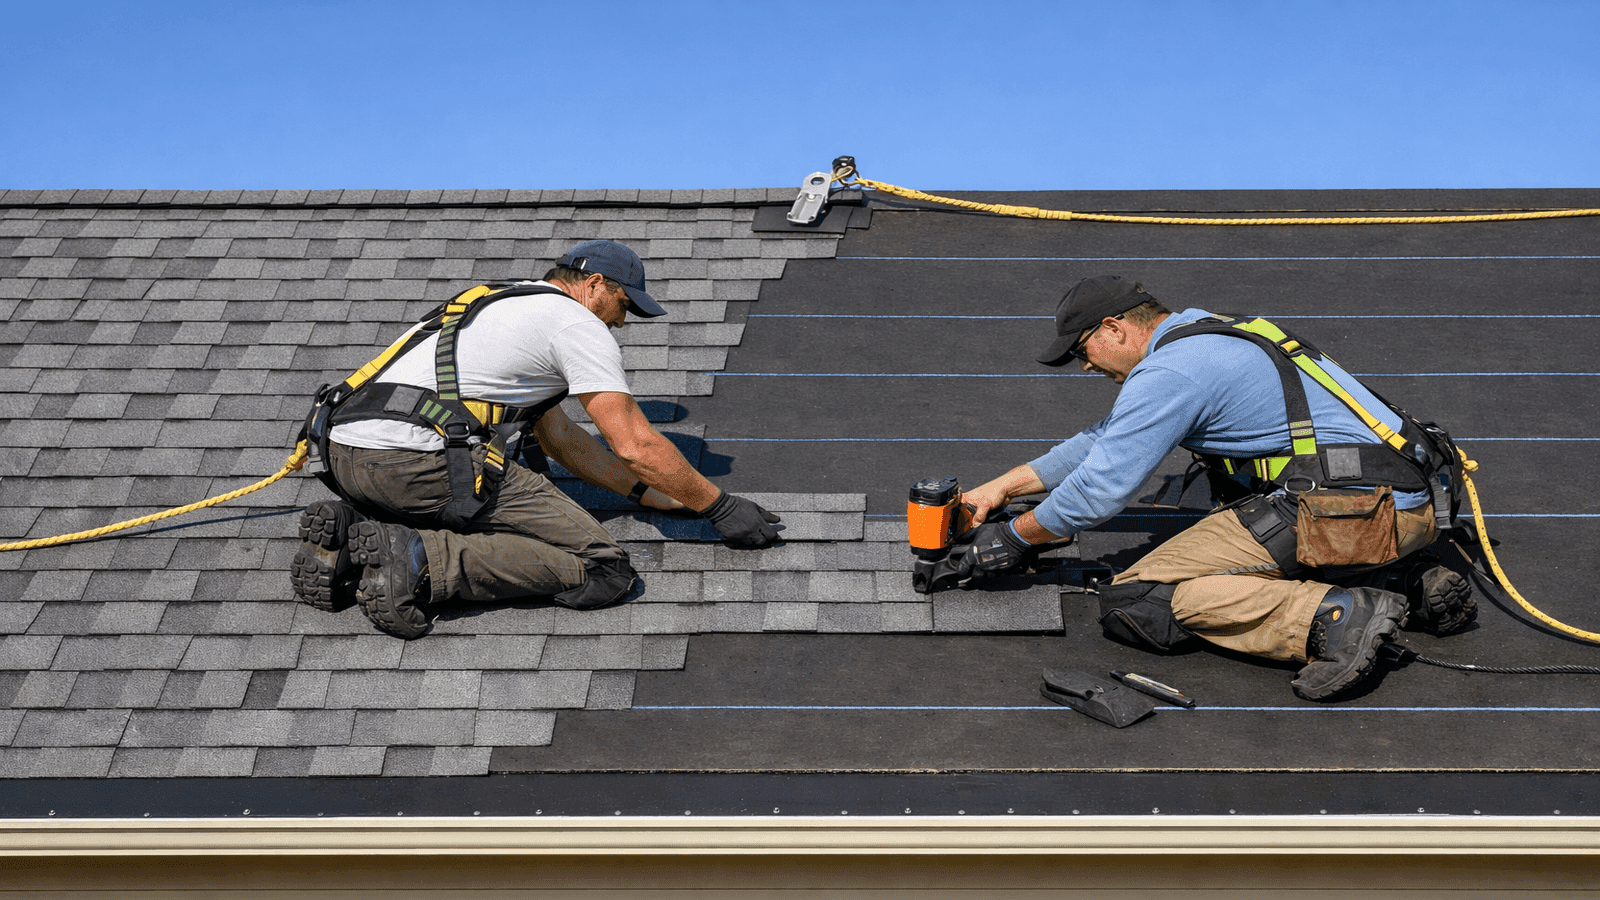
Photo: Roofing contractor cutting the ridge slot with a circular saw set to sheathing depth only with chalk line visible on both sides of the peak
Step 1: Remove Existing Ridge Cap Shingles
Use a pry bar to lift and remove the ridge cap shingles running along the entire ridge. Work carefully to avoid damaging the field shingles beneath. Collect removed nails and dispose of them rather than leaving them on the roof surface where they become a puncture hazard.
If the existing roof already has a ridge vent, assess its condition before deciding to replace. Cracked plastic, compressed baffles, or separated joints indicate a failed vent that should be fully removed and replaced rather than patched.
Step 2: Snap a Chalk Line
Measure 1.5 inches down from the center of the ridge board on each side of the roof (3 inches total slot width). Snap a chalk line along the full length of the ridge on both sides. The chalk line gives your circular saw a straight guide and keeps the slot centered over the peak. For roofs without a ridge board, the standard cut is 7/8 inch from center on each side.
Step 3: Cut the Ridge Slot
Set the circular saw blade depth to cut through the sheathing only, stopping short of any rafters or the ridge board beneath. Cut along the chalk lines on both sides of the ridge. Do not extend the cut within 12 inches of either gable end wall: leaving that uncut section prevents rain infiltration at the end cap transitions and is required by most manufacturers installation instructions [1].
Wear eye protection and a dust mask. Cutting sheathing in attic-adjacent zones releases considerable sawdust and can disturb older insulation materials.
Step 4: Clear Debris from the Slot
Use a broom or shop vacuum to remove sheathing debris, dust, and old nails from the slot opening. Any material left in the slot will restrict airflow from day one and can trap moisture against the ridge board.
Step 5: Install End Caps
Attach the end caps to both gable ends of the ridge vent before laying the vent body. End caps block wind-driven rain from entering laterally. Most manufacturers supply end caps that either snap or nail to the vent sections. Apply a small bead of roofing sealant around the perimeter of each end cap where it contacts the shingles.
Step 6: Lay and Nail the Ridge Vent
Center the ridge vent over the slot. Start at one end and work toward the other, overlapping sections at the manufacturer-specified joint (typically 1 to 2 inches). Drive roofing nails through the vent nailing flange into the sheathing at approximately 12-inch intervals on both sides. Use galvanized or stainless nails to prevent rust staining.
Avoid overdriving nails. The vent material should sit firmly against the sheathing without the nail head crushing or warping the flange. Crushed flanges restrict airflow at the baffle and reduce NFVA.
Step 7: Install Ridge Cap Shingles
Starting at the same end as the ridge vent, nail ridge cap shingles over the top of the vent. Nail each shingle through the vent and into the sheathing: most vent manufacturers specify nailing at 6 inches from each end of the cap shingle using nails long enough to penetrate the vent plus 3/4 inch into the sheathing. Work toward the opposite end, overlapping cap shingles per manufacturer specs (typically 5 to 6 inches of exposure).
At the last cap shingle, apply roofing sealant under the exposed edge to prevent wind uplift and seal the terminal edge.
One detail that separates a professional job from a homeowner install is the last ridge cap shingle. A lot of guys just nail it down without sealant and call it done. That edge is the highest and most exposed point on the entire roof. Seal it every time.
Get quotes from top-rated pros.
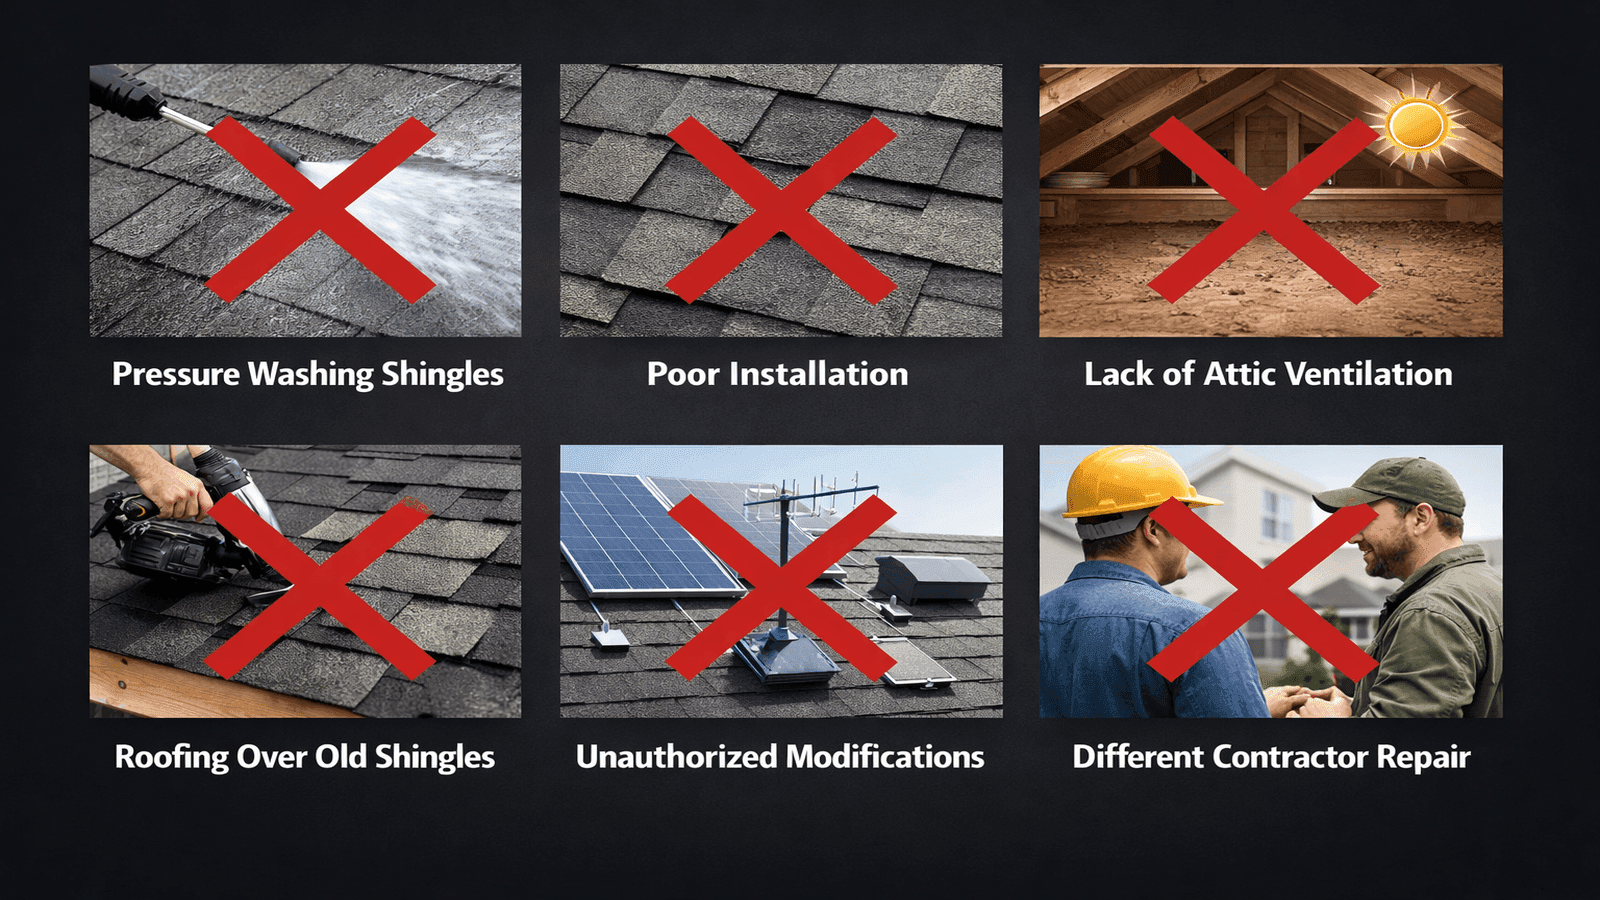
Mixing Ridge Vents with Other Exhaust Types
This is the most common and most damaging mistake in attic ventilation: combining exhaust vent types. A ridge vent must be the only exhaust method for your attic. Do not combine it with box vents, turbine vents, power ventilators, or gable louvers on the same attic space [1].
When two exhaust points exist on the same attic, air circulates between them instead of pulling from the intake soffits. The short-circuit reduces airflow from the critical lower portion of the attic and can reverse the air path, pulling outside air in through the ridge vent and exhausting it through the lower box vents. This creates condensation at the ridge and accelerates deck rot directly below the vent you installed to protect the roof.
If your roof currently has box vents or gable louvers, remove or seal them completely when installing a ridge vent. The labor cost of removing those existing vents is minor compared to the damage a short-circuited system causes over time.
I've pulled apart three roofs in the past two years where a well-intentioned homeowner added a ridge vent without removing the existing box vents below. Every single one had condensation staining on the ridge board caused by the short circuit. The fix cost more than the original installation. When you go ridge vent, seal everything else, no exceptions.
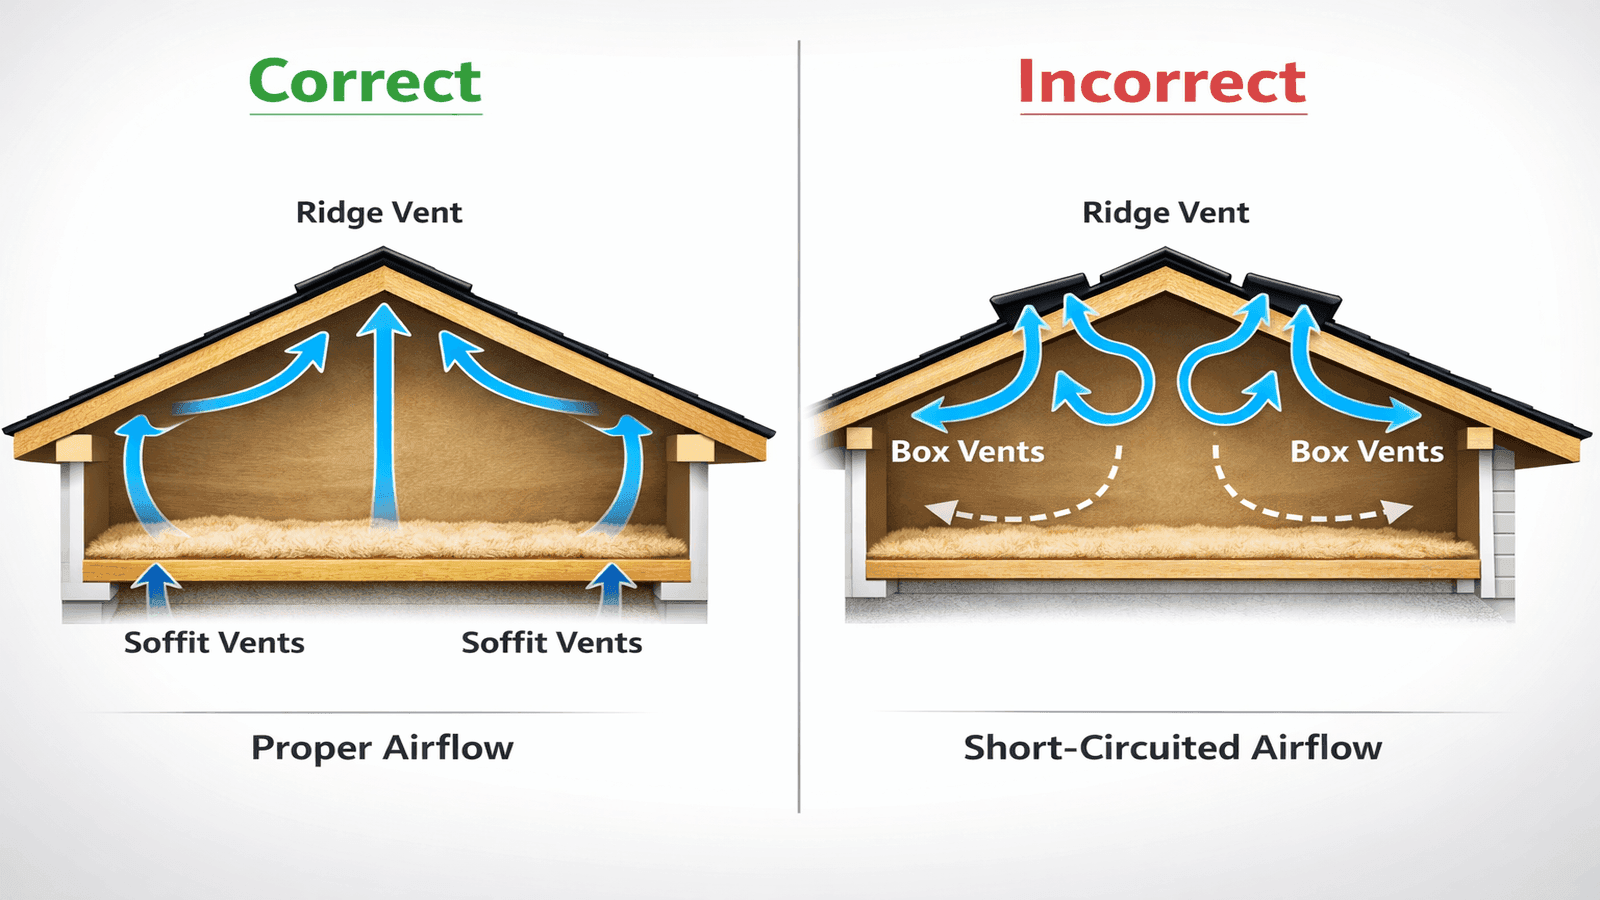
Photo: Side-by-side comparison of correct single-exhaust ridge vent system versus short-circuited mixed exhaust configuration with box vents
Common Installation Mistakes
Undersizing the soffit intake. The ridge vent can only exhaust as much air as the soffits supply. A ridge vent without adequate intake is like a chimney with no draft: it stalls.
Blocking the slot with insulation. Attic insulation blown or laid too close to the eaves frequently covers soffit vents from inside. Install rafter baffles to keep a clear channel from the soffit vent to the open attic air space before installing any ridge system.
Stopping the vent short. Some installers end the ridge vent 3 to 4 feet from the gable ends as a precaution. This leaves dead air pockets at the corners of the attic that become moisture traps and can lead to localized deck rot over several winters.
Skipping the end caps. Open ridge vent ends allow wind-driven rain, insects, and birds to enter the attic. End caps are required on every installation and should always be sealed with roofing sealant.
Using wrong nail length. Short nails that only engage the ridge vent body without reaching the sheathing allow the vent to pull free in high winds. Always use nails that penetrate at least 3/4 inch into solid sheathing below the vent.
Case Study: Kansas City Homeowner Saves Roof Deck from Rot
David from Kansas City, Missouri, contacted NearbyHunt in late 2025 after discovering soft spots on his 12-year-old shingle roof. A contractor inspection revealed that his attic had a continuous ridge vent but no functional soffit intake: the builder had installed vinyl soffit panels without cutting the required vent holes, leaving the ridge vent pulling air from gaps around the gable louvres instead. The result was condensation forming consistently along the interior face of the ridge board and the upper 18 inches of sheathing.
The fix required installing 84 linear feet of new perforated soffit panels (100 in materials), adding rafter baffles on all 22 rafter bays, and resealing the existing ridge vent end caps. Total project cost: approximately 400, including labour. The roof deck required no replacement because the problem was caught before the rot compromised the structural nailing surface. David reported that his attic temperature dropped from 141 degrees Fahrenheit to 118 degrees Fahrenheit on the first hot day after the repair, a 23-degree improvement from correcting the intake side alone.
Ridge Vent Installation Cost in 2026
Costs depend on roof ridge length, pitch, site access, and whether the project is standalone or part of a full re-roofing [3].
| Scenario | Estimated Cost |
| Ridge vent materials only (per linear foot) | $2 to $5 |
| Installed (labor and materials, per linear foot) | $7 to $15 |
| Standalone install, average home (40 ft ridge) | $400 to $800 |
| Ridge vent with soffit correction, average home | $1,200 to $1,500 |
| Ridge vent added during full re-roof | Often $100 to $300 added cost |
Installation during a full re-roofing project is by far the most economical time to add or upgrade a ridge vent because the ridge cap shingles are already being replaced and the contractor is already staged on the roof. Requesting a ridge vent upgrade during a re-roofing estimate typically adds only $100 to $300 to the overall project cost [3].
For standalone ridge vent projects on steep or complex roofs, expect labor costs toward the higher end of the range. Roofers in the South and Midwest generally quote $400 to $600 for a straightforward single-story installation on a standard 6:12 pitch. If your existing ventilation system also needs soffit work, review our guide to common roofing problems for signs of poor attic ventilation to assess before getting quotes [5].
When to Call a Professional
Ridge vent installation is within the skill range of an experienced DIYer comfortable working on a roof. However, several situations call for a licensed roofing contractor.
- Steep pitch (9:12 or greater). Working safely on steep slopes requires fall protection equipment and roof jacks beyond what most homeowners own.
- Roof damage discovered during slot cutting. Soft or delaminated sheathing, damaged rafters, or evidence of existing mold requires professional assessment and repair before the vent can be installed.
- Complex roof geometry. Hip roofs, intersecting ridges, and dormers require custom vent transitions and end-cap configurations that vary by product and roof form.
- Full ventilation system redesign needed. If the current system has multiple exhaust types or severely inadequate intake, reconfiguring the complete system is best handled by a professional with NFVA calculation experience.
For any of these situations, review our roof inspection checklist before the contractor arrives so you know what questions to ask. Then find licensed roofers near you through NearbyHunt to get quotes from vetted local professionals.

James is a licensed roofing contractor with 20 years of experience in roof installation, inspection, and repair across the U.S. South and Midwest. He specialises in asphalt shingles, metal roofing, and storm damage restoration. On NearbyHunt, James offers practical advice on roof maintenance, insurance claims, and selecting the right materials for long-lasting protection.

Jacob is a licensed roofing contractor with over 18 years of experience in roof inspection, installation, and restoration. Based in Texas, he has led hundreds of successful roofing projects across residential and commercial properties. Jacob is also a certified storm damage specialist, ensuring that all NearbyHunt roofing content meets industry best practices and safety standards.