- A fill valve typically lasts 7-10 years: if your toilet is running constantly, refilling slowly, or hissing after flushing, the fill valve is the most likely culprit.
- The Fluidmaster 400A costs $10-$20 at any hardware store and fits 99% of residential toilets; it is the #1 best-selling fill valve in the world.
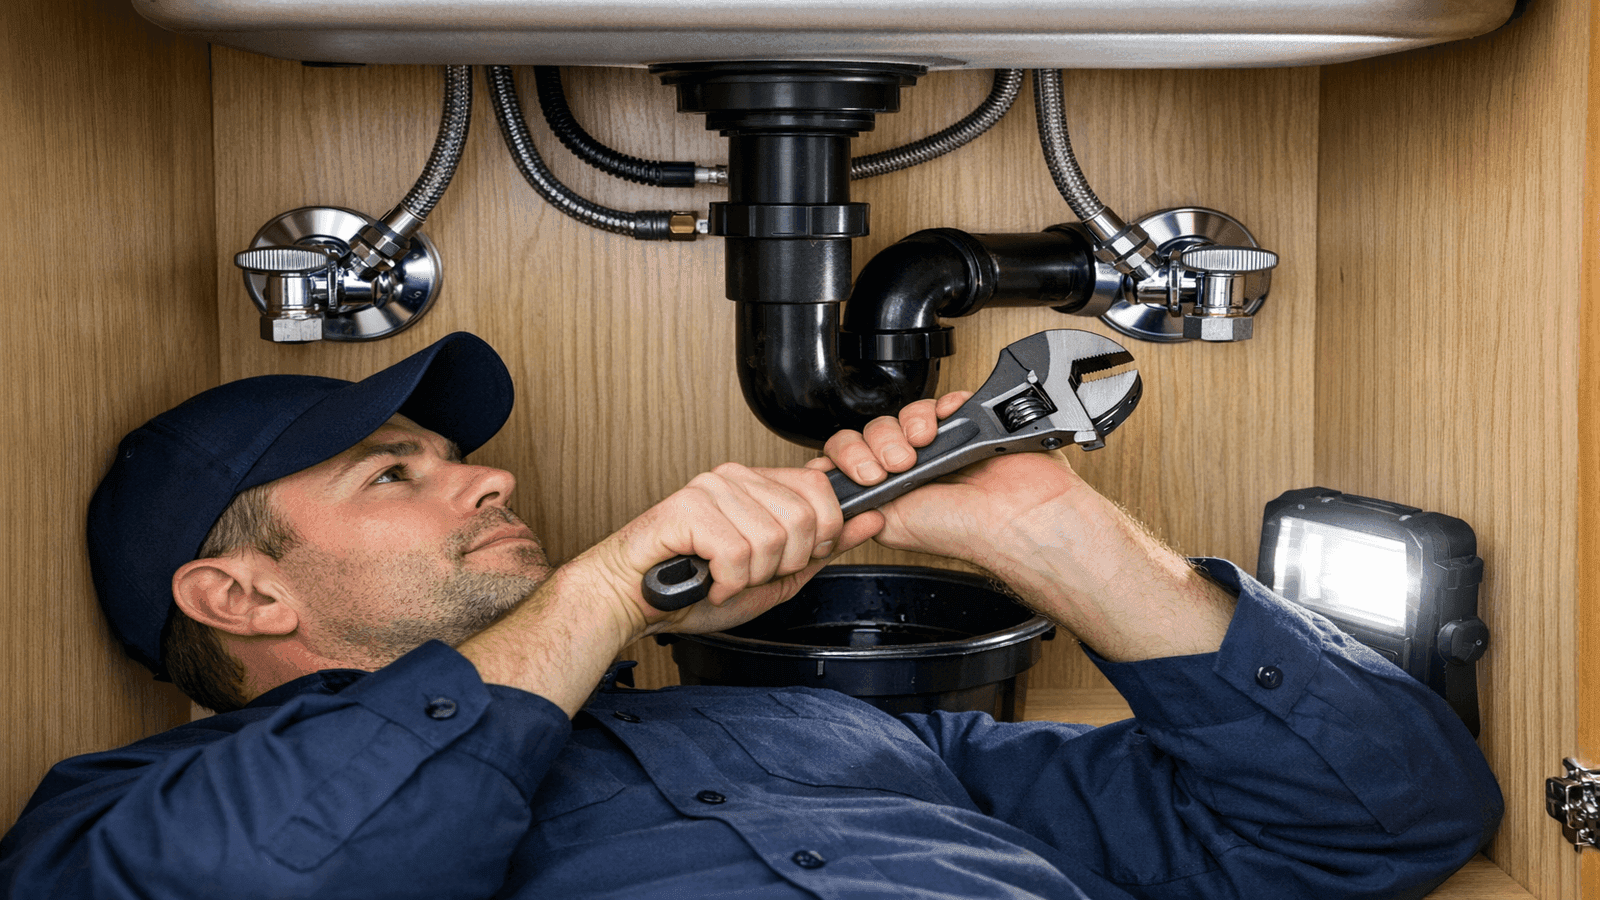
- DIY replacement takes 30-45 minutes and requires only an adjustable wrench, a sponge, and a bucket. No plumber needed for a straightforward swap.
- Professional fill valve replacement costs $100-$200 in labor on top of parts: a task that costs $10-$20 in materials is worth doing yourself.
- The single most common DIY mistake is overtightening the plastic locknut under the tank, which can crack the tank base and turn a $15 fix into a $300 tank replacement.
- Fill valve failure and flapper failure cause the same symptom (running toilet) but are different fixes: use the food-coloring test to diagnose which part is at fault before buying anything.
That quiet hissing sound from your bathroom is not just annoying: it is costing you money. A constantly running toilet can waste up to 200 gallons of water per day, and in most cases, the fix costs less than $20 and takes under an hour.
This guide covers exactly what you need to know: how to tell if the fill valve (not the flapper) is causing the problem, which fill valve to buy, the tools required, and every step from shutoff to water level adjustment.
This guide is part of the DIY Plumbing Guides series covering the most common household plumbing repairs.

Photo: Interior of toilet tank with fill valve, float, overflow tube, flapper, and supply line inlet labeled
Signs Your Fill Valve Needs Replacing
Before you buy any parts, confirm that the fill valve is actually the problem. Five symptoms point directly to fill valve failure.
Running water that does not stop is the most obvious sign. The tank fills but water keeps trickling. This is distinct from the hiss of a leaking flapper, and the food coloring test below tells you which one you have.
Slow tank refill (more than 3 minutes after a flush) means the fill valve diaphragm is worn and can no longer maintain adequate flow. Hissing from the tank indicates water bypassing a deteriorated internal seal.
A weak or incomplete flush means the tank is not reaching the correct water level before the flush cycle. Finally, water pooling near the tank base (not near the toilet base) can indicate a failed fill valve shank seal, not a wax ring problem.
The Flapper vs. Fill Valve Test
Before replacing anything, run this 10-minute diagnostic:
- Add 10 drops of food coloring to the tank.
- Wait 10-15 minutes without flushing.
- Check the bowl water.
If the bowl turns colored: the flapper is leaking, not the fill valve. See Fix a Running Toilet instead. If the bowl stays clear but the tank still hisses or overfills, the fill valve is the problem.
Before any homeowner buys a fill valve, I tell them to do the food coloring test. It takes 10 minutes and saves them from replacing the wrong part. About 40% of the running-toilet calls I get are actually flapper problems, not fill valves. A $5 flapper fix versus a $15 fill valve fix; both are easy, but you need to know which one you actually have.

Choosing the Right Fill Valve
For most homeowners, the decision is straightforward. Pick the Fluidmaster 400A and you will cover 99% of residential toilets.
| Fill Valve | Best For | Height Range | Cost | Notes |
| Fluidmaster 400A | Most toilets (99% fit) | 9" to 14" | $10-$15 | No. 1 best-seller worldwide, universal shank |
| Fluidmaster 400H (PerforMAX) | Toilets made after 2005, HET/dual-flush | 10" to 15" | $15-$20 | Faster fill, recommended for newer efficient toilets |
| Korky 528T | Universal replacement | 8" to 16" | $12-$18 | Good alternative, tall-tank compatible |
| OEM (manufacturer original) | Brand-specific issues | Varies | $20-$50 | Usually unnecessary unless warranty requires it |
For any standard toilet manufactured before 2005, the Fluidmaster 400A is the correct choice. For toilets marketed as dual-flush, high-efficiency, or HET, use the Fluidmaster 400H. When in doubt, check the model label inside the tank lid.
The 400A has an adjustable shank (9 to 14 inches) that accommodates virtually all residential tank depths. Both models are available at Home Depot, Lowe's, and most hardware stores.
Get quotes from top-rated pros.
Tools and Parts Needed
Gather everything before you start. This prevents mid-job trips to the hardware store with wet hands.
Parts:
- New fill valve (Fluidmaster 400A or 400H, $10-$20)
- New supply line (optional but recommended if the existing one is more than 5 years old, $5-$10)
Tools:
- Adjustable wrench or channel-lock pliers (for supply line nut)
- Large sponge and bucket (to remove remaining water from tank)
- Old towels (floor protection)
- Flathead screwdriver (for float height adjustment on some models)
No specialty tools required. This is one of the most approachable plumbing repairs a homeowner can do.
Step-by-Step Replacement (30 Minutes)
Remove the tank lid first and set it on a soft surface away from the work area. Porcelain tank lids break easily if knocked off a counter or hard floor.
Step 1: Turn off the supply valve. The angle stop shutoff valve is located on the wall directly behind and below the toilet tank. Turn it clockwise until it stops. If your shutoff valve will not close fully, see How to Shut Off Your Water Supply before continuing.
Step 2: Flush to empty the tank. Hold the flush handle down to drain as much water as possible from the tank.
Step 3: Sponge out remaining water. Use a large sponge and bucket to remove the water left at the bottom of the tank. This prevents spills when you disconnect the supply line.
Step 4: Disconnect the supply line. Use an adjustable wrench to unscrew the supply line nut from the threaded fitting at the bottom of the tank. Have a towel ready: some water will drip.
Step 5: Unscrew the locknut under the tank. Reach under the tank and turn the plastic locknut counterclockwise by hand. If it is stuck, use channel-lock pliers with one gentle quarter-turn. Do not use excessive force.
Step 6: Pull the old fill valve out. Lift the old fill valve straight up and out of the tank. Discard it along with the old rubber shank washer.
Step 7: Set the new valve height. Adjust the shank height so the critical water level mark on the valve shaft sits at least 1 inch below the top of the overflow tube. On the Fluidmaster 400A, twist the top of the valve counterclockwise to extend and clockwise to compress.
Step 8: Insert the new valve. Push the fill valve shank down through the hole in the tank bottom. Press firmly until the shank washer seats flat against the inside of the tank floor.
Step 9: Hand-tighten the locknut from below. Thread the locknut onto the shank from under the tank and tighten by hand, then add exactly one quarter-turn with pliers. Do not overtighten.
Step 10: Attach the refill tube. Clip the small flexible refill tube from the fill valve to the top of the overflow tube. Clip it to the rim only: do not insert the tube down inside the overflow tube.
Step 11: Reconnect the supply line. Thread the supply line nut back onto the fill valve shank fitting and hand-tighten, then snug with the adjustable wrench.
Step 12: Turn the supply valve back on slowly. Turn the angle stop counterclockwise. Watch the tank fill and listen for hissing or dripping under the tank.
The most expensive mistake I see on fill valve DIY jobs is an overtightened locknut. The locknut on a Fluidmaster 400A is plastic. It does not need to be gorilla-tight. Hand-tight plus a quarter-turn with pliers is all it takes to create a watertight seal. I have gone on service calls where a homeowner cracked the tank bottom by overtightening; that turns a $15 repair into a full tank replacement or a new toilet. Snug. Not tight.
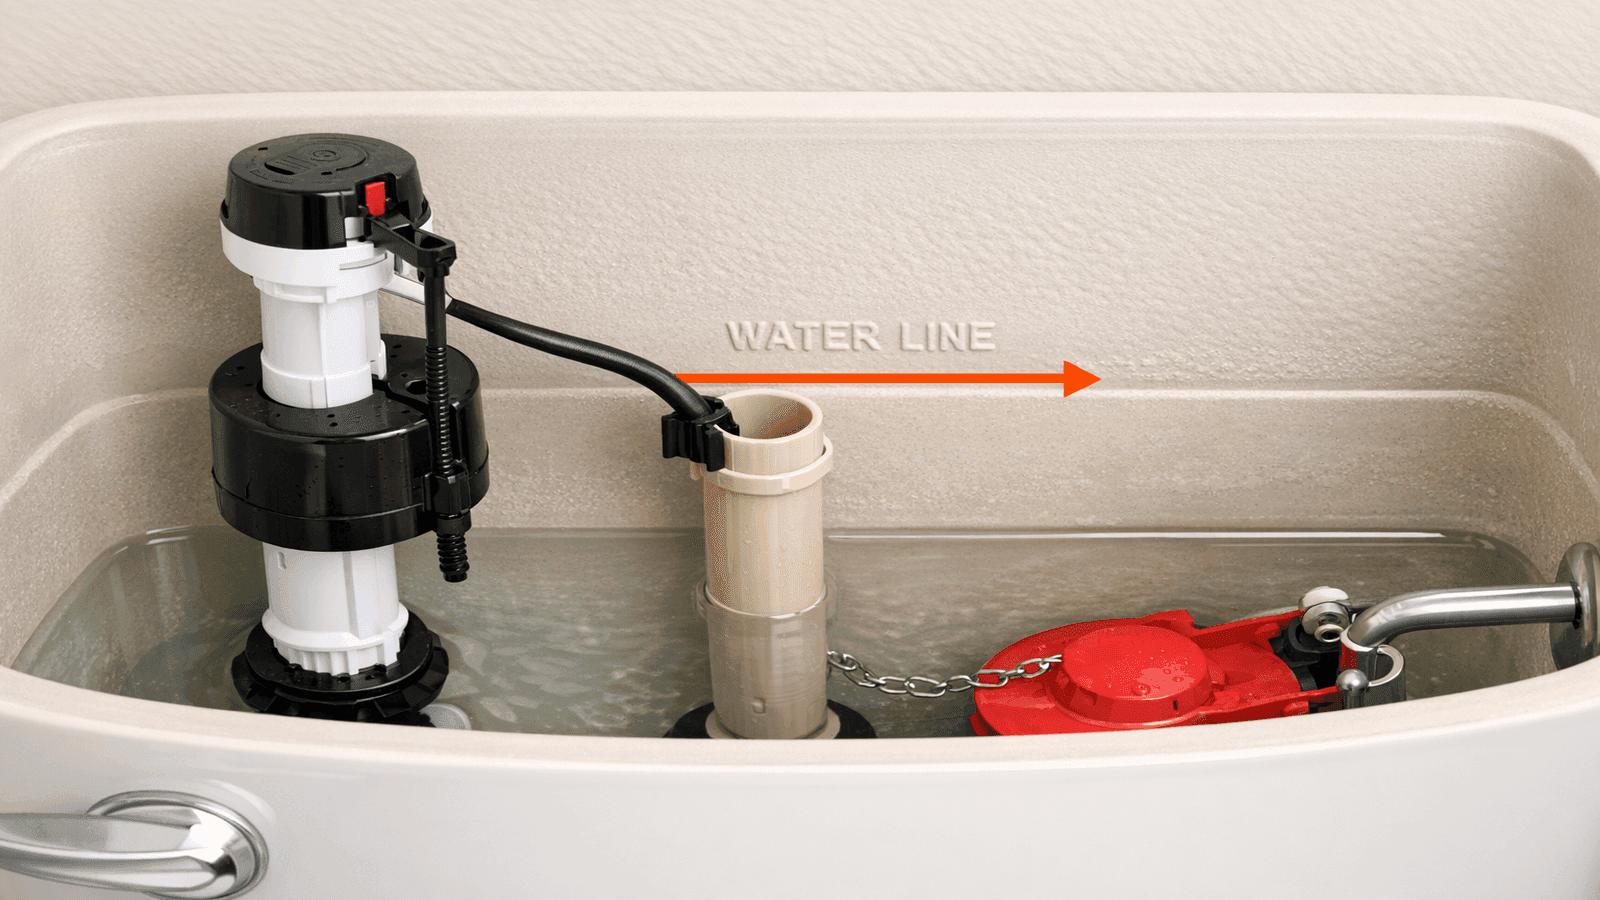
Photo: Inside toilet tank showing installed fill valve, refill tube clipped to overflow tube rim, and water level marked 1 inch below overflow tube top
Adjusting the Water Level After Installation
Many DIYers skip this step and then wonder why the toilet is still making noise. It is the step that finishes the job correctly.
The target water level is 1 inch below the top of the overflow tube. Most tanks have a water line marked on the inside wall of the tank.
Why the level matters: Too high, and water trickles down the overflow tube constantly, causing a running sound even with a brand-new fill valve. Too low, and the tank does not hold enough water for a complete flush.
How to adjust on the Fluidmaster 400A (clip-style float): Pinch the float adjustment clip on the side of the valve body. Slide it up to raise the water level, down to lower it. Flush and let the tank refill to confirm the new level. Flush twice and watch the fill level both times. The water should stop at the 1-inch-below-overflow mark.
After installation, I always do the food coloring test again with the new valve in. Put a few drops in the tank, wait 10 minutes without flushing. If the bowl water stays clear and the tank is not hissing, the job is done correctly. If the bowl turns colored, you now have a flapper issue that was masked by the fill valve problem. Two separate parts, two separate fixes. The food coloring test does not lie.
Get quotes from top-rated pros.
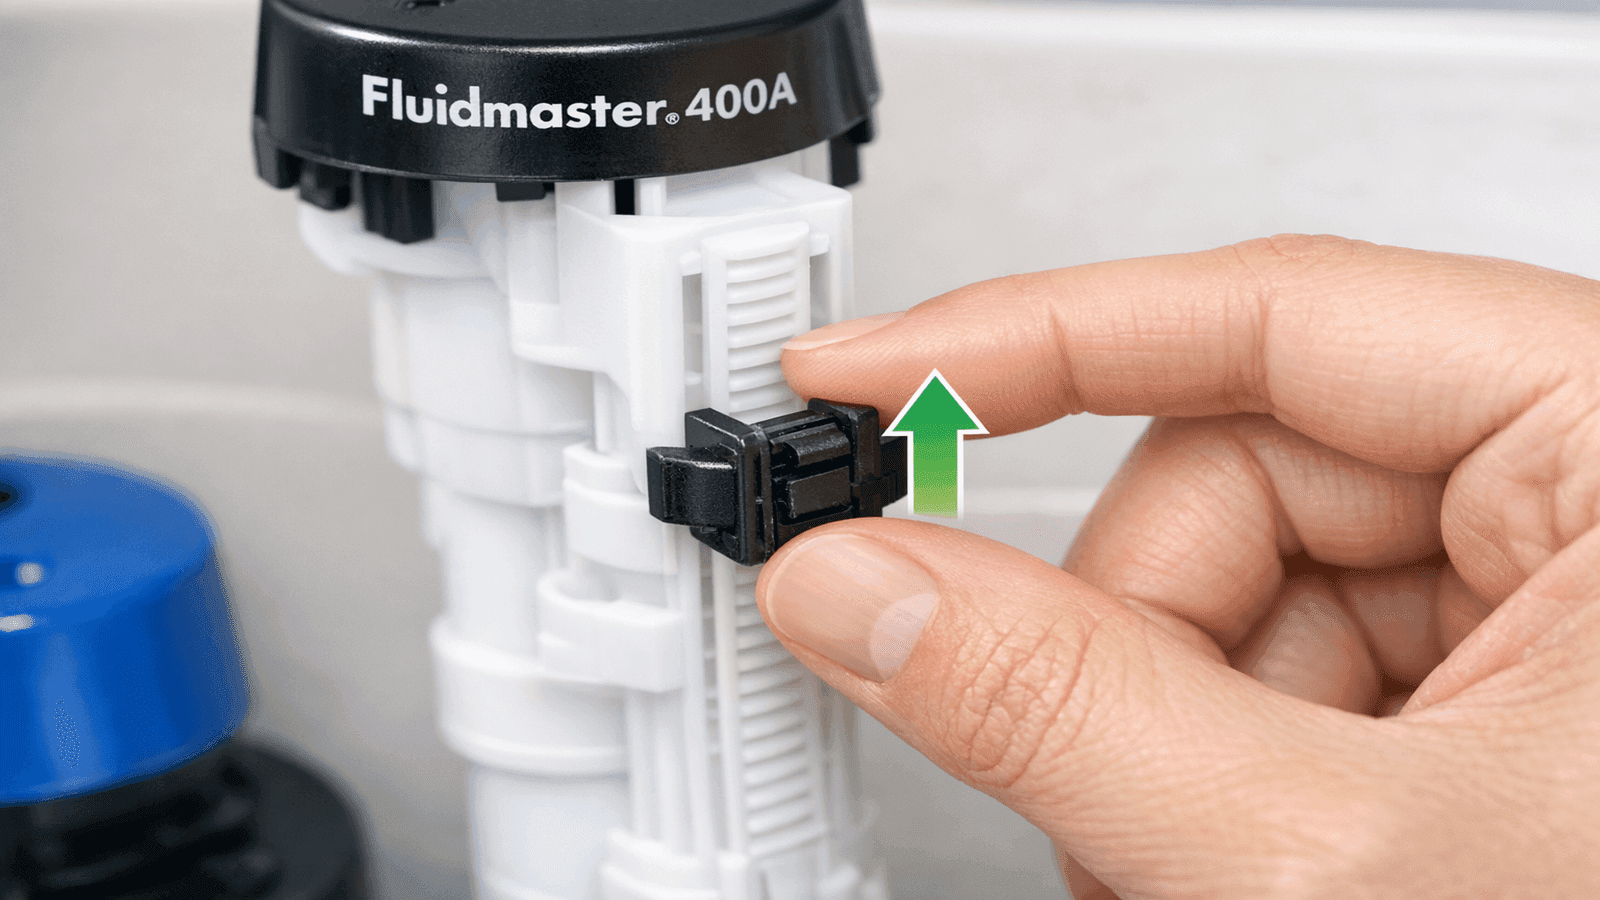
Photo: Close-up of Fluidmaster 400A float adjustment clip being pinched and slid along the valve body to adjust water level
When to Call a Plumber
Most fill valve replacements are genuinely DIY territory. A few situations are not.
Call a plumber if:
- The shutoff valve behind the toilet will not close fully (see Install a Shutoff Valve)
- There is a visible crack in the tank (full tank or toilet replacement needed)
- The toilet is 20 or more years old with repeated part failures
- Water is leaking from the tank-to-bowl connection bolts or the wax ring
Cost reality check:
- DIY fill valve replacement: $10-$20 in parts
- Professional fill valve replacement: $120-$220 total (Angi 2026)
- Tank replacement if cracked by overtightening: $150-$400
If your toilet is clogged rather than running, that is a different problem. See How to Unclog a Toilet.
I always tell homeowners: if you are calling a plumber to replace a fill valve, you are spending $150-$200 on a $15 part and 30 minutes of work. The only time it makes sense to call is when there is something else wrong; a shutoff valve that will not close, a crack in the tank, or a much older toilet that probably needs full replacement anyway. If it is just the fill valve on a toilet that is 10-15 years old and otherwise healthy, do it yourself.
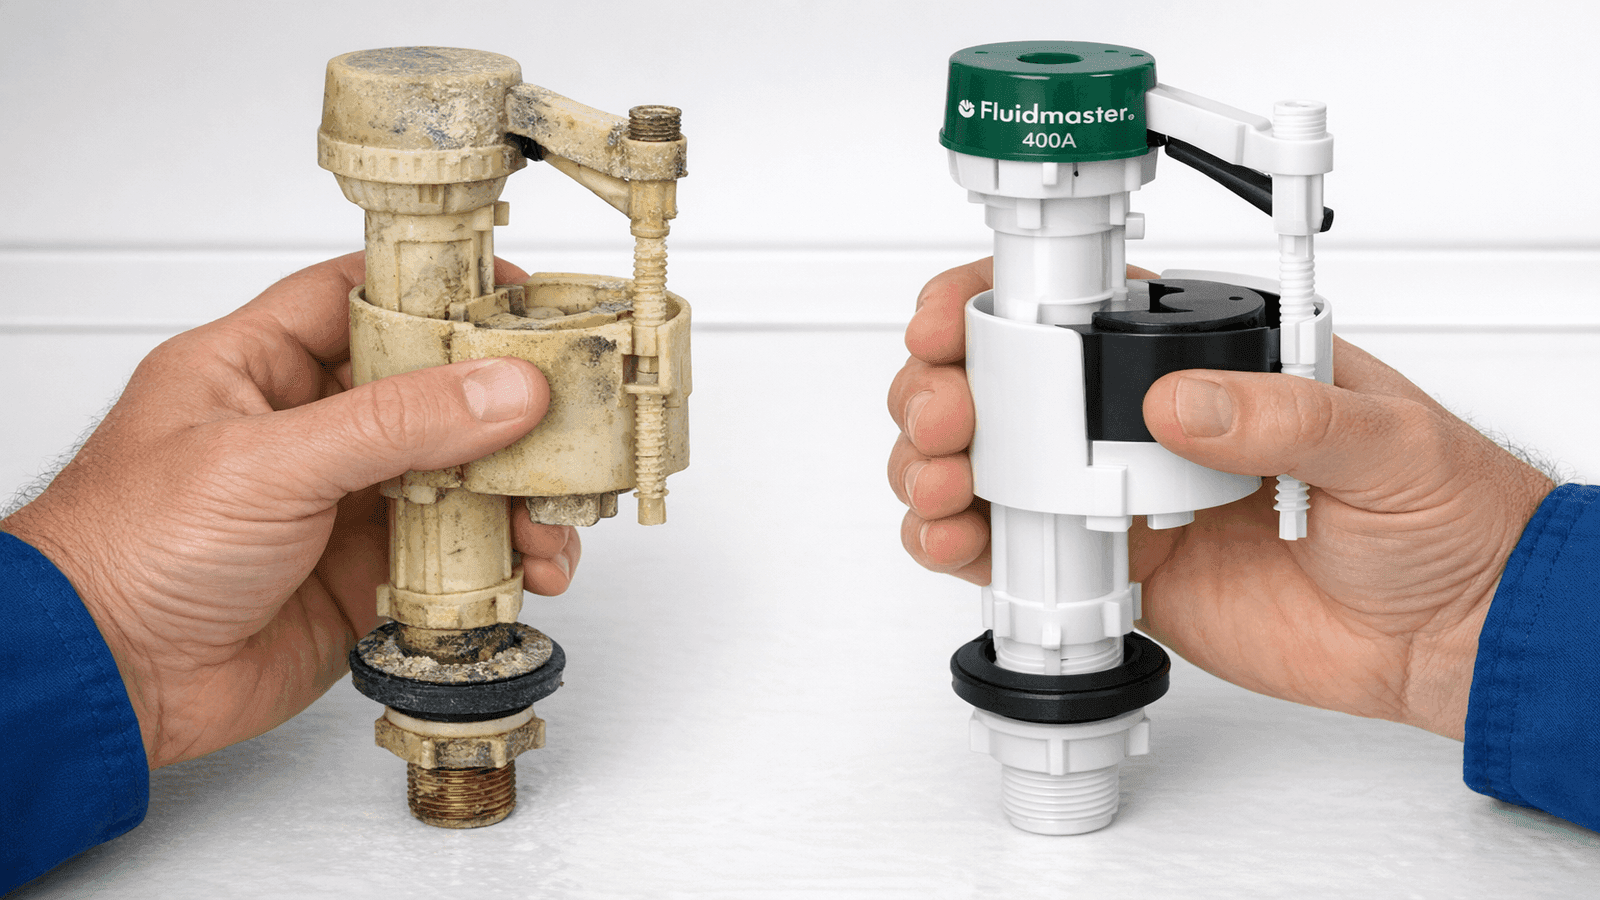
Photo: Plumber's hand holding old deteriorated fill valve next to a new Fluidmaster 400A fill valve, comparison side by side
Conclusion
Replacing a toilet fill valve is one of the best starter plumbing repairs you can learn. The parts cost $10-$20, the job takes under an hour, and the most common mistake (overtightening the locknut) is easy to avoid once you know about it. Run the food colouring test first to confirm the diagnosis, pick up a Fluidmaster 400A for standard toilets, and follow the 12 steps above. The hissing stops, the water bill drops, and you have the confidence to tackle the next repair.
For more hands-on plumbing repairs at this level, visit the DIY Plumbing Guides hub.
Disclaimer: Cost ranges listed in this guide are national averages based on 2025-2026 industry data. Actual costs vary by location, severity, and contractor. Always get multiple quotes for plumbing work. Prices in major metro areas may be 20-40% higher than the national average. This guide is for educational purposes; consult a licensed plumber for issues beyond basic DIY repairs.