- Replacing a thermostat is one of the most accessible HVAC upgrades, taking 30-60 minutes with basic tools and no special licensing, since thermostats use safe 24-volt low-voltage wiring [1].
- ENERGY STAR certified smart thermostats save an average of 8% on heating and cooling bills, or roughly $50 per year, with actual savings ranging from $20 to $200+ depending on climate and usage [2].
- Photographing and labeling every wire before disconnecting the old unit is the single most important step in the entire process and prevents 90% of wiring mistakes.
- The C wire (common wire) is required by most smart thermostats for continuous 24V power. Homes with only 4 wires may need a C-wire adapter kit ($25-$50) or professional wiring [3].
- Thermostat compatibility depends on your HVAC system type. Single-stage, multi-stage, and heat pump systems each require different thermostat configurations, and an incompatible thermostat can damage your equipment [4].
Heating and cooling accounts for roughly 48% of energy use in a typical U.S. home, making it the single largest energy expense according to the Department of Energy [1]. Your thermostat controls all of it. An outdated or malfunctioning thermostat wastes energy every hour it runs, and replacing one is among the few home improvements that pays for itself within the first year.
The good news: thermostat replacement is a genuine DIY project. Unlike most HVAC work, which involves high-voltage electricity, pressurized refrigerant, or combustion gases, thermostats operate on 24-volt low-voltage circuits. With the power off at the breaker, the wiring is safe to handle. Daniel Torres, a Certified HVAC Technician and Energy Efficiency Consultant with EPA 608 Universal, NATE, and HVAC Excellence certifications and 14+ years of experience in Minneapolis, MN, walks through the full process below, from choosing the right replacement to final system testing.
For a broader overview of DIY HVAC tasks and where the safety line falls between homeowner maintenance and professional work, see the complete guide on HVAC how-to and DIY maintenance.

Get quotes from top-rated pros.
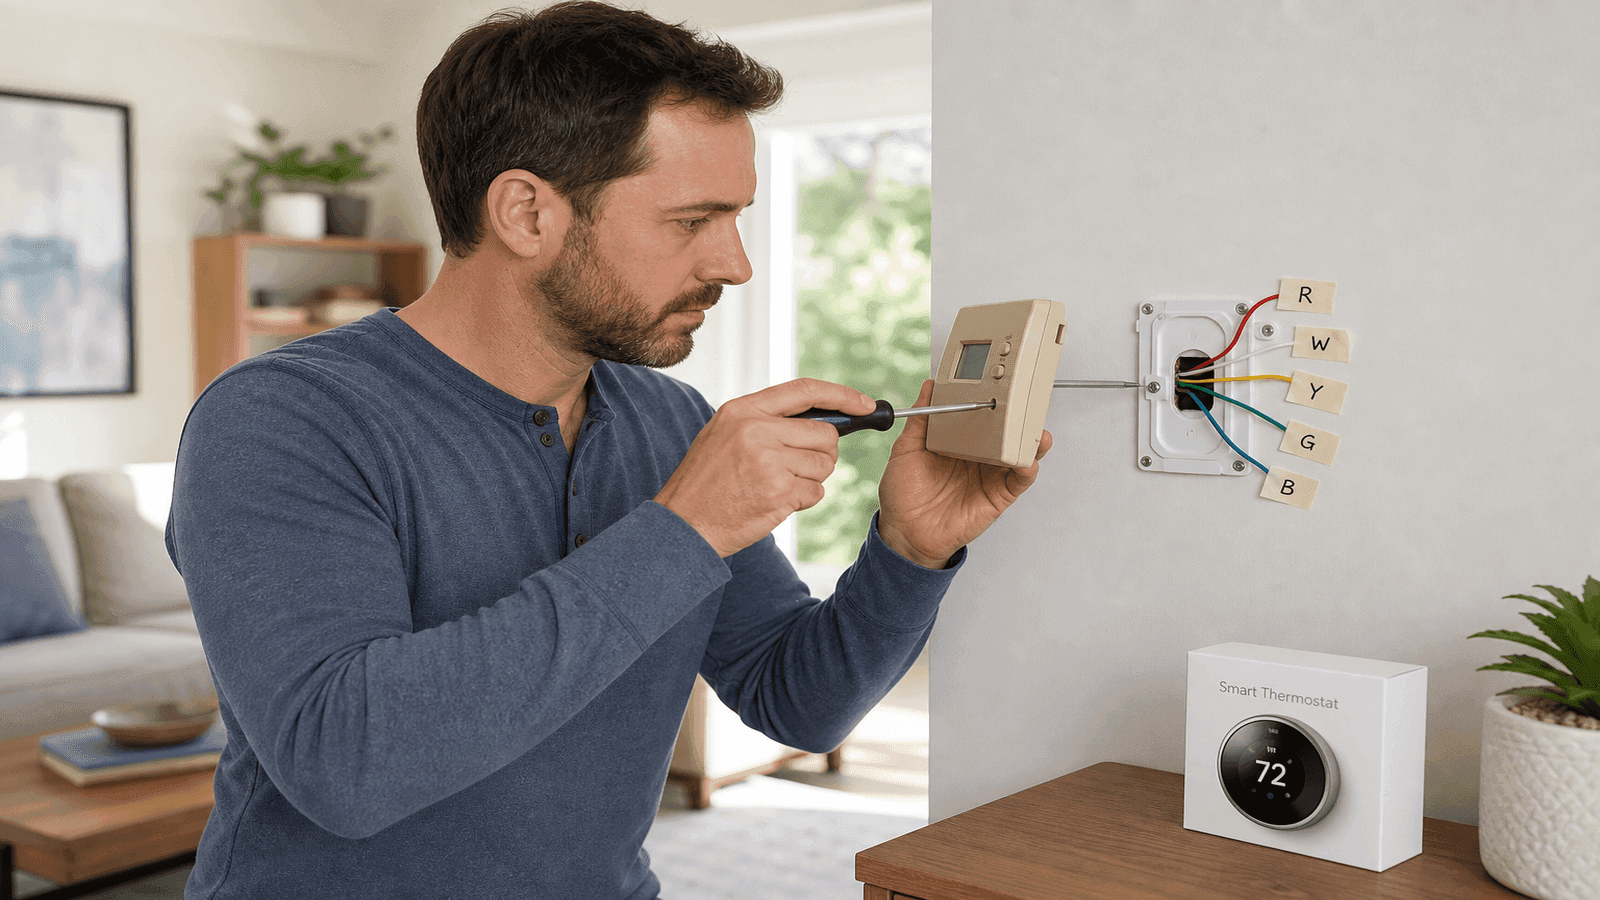
Photo: Homeowner removing an old thermostat from a living room wall with labeled wires visible and a new smart thermostat box on a nearby table
Choose the Right Replacement Thermostat
Not every thermostat works with every HVAC system. Before purchasing, you need to identify your system type and confirm compatibility. Installing an incompatible thermostat can cause short cycling, system lockouts, or compressor damage.
Identify Your HVAC System Type
Your system type determines which thermostat you need. Check the wires connected to your current thermostat or look at the model number on your indoor unit.
| System Type | Wiring Clues | Thermostat Requirement |
| Single-stage heat only | R and W wires (2 wires total) | Basic or programmable |
| Single-stage heat + cool | R, W, Y, G wires (4 wires) | Any compatible model |
| Multi-stage heat + cool | W1, W2, Y1, Y2 wires present | Multi-stage compatible |
| Heat pump | O/B wire present (reversing valve) | Heat pump compatible |
| Heat pump + aux heat | O/B wire + W2/AUX wire | Heat pump with aux support |
| Dual fuel (heat pump + furnace) | O/B + W wires | Dual fuel compatible |
The biggest mistake I see is homeowners buying whatever smart thermostat is on sale without checking compatibility. A thermostat designed for single-stage systems installed on a two-stage heat pump will only run one stage, cutting your efficiency in half. Always check the manufacturer's compatibility tool before buying.
Thermostat Types and Costs
| Thermostat Type | Unit Cost | Features | Best For |
| Basic manual | $15-$40 | Temperature dial, no programming | Rentals, simple systems |
| Programmable | $25-$80 | 7-day scheduling, backlit display | Budget-conscious homeowners |
| Smart (Wi-Fi) | $80-$250 | Learning, geofencing, app control | Energy savings, convenience |
| Smart (premium) | $200-$350 | Room sensors, air quality, humidity | Larger homes, multi-zone |
Smart thermostats from brands like Google Nest, ecobee, and Honeywell Home typically cost $120-$250 and offer the best return on investment. At $50 per year in average energy savings [2], a $150 smart thermostat pays for itself in three years.
Run a Compatibility Check
Every major smart thermostat manufacturer provides a free online compatibility checker. You enter the wire labels from your current thermostat, and the tool confirms whether the new unit works with your system [4].
To check compatibility:
- Turn off HVAC power at the breaker
- Remove your current thermostat cover
- Note every wire color and the terminal letter it connects to (R, W, Y, G, C, O/B, etc.)
- Visit the manufacturer's website and enter your wiring configuration
- The tool confirms compatibility and shows which terminal each wire connects to on the new unit
If you have only 2-3 wires, your options are limited. Most smart thermostats require at least 4 wires, and many require 5 (including a C wire).
Get quotes from top-rated pros.
Understand Thermostat Wiring
Thermostat wires use a standard color code, though colors can vary in older homes. The terminal letter matters more than the wire color. Always match wires to terminals, not colors.
Standard Wire Color Codes
| Terminal | Standard Color | Function |
| R (Rh/Rc) | Red | 24V power from transformer |
| W (W1) | White | Heating call |
| Y (Y1) | Yellow | Cooling call (compressor) |
| G | Green | Fan control |
| C | Blue or black | Common (continuous 24V power) |
| O/B | Orange or dark blue | Heat pump reversing valve |
| W2/AUX | Brown or white | Second-stage or auxiliary heat |
| Y2 | Light blue | Second-stage cooling |
The R wire supplies 24 volts from your HVAC transformer. Some systems split this into Rh (heating power) and Rc (cooling power) with a jumper wire connecting them. Note any jumper before removing it [5].
The C wire provides a return path for the 24V circuit, giving the thermostat continuous power. Older homes often lack a C wire because mechanical thermostats did not need one [3].
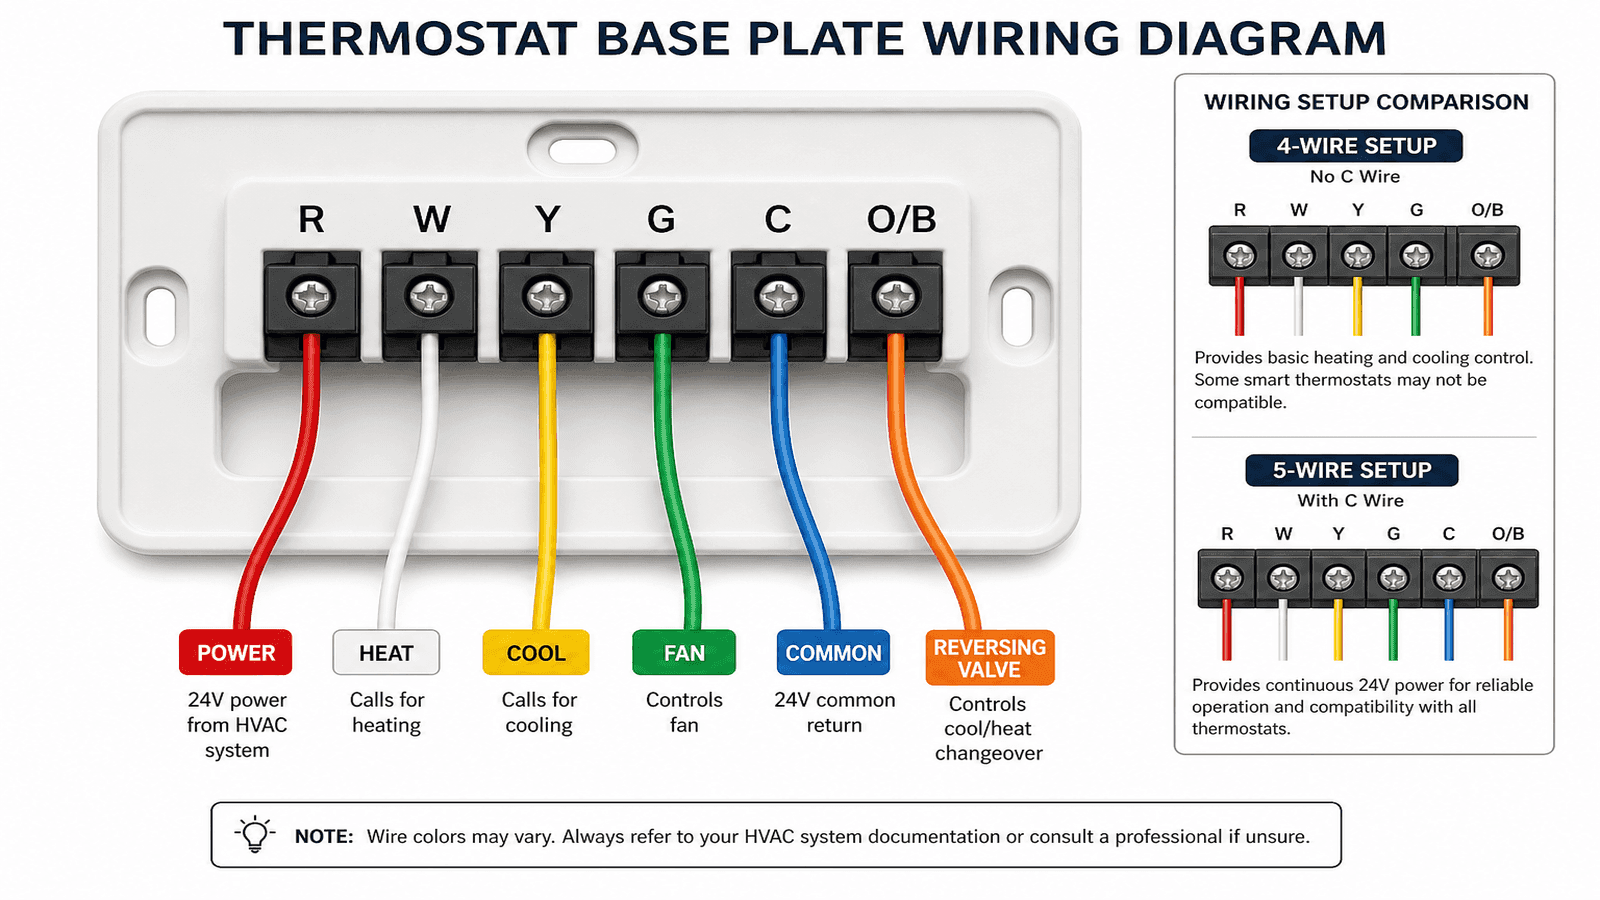
Photo: Labeled thermostat wiring diagram showing standard wire colors connected to terminal letters R, W, Y, G, and C on a thermostat base plate
What If You Have No C Wire?
Roughly 40% of homes built before 2000 lack a C wire at the thermostat location. You have four options:
- Use an unused wire. If your thermostat cable has an extra wire not connected to any terminal, you can repurpose it as a C wire by connecting it to the C terminal on both the thermostat and the HVAC control board.
- Install a C-wire adapter kit ($25-$50). These kits from Honeywell, ecobee, and others install at the HVAC control board and reroute existing wires to provide C wire functionality without running new cable [3].
- Use a thermostat with battery backup. Some models like the Google Nest Thermostat can operate without a C wire by "power stealing" from the R wire, though this can cause issues with certain HVAC systems.
- Run a new thermostat cable ($100-$250 professional installation). This is the most reliable long-term solution, especially for premium smart thermostats with room sensors and continuous power demands.
C-wire adapter kits work well for most installations. I install 3-4 per week. The ecobee Power Extender Kit is included free with their thermostats, and the Honeywell C-Wire Adapter runs about $35. Either one takes 15 minutes to install at the furnace.
Tools and Materials
Gather everything before starting. The job takes 30-60 minutes without interruptions.
Required:
- New thermostat (with mounting hardware included)
- Phillips and flathead screwdrivers
- Smartphone or camera (for photographing wires)
- Masking tape and pen (for labeling wires)
- Level
- Drill with appropriate wall anchors (if new mounting holes needed)
- Non-contact voltage tester
Optional:
- C-wire adapter kit (if needed)
- Wire strippers (if wire ends are damaged)
- Drywall anchors (if existing holes do not align)
- Pencil for marking new mounting holes
Step-by-Step Thermostat Replacement
Step 1: Turn Off HVAC Power
Locate your HVAC system's circuit breaker and switch it to the OFF position. Most homes have separate breakers for heating and cooling. Turn off both. Use a non-contact voltage tester at the thermostat to confirm no power is present.
Do not skip this step. While thermostat wiring is low voltage (24V), shorting the wires with power on can blow the HVAC transformer fuse, which costs $20-$50 to replace and requires accessing the furnace or air handler control board.
Step 2: Document Existing Wiring
This is the most critical step. Take a clear, well-lit photo of every wire and the terminal it connects to before touching anything.
- Remove the thermostat faceplate (most snap or pull off)
- Photograph the wiring from straight on, close enough to read terminal labels
- Take a second photo from a wider angle showing the full wiring layout
- Using masking tape, wrap a small flag around each wire and write the terminal letter on the tape (R, W, Y, G, C, etc.)
- Note any jumper wires between terminals (especially Rh to Rc)
If wire colors do not match standard codes, the tape labels become your only reference. Do not rely on memory.
Get quotes from top-rated pros.
Step 3: Remove the Old Thermostat
- Disconnect each wire from its terminal by loosening the screw or pressing the release tab
- Gently pull each wire free and let it hang (do not let wires fall into the wall cavity; wrap them around a pencil laid across the hole if needed)
- Remove the mounting screws holding the thermostat base plate to the wall
- If the old base plate has a hole for wires, feed labeled wires through the new base plate before mounting
Step 4: Mount the New Base Plate
- Hold the new base plate against the wall and use a level to ensure it is straight
- Mark screw hole locations with a pencil
- If existing holes align, use them. If not, drill new holes and insert wall anchors
- Feed labeled wires through the base plate wire opening
- Secure the base plate with mounting screws until snug (do not overtighten into drywall)
Step 5: Connect the Wires
Match each labeled wire to the corresponding terminal on the new thermostat base plate. Terminal letters are printed on the base plate next to each connector.
- Strip wire ends to expose about 1/4 inch of copper if needed
- Insert each wire into the matching terminal (R to R, W to W, Y to Y, G to G, C to C)
- For screw terminals, tighten until the wire is secure with no exposed copper touching adjacent terminals
- For push-in connectors, insert the wire until it clicks
- Verify every connection against your photo and tape labels
If your old thermostat had a jumper between Rh and Rc but your new thermostat has a single R terminal, connect the red wire to R. If the new thermostat has separate Rh and Rc terminals, install the included jumper wire or check the manual.
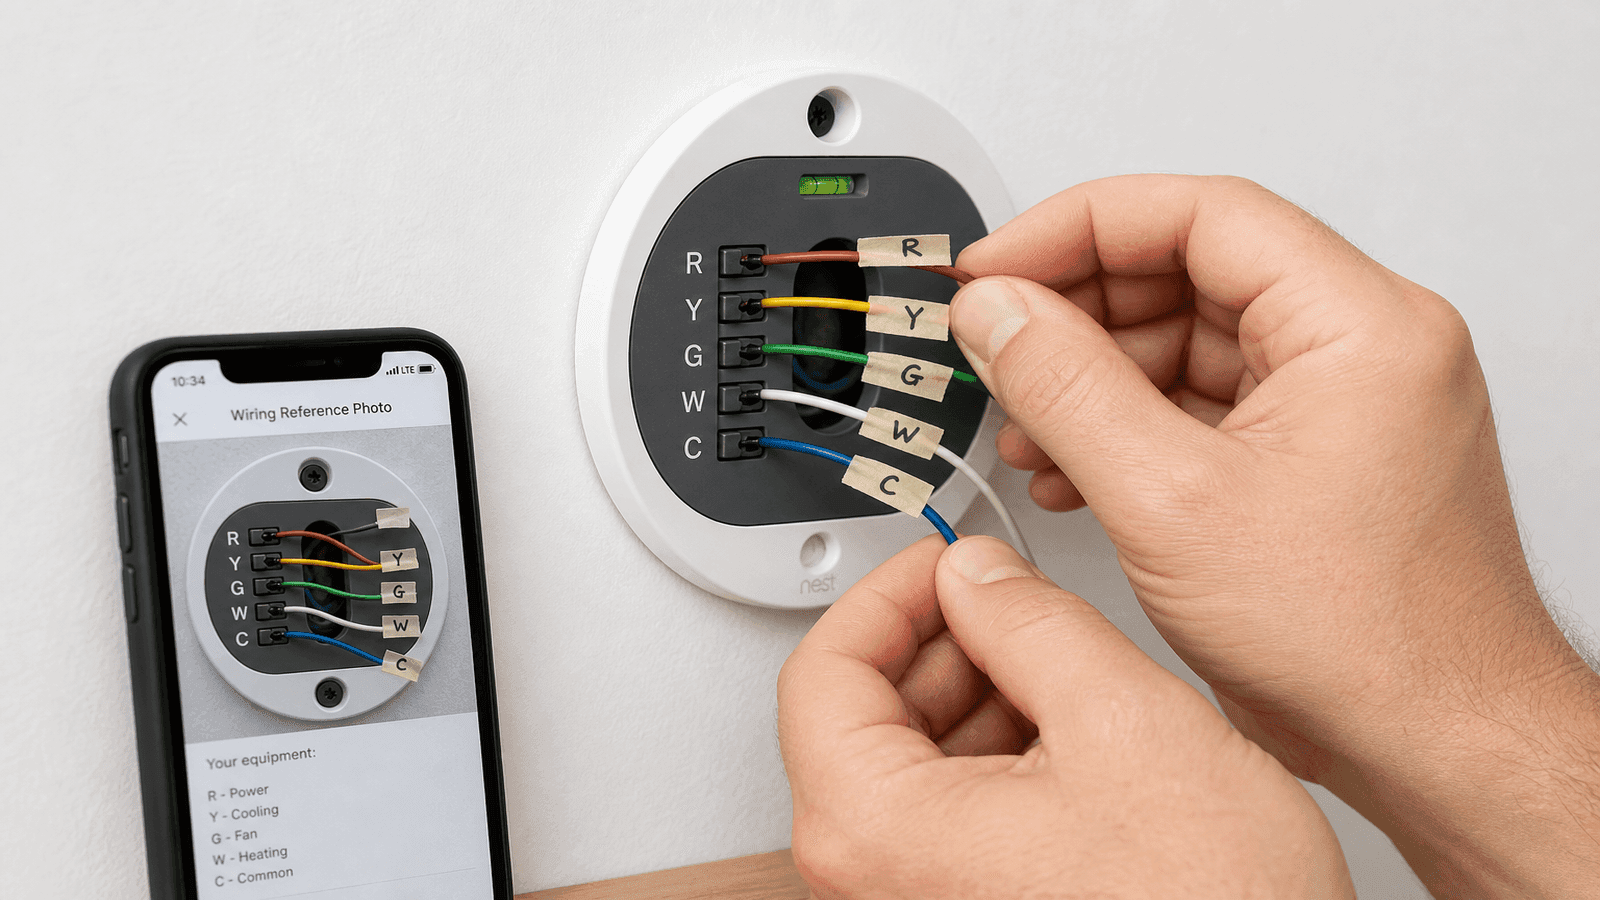
Photo: Hands connecting labeled thermostat wires to terminal screws on a new smart thermostat base plate mounted on a wall
Step 6: Attach the Thermostat and Power On
- Snap or screw the thermostat display unit onto the base plate
- Return to the breaker panel and turn HVAC power back on
- The thermostat should power up and begin its setup process
- Follow the on-screen prompts to configure Wi-Fi (if applicable), system type, and scheduling preferences
Step 7: Test Every Mode
Testing confirms that every wire connection is correct.
- Test cooling: Set the thermostat 5 degrees below room temperature. Verify cold air at the supply registers within 1-5 minutes.
- Test heating: Set the thermostat 5 degrees above room temperature. Verify warm air at the registers.
- Test fan only: Switch to fan-only mode. The blower should run without heating or cooling engaging.
If the system does not respond correctly, power off at the breaker and recheck wiring against your photo. The most common errors are swapped Y and G wires (cooling and fan reversed) and missing jumper wires between Rh and Rc.
Troubleshooting Common Issues
| Problem | Likely Cause | Fix |
| Thermostat blank/no power | Blown transformer fuse, missing C wire | Check fuse at control board, verify C wire |
| Heat works but no cooling | Y wire loose or not connected | Recheck Y terminal connection |
| Fan runs but no heat or cool | R wire not providing power | Verify R wire connection and breaker |
| Short cycling (on/off rapidly) | Incompatible thermostat or wiring error | Confirm system type matches thermostat |
| "No power" error on smart thermostat | No C wire or weak power steal | Install C-wire adapter kit |
| System runs but wrong mode | O/B wire configured incorrectly | Check heat pump O/B setting in thermostat menu |
If troubleshooting does not resolve the issue within 30 minutes, turn the system off and call a licensed HVAC technician. Continuing to run a system with incorrect wiring can damage the control board ($200-$600 to replace) or the compressor [6].
When to Call a Professional
While thermostat replacement is DIY-friendly, certain situations require a licensed HVAC technician:
- High-voltage systems (line voltage thermostats). Baseboard heaters and some older systems use 120V or 240V thermostats. These carry serious shock risk and require an electrician. Line-voltage thermostats have thick wires (12 or 14 gauge) compared to the thin 18-gauge wires in low-voltage systems.
- No existing wires at all. If you are adding a thermostat where none existed, new wiring must be run from the HVAC control board through walls and ceilings.
- Multi-zone or zoned systems. Homes with multiple HVAC zones use zone control panels that add complexity beyond a simple wire swap.
- Wiring does not match any standard configuration. Custom or modified HVAC installations sometimes have non-standard wiring that requires professional diagnosis.
- Repeated blown fuses. If the HVAC transformer fuse blows after installation, a short circuit exists somewhere in the wiring. Professional testing with a multimeter is needed.
Professional thermostat installation costs $80-$200 for labor on top of the thermostat price, with the national average total project cost between $140 and $350 [7].
Get quotes from top-rated pros.
Maximize Savings After Installation
A new thermostat only saves money if you use its features. The DOE estimates that an optimized heating and cooling schedule can reduce annual costs by up to 10%, saving roughly 1% for every 1 degree Fahrenheit of setback maintained for 8 hours [1].
Recommended schedule for a smart thermostat
| Time | Occupied | Setpoint (Cooling) | Setpoint (Heating) |
| 6:00 AM - 8:00 AM | Home | 75F | 70F |
| 8:00 AM - 5:00 PM | Away | 82F | 62F |
| 5:00 PM - 10:00 PM | Home | 75F | 70F |
| 10:00 PM - 6:00 AM | Sleep | 78F | 65F |
Setting the temperature back 7-10 degrees from its normal setting for 8 hours a day yields the best balance between comfort and savings [1].
Utility rebates: Many utility companies offer $25-$100 rebates for ENERGY STAR certified smart thermostats. Visit the ENERGY STAR Rebate Finder at energystar.gov/rebate-finder and enter your ZIP code to check availability in your area [8].
Case Study: The Kowalski Family's $400 Annual Savings
Tom and Sarah Kowalski of Eden Prairie, Minnesota, contacted Daniel through NearbyHunt in October 2025 after their 15-year-old mercury thermostat stopped holding temperature. The thermostat would overshoot by 3-4 degrees in heating mode and undershoot by 2-3 degrees in cooling, causing the furnace and AC to cycle excessively.
Daniel inspected the system and confirmed the thermostat's internal temperature sensor had drifted significantly from calibration. The Kowalskis' home had a standard 5-wire setup (R, W, Y, G, and an unused blue wire), making a smart thermostat upgrade straightforward. Daniel connected the unused blue wire as the C wire, installed an ecobee Smart Thermostat Premium, and programmed it around the family's work and school schedule.
After three months of winter operation, the Kowalskis' gas heating bill dropped by 22% compared to the same period the previous year. Their utility data showed the old thermostat had been running the furnace an average of 45 minutes per hour during cold snaps, while the new thermostat achieved the same comfort level at 32 minutes per hour through tighter temperature control and scheduled setbacks. Projected annual savings: approximately $400 in combined heating and cooling costs against a total project cost of $280 (thermostat plus one hour of labor).
NearbyHunt Network Insight
Data from HVAC professionals in the NearbyHunt network shows that thermostat-related service requests follow predictable seasonal patterns:
| Request Type | % of Thermostat Calls | Average Cost |
| Thermostat replacement (upgrade) | 38% | $140-$350 |
| Smart thermostat installation | 27% | $200-$450 |
| Thermostat not working (diagnosis) | 18% | $100-$250 |
| C-wire installation | 10% | $100-$250 |
| Wiring repair/correction | 7% | $150-$400 |
Across the network, 62% of thermostat replacement requests come in fall (September through November) as homeowners prepare for winter. The most frequently installed models through NearbyHunt professionals are the Google Nest Learning Thermostat, ecobee Smart Thermostat Premium, and Honeywell Home T9.
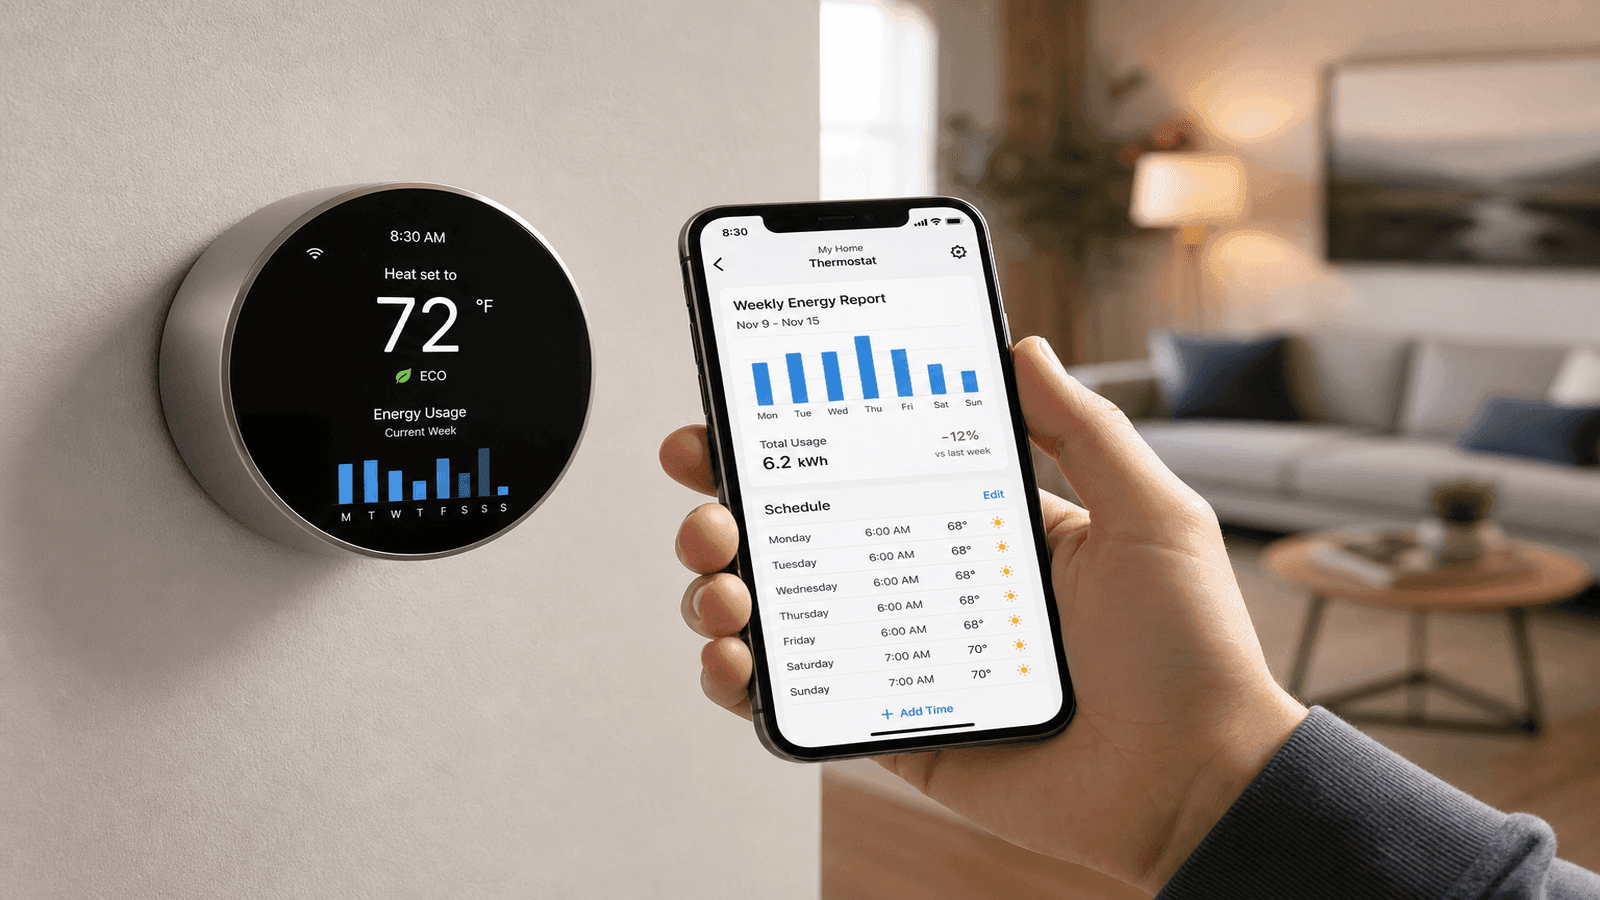
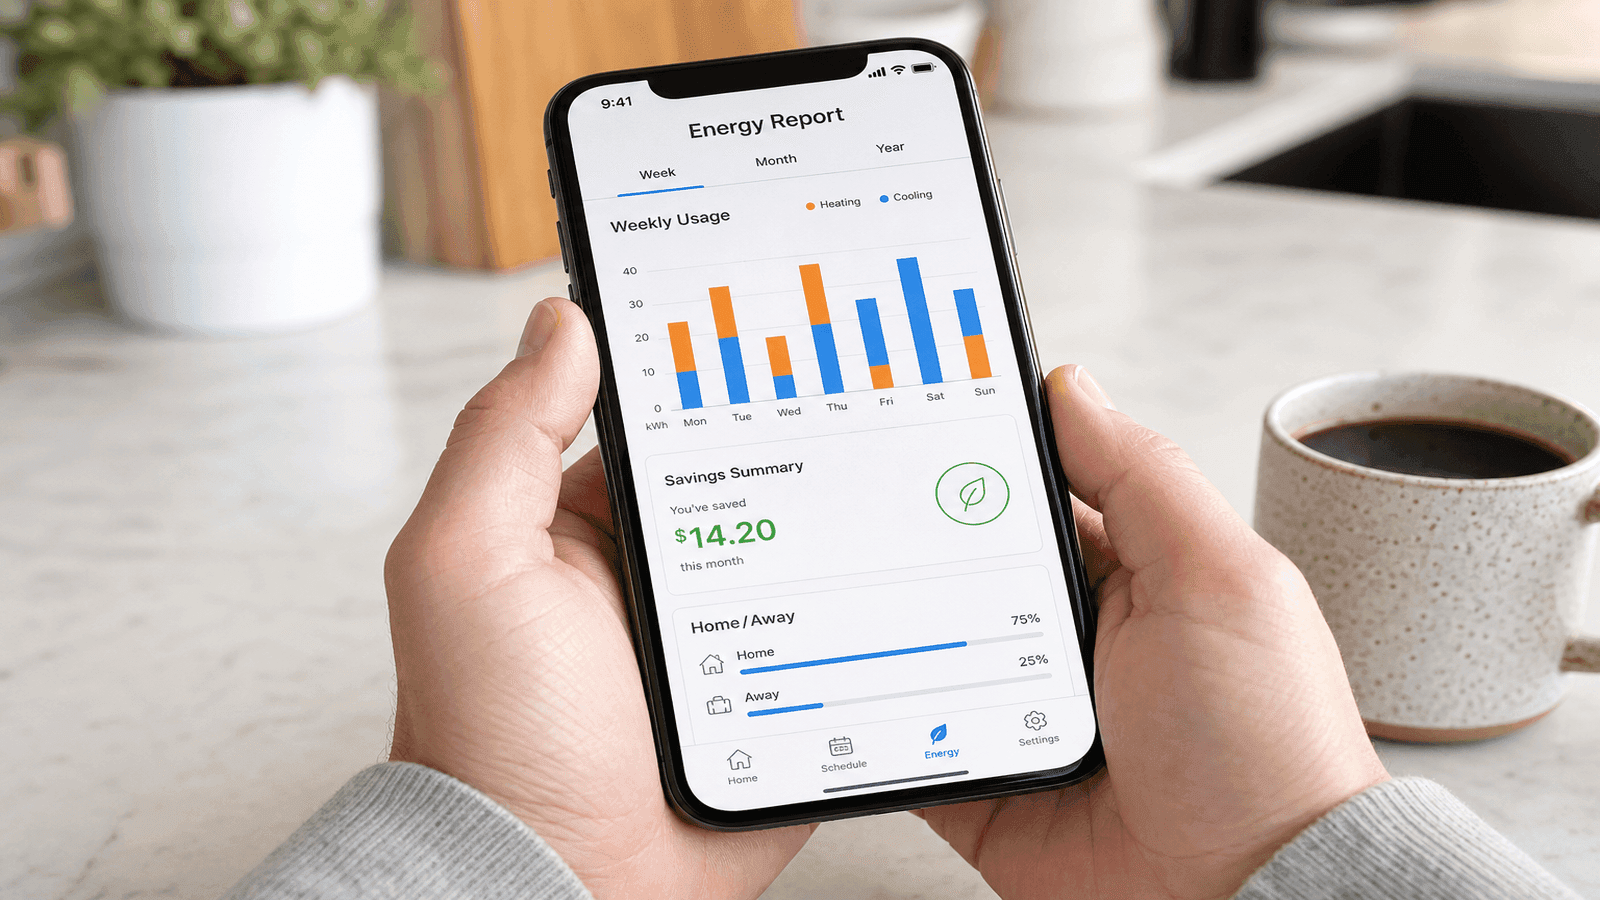
Photo: Smart thermostat on a living room wall displaying temperature and energy usage data with a smartphone showing the companion app nearby
Find Thermostat Installation Pros on NearbyHunt
When the wiring gets complicated or you want a professional installation done right the first time, NearbyHunt connects you with licensed HVAC technicians who handle thermostat installations daily. Compare quotes, read verified reviews, and book service through one platform.
Sources and References
[1] U.S. Department of Energy. "Energy Saver: Programmable Thermostats."
[2] ENERGY STAR. "Smart Thermostats FAQs."
[3] Honeywell Home. "Everything You Need to Know About a C-Wire."
[4] Google Nest Help. "Nest Thermostat Compatibility."
[5] Honeywell Home. "How Do I Wire My Thermostat."
[6] ServiceTitan. "HVAC Statistics: Industry Data and Cost Benchmarks."
[7] Forbes Home. "How Much Does Thermostat Installation Cost?"
[8] ENERGY STAR. "Rebate Finder."
Disclaimer: Thermostat replacement procedures vary based on HVAC system type, wiring configuration, home age, and local building codes. The costs provided are national averages from 2025-2026 data and may not reflect pricing in your area. Always turn off power at the circuit breaker before working on thermostat wiring. Line-voltage thermostat replacement (120V/240V) should only be performed by a licensed electrician. If you encounter unfamiliar wiring or your system does not respond correctly after installation, contact a licensed HVAC technician. This article is for informational purposes only and does not constitute professional HVAC advice for your specific situation.


Daniel is an EPA-certified HVAC technician & Energy Efficiency Consultant with over 14 years of experience in maintaining and installing heating and cooling systems throughout the Midwest. Passionate about sustainability, Dan specialises in energy-efficient retrofits and intelligent climate control systems. He writes for NearbyHunt to help homeowners extend the lifespan of their HVAC units while lowering utility bills.

Christine is an EPA-certified HVAC professional with 17 years of experience in heating, cooling, and indoor air quality systems. She has managed large-scale residential installations and worked as a technical trainer for new HVAC apprentices. Chris’s reviews focus on accuracy, safety, and performance standards in modern HVAC practices.