- Standing seam systems hide all fasteners beneath raised, interlocked seams — eliminating the most common metal roof failure point and qualifying the system for 40-70 year manufacturer warranties.
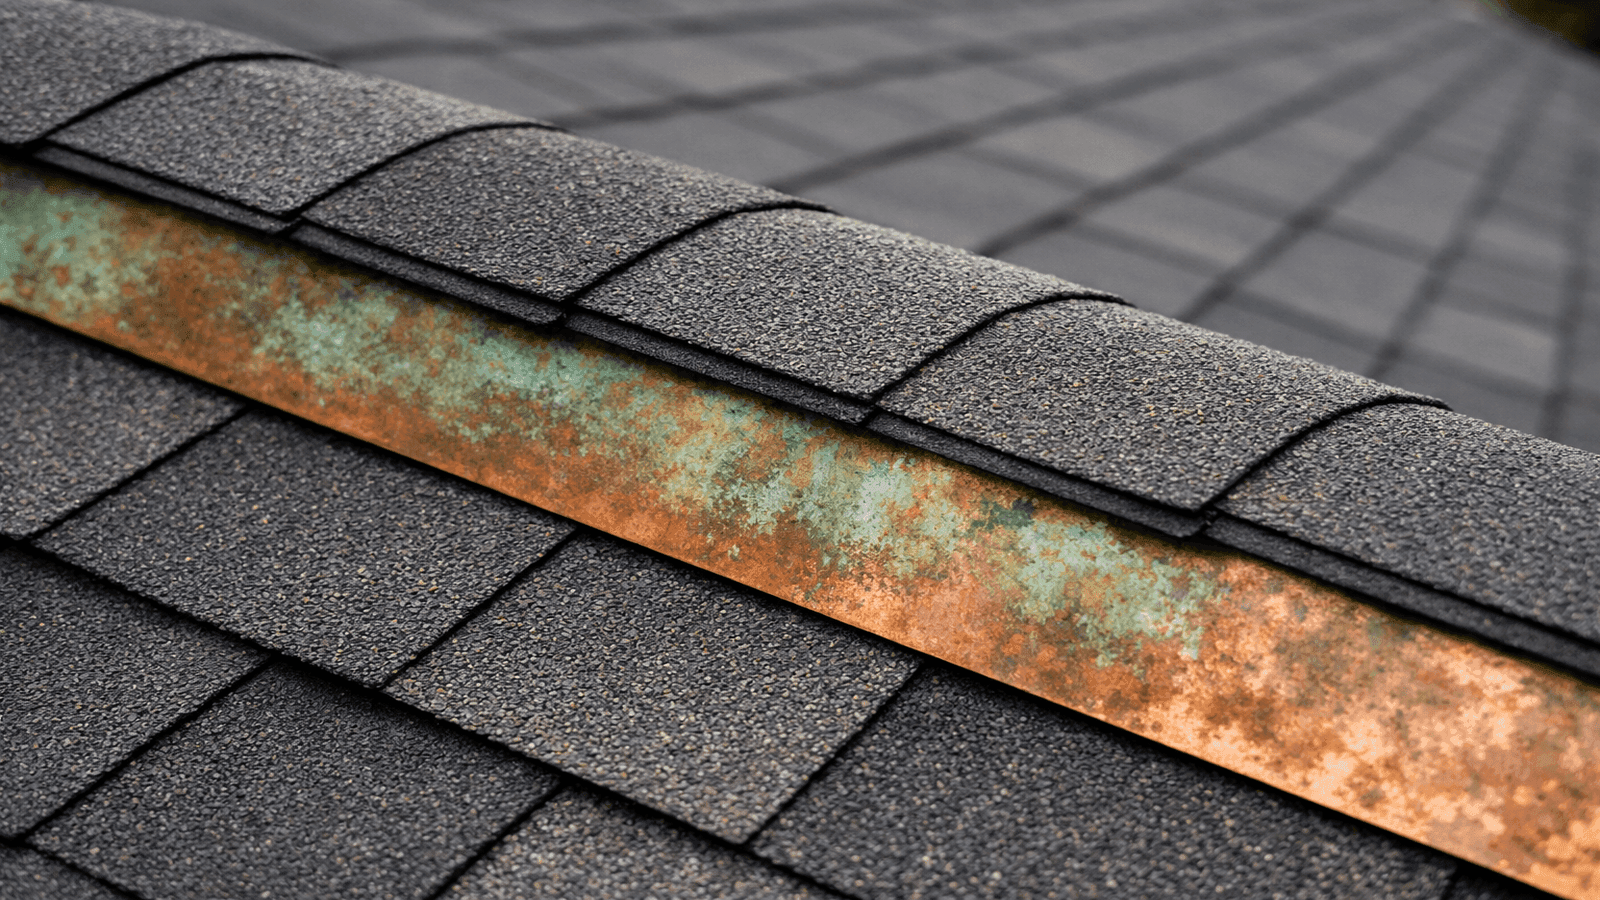
- Exposed-fastener panels (corrugated, R-panel) cost 30-40% less to install but require fastener inspection every 5-10 years as neoprene washers degrade and create potential leak points.
- 26-gauge steel is the residential standard for most U.S. climates; 29-gauge is appropriate only for outbuildings or mild climates with minimal hail exposure.
- Galvalume steel outperforms bare galvanized inland and provides self-healing corrosion protection; aluminum is the correct choice within 5 miles of saltwater environments.
- Metal roofing can go over one layer of existing shingles in most jurisdictions, but only when the deck is sound, pitch exceeds 3:12, and a proper underlayment is used — saving $1,000-$3,000 in tear-off labor.
- Over 1,800-plus residential projects across the U.S. South and Midwest, James Carver has seen fastener-related failures account for the majority of premature metal roof replacements — a problem that standing seam systems eliminate entirely.

Get quotes from top-rated pros.
Metal roof installation is not a single method — it is a family of distinct systems, each with its own fastening approach, thermal behavior, flashing requirements, and performance expectations. Choosing the right system for a home, and then executing the installation correctly, determines whether that roof lasts 40 years or fails at the first cold snap.
In 2026, metal roofing accounts for approximately 17% of the U.S. residential market, with standing seam products driving the majority of premium residential installations. Yet the installation method varies significantly between panel types, and getting the details wrong — from clip spacing to valley flashing depth — is costly to fix once panels are down. For the broader context of where metal installation fits within the full spectrum of roofing materials and methods, see the complete guide to roofing installation.
This guide covers the full installation workflow for both standing seam and exposed-fastener systems: system selection, gauge and material choices, panel sequencing, thermal expansion management, flashing at every transition point, the over-shingle question, and what to expect on cost from $10 to $25 per square foot installed.
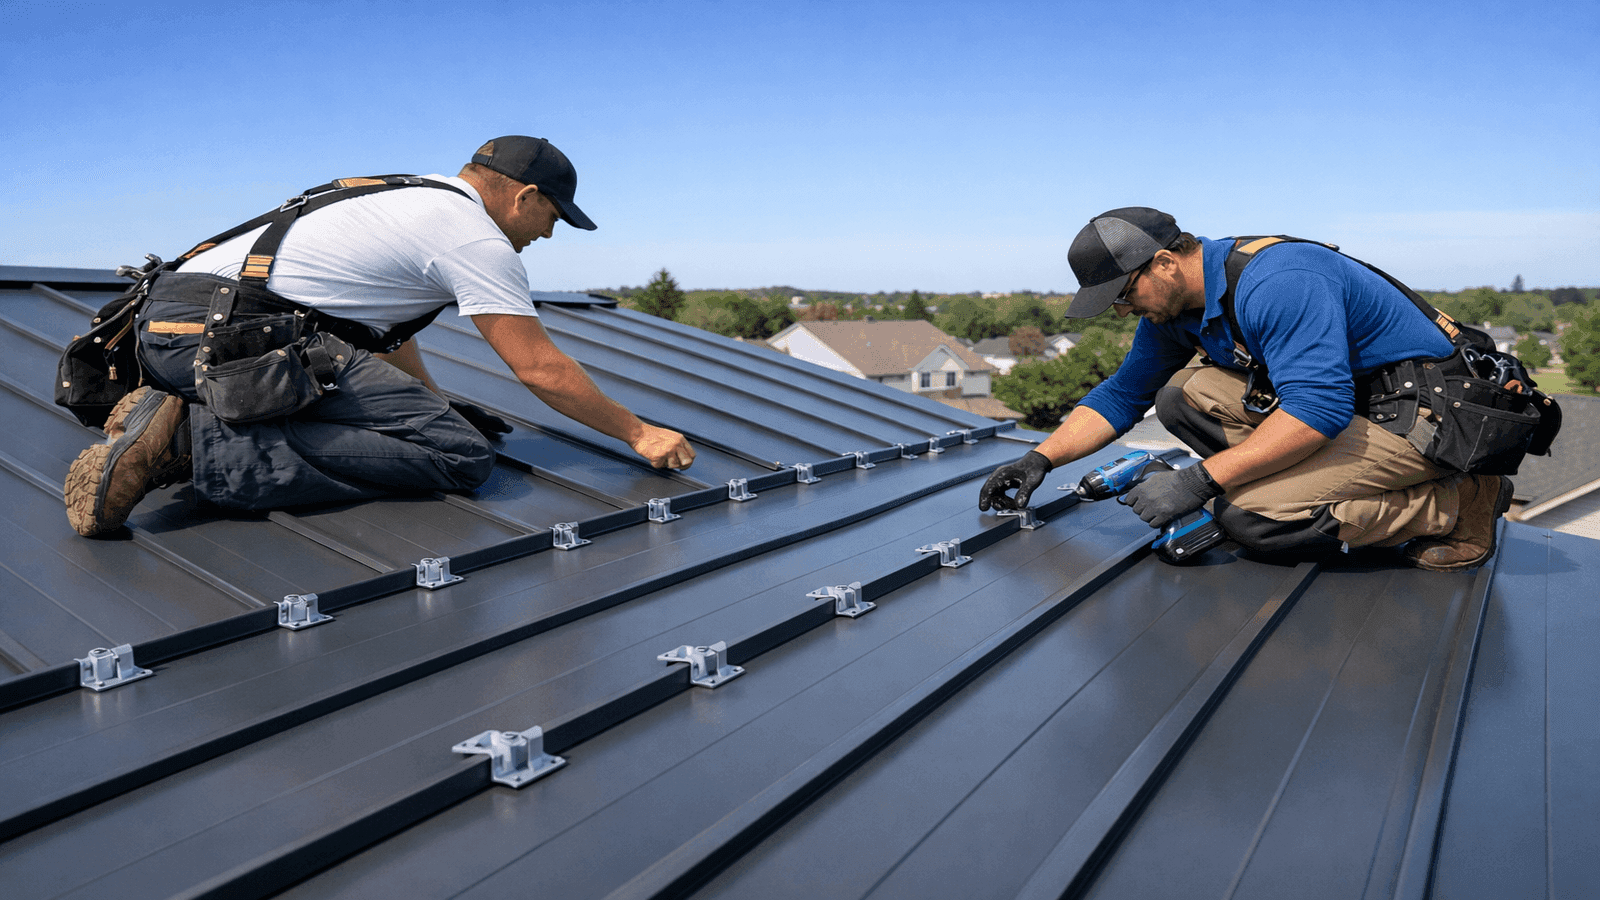
Photo: Two roofers installing standing seam metal panels on a residential roof with concealed clips visible between seams
Standing Seam Systems
Standing seam metal roofing is defined by one core feature: all fasteners are concealed beneath the panel seams, never penetrating the exposed face of the metal. Panels run vertically from ridge to eave, connecting along raised seams that interlock and are fastened to the deck through either a clip or a fastener flange hidden at the panel edge.
There are two main fastening approaches within standing seam:
Clip-attached (floating) systems secure the panel to the deck through a separate clip that slides into a channel along the panel seam. The clip is screwed to the deck or batten, and the panel itself is free to move laterally within the clip slot. This floating design allows the panel to expand and contract with temperature changes without buckling or oil-canning. Clip systems are the standard for 24-gauge residential installations and are required by most manufacturers when panel runs exceed 30 feet.
Snap-lock systems eliminate the separate clip. The panel's leg geometry is designed to snap directly over the preceding panel's seam when pressed down by hand. Fastener flanges at the panel base are screwed to the deck during installation before the next panel covers them. Snap-lock installs faster than clip systems and works well on pitches above 3:12. It allows some thermal movement but less than a full floating clip system, so it is better suited to moderate-climate markets [1].
Mechanically seamed panels use a field seaming machine or hand crimper to fold the standing seam shut after panels are positioned. This creates one of the strongest seam connections available in roofing and is the standard method on low-slope metal roofing (1:12 to 3:12) where water pressure at the seam is greater. Mechanically seamed systems are common on commercial applications and premium residential projects where a fully watertight seam is required by the warranty [1].
The Metal Roofing Alliance notes that standing seam panels with concealed fasteners and Kynar 500 paint systems can carry 40-70 year material warranties when installed by certified contractors [2].
On every standing seam project I run, the thing I emphasize to my crew is clip spacing. The manufacturer spec might say 24 inches on center, but on a Tennessee roof that sees 100-degree summers and occasional ice, I install at 16 inches. That extra material is $200-$300 on the job and it's the difference between panels that float cleanly and panels that buckle and deform over five years.
Exposed-Fastener Systems
Exposed-fastener metal panels — corrugated, ribbed (R-panel), and structural standing seam hybrids — are installed with screws that penetrate directly through the face of the panel into the deck or purlins. Each screw is sealed with a neoprene rubber washer that compresses against the metal surface to create a weathertight seal at the penetration point.
These systems install significantly faster than concealed-fastener standing seam. A 36-inch cover-width corrugated panel installs in roughly half the time of a 16-18 inch standing seam panel, and the simpler fastening geometry requires less crew skill. This makes exposed-fastener systems the cost-effective choice for outbuildings, agricultural structures, and residential projects where budget is the primary constraint.
The maintenance liability is real and must be disclosed to homeowners: neoprene washers degrade in UV exposure over 10-20 years, creating a progressively larger gap at each fastener penetration. Approximately 68% of metal roof repair calls that licensed roofers in the NearbyHunt network receive involve fastener-related failures — either backing-out of exposed screws due to thermal cycling or improperly sealed penetrations at installation. Standing seam eliminates this failure mode entirely; exposed-fastener systems require periodic inspection and re-fastening to manage it.
R-panel (structural rib panel) is the most common commercial exposed-fastener product that has crossed into residential use. Its 1.25-inch rib height provides enough rigidity to span open purlins without a solid deck, making it suitable for agricultural and utility applications. For residential use on solid decks, corrugated panels provide a cleaner aesthetic.
Corrugated metal panels have a wave profile rather than flat fields with raised ribs. They are popular for modern farmhouse, coastal cottage, and contemporary-rustic aesthetics. Cover widths typically run 26-36 inches. Because the corrugated profile limits flat bearing at the fastener, proper washer compression is more critical on corrugated than on flat-panel systems.
Panel Materials
Steel and Galvalume
Steel is the dominant residential metal roofing material. Bare steel rusts rapidly when the protective coating is compromised, which is why virtually all residential steel panels are coated with either galvanizing (zinc) or Galvalume (an aluminum-zinc-silicon alloy).
Galvalume is the residential industry standard for inland applications. The aluminum component of the coating provides an exceptionally durable barrier against corrosion, while the zinc component offers "self-healing" protection: when a minor scratch exposes the underlying steel, the zinc sheds particles that migrate to cover the damaged area, slowing further corrosion. Galvalume panels carry a 20-year substrate warranty against perforation under most manufacturer specifications. Sheffield Metals reports that Galvalume performs significantly better than galvanized steel in most U.S. inland environments due to this self-healing mechanism [1].
Galvalume is not appropriate within 5 miles of saltwater. The aluminum content in the alloy becomes a liability in high-chloride environments where galvanic corrosion can accelerate at cut edges and penetrations.
Aluminum
Aluminum is the correct material choice for coastal installations. It contains no iron, so it cannot rust regardless of salt spray exposure. Aluminum panels are approximately 50% lighter than equivalent steel panels, which reduces structural loading and can simplify installation on older framing.
The tradeoffs are cost and dent resistance. Aluminum panels typically run 15-30% more expensive than Galvalume steel of the same gauge. Aluminum is also a softer metal — a 26-gauge aluminum panel will dent more readily under hail impact than a 26-gauge steel panel. For coastal markets where saltwater corrosion is the primary threat, aluminum is clearly worth the premium. For inland installations, Galvalume steel delivers equal or better long-term performance at lower cost [2].
Gauge Selection
In metal roofing, a lower gauge number means a thicker, heavier panel. The most common residential gauges are 26 and 29.
26-gauge is the residential standard for standing seam applications across most U.S. climates. It provides sufficient rigidity to resist oil-canning (a waviness visible in flat panel fields under certain lighting), resists denting from moderate hail, and is required by most manufacturers for concealed-clip standing seam systems. The case study below illustrates why 26-gauge is the minimum specification most professionals recommend for occupied residential homes.
29-gauge is thinner and less rigid. It is appropriate for agricultural buildings, outbuildings, and garages. On residential homes in low-hail-risk regions, 29-gauge corrugated panels can perform acceptably over a 25-30 year horizon, but they show oil-canning more readily, are more susceptible to denting, and are not compatible with most manufacturer warranties for concealed-fastener systems. In snow-load regions of the upper Midwest and Mountain West, 29-gauge is generally not recommended by structural engineers for residential applications.
24-gauge is the step above 26-gauge and is specified on premium projects, hail-prone Midwest installations, and commercial applications. The additional material cost — roughly 10-15% more than 26-gauge — is often offset by longer manufacturer warranties (some extending to 50 years) and better resistance to impact damage [2].
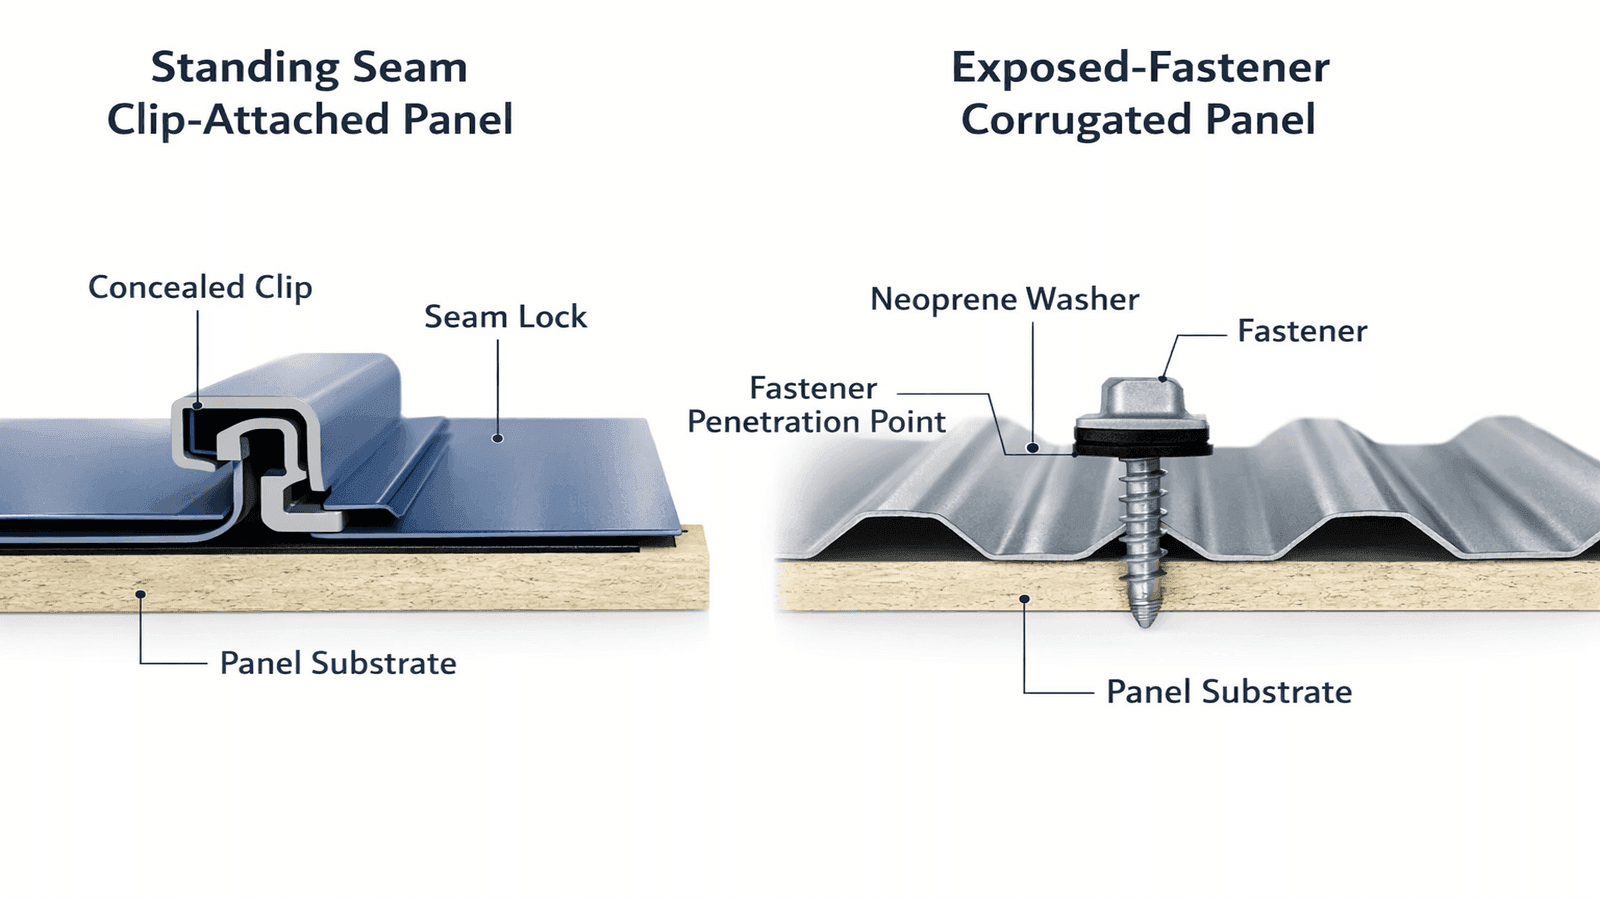
Photo: Cross-section diagram comparing standing seam concealed clip panel system versus exposed-fastener corrugated panel with labeled components
Panel Installation Sequence
Whether installing standing seam or exposed-fastener panels, the installation sequence follows a defined order that prevents rework and ensures each component is correct before it is covered.
Get quotes from top-rated pros.
Deck Preparation
Metal roofing requires a solid, sound deck. Any soft spots, delamination, or deteriorated sheathing must be replaced before panels go down. Standing seam clip systems are unforgiving of deck voids — a clip fastened over a soft spot will back out under thermal cycling and panel movement.
Minimum deck fastening: 8d ring-shank nails at 6 inches on center at panel edges, 12 inches in the field. All nail heads should be set flush or slightly below the deck surface; any proud nails will telegraph through the underlayment and create contact points that rub the panel coating over years of thermal movement.
Underlayment
Metal roofing requires purpose-built underlayment. Standard #15 or #30 felt paper is not recommended under metal panels — the asphalt volatiles in felt react with Galvalume coatings over time, and felt tears at fastener points as the metal panel cycles thermally.
Approved underlayments for metal roofing include:
- Synthetic non-perforated underlayment: minimum for all metal systems. NRCA guidelines recommend a minimum of one layer of 30 lb felt or equivalent synthetic underlayment under all metal roofing panels [2].
- Self-adhering ice and water shield: required at eaves (minimum 24 inches past the interior warm wall), at all valleys, and at all penetrations in climates where ice damming is possible.
- Acoustic underlayment: for standing seam installations over occupied living spaces where rain noise is a concern. Products like Acoustical Mat reduce rain sound transmission by 15-20 dB.
| Underlayment Type | Application | Cost (per sq ft) | Notes |
| Synthetic non-perforated | All metal systems, full field | $0.15-$0.30 | Required minimum — do not use standard felt |
| Self-adhering ice and water shield | Eaves, valleys, all penetrations | $0.40-$0.80 | Mandatory in climates with ice dam risk |
| Acoustic underlayment | Standing seam over living spaces | $0.50-$1.20 | Reduces rain noise 15-20 dB |
| High-temp synthetic | All metal — recommended in hot climates | $0.25-$0.45 | Rated for 240°F+ surface temps under dark metal |
I've had homeowners call me to fix standing seam roofs installed by other contractors where the only underlayment was standard 30-lb felt. Within three to five years, the felt degrades at every clip nail and panel edge — you end up with a road map of perforations that wicks moisture into the sheathing. I specify high-temp synthetic on every metal project, full stop. The cost difference is maybe $400-$600 on a typical house and it is not negotiable.
Panel Run Direction and Starting Point
For gable roofs, start the first panel run at the rake (the sloped edge at the gable end) and work toward the opposite rake. This ensures that prevailing wind-driven rain, which typically comes from one primary direction, strikes the overlapping (not the open) side of each seam.
For hip roofs, panels originate at the ridge and run to each eave. Hip roofs require more trim pieces and angle cuts than gable roofs, adding 10-20% to installation time.
Standing seam panels are set to the deck starting at the first clip position. The lead edge of the first panel aligns with the rake flashing. Each subsequent panel's seam leg engages the previous panel's standing leg and the clip simultaneously. Panel alignment is checked at every fourth run against a chalk line struck from ridge to eave — even minor misalignment accumulates over the run and creates trim problems at the opposite rake.
Thermal Expansion Management
Steel expands approximately 0.0000065 inches per inch per degree Fahrenheit. For a 40-foot panel run on a Tennessee roof that cycles from -5°F in winter to 105°F in summer, that is a total thermal movement of 0.43 inches — nearly half an inch of differential expansion in a single panel. Clip systems accommodate this by allowing the panel to slide within the clip slot. Fixed fastener systems (including exposed-fastener panels) must use neoprene grommet fasteners that allow slight rotational movement and must observe manufacturer maximum panel length specifications [1].
Oil-canning — the waviness that appears in flat-field panels — is amplified when panels are over-fastened or when panel lengths exceed thermal design limits. Proper clip spacing and observing panel length maximums are the two most effective ways to minimize oil-canning in installation.
Flashing at Eaves, Rakes, Valleys, and Penetrations
Flashing is where metal roof installations succeed or fail. A properly executed panel installation with poor flashing will leak at the first driving rainstorm. NRCA guidelines specify minimum flashing gauge (26-gauge galvanized, Galvalume, or 0.032-inch aluminum for most residential applications) and dimensional minimums for each transition type [2].
Eave Flashing
The eave starter flashing (often called a drip edge or eave trim) is the first piece of metal installed on the roof, before any underlayment or panels. It directs water draining off the panel into the gutter and away from the fascia. Eave trim should extend at least 1 inch beyond the fascia face and should have a hem (a folded return) on the lower edge to prevent capillary action from pulling water back up under the trim.
For standing seam systems, the eave trim includes a panel stop or clip rail that supports the bottom edge of the first panel run. This prevents the panel end from deflecting and maintains the designed drainage angle at the eave.
Rake Flashing
Rake flashing (at the sloped gable edges) must lap over the panel edge by a minimum of 1 inch and should be secured with concealed clips rather than face-fastened screws wherever possible. Face-fastened rake trim creates penetrations that can allow wind-driven water to bypass the trim in severe weather. NRCA recommends butyl tape sealant under all rake trim flanges in addition to mechanical fastening.
Get quotes from top-rated pros.
Valley Flashing
Metal-to-metal valleys (a valley pan flashing under the metal panels) are the professional standard for metal roofing systems. The valley pan should be a minimum 20 inches wide, fabricated from the same metal as the panels (or a compatible material that will not create galvanic corrosion at contact points). Panels terminate at a cut line 2-4 inches from the valley center, and the panel ends are sealed with a foam closure strip that matches the panel profile, then overlapped by the adjacent slope's panels.
Open valleys (pan visible) are acceptable for metal on metal. Closed cut or woven valleys are not appropriate for metal panel systems.
Penetration Flashing
Every penetration through a metal roof — pipe boots, skylights, HVAC curbs, exhaust vents — is a potential leak point. Penetration flashing for metal roofing typically uses one of three approaches:
- Pitch pans (for irregular penetrations): a flanged box filled with flexible sealant, compatible with metal roofing.
- Pipe boots: prefabricated rubber or metal boots that slide over round penetrations and integrate with the panel system.
- Curb-mounted skylight or HVAC flashing: a fabricated curb that the panel system terminates against, with cap flashing that laps over the curb sides.
All penetration sealant must be a butyl or polyurethane formulation rated for metal roofing use. Silicone sealants can be used on many metal surfaces but must not contact Galvalume directly as certain silicone formulations can damage the Galvalume coating over time.
The failure I see most often on metal roofs that were installed five or ten years ago is at the pipe penetrations. The installer used standard EPDM pipe boots designed for asphalt shingles, and after a few years the UV degradation on the rubber lets water in under the flange. On every metal roof project, I use metal pipe boots with a silicone skirt or closed-cell foam closure — they cost $25 more each and I've never had one fail.
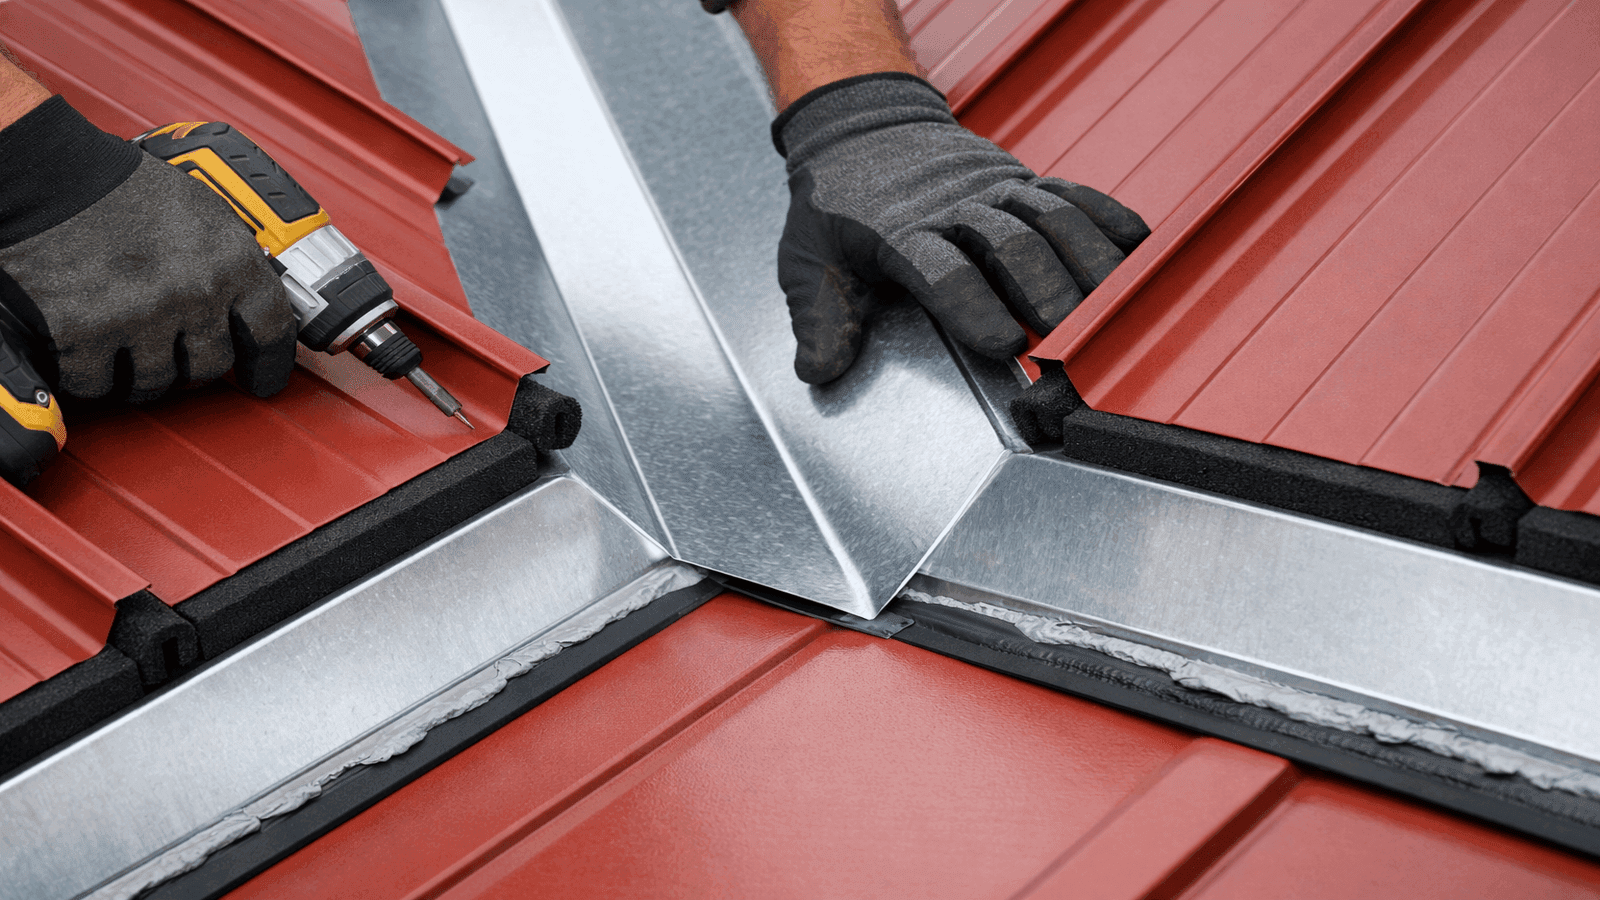
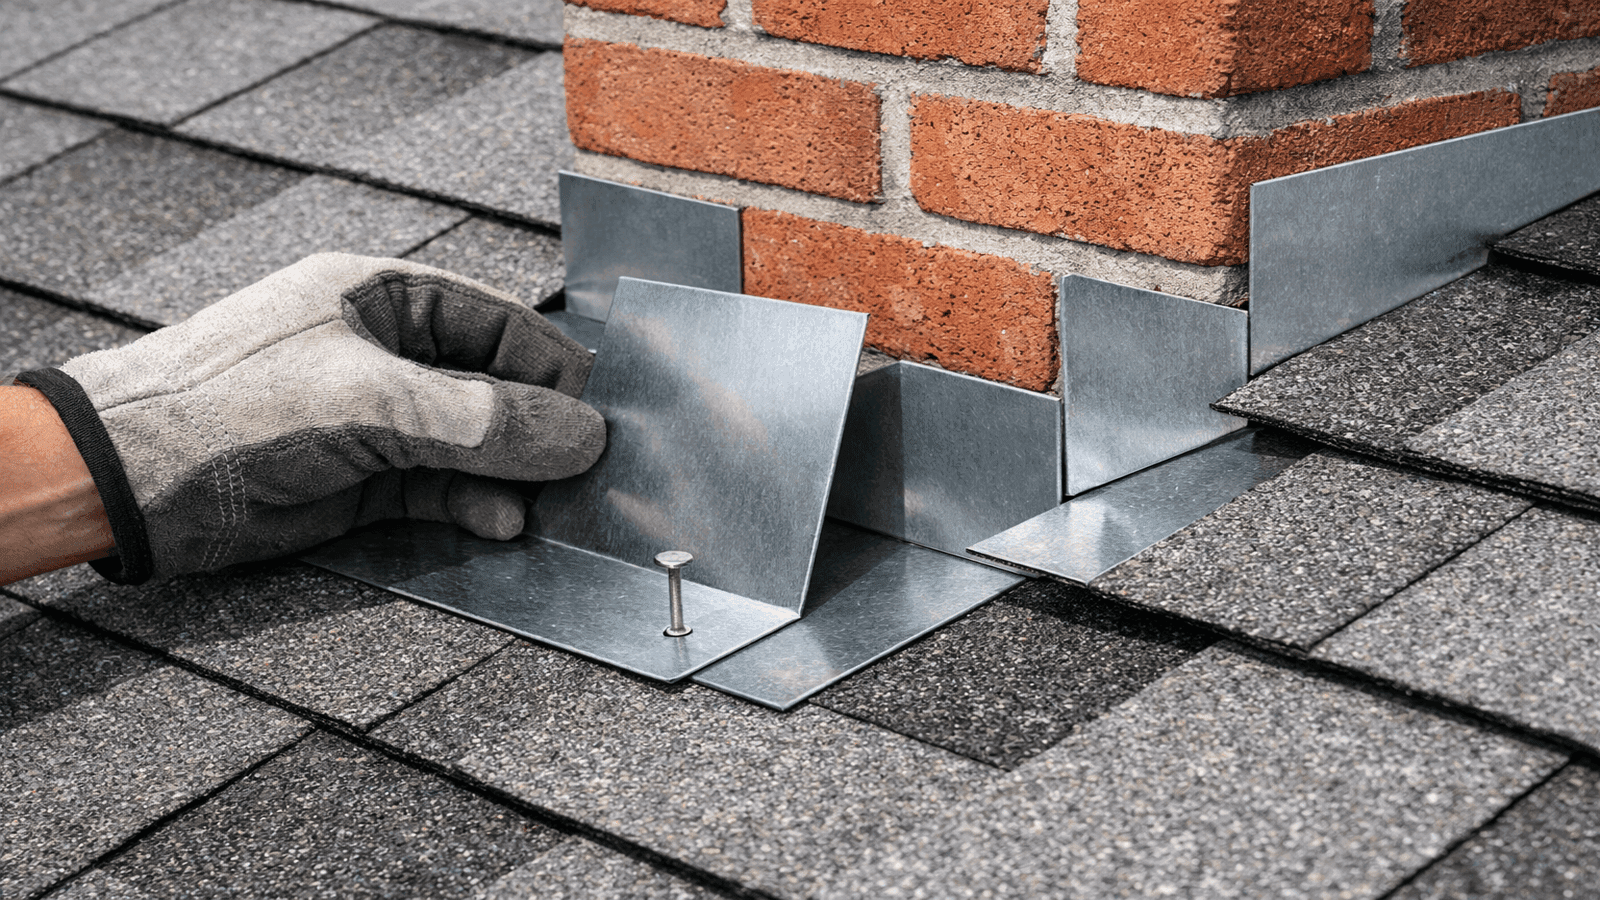
Photo: Metal roofing contractor installing valley pan flashing with closure strips and butyl tape sealant on a residential standing seam roof
Installing Metal Over Existing Shingles
One of the most common questions in residential metal roofing is whether to tear off the existing shingles before installing metal panels. In most jurisdictions, one layer of existing roofing can remain in place when the new roof goes on. Whether that is the right choice depends on several factors.
When over-installation is appropriate:
- The existing shingle layer is no more than one layer (most building codes prohibit metal over two layers of existing material)
- The deck beneath the shingles is structurally sound with no soft spots, rot, or delamination
- The roof pitch is at least 3:12 (lower pitches under existing shingles create drainage problems)
- The homeowner understands that hidden deck damage cannot be inspected or repaired without tear-off
When tear-off is required:
- Two or more existing roofing layers are present
- Any evidence of deck rot, moisture intrusion, or structural damage
- Ice dam history on the home (requires full access to the deck for ice and water shield installation)
- The manufacturer's warranty requires a tear-off installation
The cost savings from over-installation typically range from $1,000-$3,000 on a standard residential project, representing tear-off labor and disposal fees. That savings must be weighed against the risk of trapping hidden deck damage beneath a metal system that will be in place for 40-50 years [6].
A critical installation detail when going over shingles: corrugated or ribbed panel systems installed directly over shingles will mirror the shingle edge pattern as a visible wave (called "telegraphing") in the installed panel surface. To prevent this, install a continuous layer of 1x4 wood batten strips over the shingles before panel installation, or use a solid layer of synthetic underlayment rated for over-shingle applications. Standing seam systems are less susceptible to telegraphing because their floating clip design isolates the panel from minor substrate irregularities.
Real-World Case Study: Kevin S., Nashville, Tennessee
Kevin S. owns a 2,200 sq ft home in Nashville, Tennessee, built in 2001. In 2025, his original architectural asphalt shingle roof reached the end of its service life at 24 years — about average for a high-humidity Southeast climate with frequent thermal cycling. Kevin received three bids: one for asphalt replacement ($14,800), one for 29-gauge corrugated exposed-fastener metal ($19,500), and one for 26-gauge standing seam ($28,400).
Kevin chose the 26-gauge standing seam system. His reasoning: the corrugated system's $8,900 premium over asphalt did not include a weathertight warranty, the fasteners would need periodic inspection, and the expected lifespan was 35-40 years — still requiring eventual replacement. The standing seam system, at $28,400 total installed, carried a 50-year material warranty, a weathertight warranty from the manufacturer (MBCI), and zero fastener maintenance over the life of the roof.
The premium Kevin paid over the corrugated option — $8,900 — amounts to roughly $178 per year over a 50-year life. On a roof that will likely outlast his ownership of the home, that premium also represents a documented installation quality that will be verifiable on resale. Kevin's installer (a certified MBCI contractor) used 26-gauge Galvalume panels with a Kynar 500 paint system in charcoal gray, clip-attached at 16-inch intervals on a new synthetic underlayment over his existing single shingle layer.
Installation Cost by System
Metal roof installation costs vary substantially by system type, gauge, material, and regional labor markets. The ranges below reflect fully installed pricing from licensed contractors across the U.S. in 2026, including materials, labor, underlayment, flashing, and trim [1][2].
| System | Installed Cost (per sq ft) | Installed Total (2,200 sq ft) | Expected Lifespan |
| 29-gauge corrugated steel | $10-$14 | $22,000-$30,800 | 30-40 years |
| 29-gauge Galvalume R-panel | $10-$15 | $22,000-$33,000 | 35-45 years |
| 26-gauge exposed-fastener Galvalume | $12-$17 | $26,400-$37,400 | 35-45 years |
| 26-gauge snap-lock standing seam | $14-$20 | $30,800-$44,000 | 40-60 years |
| 26-gauge clip-attached standing seam | $15-$22 | $33,000-$48,400 | 40-70 years |
| 24-gauge standing seam (premium) | $18-$25 | $39,600-$55,000 | 50-70 years |
| Aluminum standing seam (coastal) | $16-$25 | $35,200-$55,000 | 40-60 years |
Regional cost variation: Metal roofing labor is tighter in supply than asphalt labor in most markets. The Gulf Coast, Mountain West, and upper Midwest show standing seam labor rates 20-35% above the national midpoint. In urban Southeast markets (Nashville, Atlanta, Charlotte) where storm damage has driven metal adoption, contractor supply is higher and rates are more competitive.
Tear-off adder: If removing an existing asphalt layer, add $1.00-$2.50 per sq ft to the above totals for tear-off and disposal.
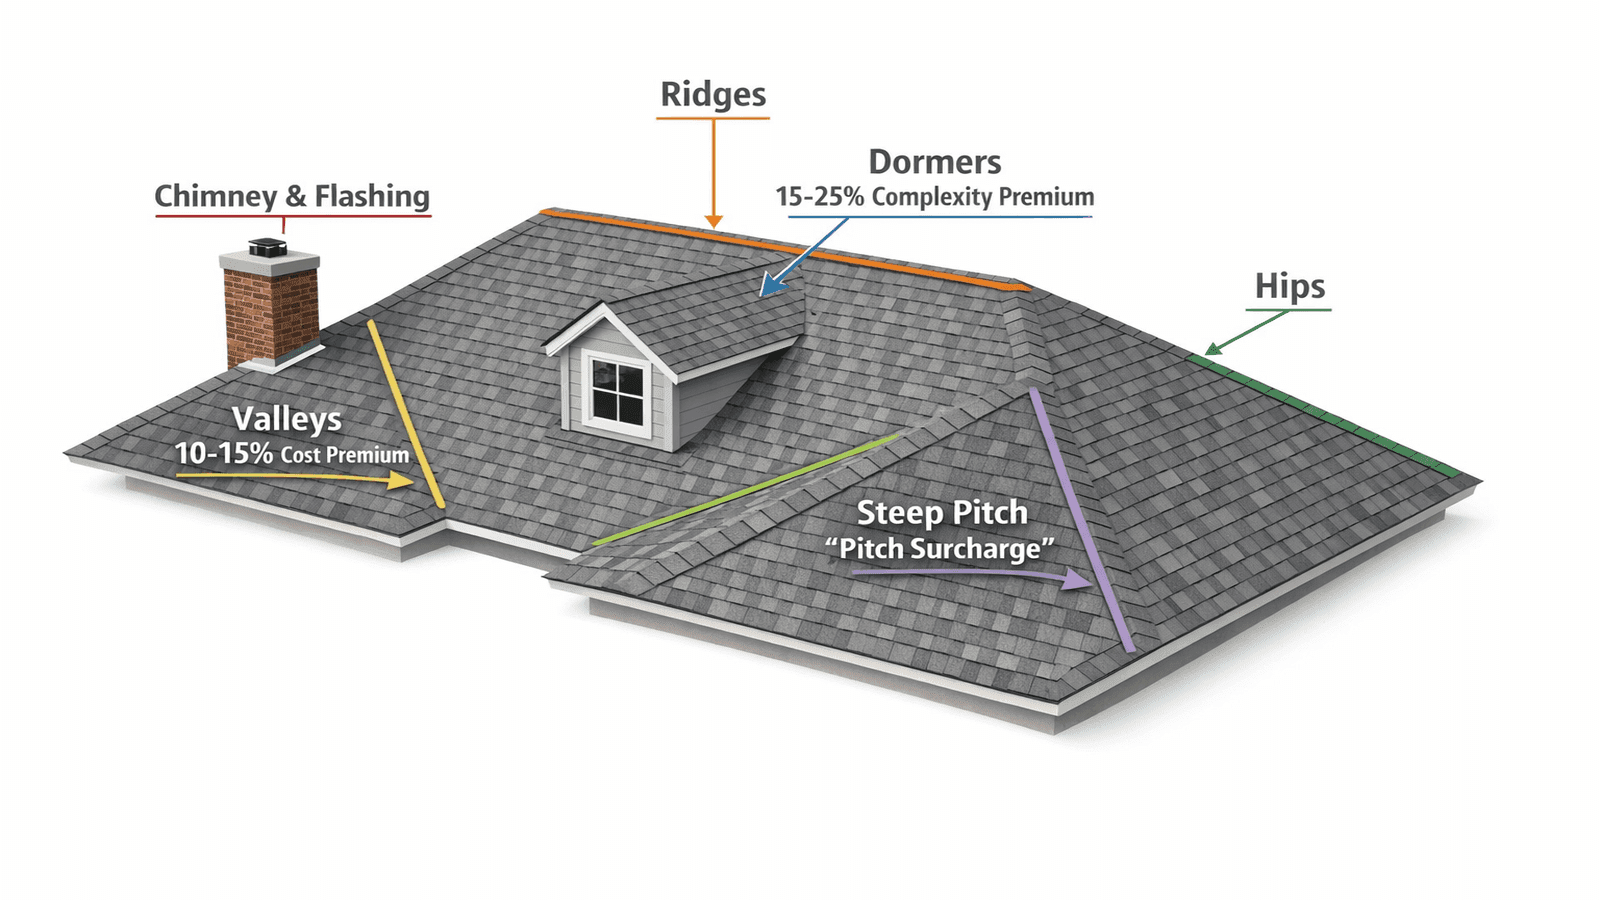
Complexity adder: Each valley, dormer, skylight, and chimney adds flashing labor. Complex hip roofs with multiple penetrations can add $3,000-$8,000 over a simple gable roof of equivalent area.
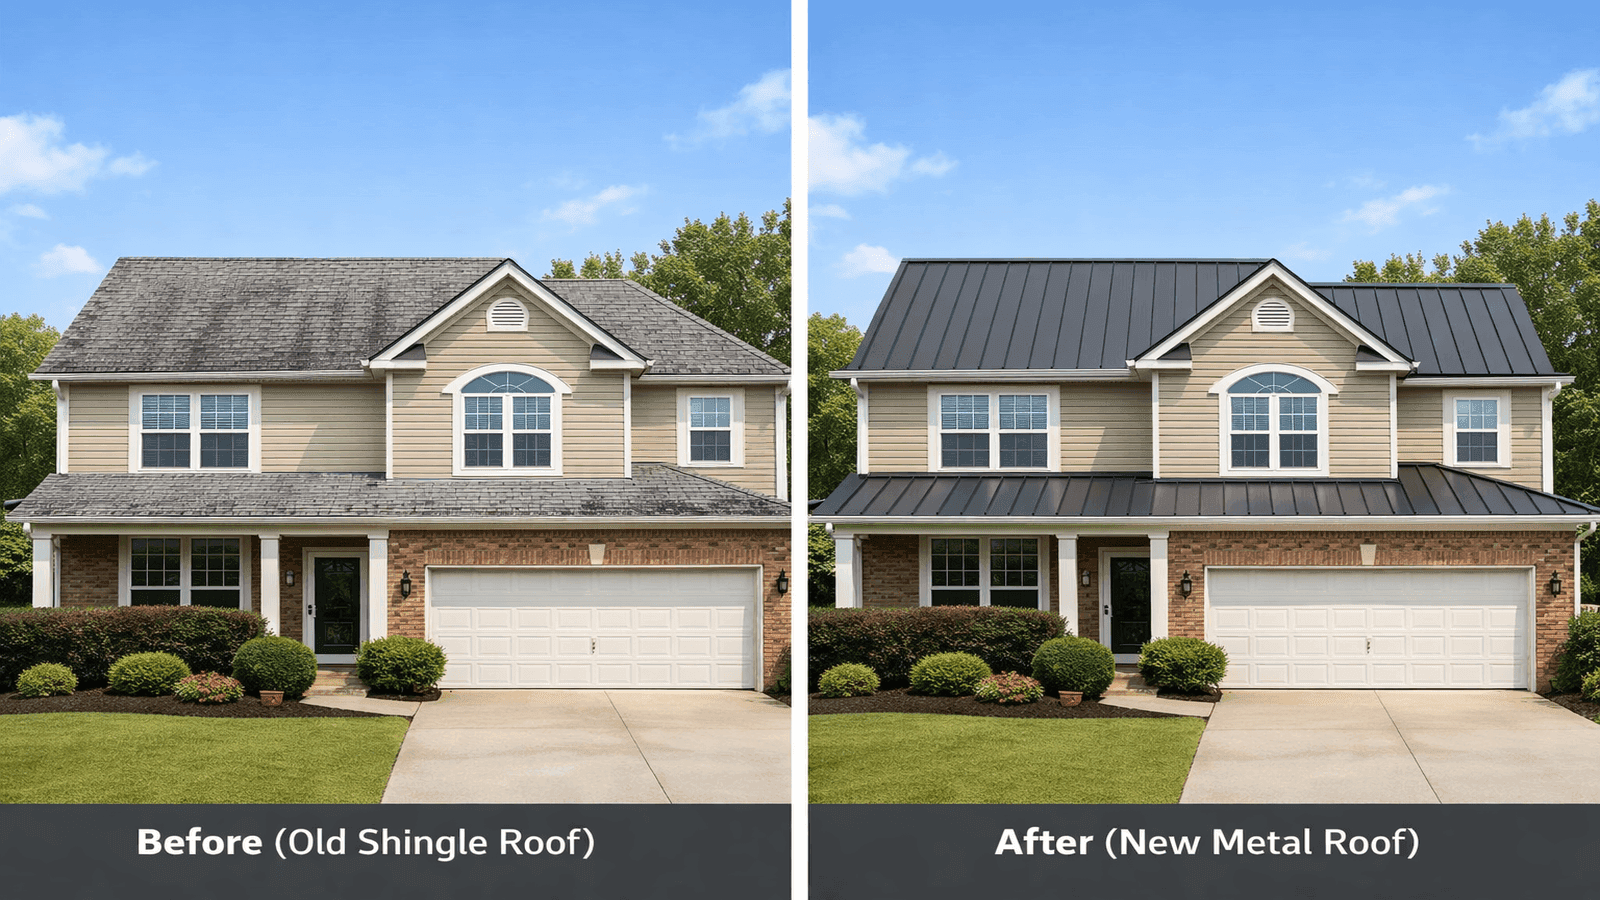
Photo: Before and after photos of a two-story Nashville Tennessee home showing worn asphalt shingles replaced with charcoal gray 26-gauge standing seam metal roofing
Contractor Selection and Certification
Metal roof installation — particularly standing seam — requires specialized training, manufacturer certification, and equipment that most general roofing contractors do not have. A corrugated panel installation on a simple gable roof is within reach of an experienced general roofer. Standing seam clip installation, mechanical seaming, and the flashing fabrication required at complex penetrations require dedicated training.
The Metal Roofing Alliance and individual manufacturers (MBCI, Sheffield Metals, Englert, Drexel Metals) each run contractor certification programs. Certified installers have completed training on that manufacturer's specific clip system, seam geometry, and warranty requirements. Always verify certification before signing a contract for standing seam work.
Questions to ask every bidder:
- Are you certified by the panel manufacturer you are specifying?
- What gauge and paint system are you quoting?
- Does this bid include a weathertight warranty from the manufacturer, or only a workmanship warranty from you?
- What underlayment are you using, and is it rated for metal roofing?
- How do you handle penetration flashing at pipe boots and vents?
A contractor who hesitates or cannot answer these questions directly is likely not the right fit for a standing seam installation. For exposed-fastener systems, the threshold is somewhat lower, but experience with metal-specific flashing and fastener torque control still matters significantly.
Conclusion
Metal roof installation is one of the most consequential decisions in residential roofing — not because the material is inherently difficult to install, but because the system choice and installation quality determine whether a roof performs for 40-70 years or begins failing within a decade. Standing seam systems with concealed clips and Kynar-painted 26-gauge Galvalume represent the standard for occupied residential homes in most U.S. climates. Exposed-fastener systems are cost-effective for secondary structures and budget-constrained projects, provided the homeowner understands the maintenance commitment at the fastener level.
The installation details that matter most — clip spacing, underlayment specification, valley flashing execution, and penetration sealing — are not visible once the job is complete. The only way to ensure they are done correctly is to hire a certified contractor, specify the materials in writing, and understand what the bid covers before the crew arrives.
Disclaimer: Installation costs, material specifications, and warranty terms in this article reflect general industry data and the professional experience of the author as of March 2026. Costs vary significantly by region, roof complexity, and individual contractor. Always obtain at least three bids from licensed, insured roofing contractors. Verify that all contractors carry current workers' compensation and general liability insurance before work begins. This article is for informational purposes only and does not constitute contractor advice or a recommendation for any specific product or company.
Sources & References
[1] Sheffield Metals. "Standing Seam vs. Exposed Fastener Metal Roofing." sheffieldmetals.com/learning-center/standing-seam-vs-exposed-fastener-metal-roofing
[2] NRCA (National Roofing Contractors Association). "The NRCA Roofing Manual: Architectural Metal Flashing and Condensation and Air Leakage Control — 2022." National Roofing Contractors Association, 2022 nrca.net/roofing-guidelines
[3] MBCI. "Metal Roof Installation Techniques." mbci.com/blog/metal-roof-installation-techniques
[4] Metal Roofing Alliance. "Residential Metal Roofing." metalroofing.com
[5] Forbes Home. "Standing Seam Metal Roof Cost Guide." forbes.com/home-improvement/roofing/standing-seam-metal-roof-cost
[6] This Old House. "Metal Roofing Over Existing Shingles: What You Need to Know." thisoldhouse.com/roofing/metal-roofing

James is a licensed roofing contractor with 20 years of experience in roof installation, inspection, and repair across the U.S. South and Midwest. He specialises in asphalt shingles, metal roofing, and storm damage restoration. On NearbyHunt, James offers practical advice on roof maintenance, insurance claims, and selecting the right materials for long-lasting protection.

Jacob is a licensed roofing contractor with over 18 years of experience in roof inspection, installation, and restoration. Based in Texas, he has led hundreds of successful roofing projects across residential and commercial properties. Jacob is also a certified storm damage specialist, ensuring that all NearbyHunt roofing content meets industry best practices and safety standards.