- The U.S. Department of Energy reports that a dirty condenser coil can increase compressor energy consumption by up to 30%, making coil cleaning one of the highest-impact DIY maintenance tasks for reducing cooling costs. [1]
- Evaporator and condenser coils serve different functions and require different cleaning methods. The indoor evaporator coil absorbs heat from your home's air, while the outdoor condenser coil releases that heat outside. Both collect dirt, but exposure conditions and access differ significantly.
- DIY condenser coil cleaning costs $15 to $30 in supplies, compared to $100 to $400 for professional service. Evaporator coil cleaning is more complex and often best left to a licensed technician. [2]
- Annual coil cleaning is the minimum recommendation, with twice-yearly cleaning advised for homes with pets, heavy pollen exposure, or location in dusty or coastal environments.
- The NearbyHunt network reports that 38% of AC efficiency complaints trace back to dirty coils, making it the second most common cause of reduced cooling performance after clogged air filters.
- Using the wrong cleaning products can corrode aluminum fins and copper tubing, potentially causing refrigerant leaks that cost $200 to $1,500 to repair. Always use non-acidic, coil-specific cleaners. [3]

Get quotes from top-rated pros.
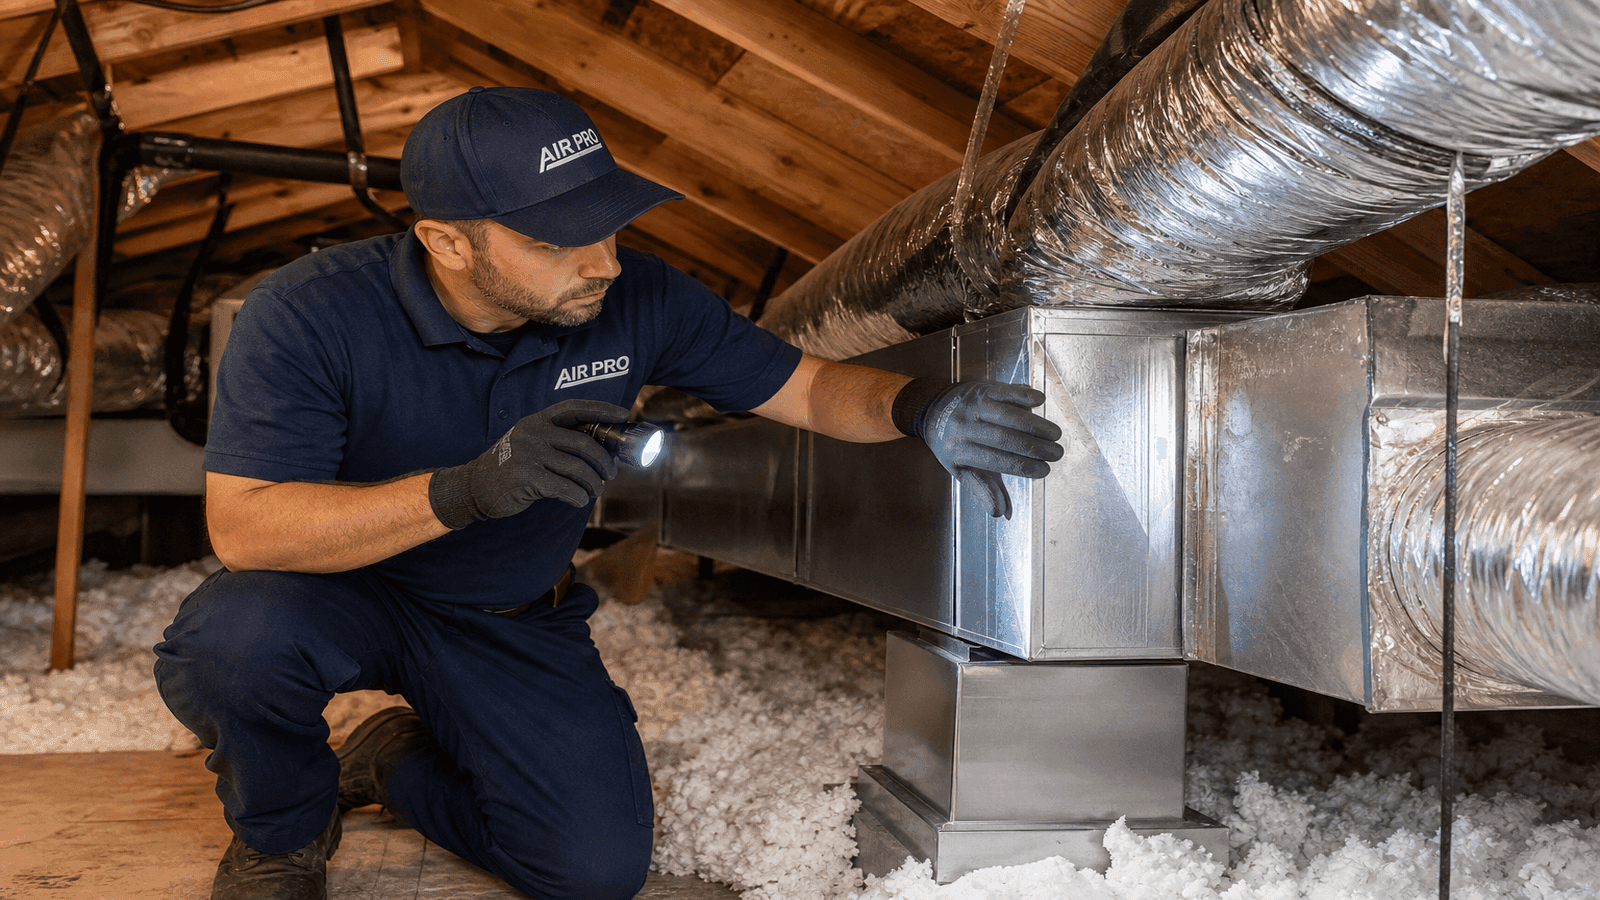
Your air conditioner has two sets of coils that make cooling possible. The evaporator coil sits inside your home and absorbs heat from indoor air. The condenser coil sits outside and releases that heat into the atmosphere. Together, they form the heat exchange cycle that keeps your home comfortable through the cooling season.
When dirt, dust, pollen, and debris build up on these coils, they act as insulation, blocking the heat transfer process. The system compensates by running longer and working harder, which drives up energy bills and accelerates wear on the compressor. According to the Department of Energy, a dirty condenser coil alone can increase compressor energy consumption by 30%. [1] An EPA study found that as little as 0.042 inches of dirt on a condenser coil causes a 21% drop in system efficiency. [4]
The good news is that condenser coil cleaning is a straightforward DIY task that most homeowners can handle in under an hour. Evaporator coil cleaning requires more caution because of the coil's location inside the air handler and proximity to electrical components, but light maintenance is still manageable with the right approach.
This guide walks through both processes step by step, covers the tools and cleaners that work (and the ones that cause damage), and explains when professional service is the better choice. For a broader look at hands-on HVAC maintenance, the HVAC How To and DIY pillar guide covers additional projects and skill levels.
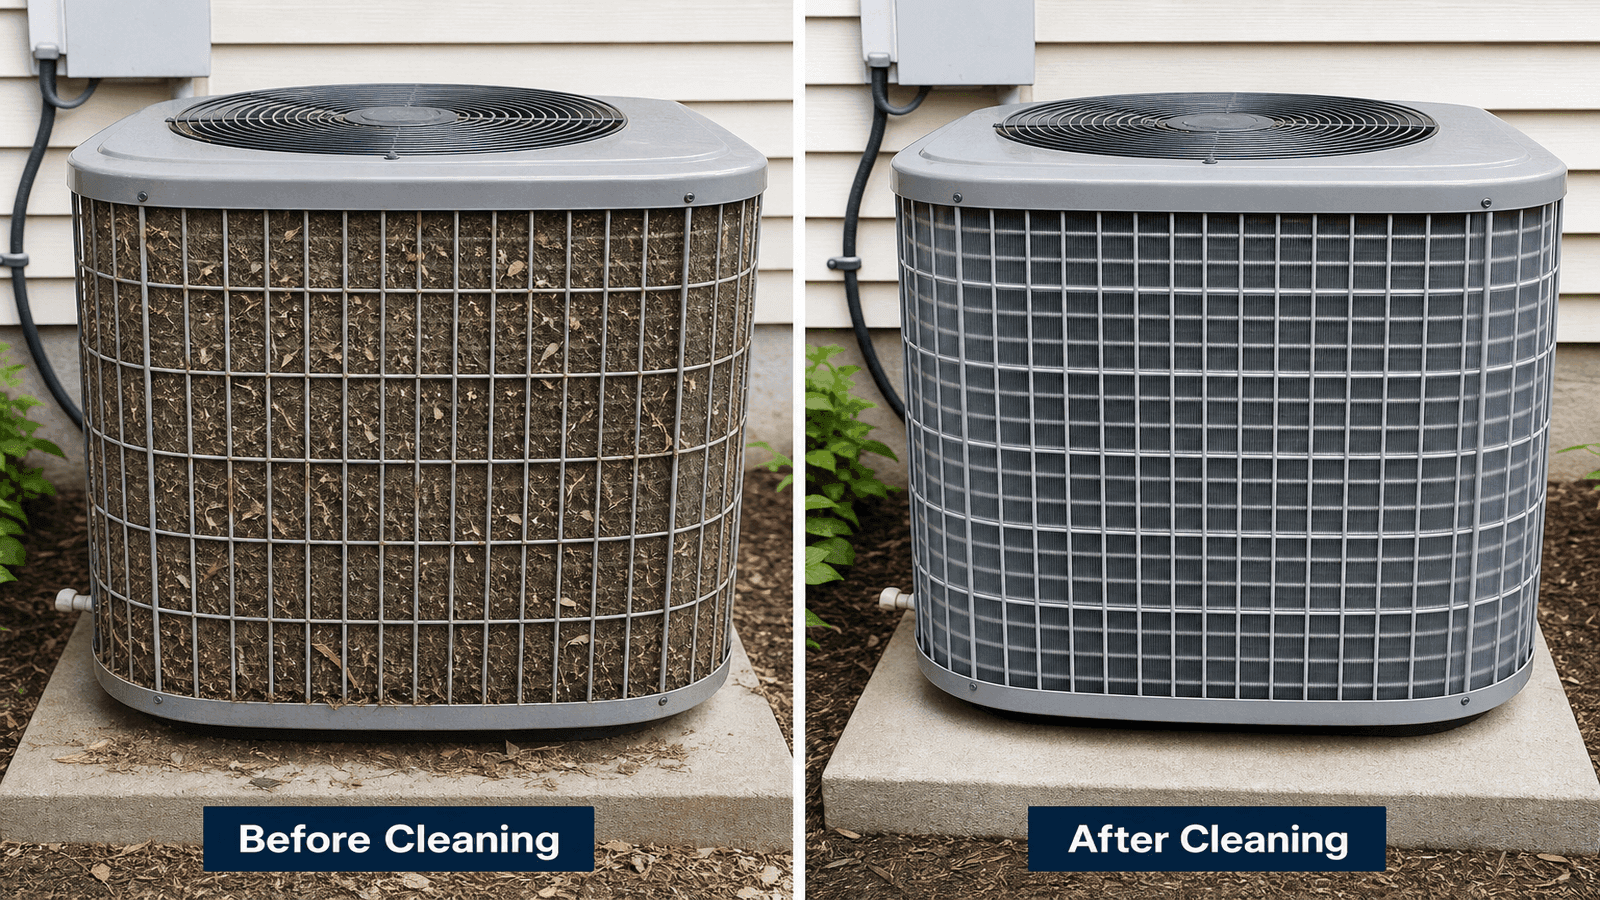
Photo: Residential outdoor AC condenser unit with visible dirt buildup on fins next to a clean unit for comparison showing the difference coil cleaning makes
How AC Coils Work
Understanding what each coil does helps you clean them more effectively and recognize when something is wrong.
Evaporator Coil (Indoor)
The evaporator coil is a series of copper or aluminum tubes with thin aluminum fins, housed inside the air handler or attached to the furnace. Refrigerant flowing through the coil absorbs heat from indoor air as the blower pushes air across the fins. The cooled air then circulates through your ductwork.
Because the evaporator coil handles cold refrigerant, moisture from the air condenses on its surface, similar to water droplets forming on a cold glass. That moisture drains into a condensate pan and out through a drain line. This combination of moisture and airflow creates an environment where dust, mold, and biological growth accumulate over time.
Condenser Coil (Outdoor)
The condenser coil sits inside the outdoor unit and works in reverse. Hot, pressurized refrigerant flows through the coil while a large fan pulls outdoor air across the fins to dissipate heat. The refrigerant cools, returns to liquid form, and cycles back indoors.
The condenser coil is exposed to everything outdoors: grass clippings, leaves, cottonwood seeds, pollen, dirt kicked up by lawnmowers, and general debris. These materials pack between the fins and reduce airflow, forcing the compressor to work harder and run longer.
Why Dirty Coils Cost You Money
| Condition | Impact on System | Estimated Cost Increase |
| Light dust buildup on condenser | 5-10% efficiency loss | $50-$120/year in extra energy |
| Moderate dirt on both coils | 15-21% efficiency loss | $120-$250/year in extra energy |
| Heavy fouling with blocked fins | 25-30% efficiency loss | $250-$400/year in extra energy |
| Severely clogged coils (neglected 3+ years) | Compressor strain, risk of failure | $1,500-$3,000 compressor replacement |
Data based on DOE compressor energy consumption estimates and ASHRAE coil fouling research. [1] [5]*
Tools and Supplies You Need
Gather everything before you start. Running to the hardware store mid-project with an open air handler is not ideal.
For Condenser Coil Cleaning (Outdoor)
- Garden hose with adjustable nozzle (moderate pressure, not a pressure washer)
- Non-acidic foaming coil cleaner ($8-$15 per can)
- Fin comb or fin straightening tool ($5-$10)
- Soft-bristle brush or coil brush
- Screwdriver or nut driver (for removing fan grille)
- Work gloves and safety glasses
- Shop vacuum (optional, for loose debris)
Get quotes from top-rated pros.
For Evaporator Coil Cleaning (Indoor)
- No-rinse foaming evaporator coil cleaner ($10-$18 per can)
- Soft-bristle brush
- Spray bottle with warm water
- Flashlight or headlamp
- Screwdriver for access panel removal
- Drop cloth or towels (to protect flooring)
- Wet/dry vacuum (for condensate pan)
What to avoid: Never use a pressure washer on either coil. The high pressure bends and flattens aluminum fins, permanently restricting airflow. Avoid acidic cleaners, bleach, or general household cleaners on coils. These products corrode the aluminum fins and copper tubing, which can lead to refrigerant leaks over time. [3]

Photo: Close-up of AC coil cleaning supplies laid out including foaming coil cleaner fin comb soft brush garden hose nozzle gloves and safety glasses
How to Clean Condenser Coils (Outdoor Unit)
Condenser coil cleaning is the most accessible and highest-impact coil maintenance you can do yourself. Plan for 30 to 60 minutes.
Step 1: Turn Off the Power
Locate the disconnect box mounted on the wall near your outdoor unit. Pull the disconnect switch or remove the fuse block. Also turn off the AC at the thermostat. Never work on the unit with power connected.
Step 2: Remove Debris and Clear the Area
Pull away any vegetation, leaves, or objects within 2 feet of the unit. Remove the top fan grille using a screwdriver or nut driver (typically 4-6 screws). Carefully lift the grille and fan assembly aside without disconnecting the wiring. Reach in and remove any large debris (leaves, sticks, animal nests) from inside the unit.
Step 3: Brush the Fins
Using a soft-bristle brush, gently brush the exterior fins in a vertical direction (up and down, following the direction of the fins). Never brush side to side, as this bends the fins shut. The goal is to loosen surface dirt before applying cleaner.
Step 4: Apply Coil Cleaner
Spray the non-acidic foaming coil cleaner generously onto the fins from the outside, working in sections. Cover all four sides of the unit. Follow the product instructions for soak time, typically 5 to 15 minutes. The foam expands into the fin gaps and lifts embedded dirt.
Step 5: Rinse From the Inside Out
Using a garden hose at moderate pressure, spray water from the inside of the unit outward through the fins. This pushes dirt out in the same direction it entered. Work from top to bottom. Repeat until the water runs clear. Never spray from the outside in, as this pushes debris deeper into the coil.
Step 6: Straighten Bent Fins
Inspect the fins after rinsing. Bent or crushed fins block airflow just like dirt does. Use a fin comb matched to the fin spacing (typically 12 to 16 fins per inch) to gently straighten any bent sections. Work slowly and carefully. Aluminum fins bend easily but also break if forced.
Step 7: Reassemble and Restore Power
Replace the fan grille and secure all screws. Restore power at the disconnect box. Turn the system on at the thermostat and verify the fan spins freely and air flows through the unit normally.
The single biggest mistake I see homeowners make is using a pressure washer on the condenser. It looks clean afterward, but you have flattened half the fins. That unit will now run 15-20% less efficiently than before you touched it. A regular garden hose at moderate pressure is all you need.
How to Clean Evaporator Coils (Indoor Unit)
Evaporator coil cleaning is more involved than condenser work. The coil sits inside the air handler, which means limited access, proximity to electrical components, and the need to manage condensate drainage. Light cleaning is a reasonable DIY project, but heavy fouling should go to a professional.
Get quotes from top-rated pros.
Step 1: Turn Off the System
Switch the system off at the thermostat and the breaker panel. The evaporator coil is near high-voltage wiring. Turning off only the thermostat is not sufficient protection.
Step 2: Locate and Access the Coil
The evaporator coil is inside the air handler, typically in the attic, basement, utility closet, or attached to the furnace. Look for an access panel secured with screws or clips. Some systems have a clearly marked evaporator access door. Others require removing multiple panels. If you cannot find or reach the coil without removing refrigerant lines or major components, stop and call a technician.
Step 3: Inspect the Coil
Use a flashlight to examine the coil surface. Light dust that looks like a thin film is normal and easy to clean. Thick matted buildup, visible mold growth (dark green or black patches), or ice formation indicates a deeper issue that benefits from professional cleaning.
Step 4: Apply No-Rinse Coil Cleaner
Spray no-rinse foaming evaporator coil cleaner directly onto the coil surface. The foam penetrates the fins, breaks down dirt and biological buildup, and drips into the condensate pan below. No rinsing is needed because the condensate generated during normal operation flushes residue over subsequent cooling cycles.
For light dust, a spray bottle with warm water and a few drops of mild dish soap also works. Spray gently, let it soak for a few minutes, and blot with a soft cloth.
Step 5: Clean the Condensate Pan and Drain
While the access panel is off, inspect the condensate pan beneath the coil. Pour out any standing water and wipe the pan clean. Flush the condensate drain line by pouring a cup of white vinegar or a 50/50 bleach-water solution into the drain opening. A clogged condensate drain causes water damage and is one of the most common AC service calls.
Step 6: Reassemble and Test
Replace the access panel and secure it. Restore power at the breaker and thermostat. Run the system for 15 to 20 minutes, then check the condensate drain for normal water flow. This confirms the drain line is clear and the cleaning residue is flushing properly.
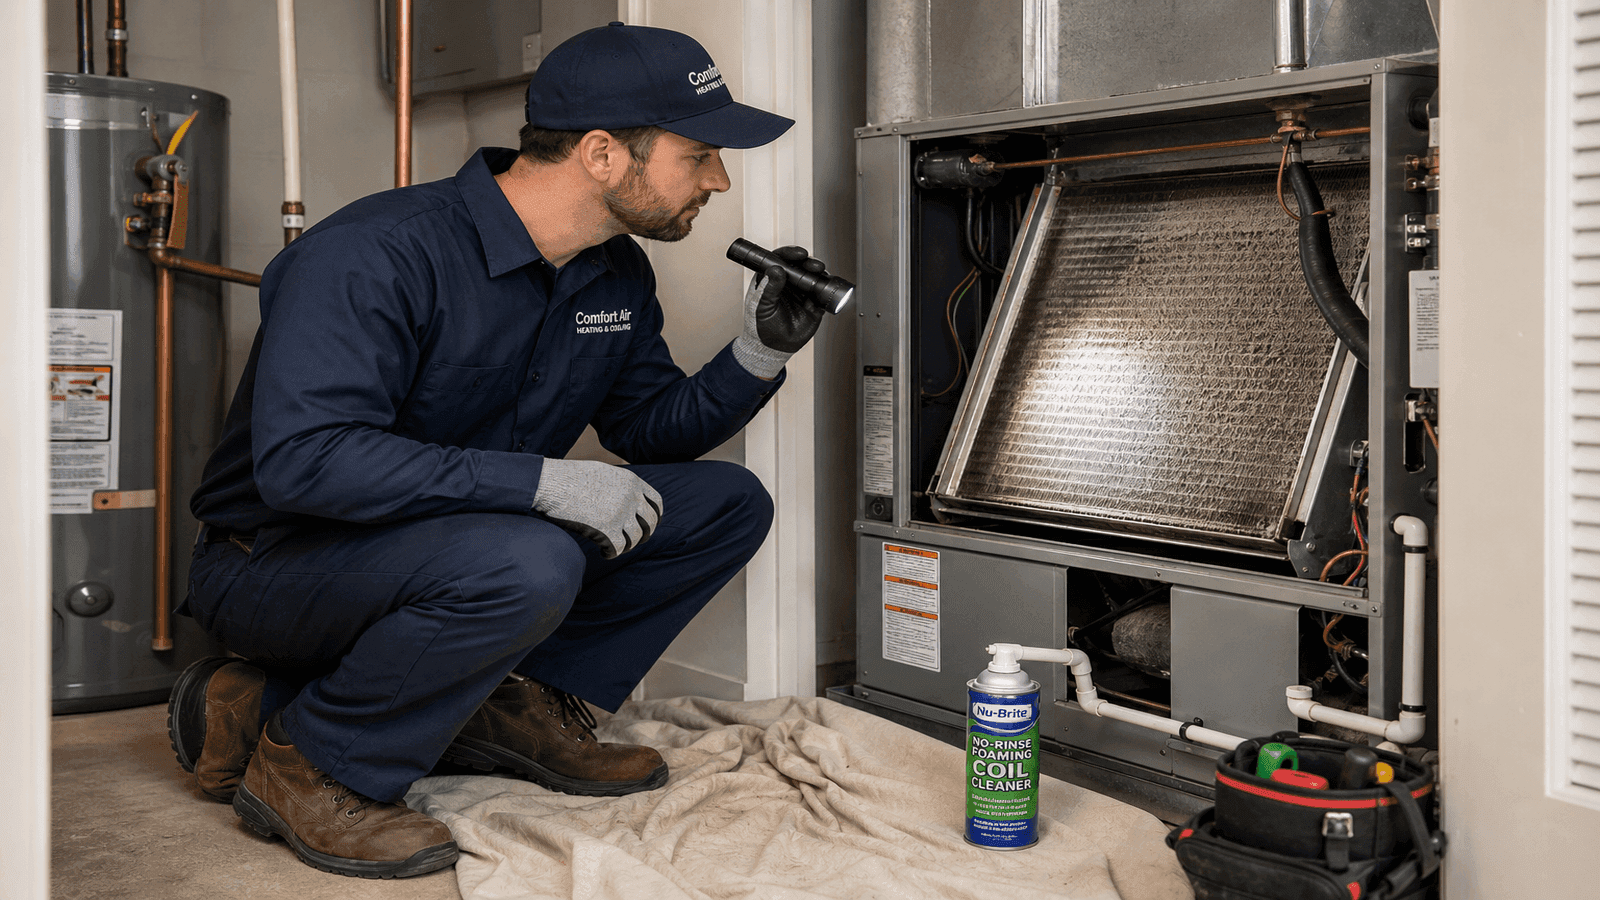
Photo: HVAC technician accessing an indoor evaporator coil through the air handler access panel with a flashlight illuminating the coil surface
When to Call a Professional
DIY cleaning covers routine maintenance, but some situations require licensed expertise.
Call a professional when:
- The evaporator coil has heavy mold growth or biological contamination
- Fins are severely bent, corroded, or damaged
- The system still underperforms after cleaning (possible refrigerant issue)
- You cannot access the evaporator coil without disconnecting components
- The system is under warranty (some manufacturers require professional maintenance to maintain coverage)
- Coils have not been cleaned in 3 or more years
Professional Cleaning Costs
| Service | Typical Cost Range | What It Includes |
| Condenser coil cleaning (outdoor) | $75-$230 | Chemical wash, fin straightening, inspection |
| Evaporator coil cleaning (in place) | $100-$400 | Chemical treatment, condensate drain flush |
| Evaporator coil removal and cleaning | $400-$700 | Full removal, deep cleaning, reinstallation |
| Complete coil cleaning (both coils) | $150-$500 | Both coils, drain service, system inspection |
Cost data from NearbyHunt network service providers, national average as of 2026. [2]*
Professional technicians also check refrigerant levels, test electrical connections, and inspect components that are not part of a DIY cleaning. The combined value often makes annual professional service worthwhile even for homeowners who maintain their condenser coils themselves.
Get quotes from top-rated pros.
Cleaning Frequency and Seasonal Schedule
How often you clean depends on your environment, usage patterns, and system age.
Recommended Cleaning Schedule
| Factor | Condenser Coil | Evaporator Coil |
| Standard conditions | Once per year (spring) | Once per year (professional) |
| Pets in the home | Twice per year | Once per year |
| Heavy pollen area | Twice per year (spring + midsummer) | Once per year |
| Dusty or construction area | 2-3 times per year | Twice per year |
| Coastal/salt air environment | 2-3 times per year | Once per year |
| Cottonwood trees nearby | Monthly inspection, clean as needed | Once per year |
Best timing: Clean the condenser coil in early spring before the cooling season starts. This gives you peak efficiency when the system is working hardest. A second cleaning in midsummer catches accumulated pollen, grass clippings, and debris from lawn maintenance.
Case Study: The Hendersons' Energy Bill Drop
Mark and Lisa Henderson in Charlotte, North Carolina, contacted a NearbyHunt network HVAC technician after their summer energy bills climbed from $185/month to $310/month over two years with no change in usage habits.
The technician found both coils heavily fouled. The condenser coil had packed cottonwood fibers and grass clippings reducing visible airflow by an estimated 40%. The evaporator coil had a thick layer of dust and early mold growth. The system, a 3-ton unit rated at 16 SEER, was performing closer to 11 SEER based on temperature differential measurements.
After professional cleaning of both coils, condensate drain service, and a fresh filter, the system's supply air temperature dropped from 62F to 53F at the register (a 9-degree improvement in cooling output). The Hendersons' next monthly bill dropped to $195, a $115/month reduction. Total service cost was $375.
"We assumed the system was just getting old at 6 years," Mark said. "Turns out it was suffocating under two years of cottonwood and grass."
NearbyHunt Network Insight: Across the NearbyHunt provider network, HVAC technicians report that combined coil cleaning restores an average of 15-20% cooling efficiency in systems that have gone 2 or more years without maintenance. The most dramatic recoveries occur in homes near cottonwood trees, agricultural land, or active construction zones.
Common Mistakes to Avoid
These errors turn a simple maintenance task into an expensive repair.
1. Using a pressure washer. High-pressure water flattens aluminum fins permanently. A garden hose at moderate pressure is the correct tool. Even a strong jet nozzle setting can cause damage on older units.
2. Spraying the condenser from the outside in. This pushes debris deeper into the coil instead of removing it. Always rinse from inside the unit outward through the fins.
3. Using acidic or household cleaners. Products containing hydrochloric acid, muriatic acid, or strong alkaline compounds corrode aluminum and copper. Use only cleaners specifically formulated for AC coils. [3]
4. Bending fins with aggressive brushing. Brush vertically, following the fin direction. Side-to-side brushing bends fins closed. If you need to straighten fins, use a fin comb matched to your unit's fin spacing.
5. Skipping the condensate drain. Cleaning the evaporator coil without flushing the drain line sends loosened debris into the drain, potentially clogging it. Always flush the drain as part of the process.
6. Forgetting to kill power. The condenser has a high-voltage contactor and capacitor. The air handler has line voltage wiring. Always disconnect power at both the disconnect box and the breaker panel before opening any access panels.
7. Cleaning only one coil. Both coils work together. A clean condenser paired with a dirty evaporator (or vice versa) still operates below capacity. Address both for full efficiency recovery.
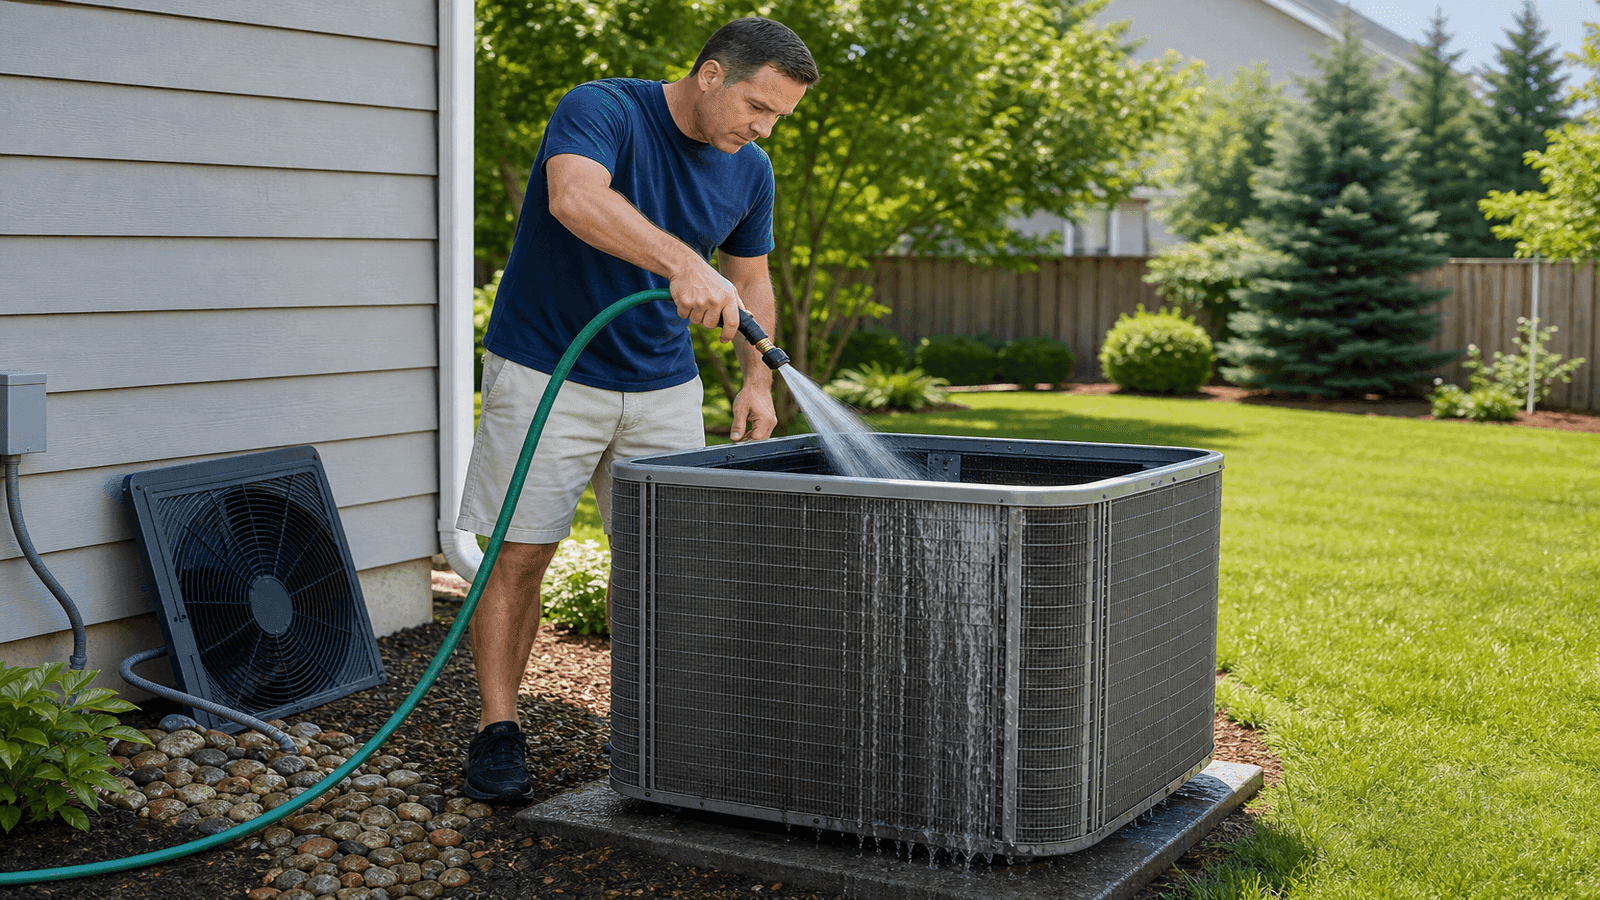
Photo: Homeowner using a garden hose at moderate pressure to rinse an outdoor AC condenser unit from the inside out with water flowing through clean fins
DIY vs. Professional Cleaning Comparison
| Factor | DIY Cleaning | Professional Cleaning |
| Cost | $15-$30 for supplies | $100-$500 depending on scope |
| Time | 30-60 minutes per coil | 1-2 hours for full service |
| Condenser coil access | Easy (outdoor, minimal disassembly) | Same access plus chemical deep clean |
| Evaporator coil access | Limited (light surface cleaning only) | Full access, deep cleaning, mold treatment |
| Refrigerant check | Not possible (requires EPA certification) | Included in most service visits |
| Electrical inspection | Not recommended for homeowners | Standard part of professional service |
| Fin straightening | Basic with fin comb | Professional tools for severe damage |
| Warranty compliance | May not satisfy manufacturer requirements | Typically satisfies warranty terms |
| Best for | Annual condenser maintenance | Annual or biannual full-system service |
Keep Your System Running at Peak Efficiency
Clean coils are one of the simplest ways to maintain cooling efficiency, extend equipment life, and keep energy bills under control. The outdoor condenser coil is a 30-minute DIY project that pays for itself in a single month of reduced energy consumption. Combined with annual professional service on the evaporator coil, you protect a system that costs $5,000 to $12,000 to replace.
If your coils have not been cleaned in over a year, or if your system is not cooling as effectively as it used to, find a certified HVAC technician near you on NearbyHunt to schedule a professional coil cleaning and full system inspection.
Disclaimer: This article provides general guidance for residential AC coil maintenance. Always follow your specific equipment manufacturer's instructions and safety guidelines. Refrigerant handling requires EPA 608 certification. If you are unsure about any step, consult a licensed HVAC professional. NearbyHunt connects homeowners with local service providers but does not perform HVAC work directly.
Sources
[1] U.S. Department of Energy. "Maintaining Your Air Conditioner."
[2] Forbes Home. "How Much Does AC Coil Cleaning Cost?"
[3] Carrier. "How to Clean Evaporator Coils."
[4] ACEEE. "Dirty Air Conditioners: Energy Implications of Coil Fouling."
[5] ASHRAE. "Clean vs. Dirty Condenser Coils: Energy Cost Analysis."
[6] Trane. "How to Clean Evaporator Coils and Why."

Daniel is an EPA-certified HVAC technician & Energy Efficiency Consultant with over 14 years of experience in maintaining and installing heating and cooling systems throughout the Midwest. Passionate about sustainability, Dan specialises in energy-efficient retrofits and intelligent climate control systems. He writes for NearbyHunt to help homeowners extend the lifespan of their HVAC units while lowering utility bills.

Christine is an EPA-certified HVAC professional with 17 years of experience in heating, cooling, and indoor air quality systems. She has managed large-scale residential installations and worked as a technical trainer for new HVAC apprentices. Chris’s reviews focus on accuracy, safety, and performance standards in modern HVAC practices.